Sorting the List Data
You can sort your data using the Order by panel accessible from the list toolbar or the sort options available in the column headers. Both methods work together.
This feature supports ascending and descending sort options and multi-level sorting up to three levels. Any sort order applied to a list continues to apply the next time you go to the same list until you change it or switch to a different list layout.
|
1 |
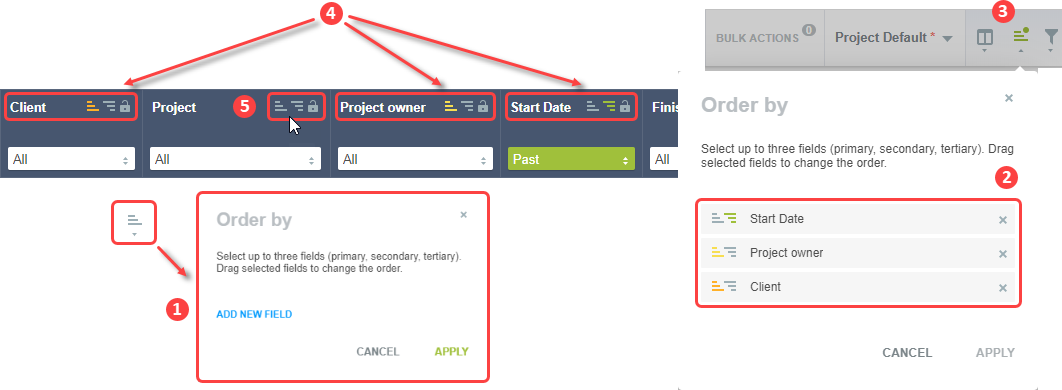
Click the sort icon |
|
2 |
The fields are displayed in the Order by panel. Click one of the icons next to the field name to select between an ascending sort order Drag the fields up or down to determine the order of your sorting levels. The sorting levels are color-coded - green Click the remove icon Click Apply to validate your changes and return to the list. |
|
3 |
Notice the sort icon is displayed in green color with a dot |
|
4 |
Notice the column headers also indicate the sort order and sorting levels with icons similar to those in the Order by flyout panel. |
|
5 |
You can also sort your data directly from the column headers. Point to the column title to display the option icons for the column. Click the Sort Ascending You can set up to three sorting levels. The first sort icon you click will make that column the primary sort field. The second and third sort icons you click will make these columns the secondary and tertiary sort fields, respectively. When you have set all three sorting levels, the sort icons no longer display for the remaining columns. Click an active sort icon to clear that sort level if you want to sort your data by another column. |
You can save the sort order settings as part of a custom list layout. See Personalized List Layouts.
Sorting is disabled if the list contains more than a threshold number of rows. The threshold depends on the configuration of your company's SuiteProjects Pro account.
-
A message appears at the top of the list column headers if the number of rows exceeds the threshold: 'Sorting is disabled for lists containing more than
<threshold>rows. To reduce the number of rows and restore full functionality, use advanced filters. See Advanced Filters. -
You can still use the Order by panel and the sort ascending or descending buttons. However, any changes will have no effect on the order your list data is displayed if the number of rows exceeds the threshold.