Push Microsoft Project File to a Project in OpenAir With Booked Users
This procedure addresses creating and assigning resources to a new project in OpenAir when your OpenAir company settings require that only booked resources are available for assignment.
While the procedure is similar to pushing an Microsoft Project file to OpenAir, the work flow is somewhat different. An extra step ensures that only booked OpenAir resources are assigned to tasks. Once the project is established and resources are assigned to tasks, you can maintain it in either OpenAir or Microsoft Project.
To create a new project in OpenAir and assign booked resources:
-
Open the Microsoft Project file you wish to push to OpenAir.
-
Click the OpenAir ToolBar , select Account Settings, and enter your OpenAir account information.
Refer to Account Settings for more information.
-
Click the OpenAir ToolBar and select Push to OpenAir.
Retrieving account information window displays.
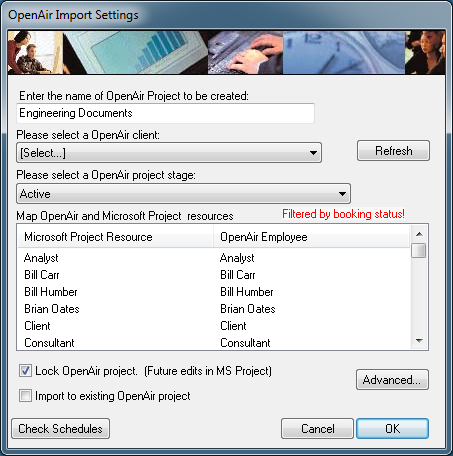
OpenAir Import Settings window displays. Clear check boxes if checked from previous task.
 Note:
Note:Because OpenAir company settings allow only booked users to be available for assignment to a project, “Filtered by booking status!” appears on the OpenAir Import Settings window.
-
Make changes as necessary to OpenAir project to be created, OpenAir client, and OpenAir project stage.
-
Select the check box to Lock OpenAir project.
-
Click OK to push the project to OpenAir.
-
Sign in to OpenAir and follow the procedure to create bookings for the selected resources. Click Save. Once resources are booked in OpenAir, they are available in Microsoft Project.
-
Return to Microsoft Project. Click the OpenAir ToolBar and select Push to OpenAir. Ensure the check box is selected to Import to existing OpenAir project.
The following prompt displays.
-
Click Yes.
The OpenAir Import Settings window displays Microsoft Project Resources and OpenAir Users that are booked and available for assignment.
 Note:
Note:You can assign resources to tasks in Microsoft Project. Simply cancel, assign resources, and push the project again. Ultimately, when the OpenAir company settings allow only booked users to be available for assignment to a project, bookings also need to be created in OpenAir.
-
To change the mapping of a Microsoft Project Resource name to a different OpenAir User, click on the OpenAir User name and a drop-down list of booked users available for assignment displays. Mapping is automatic if the names match.
For information about how mapping works, refer to Resource Assignment Mapping.
-
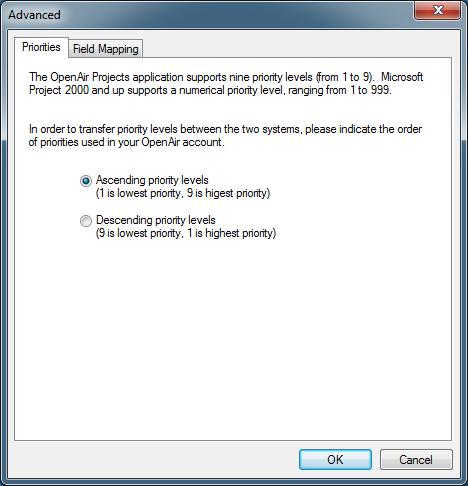
To change priority levels, click Advanced and select the Priorities tab. Select the option that indicates how priority levels are used in your OpenAir account. Ascending priority levels is the default.
-
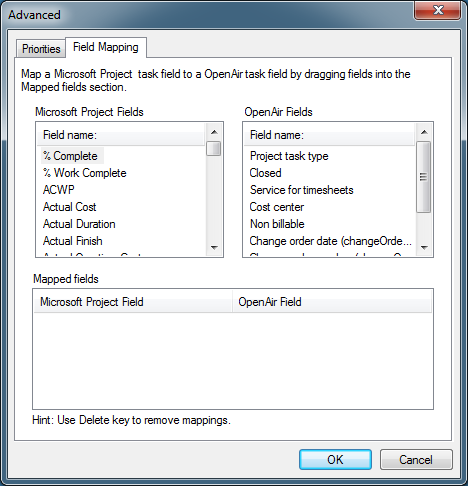
To map OpenAir custom fields to Microsoft Project Fields, click Advanced and select the Field Mapping tab. Once mapped for a project, custom fields are populated automatically in OpenAir with data from corresponding fields in the Microsoft Project file. Refer to Map OpenAir Fields. Once custom fields have been created in either Microsoft Project or in OpenAir, drag the Microsoft Project Fields into the Mapped fields section and then drag a corresponding OpenAir field, placing it to the right. When finished with all mapping, click OK. Refer to the following example.
 Note:
Note:You can map Microsoft Project built-in task-related fields such as WBS, as well as custom fields you create, to specific OpenAir fields. You could create a custom field in OpenAir to hold the built-in Microsoft WBS code.
-
Select the check box to Lock OpenAir project. (Future edits in MS Project) if you want to update the plan in Microsoft Project.
-
Select the check box to Import to existing OpenAir project since the project has been pushed to OpenAir.
-
Click Check Schedules. If you do not click Check Schedules, the following prompt displays.
-
Click Yes to check schedules (recommended) or No. he following message displays when there are no schedule differences. If there are differences, a schedule exception message displays.

-
-
Click OK.
The Microsoft project is pushed to OpenAir.
-
Click Done or it closes automatically.
The Microsoft Project file has been pushed to OpenAir. Notice that an additional file has been added to your Microsoft Project directory with an .mdb extension.
Important:You must keep the Microsoft Project .mpp file in the same directory as the .mdb file to be able to push an updated project file to OpenAir.