Using Your Own OCI Configuration for Text Enhance
If your company needs more than the free monthly allocation of Text Enhance usage, you can configure NetSuite to use your own Oracle Cloud account with OCI Generative AI Service.
When using the unlimited use model through your company’s own Oracle Cloud account, your company pays for use of the Oracle Generative AI service. For more information, refer to the Calculating Cost in Generative AI section and the Billing and Cost Management section of the Oracle Cloud Infrastructure Documentation.
See the following sections to manage your own OCI configuration with Text Enhance:
Before You Begin
If your company would like to use this option and does not yet have an Oracle Cloud account, refer to the Get an Oracle Cloud Account topic and the OCI Generative AI service topic Getting Access Using Policies in the Oracle Cloud Infrastructure Documentation.
After you have an Oracle Cloud account, add the OCI Generative AI Service. For instructions, refer to Getting Access to Generative AI and see the "Access to Generative AI Playground, Custom Models, Dedicated AI Clusters, and Endpoints" section for the policy to add.
Get the OCI configuration details from your Oracle Cloud account.
Refer to the Oracle Cloud Infrastructure Documentation for the linked topics in the following list.
The necessary configuration details are:
-
User OCID: For more information, refer to Managing Users.
-
Compartment OCID: For more information, refer to Managing Compartments.
-
Tenancy OCID: For more information, refer to Managing the Tenancy.
-
Fingerprint: The OCI fingerprint of the public key. For more information about the OCI fingerprint, refer to Required Keys and OCIDs.
-
Private Key: The private key of the OCI user in a file in PEM format (for example,
oci_api_key.pem). For more information about the private key of the OCI user, refer to Required Keys and OCIDs. -
Endpoint ID: Only needed if you have set up a dedicated AI cluster through Oracle Cloud. For more information, refer to Hosting an Endpoint in Generative AI.
Configuring Text Enhance for Unlimited Use through OCI
Use the OCI configuration details from your Oracle Cloud account, described in the Before You Begin section, to complete the fields in this section.
To configure Text Enhance for unlimited use through OCI:
-
Go to Setup > Company > AI > Text Enhance.
-
On the Text Enhance Preferences page, check the Use OCI Configuration to Get Unlimited Usage box.
When you check the box to use the OCI configuration, the OCI configuration fields are shown and the usage table is hidden.
-
Fill in the following fields using the values from your Oracle Cloud account:
-
User OCID
-
Compartment OCID
-
Tenancy OCID
-
-
To ensure security when running scripts, you must create NetSuite API secrets for the OCI fingerprint and OCI private key.
-
Click Create your API secrets here. The API Secrets page is shown in a new browser tab.
-
Click Create New. The Create New Secret dialog is displayed. Create the API secret for the OCI fingerprint as described below, and click Save.
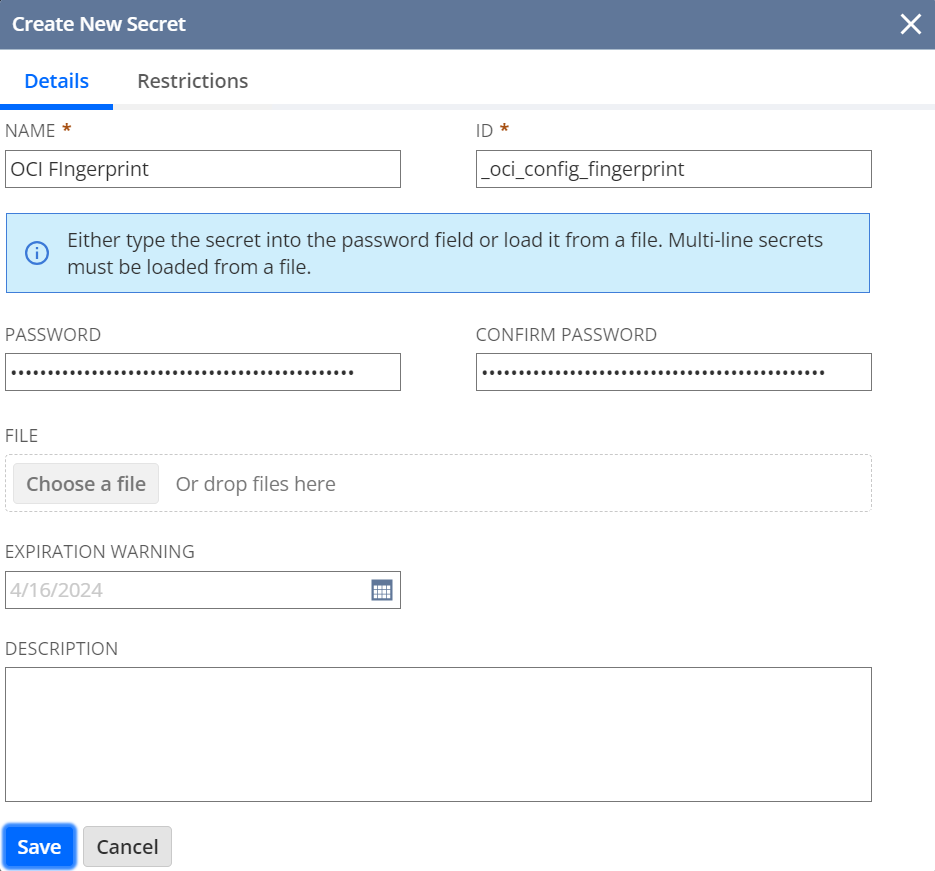
When you create the API secret for the OCI fingerprint, complete the fields as follows.
-
On the Details tab:
-
For the ID, ensure that it starts with an underscore, because the system adds a prefix custsecret when you save. For example, if you enter _oci_config_fingerprint, then the ID will be custsecret_oci_config_fingerprint after you save.
-
Enter the OCI public key fingerprint value into the Password and Confirm Password fields.
-
-
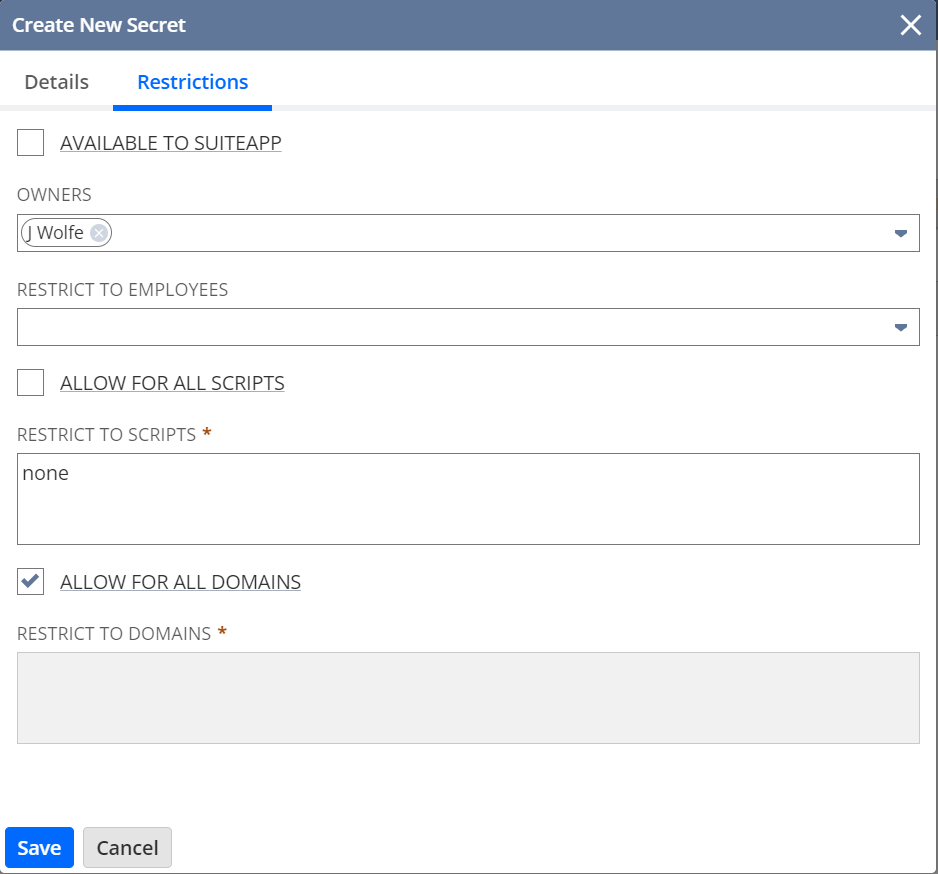
On the Restrictions tab:
-
Enter none in the Restrict to Scripts field to specify that the secret is not to be shared with any script.
-
Check the Allow for All Domains box.
-
-
-
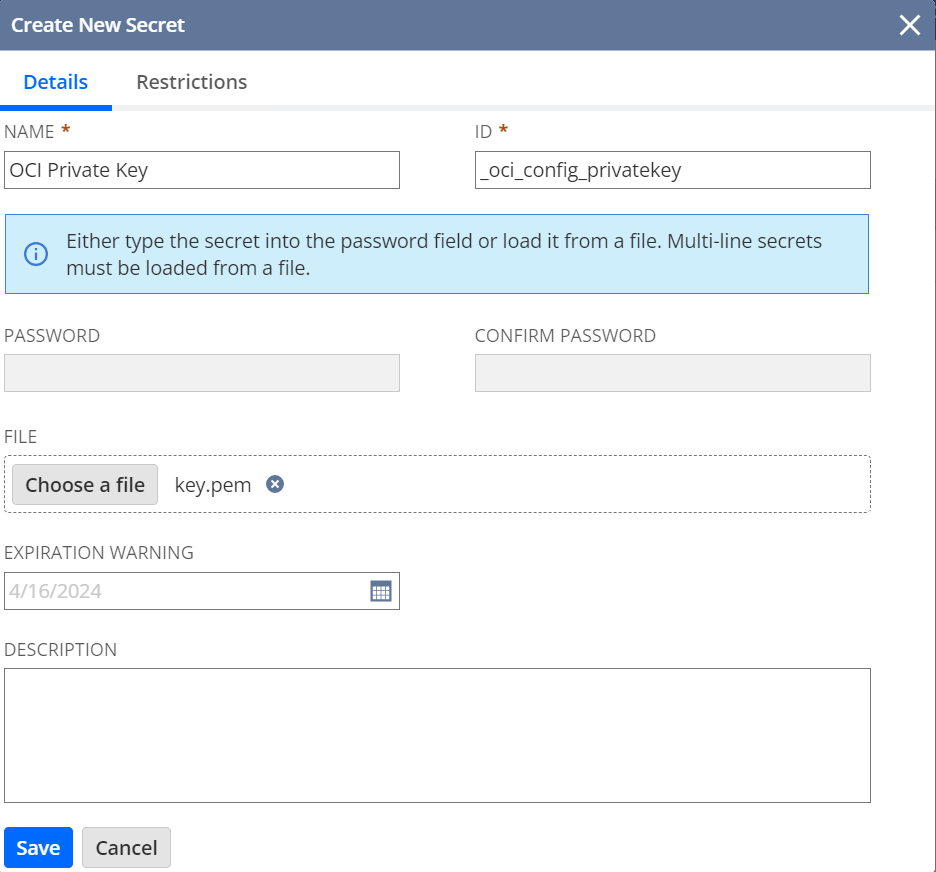
To create the API secret for the OCI private key, click Create New again. The Create New Secret dialog is displayed. Complete the fields as described below, and click Save.
-
On the Details tab, complete the fields similarly to those for the fingerprint, but upload the private key file instead of entering values in the Password and Confirm Password fields.
-
Use the same settings for the fields on the Restrictions tab.
-
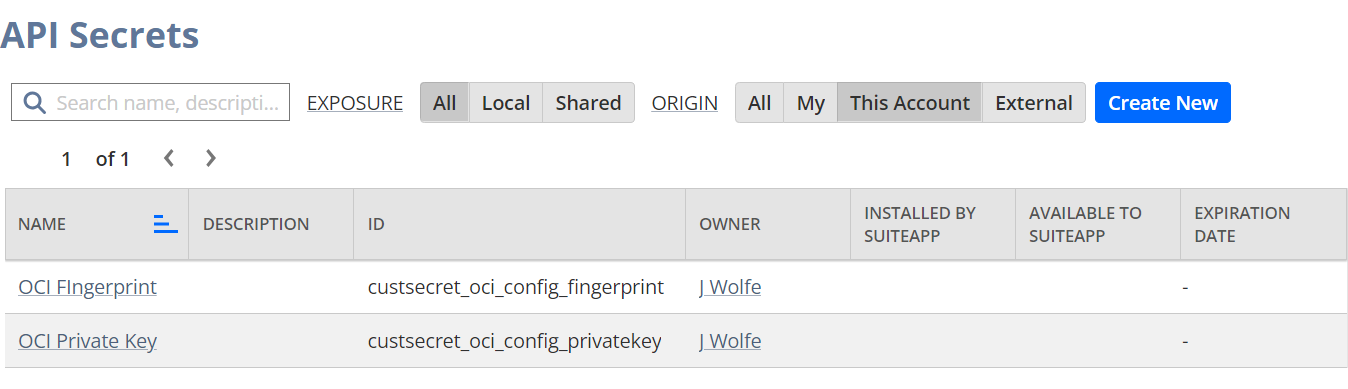
After you have created the API secrets, they are displayed on the API Secrets page.
-
-
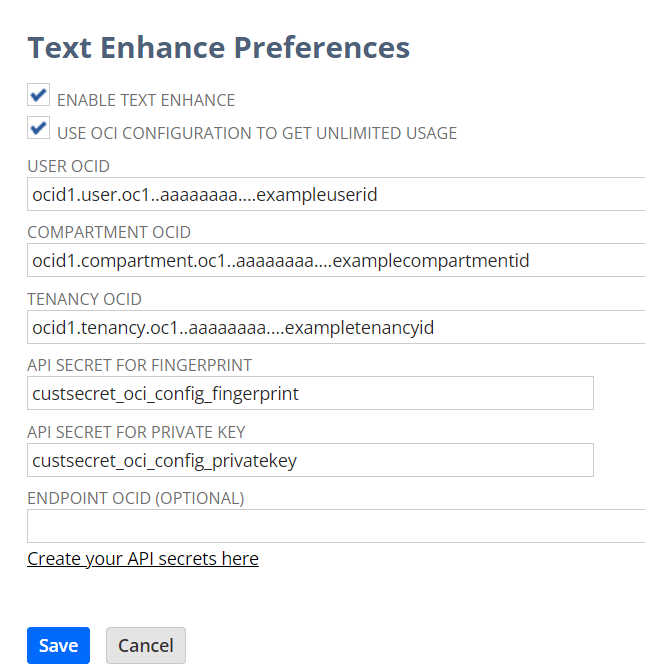
Return to the Text Enhance Preferences page and enter the IDs of the API secrets in the API Secret for Fingerprint and API Secret for Private Key fields.
The page should appear similar to the following screenshot.
-
Click Save. After the preferences are saved, NetSuite sends Text Enhance requests to your Oracle Cloud account using the Oracle Generative AI Service.
-
Test the new configuration: Go to a page that has a field with Text Enhance enabled and perform a valid action. For more information, see Text Enhance.
-
If the configuration was correct, the Text Enhance action completes successfully.
-
If the configuration was not correct, a Task Unavailable error is displayed. Verify the following items:
-
On the Text Enhance Preferences page, do the OCI configuration parameters contain the correct values for your Oracle Cloud account?
-
On the Text Enhance Preferences page, were the NetSuite API Secret IDs entered correctly, and do they match the secret IDs and not the secret names as shown on the API Secrets page?
-
On the API Secrets page, were the OCI fingerprint and OCI private key secrets created correctly?
-
-
Removing the OCI Configuration for Text Enhance
You can return to the default configuration for Text Enhance and use the limited free pool.
To remove the OCI configuration and use limited, free usage for Text Enhance:
-
Go to Setup > Company > AI > Text Enhance.
-
On the Text Enhance Preferences page, clear the Use OCI Configuration to Get Unlimited Usage box. This hides OCI configuration fields and shows the usage table for the free usage pool.
-
Click Save.
Note:The OCI configuration is stored but not used if the Use OCI Configuration to Get Unlimited Usage box is cleared. If you want to enable it again, check the Use OCI Configuration to Get Unlimited Usage box and the fields will still have the values that were last saved. Verify that the OCI configuration details are still correct before saving.