Item Badges
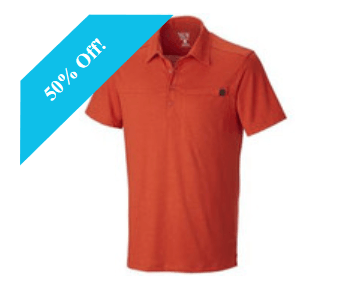
The Item Badges extension lets you display promotional badges on a product, so you can promote certain items to users. Item Badges appear on the Product Details and Product Listings pages, as well as in image carousels. You can use these to promote certain products to users by choosing the label, shape, and size of the badge.
Commerce extensions are only available if provisioned, installed, and activated for a selected domain in your account. For more information, see Commerce Extensions.
You need SuiteCommerce or the Aconcagua release of SCA or later to use extensions.
This extension only supports inventory items, not assembly or kit items.
This topic explains how to:
Set Up the Extension
To set up the Item Badges extension, you'll need to add fields to your site's field sets. Field sets control the data that's exposed to site templates. Add the Badges (Custom) and Show Item Badges (Custom) fields to the site's field sets to use Item Badges. For more information, see Define Field Sets.
To add Item Badges fields to the Web Site Setup Record:
-
Go to Commerce > Websites > Website List.
-
Click Edit next to the website you're adding Item Badges to.
-
Go to the Field Sets subtab.
-
Add the Badges (Custom) and Show Item Badges (Custom) fields to the details, search, related items, and correlated items field sets. Follow these steps to add each field to each field set:
-
Locate the Fields Included in Field Set column and click the Set button.
-
Select the fields from the Field Name list and click Add.
-
In the Field Set window, click Submit.
-
In the Field Set row, click OK.
-
-
After adding the fields to all of the field sets, click Save.
Enable Item Badges for an Item
For Item Badges to display on your products, you'll need to enable them at the item level. Update item records one by one or use Mass Update for a whole category of items. Find Mass Updates for Item Badges in NetSuite under Lists > Mass Update > Mass Updates > General Updates > Custom Records > Item Badges and Shapes. For more information, see Mass Updates.
To enable Item Badges for an item:
-
Go to Lists > Accounting > Items.
-
Click Edit next to the item you want to add a badge to.
-
Go to the SuiteCommerce Extensions subtab and the Item Badges and Shapes subtab.
-
Check the Show Item Badges box.
-
In the Badges to Display field, select the badges you want to add to this item.
You can select up to three badges to display per item.
-
Click Save.
Configure Properties
To determine how Item Badges display on your website, you'll need to configure the properties on the SuiteCommerce Configuration record. To determine how Item Badges display on your website, configure the properties on the SuiteCommerce Configuration record. You can choose where to display the badge on the product image.
To configure properties:
-
Go to Commerce > Websites > Configuration.
-
Select the website and domain where the Item Badges extension is activated and click Configure.
-
Go to the Extensions subtab, then the Item Badges subtab.
-
In the Badge Position field, select where to position the badge on the product image.
-
Click Save.
Create or Edit an Item Badge
You can customize the badge text, color, and shape by editing an existing badge or creating a new one. Edit or create an item badge by modifying the Item Badges and Shapes record.
To create or edit an item badge:
-
Go to Customization > List, Records, & Fields > Record Types > Item Badges and Shapes.
The Item Badges and Shapes record is created when you install the extension.
-
Click List.
-
Click Edit next to the badge you want to edit, or click New to create a new one.
-
Set the following general fields:
Field
Description
Badge Name
This sets the name that'll display at the item level.
This name displays in the Badges to Display field of the Item record.
Badge Text
This sets the text to display on the badge.
Basic HTML formatting tags are supported.
Alt Text
This sets the description for the badge.
-
In the Style subtab, set the following fields:
Field
Description
Text Color
This sets the color of the badge text.
Background Color
This sets the background color of the badge or fill color of SVG images.
This field supports text, HEX, or RGB.
Shape
This sets the shape of the badge from a list of pre-defined shapes.
You can choose a default badge or upload a new image.
If the Shape field is set to Bookmark, the Badge Text will display next to the badge instead of on the badge.
To customize badge shape options, see Create or Edit a Badge Shape.
Text Weight
This sets the weight of the badge text.
The text display depends on your web store's theme.
Inactive
This determines if the item badge is inactive.
An inactive badge does not render on your web store but can be made active again at any time.
-
Click Save.
-
If the item is a Matrix Item, click Update Matrix.
-
If not, click Save.
-
Create or Edit a Badge Shape
To add or change the Shape field options in the Item Badges and Shapes record, you'll need to edit the Item Badge Shape record. You can customize item badge shapes by choosing a name, shape, or image. You select a shape from the options found in the Item Badge Shapes list.
To create or edit a badge shape:
-
Go to Customization > List, Records, & Fields > Record Types > Item Badge Shapes.
The Item Badge Shapes record is created when you install the extension.
-
Click List.
-
Click Edit next to the badge shape you want to edit, or click New to create a new record.
-
Set the following fields:
Field
Description
Name
This sets the name for the shape that appears in the Shape field of the Item Badges and Shapes record.
Shape
This sets the badge shape from a list of pre-defined options.
If the Shape field is set to Bookmark, the Badge Text will display next to the badge instead of on the badge.
Image
This allows you to select an image from the file cabinet or upload an image to serve as a badge shape.
Note that selecting a shape in the Shape field will override any uploaded image.
-
Click Save.
Add Facet Fields
Item badges can be configured as facets, so users can search for products with badges on your web store.
To use faceted navigation with item badges:
-
Select facet fields in the Web Site Setup record.
-
Configure facet fields in the SuiteCommerce Configuration record.
Follow the instructions for setting up facets in Select and Configure Facet Fields, using these guidelines:
-
When selecting facets in the Web Site Setup record, add the Badges (Custom) facet field.
-
When configuring facets in the SuiteCommerce Configuration record, add the custitem_ns_ib_badges facet field.
This internal ID corresponds to the Badges (Custom) facet field listed on the Web Site Setup record.
After setting up this extension, you'll be able to display item badges on both the Product Listings and Product Details pages. Customize badges to highlight products and enable faceted navigation using badges for users.