Managing Your Tender Types and Payment Methods
The different forms of payment accepted by your NSPOS registers are called 'tender types.' Each tender type must be configured to track the payments tendered in your stores. The following tender types are common to many NSPOS setups:
-
Cash
-
Check
-
Credit Card / Debit Card
-
Gift Card / Gift Certificate
A payment method determines how NetSuite ERP and NSPOS handles cash and other tender types used in a transaction. You set up or edit a payment method and tenders in three steps:
1. Set up a Payment Method in NetSuite ERP
First, ensure that your NetSuite ERP default view is set to Show Internal IDs. This is a one-time setup.
To set your default View for Internal IDs:
-
Log into NetSuite as an administrator.
-
Go to Home > Set Preferences > General tab.
-
Under Defaults, ensure that Show Internal IDs is checked.
-
Click Save.
Then set up your payment methods. You will do this one time for each tender type handled in your stores.
The most common tenders are set up during your implementation. These steps help you create additional tender types.
To set up a new Payment Method:
-
Log into NetSuite as an administrator.
-
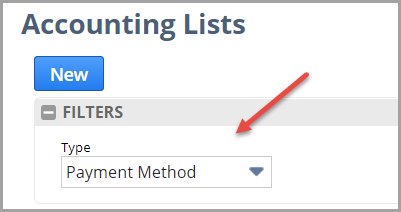
Go to Setup > Accounting > Accounting Lists.
-
Filter the list by Payment Method to see what tenders are in place now. Determine what additional methods you need to handle your tenders.
-
Click New. Select Payment Method if listed as a choice.
-
Enter a name for your Payment Method. When reviewing accounting activity, you'll use the name to identify transactions paid using that method (tender).
The name should describe the tender or tender-method that will be associated with the tender button on the register. Because basic tender types were set up during your implementation, custom payment methods usually handle special circumstances only.
You might set up a method and button for a credit card brand that requires special handling, naming it SPCLCC for 'Special Credit Card.' Or, if the method will handle credit card payments made through a separate, non-integrated gateway, you might name it EXTCCGATEWAY for 'External Credit Card Gateway.'
-
If you want deposits from this method to go to a specific account, select Deposit to Account and choose the account.
-
Click Save. The Accounting List updates with your new method.
-
Note the Internal ID for your method. You will enter the ID in the next set of steps.
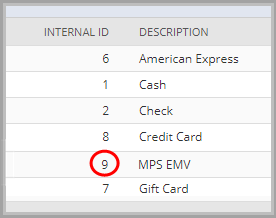 Important:
Note the Internal ID for your new payment method. This ID is required for the register button setup.
-
Click Home or Log Out as desired.
2. Create a new Tender in NSPOS
Tenders in NSPOS provide a method for the cashier to accept different forms of payment. They also provide information about the payment to NetSuite ERP, so the retailer can track sales and money flow by tender type. The common tenders were set up during your implementation. Use the steps in this section to set up or change custom tenders for your business needs.
To create a new Tender:
-
Sign in to an NSPOS register as an administrator (9090 level operator).
-
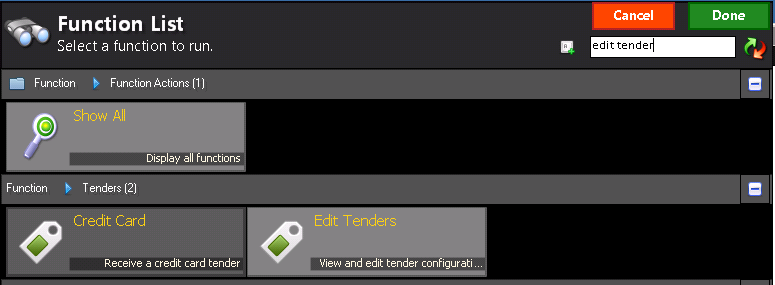
Press Ctrl+F12 and search for Edit Tenders.
-
Tap Edit Tenders.
-
Tap Create Tender.
-
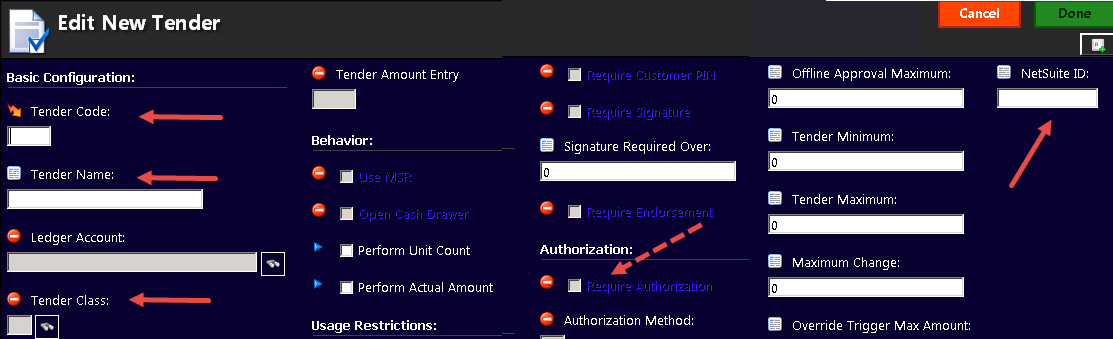
Complete the required fields as follows:
-
Tender code - Enter up to four characters that describe the tender type. Common examples are DB for debit card, CC for credit card, CASH for currency.
Warning:Don't delete or modify an existing Tender Code. Don't duplicate a Tender Code.
-
Tender Name - How the tender will appear on the NSPOS register, on receipts, on the Sales Audit Report and in the memo field of Invoice records where tender is used as payment. For example, Gift Card.
-
Tender Class - Choose the class that best describes the tender.
-
NetSuite ID - Internal ID from the NetSuite ERP payment method.
-
If the tender is for credit cards or gift cards/certificates, you must check Require Authorization.
-
-
Tap Done. The tender will now appear with the other NSPOS tenders.
3. Map the Tender to a Button in NSPOS
After you create a tender, you can assign it to one or more buttons. Buttons are shared by all other workstations within the same workstation group. Before modifying buttons, make sure the changes apply to all workstations (registers) in the workstation group. If any workstations have different requirements, create a new workstation group to handle them.
To add a Tender Button:
-
Sign in to a NSPOS register as an administrator (9090 level operator).
-
Tap Manager Functions > System Configuration > Button Edit.
Or press CTRL+F12 and search for Button Edit.
-
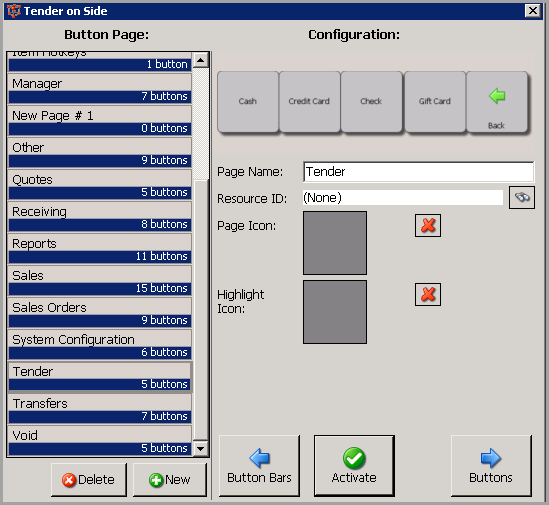
Tap Side in the Button Bar list.
-
Tap Pages.
-
Tap the Tender row in the Button Page list.
-
Tap Activate to display your changes immediately.
-
Tap Buttons.
-
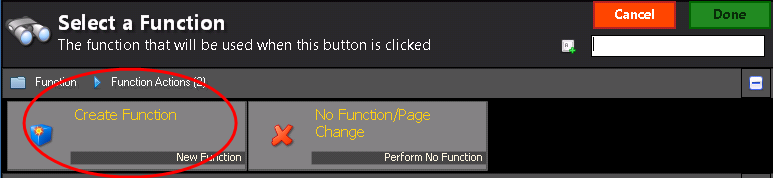
Tap New and then Create Function.
-
Tap Yes to edit a function by name.
-
Enter values for the following fields:
-
Function Name - Descriptive name for the tender function. Use alphanumeric characters only, with no spaces. For example, enter Function_enabling_XYZ_card_tender.
-
Function Groups - Tender.
-
Caption for Buttons - Text to display on cashier's button in Journal tender sidebar. For example, enter XYZ Card.
-
Resource ID - Security level required to use the tender button. If a role lower than the one set here attempts to use the button, a higher, authorized role must enter their credentials for the task to proceed.
-
2 - Sales Associates, Specialist, Cashier
-
9050 - Openers/Closers
-
9070 - Managers
-
9090 - System Administrators
-
-
Message - #NetSuite.Retail.POS.Business.TenderProcess.
-
Parameter - Enter the word Tender: and the Tender Code entered in the previous NSPOS steps.
For example, enter Tender:DB.
-
-
Tap Done. You can customize the button size and position using the Column, Row, Width, Height and Style fields.
-
Close the form when your button setup is complete.