During the Day
Use these functions after Start of Day and before End of Day.
You can assign till functions to journal buttons to make them available without searching with Ctrl+F12. See Configure Button Bars.
Count Till
Count Till is used to determine the cash held during an active session, while Count and Settle Til l is usually performed at the end of a session or as part of your End of Day (EOD) process. However, you can run either procedure as needed when a till is available to count. EOD ends the till session.
Count and Settle Till syncs the results to NetSuite ERP, while results for Count Till are reportable within NSPOS only.
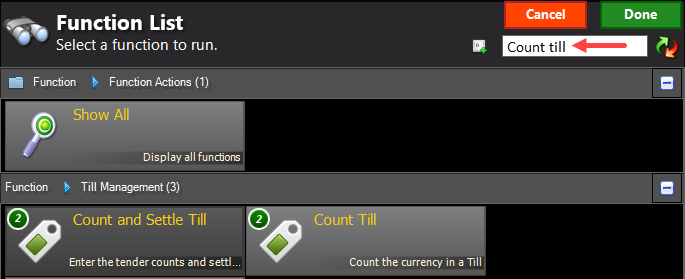
NSPOS identifies the number of tills that are eligible to count or count and settle in the count till Function List. You can do an initial count of a till before performing a final count to settle the till.
This example shows two tills as being ready to count (and settle).
You can't settle a till until it's counted.
Use these steps to perform a count of currency in the till during a shift or business day. Settlement usually happens during the End of Day procedure.
To enter a till count:
-
In Sales Mode, complete all sales and return transactions.
-
Tap Register Functions.
If you don't see Register Functions, press Ctrl+F12 and search for
Count Till. -
Tap Count Till.
Tip:Use the tab key to move between fields.
-
In the Count Till ID window:
-
Browse or search for the Till ID.
-
Tap the Till ID. For example, tap "Till for Workstation 3."
The Till ID and Status appear at the bottom.
-
Tap Done.
-
-
In the Count Till window:
-
Enter a count of each cash denomination.
-
Tap Done.
-
-
When prompted to Print the Actual Till Counts?
-
Tap Yes to print a count receipt
-
Tap No to continue with no receipt
-
Make a Disbursement
Depending on your store's setup, you may also have the option to disburse cash from a till for small expenditures such as petty cash purchases of supplies or services.
Disbursements are typically performed for immediate needs, such as purchasing receipt paper or paying a cleaning service. Disbursements might also occur for expenses such as charitable donations. If the disbursement option is installed, you can select a Reason Code for tracking purposes.
To make a disbursement:
-
In Sales Mode, complete all sales transactions.
-
Press Ctrl+F12 and search for
Disbursement. -
Tap Disbursement.
-
If prompted, enter your NSPOS user ID and password.
-
Find and select a Reason Code.
-
Remove the cash to disburse.
-
Enter the Cash Disbursement Amount and tap Enter.
-
Choose whether to print a receipt.
-
If printed, place the receipt in the location listed in your store's procedures, such as the cash drawer.
Make a Drawer Drop
Also called a tender pickup, drawer drops remove excess cash from an NSPOS till during a shift or business day. Besides keeping the drawer organized and manageable, making drawer drops reduces the risk of having large amounts of cash in registers throughout your store.
To make a drawer drop:
-
In Sales Mode, complete all sales transactions.
-
Tap Manager Functions and then Drawer Drop.
If you don't see Manager Functions, press Ctrl+F12, then search for and tap
Drawer Drop. -
The cash drawer opens and the Tender Pickup window appears.
Remove cash as needed, entering the count for each coin and bill denomination taken.
-
Review the total Cash Amount on the right.
-
Tap Done.
-
If prompted, select a Pickup Reason Code.
-
Tap Done.
Make a Drawer Loan
When a cashier runs short of change during their shift, your cash office or back office can make a drawer loan to their NSPOS till. A drawer loan is also called a tender loan. Loans to a drawer are reconciled using your company's internal methods.
To make a drawer loan:
-
In Sales Mode, complete all sales transactions.
-
Tap Register Functions and then Drawer Loan.
If you don't see Register Functions, press Ctrl+F12 and search for
Drawer Loan.The cash drawer opens and the Till Count window appears.
-
Add the loaned cash, entering the count for each coin and bill denomination placed in the till.
Tip:Use the tab key to move between fields.
-
Review the total Cash Amount on the right.
-
Tap Done.
Remove Till Assignment
Managers can use this function to unlock a till if a cashier has logged out, but the cash drawer must be used by another cashier.
To remove a till assignment:
-
In Sales Mode, complete all sales transactions.
-
Tap Register Functions.
If you do not see Register Functions, press Ctrl+F12 and search for
Remove Till Assignment. -
Tap Remove Till Assignment.
-
Browse or search for the till assignment to remove.
-
Tap the till assignment.
-
Tap Done.