Pivot Table Customization
SuiteAnalytics Workbook enables you to customize many aspects of your pivot tables. Click the links below for more information:
Customizing Numeric Values
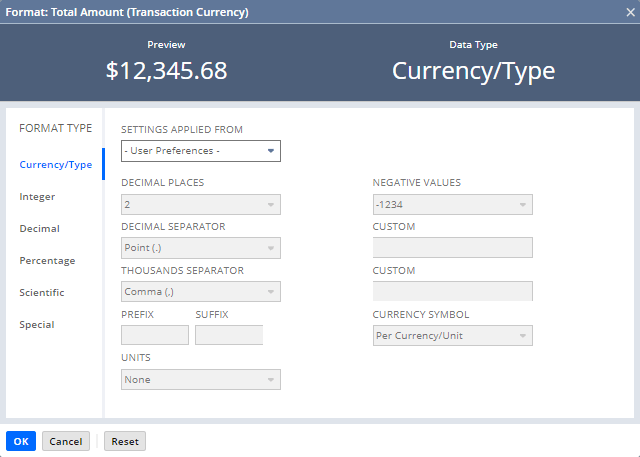
You can customize how numbers display in your pivot table with the Format window. To access it, click the Field Menu icon ![]() next to a field in the Fields list or Layout panel and select Format... from the list.
next to a field in the Fields list or Layout panel and select Format... from the list.

The following options are available. After you make a selection, the Preview field shows your changes. To apply them, click OK and refresh the table. To make your own format, click the Special tab and enter your syntax.
-
Settings Applied From: Lets you set numeric formatting based on a specific language. To set every setting manually, select Custom. To use the formatting from your NetSuite personal preferences, select User Preferences. For more information about personal preferences, see Setting Personal Preferences.
-
Decimal Places: The number of decimal places to show for each value.
-
Select Per Currency/Unit to use the currency or unit's decimal places.
-
Select Unbound for no limits on the number of decimal places.
-
-
Negative Values: The format for negative values.
-
Decimal Separator: The punctuation for the decimal place. Select Custom to set your own.
-
Thousands Separator: The punctuation that splits up thousands. Select Custom to set your own.
-
Prefix: Lets you add something before each value.
-
Suffix: Lets you add something after each value.
-
Currency Symbol: Lets you choose where the currency symbol shows up for dollar values.
-
Units: Lets you shorten values by thousands, millions, or billions.
Custom Number Formatting
can set custom number formats for pivot tables in the special tab. Define your own syntax, or choose from the Predefined Values.
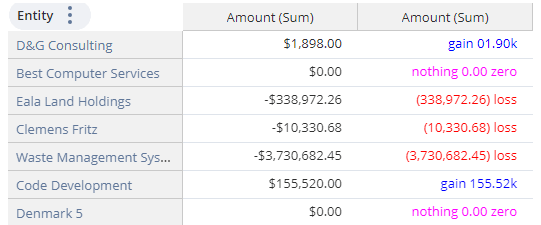
The pivot table below shows numbers without no formatting in the first column. In the second column, the numbers use this custom format: [0000ff]'gain '00.00,;[ff0000](##,#00.00)' loss';[ff00ff]'nothing '0.00' zero'

The available symbols for custom numbering syntax are:
|
Symbol |
Name |
Application |
|---|---|---|
|
# |
Number Sign |
Displays significant digits |
|
0 |
Zero |
Displays non-significant zeros |
|
' ' |
Double Quotation Marks |
Displays text inside quotation marks. You can place this text before or after numbers (positive, negative, or zero). |
|
+ |
Plus Sign |
Typically used for positive numbers |
|
( ) |
Paretheses |
Typically used for negative numbers |
|
- |
Minus Sign |
Typically used for negative numbers |
|
, |
Comma |
Thousands separator, or to scale a number by 1000 |
|
. |
Period |
Decimal separator |
|
; |
Semicolon |
Separates parts of the syntax. When you make custom number formats, you can use up to three sections for positive, negative, and zero values, in that order. |
|
[ ] |
Brackets |
A hexadecimal number (without #) in brackets sets the color of that format section. For example, [0000ff] is blue. |
Grouping Pivot Table Fields
Grouping fields in the pivot table Layout panel changes how detailed your table data is. If you set more than one field as a row or column, you can show subsets of data in your table.
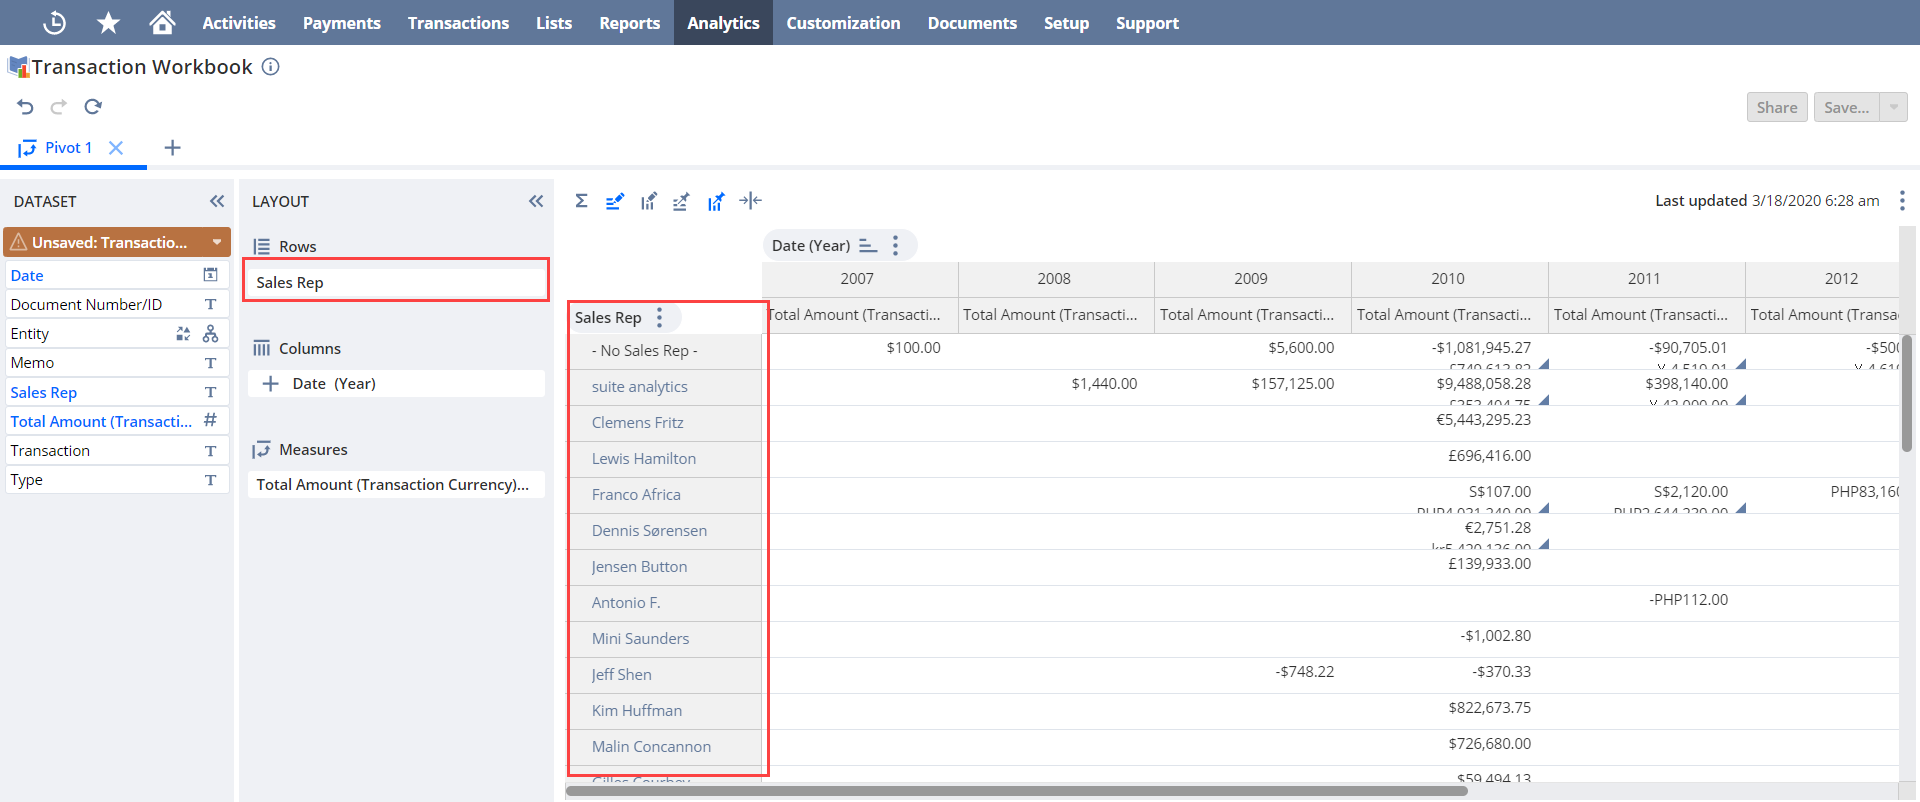
For example, in the transaction table below, only the sales rep field is set as a row. The pivot table only shows total transactions for each sales rep.

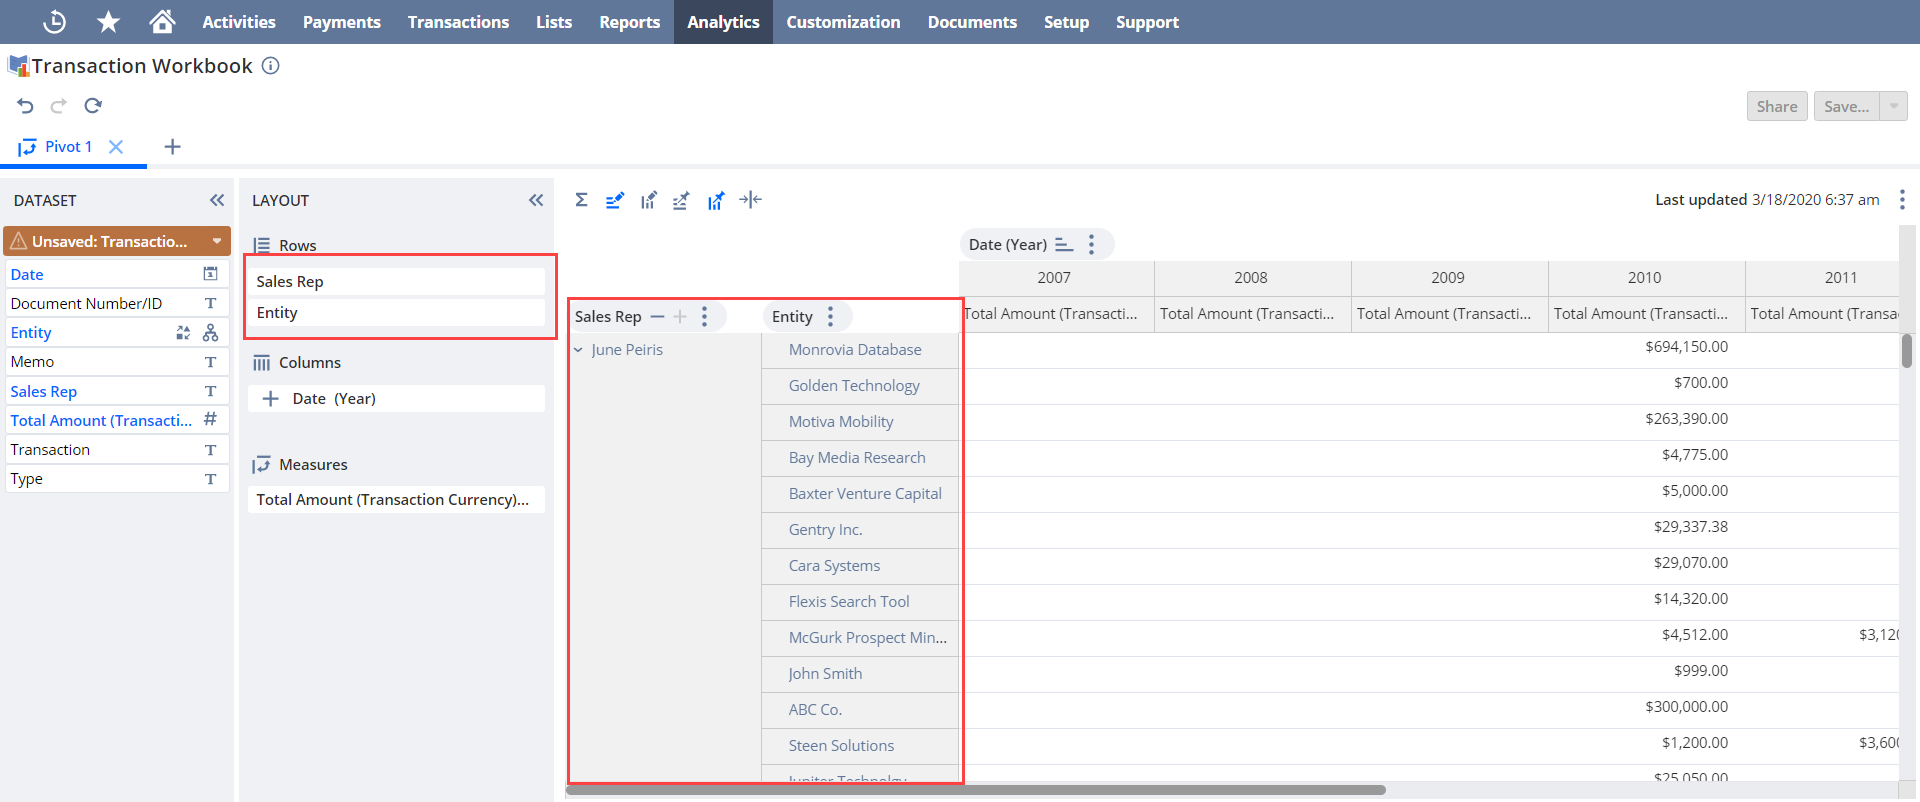
If you also define the entity field as a row however, the table displays the total transactions per sales representative and customer.

Try grouping different fields in your pivot table layouts to analyze different subsets of data.
Compact and Expanded Mode
By default, if you group fields or use multicolumn hierarchical fields, your pivot table expands horizontally, which can make it difficult to view all your data.
To display the table data vertically, click the Compact Mode icon ![]() .
.
Additional Pivot Table Customization Options
To customize your pivot tables even more, SuiteAnalytics Workbook has these options:
-
To keep column or row headers visible while you scroll, click the Freeze Column
 or Freeze Row
  icons.
 -
To highlight rows or columns when you point to them, click the Highlight Column
 or Highlight Row
  icons.
 -
To rename a column or row, click the Field Menu icon
 and select Rename... from the menu.
 -
To resize a column or row, drag the boundary until it's the size you want.
-
To auto-fit a column's width to its values, double-click the column header.
-
To show more or fewer values for a row, click the

 icons in the column header.
 -
To expand or minimize the number of values displayed for a row, click the
 icon in the row header.