Common Mobile Pages and Screens
Common pages and screens include menus, search pages, information screens, popup windows, and list pages. Menus and some list pages, called independent pages, appear before you start a mobile process. The other pages and screens are process-dependent and contain page elements that enable you to complete tasks within a mobile process.
The Main Menu page includes icons that provide access to mobile processes. You can hide standard icons that appear on this page to prevent access to their corresponding standard mobile processes. For instructions, see Configuring Menu Icons on Independent Mobile Pages.
The following table shows a list of common pages, most of which appear within standard mobile processes:
|
Page or Screen |
Access |
Example |
|---|---|---|
|
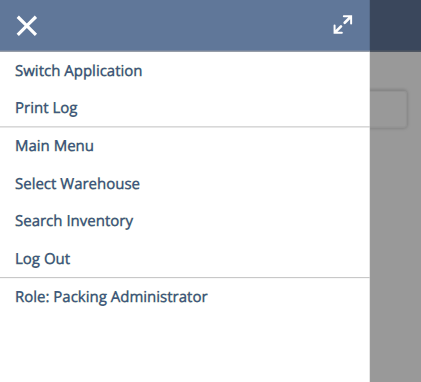
Options Menu - The Options Menu displays the following NetSuite account details within all mobile apps:
It contains links to the following common mobile pages and the log out option:
You can access the following Mobile Printing facilities from the Options menu:
The rest of the Options menu links depend on the associated mobile app. For example, the Ship Central app includes links for Generate Manifest, Schedule Pickups, and Void Shipping Label, among others. The WMS app includes the Search Inventory link. Aside from the links, you can tap the following icons located at the header of the options menu:
|
At the top-left corner of a mobile page, tap the Menu icon |
|
|
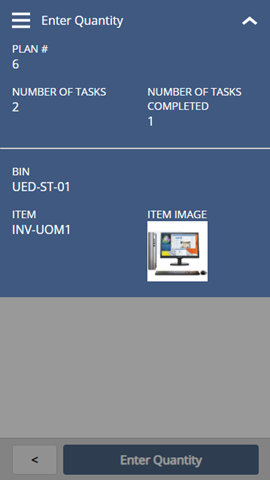
Information Screen - Within a mobile process, the Information Screen displays contextual information about a mobile process. The details vary depending on the input you provide as you complete the steps for a mobile process. Item details on the Info screen may include the bin number, item name, and item image. Transaction details include the order number and number of item lines. Quantities displayed on the info screen may pertain to inventory levels or total items processed, such as the received quantity. |
To expand the screen, at the top-right corner of a mobile page, tap the Info icon To close the screen, tap the arrow icon |
|
|
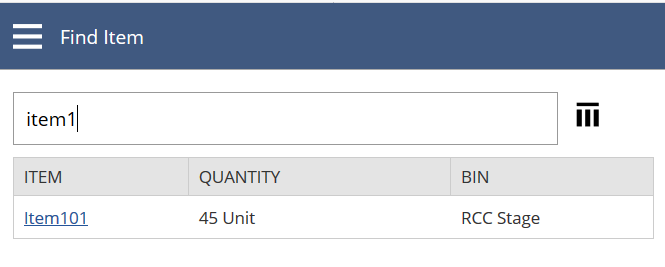
Search Pages - Within a mobile process, you can access search pages to look for and select items or records. It provides a search box in which you can enter keywords of at least three characters. Below the search box, a list of results appears to display active and valid items or records. From the list, you can tap a row to select the item or record. For example, within the Bin Transfer process, you can search for an item contained in multiple bins. In the search results, NetSuite WMS displays the consolidated available quantity along with one of the bins. |
On a mobile page, tap the Find button. 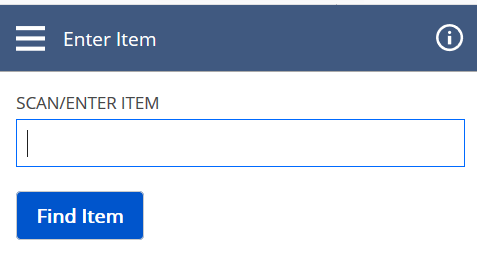
|
|
|
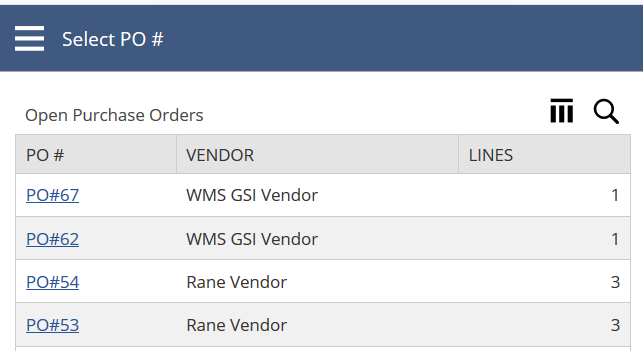
Select from List Pages - List pages display items, records, or transactions that you can select from. On a list page, you can tap the record or item link you want to select. If you want to refine the list, you can use the search tool. Entries in the list vary depending on the input required for the mobile process. For example, during the PO Receiving process, you want to view and select from the list of purchase orders. The list page displays only the open orders that are in Pending Receipt or Partially Received status. |
On a mobile page, tap the Select button. 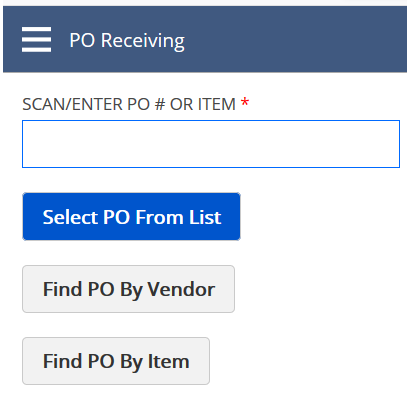
|
|
|
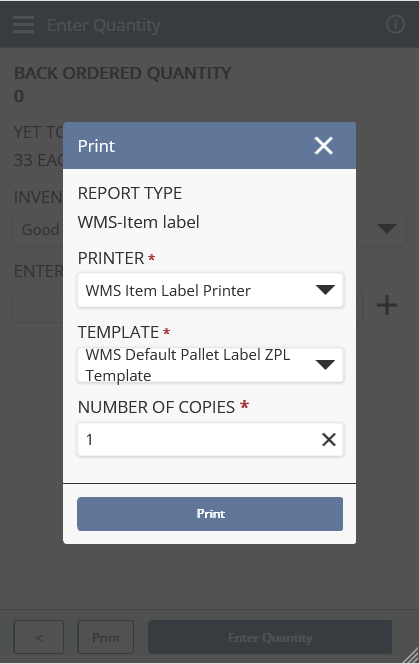
Print Popup Window - This window displays printing options and details, including the following:
For more information about report types, see Setting Up Printing Settings on Print Reports. |
When you tap a Print button, the Print popup window appears. To view the list of mobile pages that display a Print button by default, see Setting Up Automatic or Required Printing. On the popup window, you can change the printing options, then tap Print to submit your print request. If you have another label or document for printing, its associated report type and default printing settings appear next on the popup window. Instead of printing or saving a label or document, the following options are available:
|
|
 - Closes the options menu.
 - Displays the Options Menu in full-screen mode.
 .
. .
. or tap on the page outside of the information screen.
 icon.
icon.Related Topics
- SCM Mobile App Basics
- Data Entry on Mobile Apps
- SCM Mobile Page Elements (Buttons, Fields, Tables)
- Filtering Table Data Through Search Tags
- Mobile Device Transactions
- SCM Mobile Printing
- Label Printing and Reprinting
- Customizing Mobile Pages
- Customizing Information Screen Elements
- Configuring SCM Mobile App Settings
- Configuring Menu Icons on Independent Mobile Pages