Set Up NetSuite for Localized Content
To enable your website for localized content:
-
If setting up your site for multiple languages, verify that the Multi-Language feature is enabled:
-
In NetSuite, go to Setup > Company > Setup Tasks > Enable Features.
-
On the Company subtab, check the Multi-Language box.
-
Click Save.
-
-
Verify that all languages available on your site are defined in your Company General Preferences:
-
Go to Setup > Company > Preferences > General Preferences.
-
On the Languages subtab, select and add each language you want available in your NetSuite account and on your website.
-
Click Save.
Only languages enabled in your Company General Preferences are available. See Configuring Multiple Languages for more information.
-
-
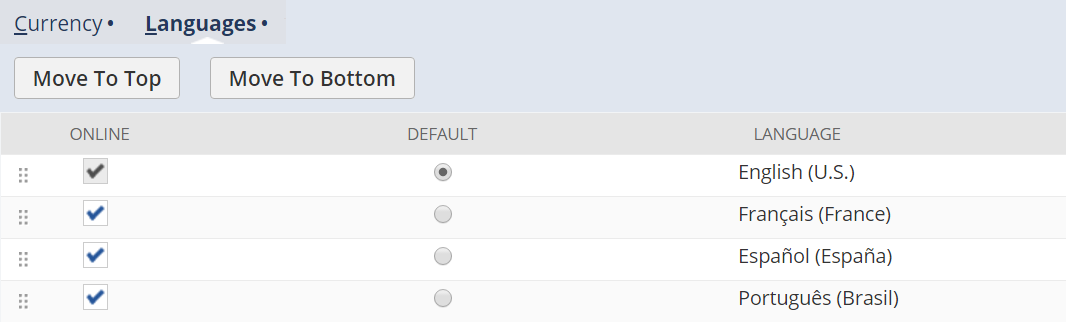
Verify that all desired languages are enabled in the Web Site Setup page.
-
In NetSuite, go to Commerce > Websites > Website List.
-
Click Edit for the desired website.
-
Navigate to the Shopping tab and Languages subtab.
-
Check the box in the Online column for each language you want available on the site.
-
Verify that item names and descriptions have associated translation fields for each language.
When you fill in translation fields on the item record, the translated fields show up in the web store.
Note:Translation of custom fields on item records isn't supported, so data from custom fields in a web store won't have translated strings.
For detailed instructions, see Working With Multi-Language Names and Descriptions.
-
Click Save.
-
-
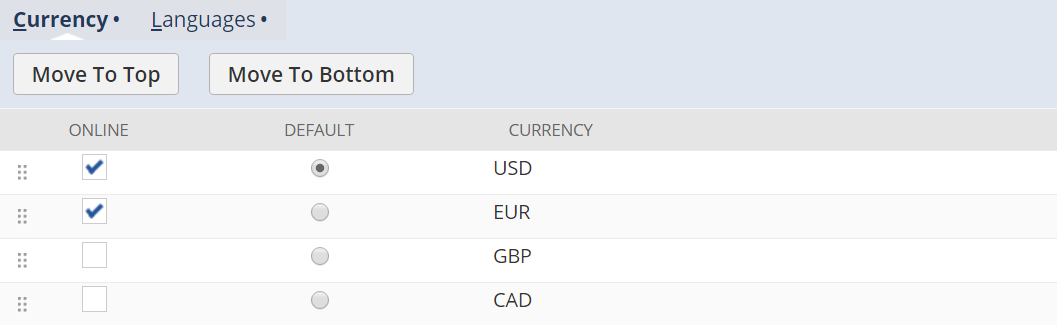
Verify that all desired currencies are enabled in the Web Site Setup page.
-
In NetSuite, go to Commerce > Websites > Website List.
Note:Currencies must be set up in NetSuite to appear in this list. See Currency Management for information on adding currencies to NetSuite.
-
Click Edit for the desired website.
-
Navigate to the Shopping tab and Currency subtab.
-
Check the box in the Online column for each currency you want available on the site.
-
Click Save.
-
-
If you're setting up your site for multiple languages and currencies, make sure you set up the
hostsarraySee Configure Hosts for Sites with Multiple Languages.
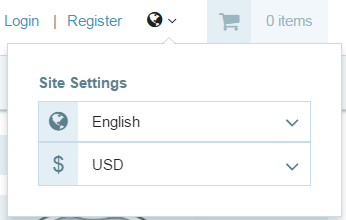
After your website is set up and customized to support multiple languages, the location drop-down appears by default in the upper left corner.