Setting Up Project Resource Management
The grid is organized first by project and then task and resource. It displays the estimated hours and percent complete for each project and task. For each resource, the grid displays the allocated hours and percentage as well as the assigned hours and the number of hours worked. The Hours Allocated, Hours Assigned, and Hours Worked columns roll up to display the totals for each project listed. For more information, see Project Resource Management Grid Columns.
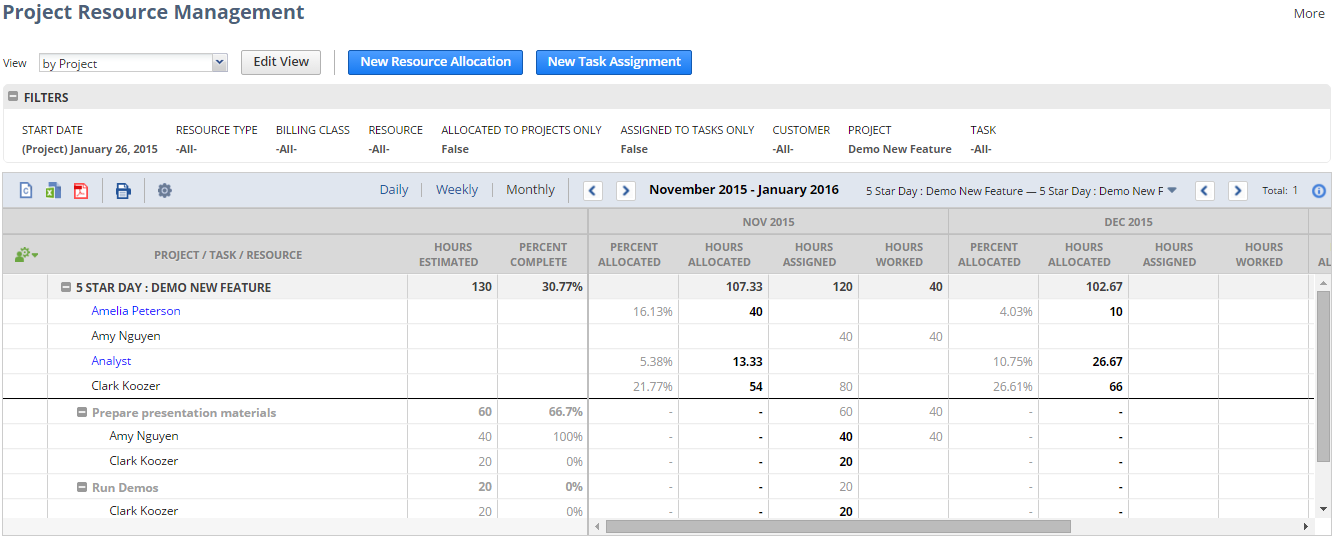
You can choose to display the grid in a daily, weekly, or monthly format by clicking the links at the top of the grid. You can also customize and save a view to filter the grid by start date, resource type, resource, customer, project, and task.
Before you begin using the grid, you can adjust the grid's appearance and available filters.
To adjust project resource manager settings:
-
Click the Settings icon
 at the top of the project resource management grid.
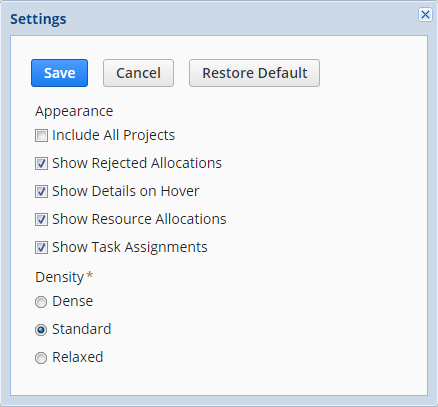
-
Check Include All Projects to include all your available projects on the chart.
If not checked, the grid displays only projects with no allocations and assignments.
-
If you also use Approval Routing for resource allocations, check the Show rejected allocations box to add values of rejected allocations to the grid. Rejected allocations are displayed on the grid in red font.
Note:If a project has only one resource and that resource has no task assignment, the resource will no longer be displayed on the grid even if that resource's allocation has been rejected.
-
Check Show Details on Hover to show details when you use your mouse to hover over a project, resource, or task assignment cell.
-
Check Show Resource Allocations to show resources allocated to the project.
When checked, resources allocated to a project are listed in the resource summary under the project, and the Percent Allocated, Hours Allocated and Hours Worked columns become available on the grid.
-
Check Show Task Assignments to show task assignments identified for the project.
When checked, task assignments are listed right below the resource summary, and the Hours Assigned and Hours Worked columns become available on the grid.
-
Under Density, select how compact you want your grid to appear.
-
Dense - Displays a maximum of 15 projects per page.
-
Standard - Displays a maximum of 10 projects per page.
-
Relaxed - Displays a maximum of 5 projects per page.
-
-
When you have finished, click Save.
Valid settings require that either Show Resource Allocations or Show Task Assignments or both are checked.
After you have updated your settings, you can begin using the grid to work with your projects.
At the top of the page, you can select a view to choose what projects appear in your grid. All active projects are displayed on the grid in the Default view. You can also create customized views to filter the results displayed in the grid and share views with other users.
To customize a project resource manager grid view:
-
Click Customize View next to the View field.
-
In the Custom Form field, select the form you want to use to create this view.
-
In the Name field, enter a name for your new view.
-
Check the Share View box to allow other users to use this view when using the project resource management grid. Only the view's creator can edit or delete a view.
-
Under Start Date, select which record you want to use for the start date on this view, then select a start date to begin this new view.
-
Under Resources, select the type of resources you want to see in this view. You can choose to show employees, vendors, and generic resources. Check the box corresponding to the resource type to include all active resources of each type. If you want to include only specific resources, select the names in the respective list boxes.
-
Under Resource Properties, you can also filter resources by billing class or subsidiary. Check the box to include sub-subsidiaries.
-
Under Project Properties, you can further filter projects by customer, project, or task.
-
When you have finished, click Save.
Your new view is now available in the View field at the top of the page.
After you have created custom views, you can click Edit View to make changes to the view you are currently using.
Each time you view the project resource management grid, the filter you selected the previous time is selected by default.
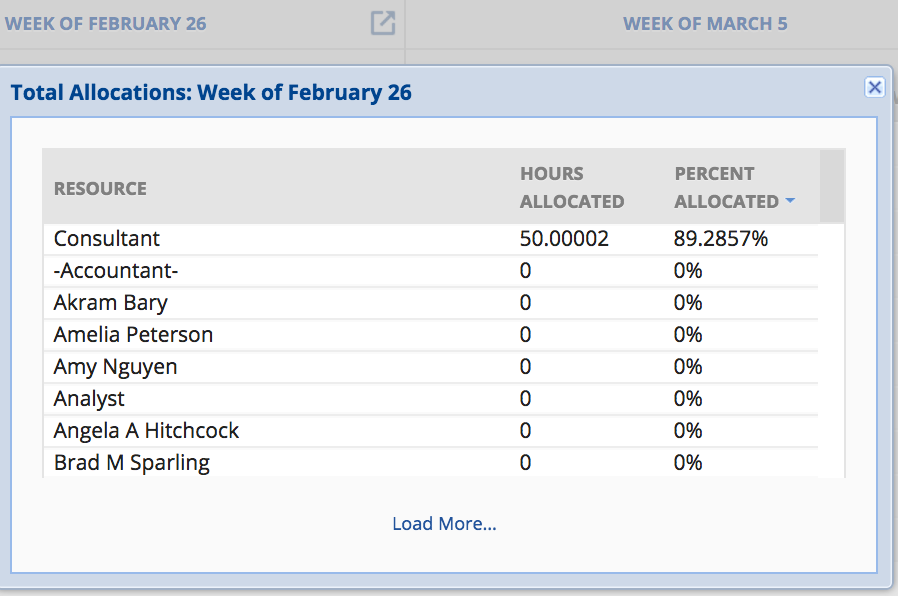
You can also use the buttons at the top of the grid to adjust the time frame that is currently displayed. Click Daily, Weekly, or Monthly to adjust how the information is displayed and then use the arrows to move the timeline forward and backward. You can view total allocations for each time segment by clicking the pop-up icon in the date column header.
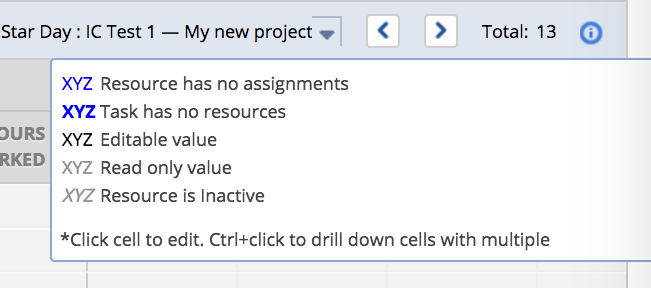
Additionally, you can switch between pages using the page selector in the upper right section of the chart. The total number of projects is displayed right next to the page selector. Click the information icon for additional details about the grid format.