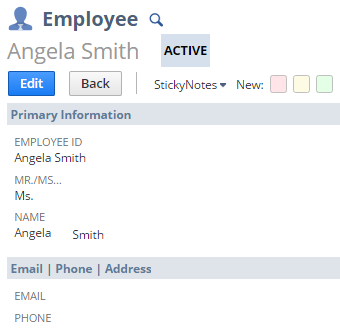
Working with StickyNotes on Record Pages
Notes on the record page let you highlight important info or track pending tasks for the record. You can also attach supporting documents or related files to a note you're creating or replying to. For more information about supported file types, see Supported File Attachments for StickyNotes.
Depending on your account setup, StickyNotes may carry over when a record changes to another type. For example, if you create an estimate from an opportunity, those notes carry over to the estimate. Notes attached to specific fields on the opportunity aren't included. Notes added to the estimate won't show up on the opportunity record.
Supported File Attachments for StickyNotes
You can drag and drop a file to a note to add it as an attachment. The following table shows the file types and the corresponding icons that will be displayed on the note:
|
Icon |
File Type |
|---|---|

|
HTML files |

|
XML files |

|
Excel files |

|
Word documents |

|
Powerpoint presentations |

|
Text files |

|
Unknown file types |

|
PDF files |

|
Compressed file types (.zip and .rar) |

|
Image files
Note:
This icon is displayed for JPG, JPEG, PNG, and BMP image files when the option to preview images is not enabled. Other image files are displayed as an icon with a link to the attached file. |
Adding a New Note
To add a note to record pages:
-
Open the record page where you want to add a note.
-
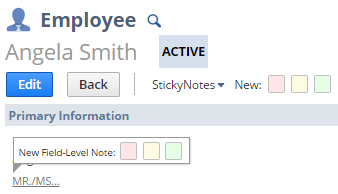
From the StickyNotes Toolbar, click on any of the note icons to create a new note.
You can also add a note to specific fields. Point to the field label and, in the tooltip, pick the note you want to create. Field-level notes show up below the field they're attached to. If the field's hidden, the note shows up in the upper-right part of the page.
-
A new note window appears. To add the note to a field or record page, do the following:
-
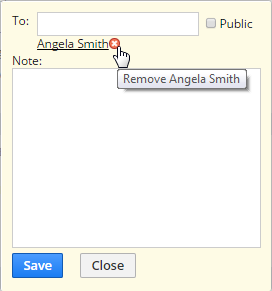
In the To field, you can enter recipient names to make the note visible to specific people or leave the field blank to make the note visible only to you.
Recipients will receive an email notification when they are tagged in a new note and when replies are posted on the note.
Note:Auto-complete suggestions show up when you type part of a first or last name.
-
To remove a recipient, pont to the recipient's name, and then click the delete icon that appears.
-
Click the Public box to make the note visible to everyone with access to the record.
-
Type your message in the space provided.
-
To add file attachments, drag and drop a file to the note.
-
Click Save to attach the note to the record.
Note:Icons on the note indicate if the note is public or private, or if the note has replies or file attachments. For more information about note icons, see StickyNotes Icons.
-
Replying to a Note
You can reply to a note either from the record page where it's attached or by replying to the email notification. You'll get an email if someone replies to a note you created, received, or already replied to.
Supported email applications only include iMail (on Mac and mobile), Outlook, and Gmail.
To reply to a note on a record page:
-
Open the record where the note is attached.
-
Point to the note to display the Actions menu, and then click Reply.
-
Type your message on the space provided.
-
If you want to attach files to your reply, drag and drop a file to the note.
-
Click Save to add your reply.
Deleting Notes
To delete notes and replies:
-
Open the record page where the note is attached.
-
Point to the note to display the actions menu. Do one of the following:
-
To delete the original note, click Delete Note from the Action menu.
-
To delete replies, click Expand Replies from the Action menu. Point to the reply that you want to delete, and then click the delete icon that appears on the upper right corner of the note.
-
-
On the confirmation window that appears, click Yes.
Customizing StickyNotes from Record Pages
To customize notes from the record page:
-
Open any record page where StickyNotes is enabled.
-
From the StickyNotes Toolbar, click or point to the StickyNotes dropdown menu, and then select Preferences.
Note:You can also set your preferred font and note size in Setup > Customization > StickyNotes Setup.
-
In the StickyNotes Preference window, you can do the following:
-
Change the colors for high, medium, and low priority notes by choosing from predefined color sets or by entering the hexadecimal color value.
-
Set the font and note size.
-
Click Reset to Default to restore the default StickyNotes preferences defined by your administrator.
-
Check the Hide Notes box to hide notes across record pages. When this setting is enabled, a pop-up alert will notify you about the hidden notes the next time you load the record page.
-
-
Click Save.