Submitting Time-Off Requests
Use the following procedure to submit a time-off request.
If the Time-Off portlet doesn't appear on the home page of your Employee Center, then the Time-Off Management feature hasn't been enabled for your account or the Time-Off permission hasn't been assigned to your role. To add the Time-Off portlet to your Employee Center, contact your NetSuite Administrator or HR Generalist.
To submit a time-off request:
-
From the home page of your Employee Center, in the Time-Off portlet, click Home.
-
Click Request Time-Off.
-
On the Request Time-Off page, specify the start and end dates for your time-off request.
You can't enter time off for days that aren't part of your work week. Non-working days and pending or approved whole day requests are grayed out and can't be selected.
Note:To request only one day off, click the day you want off in the calendar twice. The Dates field will automatically populate with the specified date.
After you specify the date range using the calendar, each day is displayed in chronological order.
-
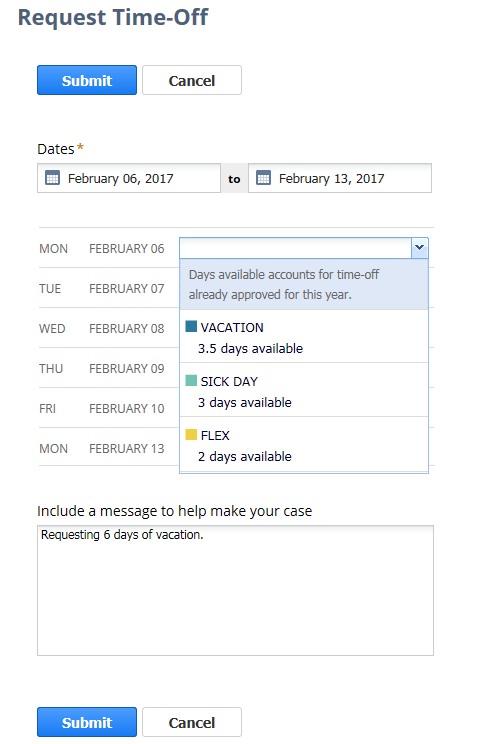
For each date in your request, select the type of time off you're requesting. If the time-off type you select has multiple days available, the corresponding date entries in the list are automatically filled for you.
For example, if you select Vacation with three days available, the first three days in the list are tagged as vacation days.
You can also use a combination of time-off types for a time-off request. For example, you can specify that you want to use a combination of vacation days and floating holidays.
The displayed days available takes into account time off that has already been approved for the year, but that you haven't taken.
If the time-off type is tagged as track only, no time off is accumulated, and only your usage is tracked. For example, you have no limit to the number of sick days that you can take. The sick day time-off type is tagged as track only.
Note:If your company lets you carry over unused time, and you're booking time off for next year, note the following. You don't see your carryover balance in the forecasted balance. Your carryover days are calculated at the end of the year to ensure you don't overbook your time off for next year.
-
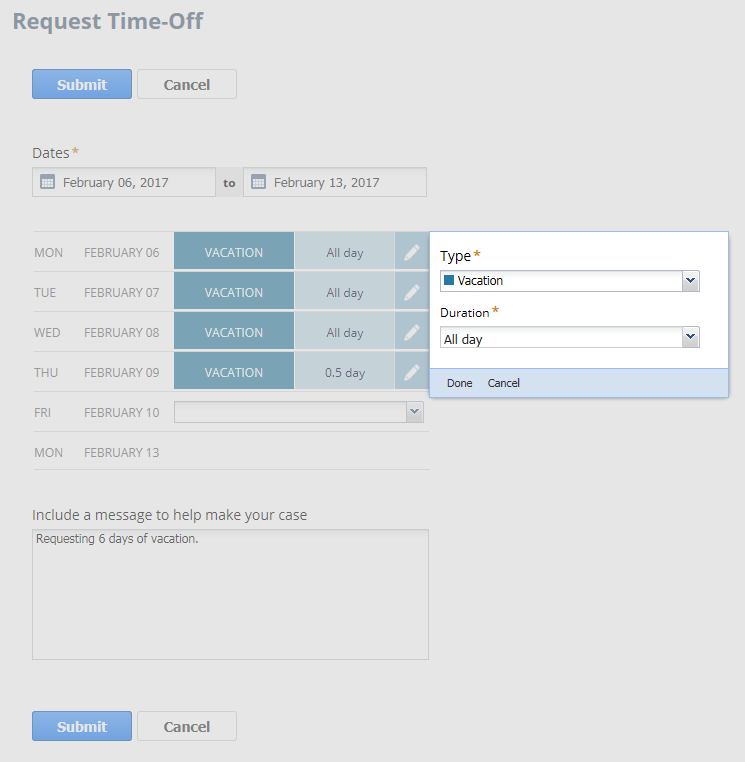
To change a time-off type, or adjust the duration of the time off, click the Edit icon beside the entry that you want to change. Make any required changes in the popup window that appears, and click Done.
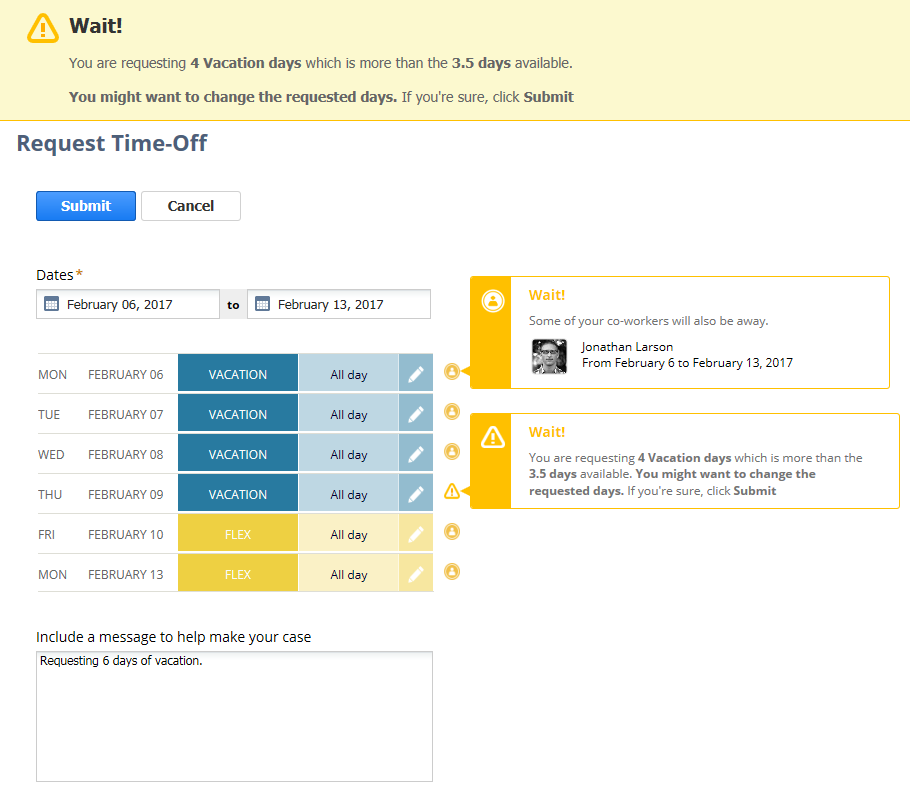
If your request exceeds the days you have available, a warning icon appears beside the request. If your request overlaps with another employee's request, a notification icon appears beside the request. Neither of these icons prevent you from submitting your request. For more information, hover over the icon, and make any necessary changes.
-
Optionally, you can include a message to your approver.
-
Review the summary box for a breakdown of your request, and then click Submit.
A request is sent by email to your approver. For time-off types set with automatic calendar event creation, calendar events will be created after the request is approved. You can view the event in your Calendar portlet, and it includes your assigned supervisor as an attendee. To view the status of your time-off request, in the Time-Off portlet, click Requests. For more information, see Viewing Time-Off Requests.