Using the Inventory Worksheet Import Assistant
The Single Inventory Worksheet Import Assistant is available at Transactions > Inventory > Adjust Inventory Worksheet > Import, to users who have the required permission. See Permission for Inventory Worksheet Import.
This Import Assistant includes the following steps:
-
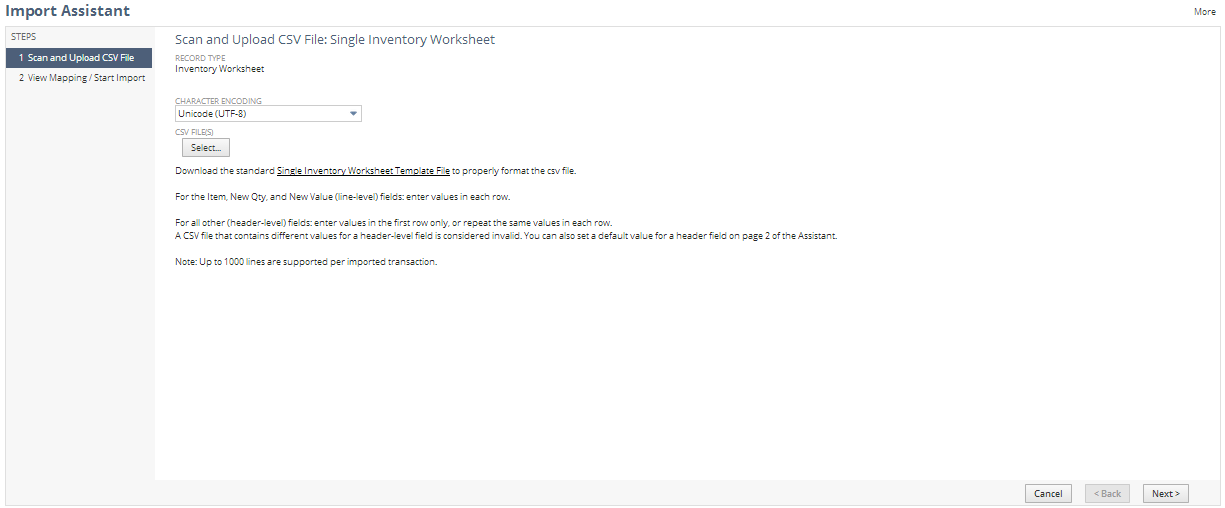
Upload the CSV file that contains your inventory worksheet data.
-
The first page of the Assistant provides a link to a CSV template file. Click this link to download the template file and populate it with your data.
Before you populate your CSV file data, review Requirements for Inventory Worksheet CSV File Data.
-
After you have a CSV file with data in it, click the Select button in the Import Assistant, browse to your file, and click Next.
-
-
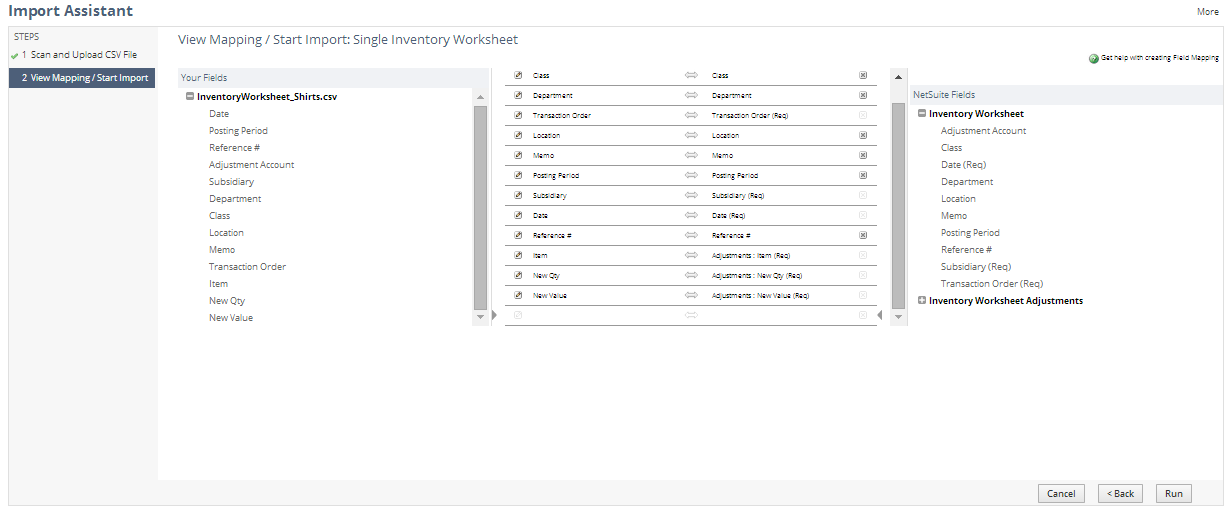
Review mappings of CSV fields to NetSuite fields and start the import.
-
The Assistant automatically maps fields in your CSV file to NetSuite standard inventory worksheet fields. Header-level fields are listed under Inventory Worksheet; line-level fields are listed under the Inventory Worksheet Adjustments sublist.
-
You can click Run to accept the default mappings and immediately start the import.
-
You can make changes as necessary by dragging and dropping fields to add or subtract them from the import.
-
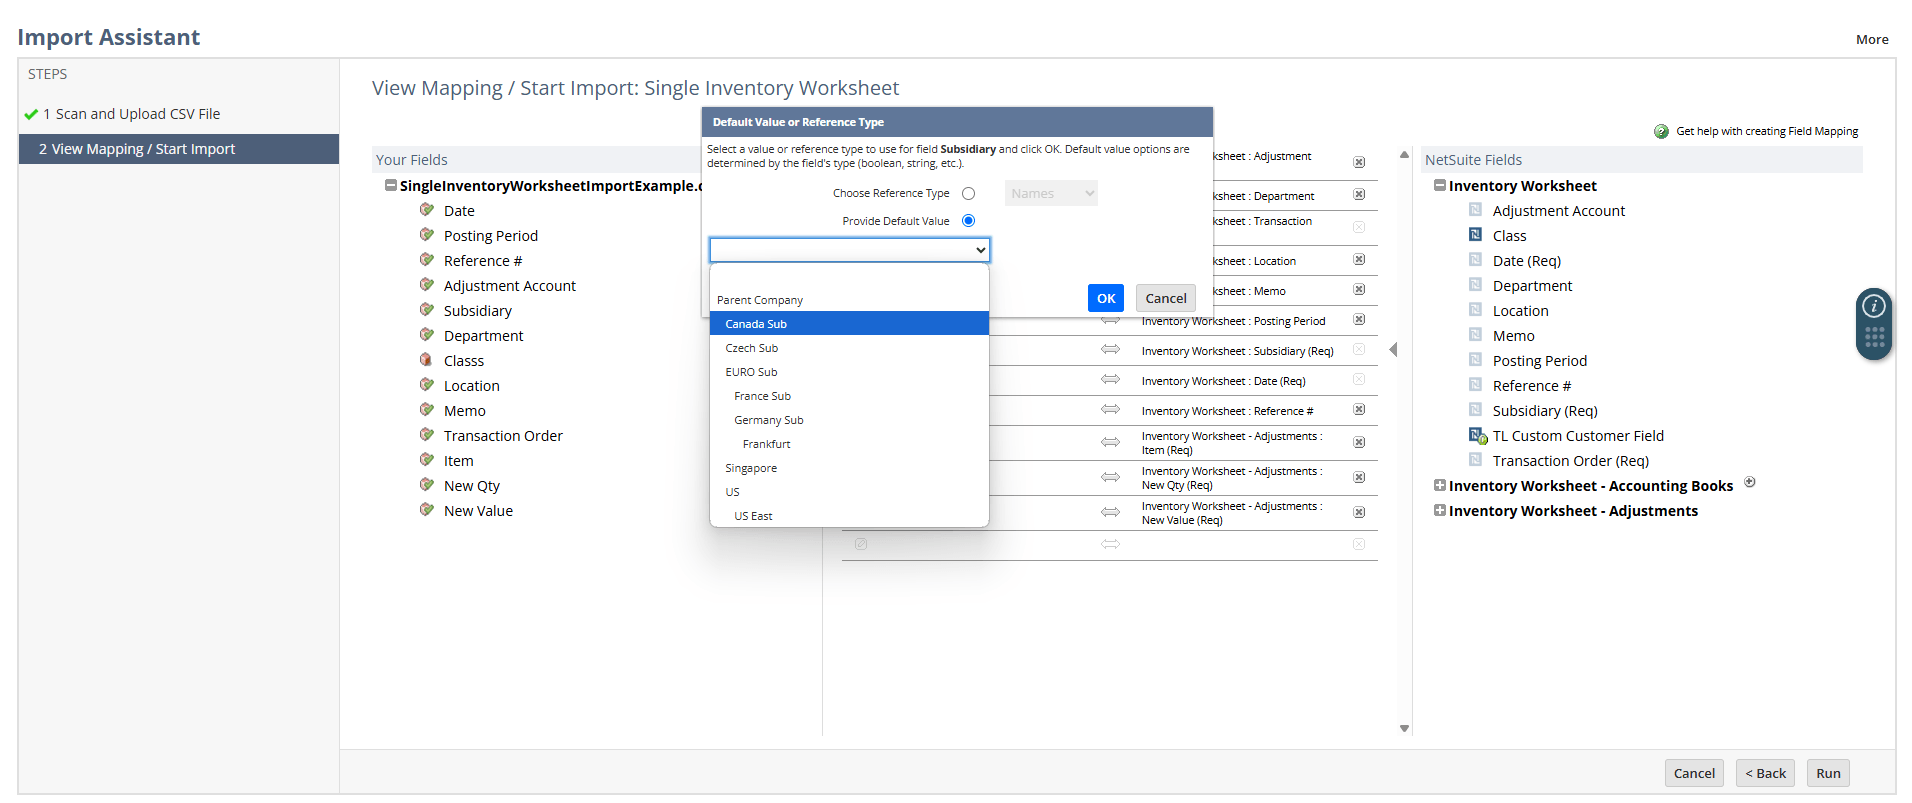
You can click the edit icon for a field to open a popup where you can set a default value. This option is useful for header-level fields that need to be the same value for each imported line.
For example, in the following screenshot, the CSV file doesn't include a Subsidiary field value, so a default value is set in the popup:
-
When you click Run, the import job is processed.
-
If the import was successful, or if there are errors, the Job Status page appears.
-
Note that, unlike most other imports, an email notification isn't sent for single inventory worksheet imports.
For more information about adjusting inventory, see Inventory Adjustments.