Creating Custom Queries in Applications
Several types of queries can help with various tasks.
Managing Queries describes Oracle Smart View for Office queries and how they can help with analysis and reporting.
Note:
Before using queries, install Smart View . See "Available Clients" in Getting Started Guide for Administrators.
To create a query:
-
On the Home page, click
 , and then click Manage Queries.
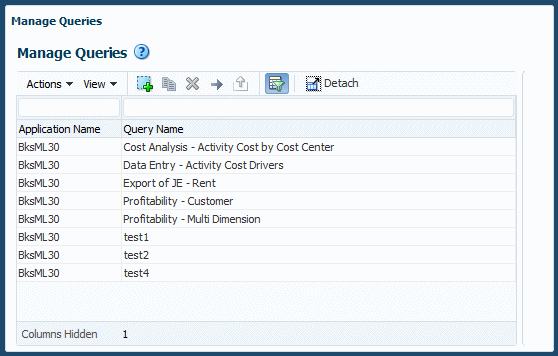
The Manage Queries screen shows all queries available to you (Figure 13-1).
Figure 13-1 Queries Screen

-
Click
 or select Actions, and then Create Query.
The New Query wizard opens.
-
In Step 1 of 3: Description, enter the following information for the new query and select Next:
-
Select the Application to use for the query from the drop-down list.
-
Enter a Query Name.
-
-
In Step 2 of 3: Program Context, select whether to use a program context (global context, rule set context, or a rule) to define dimensions. For more information about contexts, see Working with Profitability and Cost Management Rules.
-
If you selected Use Program Context?, enter POV information and then click Next.
-
If you did not select Use Program Context?, click Finish, and then skip to step 6, later in this procedure.
-
-
If you select Use Program Context? and click Next, Step 3 of 3: Dimensions is displayed. Select which program context to use, and then select from any lists that are presented. When selections are complete, click Finish.
Context options are the following:
-
Use Global Context -- Applies the default dimensions selected for all rule sets and rules in the application
-
Use Rule Set Context -- Applies default dimensions selected for the specified rule set (requires a rule set name)
-
Use Rule -- Applies rule-specific dimension information; requires a rule set name, a rule name, and a rule component (Source, Destination, Driver, or Offset)
After you click Finish, the Manage Queries screen opens, including the new query.
Select a query and complete the custom query definition as described in the following steps.
-
-
Optional: On the Description tab, do the following if appropriate:
-
Enter a Description for the query.
-
Select Use Alias to display any assigned aliases for all dimensions in the query.
-
Select Suppress Missing to set the data suppression option for the first query in Smart View, if required.
Note:
If you select Suppress Missing, the Smart View option is set only for the first query run, not all queries. To set the option for subsequent drills into the data, set the option manually in Smart View.
-
-
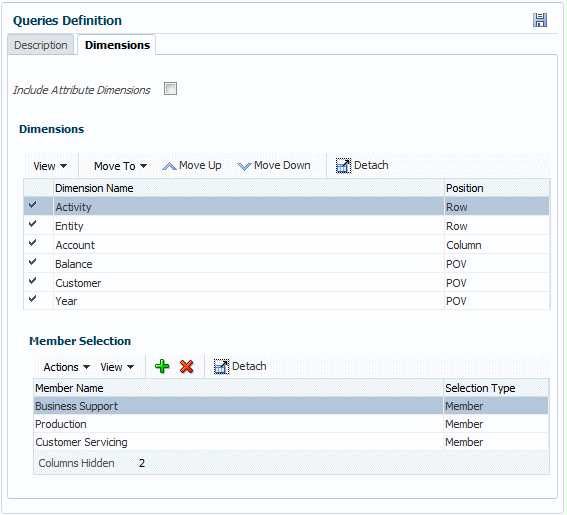
Click Dimensions to review and edit dimension selections (Figure 13-2).
By default, all dimensions in the application outline are displayed, except attribute dimensions.
Note:
To display attribute dimensions, select Include Attribute Dimensions on the Dimensions tab.
Figure 13-2 Dimensions Tab of the Queries Definition Screen

-
A default Position is assigned to each dimension. To change the position, select a dimension, open the Move To list, and then select the new position: Row, Column, or POV (Smart View POV).
-
Optional: Use Move Up and Move Down to change the position of a highlighted dimension in the query within its Position.
-
Optional: Select a dimension and use the Member Selection area to add or delete members and change the column display.
The list displays all dimension members, including alternate hierarchies and the NoMember member. Because there are no restrictions on level, alternate hierarchy, shared or base members, you can select any member.
-
When the query definition is complete, click
 to save it.
To run, edit, or delete queries, see the following: