6Career Sections
Career Sections
Career Sections
Career Section
A Career Section is a Web site where candidates can search and apply for a job available in an organization.
There are four types of Career Sections which address different hiring needs:
-
Internal: accessed only by current employees or anyone you give access to.
-
External: for candidates who are interested in current employment opportunities in your organization.
-
Agency: used by recruiting agencies or agents.
Onboarding Portal: task-oriented career section containing a single tab called "Tasks" where candidates, new hires or employees can complete their tasks. No job-related information is available.
Career Sections are highly configurable. Before building a Career Section, elements presented in the Career Section must be created, for example statements such as privacy agreement and eSignature, Diversity forms to collect diversity data such as gender or ethnicity, user-defined forms, and applications flows. The look and feel of the Career Section must also be defined with themes and branding.
When the content and design are configured, you are ready to build a Career Section. The Career Sections area in the Career Section Administration menu allows you to view existing Career Sections, create new ones or duplicate existing Career Sections, and define options and settings in the different components of the career section.
Configuration
The Access the Career Section administration section permission is required to make changes to Career Sections.
| User Type Permission | Location |
|---|---|
| Access the Career Section administration section | Configuration > [SmartOrg] Administration > User Types > Recruiting > Career Section |
Best Practices for Career Sections
While creating a career section, keep in mind that a poorly designed one increases the chances that potential candidates will abandon the job application process. Some sources of frustration that candidates might encounter are: application processes that are unduly long, password lock issues, reentering information, product stability and the inability to obtain help. Following some best practices will help you make the application process a pleasant one.
Reduce Application Process Complexity
Question the complexity of the application process. Candidates are less willing to provide information they don’t see as truly relevant to the process.
Does the organization actually use all the information candidates are required to provide during the selection process?
Could some information be included in a secondary application flow?
Is a single job application flow for executives and hourly employees desirable?
Would you want to complete the entire application process yourself? Would the CEO complete the job application process?
Why use the copy/paste resume box when there is an HTML preview in the application?
Inform Candidates of Password Lock Settings
If the password lock feature, which prevents candidates from signing in to a career section after a specific number of unsuccessful sign in attempts, is enabled be sure to modify the default error message such that the system displays clear instructions to candidates as to what to do. The message could include your organization’s Support email address or a link to a FAQ section. The message should never suggest contacting My Oracle Support.
298464
298446
298533
Create a FAQ
It is highly recommended to include a career section FAQ on the Web site for visitors or provide the email address of your organization's Support team. The FAQ link or email address could be placed in the Help section of the job list page or the Help link that is available on the career page.
Populate the Help Link
A Help link can be added to a career section. The link can point to the custom Help text or the customer's email address.
Give Candidates Extra Features on the Career Section Sign In Page
Enabling the settings that display the “Forgot your user name” and “Forgot your password” links is highly recommended. The Sign In features on the career section is where the links are enabled.
Create Candidate Friendly Page Layouts
Reduce the need to scroll within a page to view information. For example, forms should be configured to not extend beyond the established width of the career section. Eliminate the horizontal scroll bar that would otherwise be displayed at the bottom of the page by limiting the number of fields on a row and adjusting the width of fields and labels (through the CSS style).
It is important to test forms in a career section before deployment.
Name Application Flow Pages Appropriately for Display
If a page in an application flow has no title (often the case with multilingual customers), the progression bar box is blank. For this reason, provide page titles in all languages available in the career section.
If the page title is too long, the text extends beyond the box. The recommended maximum length is 25 characters.
Configure Theme for Proper Integration Within the Web Site
Each career section can be assigned a theme. A change to a theme causes a change in every career section that uses it.
A theme should be configured such that the career section pages conform to the organization's other pages. Adjust the colors and fonts so they are the same as those used in the branding.
Configure the progression bar within the theme so it does not extend beyond the established width of the career section (720px).
The width of the help panel is configured in the theme. The recommended width of the help panel is between 100 and 200px. Remove the Help panel entirely by setting its width to 0px.
The colors of the tabs and sub-tabs can be adjusted such that they conform to the Web standards. For example, white tabs are typically used to indicate a selected tab.
Further Integrate Career Section Into the Web Site Using Branding
Complete the look and feel of the career section by providing a branding file. The branding file should be tested and validated before being uploaded. Branding that includes JavaScript must be validated by Taleo.
Follow these Career Section Customization Guidelines
Career Sections are highly customizable; display, font, text, colors, etc. can be changed to reflect the needs of your organization. As a system administrator, you can change several aspects of the Career Section to have it reflect the specific needs of your organization. To successfully achieve customization, consider the general overview of the Career Section. Keep in mind that the Career Section is divided into features. To modify an element, you must know to which feature of the Career Section this element belongs. For example, style formatting is done via the theme feature, i.e. changes to colors, fonts, size etc. To hide or display a specific element, understand to which area it belongs. For example, use an application flow feature to hide the application progress bar because the progress bar is displayed in the application flow. Or, use the Career Portal Pages feature to hide the Personalized Job List tab under the Career Sections section because they belong to the career portal pages. Change one element at a time, then see the results by previewing the Career Section.
Building a Career Section
The building of a career section consists of the following steps:
Career Section Components
Each of the areas that you can configure for each of your Career Sections is described below.
Properties: Each Career Section has its own Properties settings, which include the Career Section code, name, description, and type as well as different options. For details, see Career Section Properties.
Application Flow Properties: An application flow is a sequence of pages that must be completed by a candidate when applying for a job or when submitting a profile on a Career Section. Application flows are also used by referrers, recruiters, hiring managers, and agents to enter candidate profiles, invite candidates to apply for a job, or enter information on behalf of candidates. You must attach at least one application flow to each Career Section, and you can attach up to four. For details, see Application Flow Properties.
Career Section URL : You can add different Career Section URLs to lead candidates to specific jobs or locations; for example, the URL could take them to a list of marketing jobs in Canada. For details, see Career Section URLs.
Career Portal Pages: The Candidate Career Portal is the applicant-facing aspect of the Career Section. You administer the Career Portal Pages within each Career Section independently, as the settings within the Career Portal Pages can vary from one Career Section to another.For example, within the Career Portal Pages area, you can control how the Basic Search settings allow a candidate to search an organization's job list. For details, see Career Portal Pages.
Security Settings: Each Career Section can have its own specific security settings. Specific settings are configured in the Security Settings section of each Career Section. Global Security defaults for all Career Sections of a particular type are accessed from the Career Section Administration page, under Global Security. For details, see Security Setting Options.
User Accounts: System administrators can choose the number of hours during which access codes sent to candidates by e-mail remain valid. After the number of hours specified has been exceeded, the access codes are suspended. Access codes can be sent to candidates by e-mail for a variety of reasons: candidates who choose or are required to create a new user name or password, candidate file creation following employee referrals, imports via Integration. In prior releases, such access codes remained valid forever. Because the e-mails can remain in candidates’ e-mail accounts for any length of time, customers can now impose a specific period of time (expressed in hours) after which the access codes are suspended. If candidates attempt to use an access code that is suspended, they’ll receive an e-mail instructing them to apply for a new one.
A new setting is available: Validity period for the registration and password email (in hours).
Minimum value: 1 hour (zero hours is not accepted)
Maximum value: 10,000 hours (equivalent to 417 days)
Default: 1440 hours (equivalent to 60 days)
The default value of the setting Validity period for the registration and password email (in hours) is 1440. The length of time for the setting is expressed in hours. To specify 2 days, for example, the system administrator enters “48”. A different value can be assigned to each career section. The setting applies to all access codes sent to candidates. For this reason, system administrators should choose a length of time that accounts for a variety of situations, for example, where candidates use the Forgot your password feature, where candidates are on vacation when they are referred for a job by an employee, or when candidates are imported through data integration. An access code that exceeds the time limit is suspended, not deleted, from the system. Take the case where the validity period of access codes was 8 hours. If candidates used an access code 1 day after receiving it, the code would be rejected. If the system administrator then changed the validity period to 3 months, candidates could use the same access code up to 3 months after receiving it and it would be accepted. All access codes, even those generated in prior releases, are subject to this behavior.
Sign In: You can set up the sign in conditions for candidates; for example, whether or not the "Forgot User Name" link will show when candidates attempt to log in. For details, see Sign In Policy OptionsSelf-Registration: You can configure self-registration, which would require new users to provide a password and confirm their password.You can ask for an email address and activate the Registration Confirmation page in the Self-Registration area. For details, see Self-Registration Policy Options.
User Name: User Name parameters configure functions such as the number of sign in attempts or the period during which the system prevents access to an account that has been locked. For details, see User Name Policy Options.
Career Section Properties
| Element | Description |
|---|---|
| General | |
| Code | The code must be unique. Career Section codes must not include multi-byte characters. This is because the code forms part of the URL and multi-byte characters in Oracle Taleo URLs are not supported. |
| Name | The name must be unique and cannot be used for any other career section. |
| Description | A brief description of the Career Section. |
| Type |
|
| Use anchor on refresh | When the option is enabled, if candidates make a change that causes the system to update the page that is currently displayed, the system refreshes the page but the candidates remain on the same section of the updated page. |
| Enable the radius search | Allows candidates to search for jobs based on their zip/postal code. Your organization must be using Work Locations to support radius search. If you enable this feature for a Career Section, candidates can enter a zip/postal code and specify the distance from the work location for which they want to search (i.e., 1 to 100 miles or kilometers). Candidates then select a work location (only work locations that contain posted requisitions are displayed). The system then presents the positions available in the selected work location. Each work location is displayed as a hyperlink. When candidates click a hyperlink, a window opens containing a Google map of the work location address. Radius searches are completed using the zip/postal code associated with the work location. If the work site zip/postal code is not recognized or the geocoder service is unavailable at time of query, the system will use the associated RSLocations coordinates instead of the work locations zip/postal code. Taleo recommends implementing this feature when multiple work locations are concentrated in a single geographic area as well as for audiences where location is an important driver in employment (for example, hourly). The radius search can be used globally (it is not only for US locations). |
| Sequence | Before redirecting a candidate coming from a job specific URL (from a job board, a job posting notification, etc.) to a career section, the system first evaluates the career sections in order of sequence number from lowest to highest. |
| Display links allowing to withdraw submissions in the My Submissions page and in the My Referrals page | Displays the Withdraw link in the My Submissions page and My Referrals page to allow a candidate to withdraw a job submission. |
| Display the link allowing to deactivate the account in the My account page | Displays the Deactivate link in the My Account page to allow the candidate to deactivate his or her account. |
| Enable the RSS feature | Real Simple Syndication, or RSS, allows candidates to receive a notification for jobs corresponding to their job search criteria. |
| Mobile Career Section | You can specify if a career section can be accessed from mobile devices. |
| Linked Mobile Career Section | You can specify if a career section can be accessed from mobile devices. |
| Display the "Email me a copy" link in the Summary Page | Allows candidates to receive a summary of their submission by email. |
| Display Type | If you set the Display Type property to Private, URLs that do not include a precise career section code cannot lead candidates to that career section. The Display Type property can also be used to specify which career sections are not to be excluded when jobs are pulled via an integration process. When customers migrate to a new version, the value (Public or Private) specified for each career section is maintained. When a new external career section is created, the property is set to Public by default. When an internal career section is created, the property is set to Private by default. |
| Technical Help | |
| Type | Content type of the technical help. |
| Content | Content of the technical help. |
| Posting | |
| By default, select this Career Section for posting | Specify if you wish this career section to be selected by default when posting a requisition via the Recruiting Center. |
| Default Posting Start Date | Indicate the default posting start date in the Recruiting Center (Requisition > Posting and Sourcing tab > Career Sections > Modify). |
| Default Posting End Date | Indicate the default posting end date in the Recruiting Center (Requisition > Posting and Sourcing tab > Career Sections > Modify). |
| Display the job posting date in the My Submissions page and in the My referrals page | Specify if you wish to display the job posting date in the My Submissions page and the My Referrals page. |
| Candidate Communication Agent | |
| Display user-defined job submission statuses in the My Submissions page and in the My Referrals page | The Candidate Communication Agent must be activated by Oracle Support. This feature enables candidates to view job submission statuses and stay informed of where they are in an application process. You can display links that enable candidates to view their job submission statuses and the Candidate Communication AgentView Email Messages link in the My Submission page. |
| Display the View Email Messages link in the My Submissions page | Allows candidates to see messages relating to their job submissions. Messages can be emails or detailed text regarding the status of their job submissions. |
| URL | |
| Alternate Job List URL | Provides a point of return to the Job List when the candidate clicks Exit, Return to Job, email URL or Forgot Password. See Career Section URL. |
| Alternate Candidate Profile URL | Provides an alternate candidate profile URL. When a candidate clicks on one of the Profile URLs, the alternate profile URL provides an alternate profile link. This will redirect the candidate to any other URL of the standard profiler flow. See Career Section URL. |
| Application Flows | |
| Job-specific Application | Application flow that allows candidates to apply for a specific job. |
| Candidate Profile | Application flow that allows candidate to enter a general profile. |
| Job-specific Referral | Application flow that allows referrers to apply for a specific job on behalf of a candidate. |
| Candidate Profile - Referral | Application flow that allows referrers to enter a general profile on behalf of a candidate. |
| Application - Agency | Application flow displayed when a candidate applies for a job via an agency portal. |
| Profile - Agency | Application flow displayed when candidates complete their profile via an agency portal. |
| Allow users to delete their attachments | Allows candidates to delete attachments from their profile. |
| Email address used to apply | If you enter an email address in the field, candidates will have the ability to apply via email instead of going through the application flow. When a candidate clicks the Apply button, an email browser window containing a pre-populated address opens and the candidate simply submits his/her application via email (instead of going through the online submission process). The candidate can apply for the job while remaining in the same submission page. Once the candidate has completed the email, he/she will remain on the same page of the career section.
Note: This feature applies only to Basic search and Advanced search, not to Faceted Search.
|
| Display a link to the profile in portal pages | |
| Always force this Career Section's job specific application flow | If the setting is set to Yes, the current career section's flow is applied when a candidate applies for a job through the career section. Note that if the job is not posted on the current career section, the candidate is unable to edit the submission. If the setting is set to No, the system locates the first available career section (according to Career Section Number and starting with external ones) in which the job is posted and displays that flow to the candidate even if the candidate is visiting another career section. |
| Levels displayed in the Candidate Profile | |
| Job Field Levels | Select the levels you want the system to display in the candidate profile flow. Levels available were configured in SmartOrg. |
| Location Levels | Select the levels you want the system to display in the candidate profile flow. Levels available were configured in SmartOrg. |
| Organization Levels | Select the levels you want the system to display in the candidate profile flow. Levels available were configured in SmartOrg. |
| Authentication Privacy Agreement | |
| Name | In the Name list, select the primary privacy agreement that will be displayed when a candidate visits the career section for the first time. If no privacy agreement is selected (that is, you selected Not Specified in the list), then no agreement is displayed to candidates when they initially log in. |
| Display dynamically a privacy agreement at the beginning of the job submission flow | The privacy agreement will show up at the beginning of a job submission flow. |
| Display the authentication privacy agreement before | Specify where the privacy agreement will appear in the career section. Possible options are before the Login page or the Registration page. |
| Corporate Brand | |
| Name | Corporate brand that will appear in the career section. |
| Theme | |
| Name | Theme that will appear in the career section. |
Application Flow Properties
| Element | Description |
|---|---|
| Job-specific Application | This flow is filled out by candidates who are submitting their application for a specific job opening that is listed by your organization. This type of flow can also be used by a referrer. |
| Job-specific Referral | This flow allows referrers to apply for a specific job on behalf of a candidate. |
| Candidate Profile | This flow does not pertain to a specific job; rather it is filled out by candidates who wish to upload their job preferences profile so they can be considered for future opportunities at your organization. |
| Candidate Profile - Referral | This flow allows referrers to enter a general profile on behalf of a candidate. |
Career Section URL
When a Career Section is created, a URL is automatically generated for the Career Section. When candidates access the Career Section of an organization, they are taken to the URL created for the Career Section.
System administrators can choose the page that is displayed when candidates access the Career Section; the default page is the Basic Search page.
System administrators can provide:
an alternate job list URL, i.e. when candidates are in a Career Section, the alternate job list URL provides a point of return to the Job List when candidates click Exit, Return to Job, email URL, or Forgot Password.
an alternate candidate profile URL i.e. when candidates click on one of the profile URLs, the alternate profile URL provides an alternate profile link. This redirects candidates to any other URL of the standard profiler flow.
System administrators can create additional Career Section URLs that can later be added to different areas of the Career Section or to email correspondence. For example, rather than have candidates start from the job search page, they could be directed to the portal and log in to the My Submissions page. A specific Career Section URL could be created for this purpose. When a URL is created for a Career Section, only part of the URL is displayed in the URL column of the Career Section URL list, this portion must be added to the domain name of the organization to obtain a complete URL.
System administrators can embed a source ID, a media ID, or an event ID to the URL; therefore when candidates apply for a job, the right source, or media or event is automatically selected.
URL and Source ID: Put the “src=” parameter plus a source ID in the URL. For example: https://abc.taleo.net/careersection/5/jobdetail.ftl?lang=en&job=51380&src=JB-10088. By doing that, the right source is automatically selected when a candidate applies for a job. This feature is available for any valid sources. For a list of sources, consult the Sources feature in the Recruiting Administration module.
URL and Media ID: Put the “src=” parameter plus a media ID in the URL. This parameter can only be used for eQuest.
URL and Event ID: Put the “src=” parameter plus an event ID in the URL. For example: http://v750dev.qa.rsft.net/careersection/2/jobapply.ftl?job=7397&src=EV-001. By doing that, the right event is automatically selected when a candidate applies for a job. It provides you the ability to track which events, banners or online campaigns are attracting the most candidates to your organization career section. Note that event IDs must be valid and active and they must have been activated in the Sources feature of the Recruiting Administration module. Event IDs are case sensitive. For example, ev-001 and EV-001 are two distinct Event IDs.
Parameters can be manually added to a URL to direct candidates to a specific Career Section or to filter what is displayed on the page. For example:
to have candidates land on a French page, add &art_servlet_language=fr
to have the Career Section visible for internal candidates only, add &csNo=1
to display only urgent jobs in the job list page, add &u=1
URL considerations for standard career sections using only Advanced search and linked to a mobile career section
Career Section administrators create career section URLs for a variety of reasons (Configuration > Career Section Administration > Career Section URLs).The special situation involves standard career sections for which:
the Advanced search page is enabled and
the Basic and Faceted search pages are disabled and
a mobile career section is linked to the standard career section.
In such a situation, it is important to configure any URL for the Advanced search in the standard career section such that the URL ends with "jobsearch.ftl". E.g. http://customerzone/careersection/careersectioncode/jobsearch.ftl. This might seem odd given that "jobsearch.ftl" points to the Basic search or Faceted search (both disabled on the standard career section) but this configuration works well in practice. Because the Basic search and Faceted search are disabled, visitors to the standard career section are redirected automatically to the URL ending with "moresearch.ftl" and the Advanced search page. Because of "jobsearch.ftl" (pointing to Basic search or Faceted search) in the standard career section URL and because the Faceted search page is enabled for mobile career sections, mobile device users are automatically redirected to the mobile career section and the Faceted search page.
When system administrators use the Preview functionality of the Career Section, the system automatically creates a candidate in the Career Section with the login information of the system administrator. The system administrator is then logged in to the Career Section directly using this candidate's account. All changes made in the preview page are also made in the actual Career Section. The data the system administrator creates in the Career Section is saved under this candidate's name. This data can later be accessed in the Recruiting Center and deleted.
Security Setting Options
Security setting options can be set in the following places:
-
Configuration > [Career Section] Administration > Internal Career Sections
-
Configuration > [Career Section] Administration > External Career Sections
-
Configuration > [Career Section] Administration > Agency Portals
-
Configuration > [Career Section] Administration > Career Sections > Career Section Name
| Security Setting Options |
|---|
| Require users to sign in before accessing the Job List |
| Require users to sign in before accessing job descriptions |
| Allow users to change their user name |
| Activate SSL encryption |
| Allow access by internal candidates (employees) only |
| Log the user out when the last page of the flow has been reached, then display the main Job List if the user attempts to go Back |
| Use this phone number as hotline for users who encounter login problems |
Sign In Policy Options
Sign in policy options can be set in the following places:
-
Configuration > [Career Section] Administration > Internal Career Sections
-
Configuration > [Career Section] Administration > External Career Sections
-
Configuration > [Career Section] Administration > Career Sections > Internal or External Career Section Name
-
Configuration > [Career Section] Administration > Agency Portals
| Sign In Policy Options |
|---|
| Allow new users to register in system |
| Display the link "Forgot your user name?" |
| Display the link "Forgot your password?" |
| Show explicit error messages to users at login |
| Display the OpenID option |
Self-Registration Policy Options
Self-registration policy options can be set in the following places:
-
Configuration > [Career Section] Administration > Internal Career Sections
-
Configuration > [Career Section] Administration > External Career Sections
-
Configuration > [Career Section] Administration > Career Sections > Internal or External Career Section Name
| Self-Registration Policy Options |
|---|
| Ask new users to provide a password when they register |
| Ask new users to confirm the password when they register |
| Ask new users to provide an email address when they register |
| Ask new users to confirm the email address when they register |
| Activate the registration confirmation page |
| Number of username attempts before closing the session |
User Name Policy Options
User name policy options can be viewed in the following places:
-
Configuration > [Career Section] Administration > Internal Career Sections
-
Configuration > [Career Section] Administration > External Career Sections
-
Configuration > [Career Section] Administration > Career Sections> Career Section name
| User Name Policy Options |
|---|
| Activate this user name security policy |
| Require user names that contain at least X characters |
| Require user names that contain no more than X characters |
Career Portal Pages
Once candidates have accessed the Career Section, they have access to portal pages. A career portal page is a page displayed by clicking either the tabs or the links at the top of the Career Section, below the branding. Career portal pages each represent a specific area of the Career Section.
Career portal pages allow you to customize each Career Section to the specific needs of your organization. Career portal pages are highly configurable. You can choose which career portal pages are displayed for a given Career Section. A set a properties defines each career portal page allowing the customizing of fields, icons etc. to be displayed.
Text in tabs, links, fields and buttons appearing in career portal pages can be changed if the text has a product resource identification number. See Changing the Text of a Field in a Career Portal Page.
The color and formatting of text, color and background color can also be changed via the Theme feature.
Below is a description of each of the career portal pages:
Basic Search page allows candidates to perform basic searches using criteria such as the job number, the job field, the location. Basic Search is the default search type. If Basic Search is not selected, the Advanced Search becomes the default. If Basic Search and Advanced Search are not selected, the All Jobs search becomes the default. If Basic Search, Advanced Search and All Jobs are not selected, My Job page becomes the default and candidates are required to log in.
It is not possible to change the order of search tabs. For example, the Advanced Search tab cannot appear before the Basic Search tab. However, it is possible to disable any search tabs in a Career Section. If all search pages are displayed, the display order is: Basic Search, Advanced Search, Jobs Matching My Profile, All Jobs.
Advanced Search page allows candidates to perform advanced searches using more criteria than the basic search. For example, the job number, the job field, the job type, the job status, the location, the work shift availability, the education level, etc.
Job List page allows for the configuration of standard fields and user-defined fields that are included as columns in job lists. Job lists can be configured for specific Career Sections. This flexibility enables a Career Section to provide a more effective job search for specific candidate pools by displaying the most useful information. The inclusion of user-defined fields allows customer-specific data to be readily available in the list so that candidates do not have to open the job offer to find important details. User-defined fields can be added to job lists, but they cannot be used to sort lists.
Personalized Job List allows candidates, who have completed a job specific application or a general profile, the access jobs that match the preferences they have set in their general profile. Candidates simply need to click the Jobs Matching My Profile link, and they are presented with a list of available jobs. The system administrator can set the criteria that determine when a match is to be made between a job and a candidate; Only jobs meeting all the specified criteria are displayed in the Career Section Jobs Matching My Profile page. If a candidate clicks on the Jobs Matching My Profile tab, the candidate is asked to sign in if he/she has not already signed in. If the candidate has not created a general profile or has not applied to at least one job, he/she does not see any jobs and the following message is be displayed: “You don't have a candidate profile for the moment”.
My Job Cart allows candidates to conduct job searches and select jobs that they wish to place in their job cart for later review.
My Saved Searches allows candidates to select the search criteria they want for a specific job search, run the search, view search results and then save the search.
My Submissions page allows candidates to have access to information (including the job description and job status) regarding all of their applications on job‑specific acquisitions and their draft submissions. Jobs that have been updated since a candidate last visited the site is highlighted. The candidate has the opportunity to complete or withdraw draft submissions, and view or withdraw completed ones. Submission status (in the context of career section work flows) and messaging capability are features available at extra cost to Taleo customers. When the Jobs Matching My Profile page is set to be displayed, if a candidate clicks on the Jobs Matching My Profile tab, the candidate is asked to sign in if he/she has not already signed in. If the candidate has not created a general profile or has not applied to at least one job, he/she does not see any jobs and the following message is displayed: “You don't have a candidate profile for the moment”.
The My Referrals career portal page provides candidates with a single list that brings together all of their respective referrals. The candidates can create draft referrals and complete them at a later time. They can view their past and present referrals and withdraw any of them. The ownership period is configurable.
Job Description allows users to display the job title as an hyperlink in the Career Section. When clicking the link, candidates are brought to a new page containing the complete job description. On this page, candidates are provided a link to go back to the job submission process. Candidates are returned to the page where they were at and the data they entered before clicking the link is still there.
Requisition Balloon page displays a hover callout beside the job title containing a short description of the job. Candidates have the ability to view the job description at any point in time when they apply.
The Search Query Balloon displays a hover callout beside the Basic Search and Advanced Search. This callout contains search criteria of the last search that was performed.
My Account allows candidates to configure the following account options: Personal information such as first name, last name, email address, phone numbers, address, social security number; Login information such as user name, password and security question and its answer; Correspondence preferences.
My Messages allows candidates to access correspondence directly from the secure message center in the Career Section.
Access Management gives access to user-defined labels that can be customized in the following Career Section pages: Sign In page, New User Registration page, Forgot Your Password page, Forgotten User Name page.
Faceted Search allows candidates to perform searches using dynamic search filters (facets). When the Faceted Search is activated, it replaces the existing Basic Search page and Job List page and provides candidates with a robust way to search for jobs. To activate the Faceted Search, the Faceted Search protected setting must be enabled by Oracle Support (Configuration > [Career Section] Settings).
Basic Search Properties
| Property | Description |
|---|---|
| Displayed | When set to Yes, displays the Basic Search page in the Career Section. |
| Display the organization search control | When set to Yes, the Organization search criteria is displayed in the Career Section. |
| Display the search criteria section expanded | When set to Yes, search criteria in the Career Section are expanded. When set to No, search criteria are collapsed; to see them, candidates must click Show Search Criteria. |
| Enable job invitations through social networks | When set to Yes, the candidate will have an option to share the job listing via social network, or email. |
Advanced Search Properties
| Property | Description |
|---|---|
| Displayed | When set to Yes, displays the Advanced Search tab in the Career Section. |
| Display the job number search criteria | When set to Yes, the Job Number search criteria is displayed in the Career Section. |
| Display the job field search criteria | When set to Yes, the Job Field search criteria is displayed in the Career Section. |
| Display the schedule search criteria | When set to Yes, the Schedule search criteria (Full Time, Part Time, etc.) is displayed in the Career Section. |
| Display the job type search criteria | When set to Yes, the Job Type search criteria (Summer Job, Internship, etc.) is displayed in the Career Section. |
| Display the location search criteria | When set to Yes, the Location search criteria is displayed in the Career Section. |
| Display the education level search criteria | When set to Yes, the Education Level search criteria (Bachelor’s Degree, Master’s Degree, etc.) is displayed in the Career Section. |
| Display the travel search criteria | When set to Yes, the Travel search criteria (e.g., Will travel 50% of the time) is displayed in the Career Section. |
| Display the organization search criteria | When set to Yes, the Organization search criteria is displayed in the Career Section. |
| Display the employee status search criteria | When set to Yes, the Employee Status search criteria (Regular, Temporary, etc.) is displayed in the Career Section. |
| Display the job level search criteria | When set to Yes, the Job Level search criteria (Entry Level, Team Leader, etc.) is displayed in the Career Section. |
| Display the shift search criteria | When set to Yes, the Shift search criteria (Day Job, Evening Job, etc.) is displayed in the Career Section. |
| Display the keyword search criteria | When set to Yes, the Keywords search criteria is displayed in the Career Section. The search engine returns keywords found in the job title, job description (internal if internal career section, and external if external Career Section), job qualifications (internal if internal Career Section, and external if external career section) and job locations. For example, if a candidate types “San Francisco” in the Keywords field, jobs in this location are returned even if the word “San Francisco” does not appear in the actual text of the job description or qualifications. |
| Display the posting date search criteria | When set to Yes, the Posting Date search criteria (e.g., Today, Yesterday, Last 7 days, etc.) is displayed in the Career Section. |
| Display the urgent need job search criteria | When set to Yes, the Urgent Jobs search criteria is displayed in the Career Section. |
| Display the following user-defined fields related to the department | The list contains user-defined fields that can be used as search criteria. |
| Display the following user-defined fields related to the offer | The list contains user-defined fields that can be used as search criteria. |
| Display the following user-defined fields related to the job | The list contains user-defined fields that can be used as search criteria. |
| Display the search criteria section expanded | When set to Yes, search criteria in the career section are expanded. When set to No, search criteria are collapsed; to see them, candidates must click Show Search Criteria. By default, search criteria are expanded. |
| Enable job invitations through social networks | When set to Yes, the candidate will have an option to share the job listing via social network, or email. |
Job List Properties
| Property | Description |
|---|---|
| Displayed | When set to Yes, activates the Job List feature. |
| Always show urgent need jobs on top of the job list | When set to Yes, urgent need jobs are displayed first on the search result list of the Career Section. |
| “Already applied for this job” icon displayed | When set to Yes, the “Already applied for this job” icon is displayed in the Career Section. |
| “Urgent Need Job” icon displayed | When set to Yes, the “Urgent Need Job” icon is displayed in the Career Section. |
| Search on multilingual jobs | Career sections can be configured such that if job lists contain jobs posted in multiple languages, candidates and employees can use the "Jobs available in" filter at the top right-hand corner of search pages to limit the jobs displayed to those posted in a specific language. For example, a candidate selects the Spanish language from the "Jobs available in" list. The system then displays the jobs posted in the selected language. The "Jobs available in" list is displayed in a career section provided:
|
| Default number of positions displayed | Possible values are 5, 10, 25. Default value is 10. |
| Default Sort Field | Possible values
Default value is Posting Date (Descending Order) |
| Job Field Level Displayed | Select the levels of job field to display in the Basic Search, Advanced Search and Search Results. The system administrator can decide up to which level the Job field is displayed. |
| Location Level Displayed | Select the levels of location to display in the Basic Search, Advanced Search and Search Results. The system administrator can decide up to which level the location is displayed. Select the desired level. For multiple selections, use the SHIFT key. |
| Organization Level Displayed | Select the levels of organization to display in the Basic Search, Advanced Search and Search Results. The system administrator can decide up to which level the Organization is displayed. |
| Enable job invitations through social networks | When set to Yes, the candidate will have an option to share the job listing via social network, or email. |
| Display the job posting date with date and time. If you select No, only the date will be displayed. | When set to Yes, the job posting date will display the date and the time. |
| Display the job unposting date with date and time. If you select No, only the date will be displayed. | When set to Yes, the job unposting date will display the date and the time. |
Personalized Job List Properties
| Property | Description |
|---|---|
| Displayed | When set to Yes, activates the Job Matching My Profile feature. |
| “Already applied for this job” icon displayed | When set to Yes, the “Already applied for this job” icon is displayed in the Career Section. |
| Default number of positions displayed | Possible values are 5, 10, 25. Default value is 10. |
| Job field level displayed | Select the levels to display in the Career Section, The administrator can decide up to which level the Job Field is displayed. Multiple selections are possible. |
| Organization level displayed | Select the levels to display in the Career Section. The administrator can decide up to which level the Organization is displayed. Multiple selections are possible. |
| Location Level Displayed | Select the levels to display in the Career Section. The administrator can decide up to which level the Location is displayed. Multiple selections are possible. |
| Always show urgent need jobs on top of the job list | When set to Yes, urgent need jobs are displayed first on the search result list of the Career Section. |
| Search on multilingual jobs | When set to Yes, the multilingual job search is activated in the Career Section. When activated, candidates can access jobs in multiple languages in a single Career Section. This enables candidates to view jobs that match the search criteria entered, regardless of the language in which the job is posted. For example, a job is created in English and is not translated into French. Candidates visiting the Career Section could choose to search for jobs using the French language option. Links to jobs matching the criteria and available in other languages are displayed. In this scenario, jobs which are in English are now available to the candidate via a link located at the bottom of the page. The following information would be displayed: Jobs also available in: English | French Clicking on English would display the jobs posted in English. |
| “Urgent Need Job” icon displayed | When set to Yes, the “Urgent Need Job” icon is displayed in the Career Section. |
| Maximum number of jobs displayed in the personalized job list | Possible values are Unlimited, 10, 15, 20 and 40. Default value is Unlimited. |
| Default Sort Field | Possible values
Default value is Posting Date (Descending Order) |
| Enable job invitations through social networks | When set to Yes, the candidate will have an option to share the job listing via social network, or email. |
My Job Cart Properties
| Property | Description |
|---|---|
| Displayed | When set to Yes, activates the My Job Cart feature. |
| Default number of positions displayed | Specify the number of positions displayed in My Job Cart page. Possible values are 5, 10, 25. Default value is 10. |
| Default sort field | Default value is Posting Date (Descending Order) Possible values are
|
| Location Level displayed | Select the levels to display in the Career Section. The administrator can decide up to which level the Location is displayed. Multiple selections are possible. |
| Always show urgent need jobs on top of the job list | When set to Yes, urgent need jobs are displayed first on the search result list of the Career Section. Default value is Yes. |
| “Urgent Need Job” icon displayed | When set to Yes, the Urgent Need Job icon is displayed in the Career Section. Default value is Yes. |
| Job Field Level Displayed | Select the levels to display in the Career Section. The administrator can decide up to which level the Job Field is displayed. Multiple selections are possible. |
| Organization Level Displayed | Select the levels display in the Career Section. The administrator can decide up to which level the Organization is displayed. Multiple selections are possible. |
My Saved Searches Properties
| Property | Description |
|---|---|
| Displayed | When set to Yes, activates the My Saved Search feature. |
My Submissions Properties
| Property | Description |
|---|---|
| Displayed | When set to Yes, activates the My Submissions feature. |
| Ask reason for withdrawal | When set to Yes, the Career Section displays a field where candidates can provide the reason why they decided to withdraw their job submission. |
| Default number of positions displayed | Specifies the number of positions displayed in the My Submissions page. Possible values are 5, 10, 25. Default value is 10. |
My Referrals Properties
| Property | Description |
|---|---|
| Displayed | When set to Yes, activates the My Referrals feature. |
| Ask reason for withdrawal | When set to Yes, the Career Section displays a field where candidates can provide the reason why they decided to withdraw their job submission. Default value is No. |
| Withdraw Reason is Mandatory | When set to Yes, candidates must provide a reason why they decided to withdraw. |
| Default number of positions displayed | Possible values are 5, 10, 25. Default value is 10. |
| Display to the referrer submissions for which candidates applied by themselves. | When set to Yes, referrers can see all submissions of a candidate who they referred and who is still active. Default value is No. See Displaying All Candidate Submissions in the My Referrals Tab. |
Job Description Properties
| Property | Description |
|---|---|
| Displayed | When set to Yes, activates the job description feature. |
| Enable job invitations through social networks | When set to Yes, the candidate will have an option to share the job listing via social network, or email. |
| Display the job posting date with date and time. If you select No, only the date will be displayed. | When set to Yes, the job posting date will display the date and the time. |
| Display the job unposting date with date and time. If you select No, only the date will be displayed. | When set to Yes, the job unposting date will display the date and the time. |
Requisition Balloon Properties
| Property | Description |
|---|---|
| Displayed | When set to Yes, a balloon containing information is displayed over the requisition name. |
Search Query Balloon Properties
| Property | Description |
|---|---|
| Displayed | When set to Yes, a balloon containing information is displayed over a search query. |
My Account Properties
If no display options are displayed, the Correspondence block is not displayed to candidates on the My Account page. It is recommended to enable these options and leave candidates the option of deselecting them. On the other hand, disabling options that are not used is also recommended. For example, if the job posting notifications option is not used, disable it. If the hiring process relies on notifications to communicate specific data to candidates, consider eliminating the candidate's ability to deselect that type of correspondence.
| Property | Description |
|---|---|
| Displayed | When set to Yes, activates the My Account feature. |
| SSN Validation (United States Only) | Activates the US social security number validation in personal information pages. |
| Candidate Personal Information User-defined Form | Select which Candidate Personal Information user-defined form is used. |
| Display the correspondence language | When set to Yes, allows candidates to configure the language in which they want to receive their correspondence. Set to Yes by default. If only one language is activated, the correspondence language selector is be displayed in the Career Section even if this setting is activated. The languages listed in the Career Section My Account page are not limited to the languages available in the Career Section. |
| Display the job posting notification setting | When set to Yes, allows candidates to specify if they wish to receive job posting notifications. Set to Yes by default. |
| Display the email acknowledgment setting | When set to Yes, allows candidates to specify if they wish to receive email acknowledgments. Set to Yes by default. |
| Display the rejection letter setting | When set to Yes, allows candidates to specify if they wish to receive rejection letters. Set to Yes by default. |
Access Management Properties
| UI Element | Description |
|---|---|
| Displayed | When set to Yes, activates the job description feature. |
My Messages Properties
| Property | Description |
|---|---|
| Displayed | When set to Yes, all correspondence is sent to the candidates secure messaging center. |
Faceted Search
Faceted search is a career portal page that provides a new way for candidates and employees to search for jobs via the career section Job Search tab. When enabled, Faceted search replaces the Basic search and Job List career portal pages.
While the Job Search tab is displayed, candidates can type terms in the search bar fields and filter the list of displayed job openings by selecting facets (search filters) in the left panel. Without having to perform a new search, candidates can change their facet selections and the search results are updated immediately to reflect the new filter criteria.
Oracle Support must first enable the Faceted search protected setting (Configuration > [Career Section] Settings). Afterward, customers' Career Section administrators can configure and make available the Faceted search for whichever career sections they choose. Faceted search can be configured for internal, external and agency career sections.
Search Bar
A search bar is displayed at the top of the page. This search bar can contain up to three fields from the following list:
-
Job Field
-
Job Number
-
Job Title
-
Keyword
-
Location
-
Organization
Those fields (except Job Number) support autosuggest. When candidates type at least two letters, the system suggests values that correspond to the typed characters. Take the example of the Location field. The list would contain only those locations and their "children" that match the characters entered in the field and the Location elements as configured in the Properties section of the Faceted search page. The Organization and Job Field fields behave in a similar manner. In addition, if candidates click See all locations or See all job fields in the left pane of the Faceted search page, and type two or more characters, the system suggests corresponding values. The candidates can make a selection from the list of displayed values or they can type additional characters (and the list of suggested terms is modified accordingly).
The search bar also contains an Advanced Search link which takes candidates to the Advanced search page. From there, candidates can perform advanced searches using more criteria than the basic search, for example, the job field, the job type, the education level, etc. The View All Jobs link enables candidates to view all open jobs in the organization.
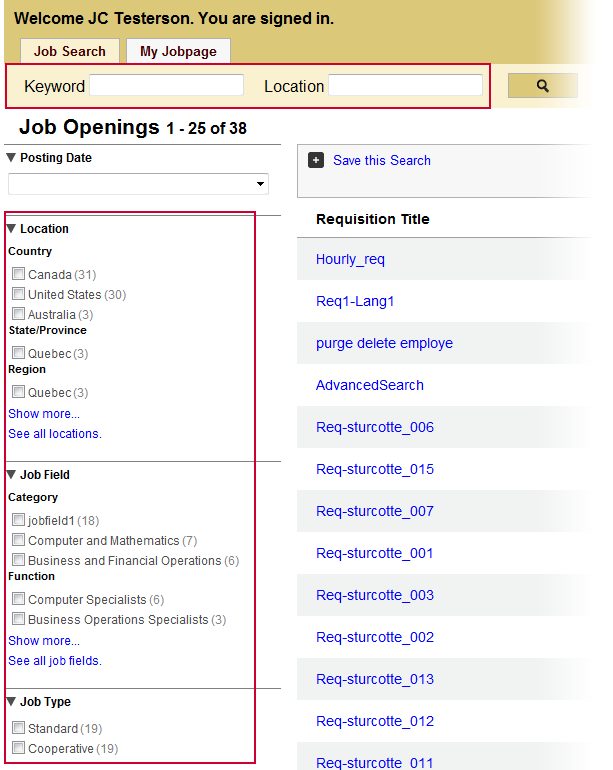
Job Openings List
Jobs in the Job Openings list can be displayed in single-line view or multiple-line view and information on each job is displayed divided into columns. The number of columns that can be displayed in the list varies depending on whether the filter panel is displayed. The width of each column can also be specified. If the content in a column is too long, the content is wrapped automatically. The Requisition Title and the Actions columns are always displayed in the Job Openings list. Candidates can click a job title to obtain details about the job. Note that the "balloon" that used to be located next to the job description is no longer displayed.
Actions that can be performed on a job are located in the Actions column. The main actions, Apply, Finish Draft Submission, View/Edit Submission are displayed with a button while other actions such as Save Job and Share are displayed in an Action drop-down list.
The number of job openings is displayed at the top of the page. Candidates can navigate between pages by clicking Next, Previous, or the page numbers located at the bottom of the page.
Default Job List Layout
Career Section administrators can determine which job list layout (or view) will be displayed by default on the Faceted search page and whether users will be able to switch between job list layouts.
If Career Section administrators enable the Faceted search for a career section, information about each job in the job list can be displayed on a single line or on multiple lines. In the first case, the job list resembles a table with cells. Administrators can select the column headings displayed in single line layout (Requisition Title is a mandatory column heading).
Career Section administrators set the default job list layout—the way jobs will be displayed each time candidates or employees visit the career section and view jobs on the Faceted search page. The default layout is used throughout a session unless the candidate or employee chooses the other layout.
Administrators can impose a single layout (single line or multiple line) or they can enable candidates and employees to switch between layouts.
If Career Section administrators enable candidates and employees to switch between views, a link is displayed in the career section at the top of the job list. Candidates click the corresponding link: "Single-line" to display information about each job on a single line; "Multi-line" to display information about each job on multiple lines.
If candidates display a job description and return to the job list, the list is displayed in the layout that candidates selected most recently (single line or multiple line). If candidates click a different tab or go to the Advanced search page and return to the Faceted search job list, the default job list layout (selected by the Career Section system administrator) is displayed.
Filters
Filters (or facets) can be used to refine search results. If candidates or employees select filters, the search result display is updated accordingly; only job openings that satisfy the job search criteria and the selected filters are displayed in the Job Openings list. Filters are organized into groups (for example, Location, Job Type, Job Level) and each group displays up to five filters. Within each group, filters are ordered by the number of occurrences in the career section, from greatest to smallest. If there are more than five filters, a Show more option enables candidates to view the "top 10" filters. Next to each filter, the number of jobs that satisfy the search criteria and the filter is displayed.
When a filter is selected, it is displayed above the Job Openings list. To remove a filter after having applied it, users click the Delete icon. Alternatively, users can remove all applied filters by clicking Clear at the far right of the selected criteria zone. In both cases, the Job Openings list is adjusted accordingly. When no filter is selected, the Job Openings list displays all jobs posted on the career section.OLF filters are arranged and displayed by OLF level. Under Location, filters are grouped by two levels: state/province and region. Under Job Field, filters are grouped by two levels: Category and Function. Within a level, filters are ordered by the number of occurrences, from greatest to smallest.
After a candidate or employee enters a value in the OLF field (e.g. Location), and performs the search, the system displays on the left side all the levels below the level of the search term. Below each level, the corresponding filters are displayed. For example, if someone entered "United States" in the Location field as depicted in the screenshot, the system would display the State/Province and Region levels but not the Country level. If someone entered "New York, United States" (as in the State of New York), the system would display the City level. If no OLF values are specified, all levels (including the highest level) are displayed. In the case of Location, for example, Country, State/Province and Region levels would all be displayed.
If candidates click "Show all locations" in the Location section of the "facets" panel, the window that appears displays only locations and their "children" that match the Location elements as configured in the Properties section of the Faceted search page. The "Show all organizations" and "Show all job fields" links behave in a similar manner.
OLF Levels for a Faceted Search Page
OLF levels for a Faceted search page are configured in the page's Properties section. The levels determine the display of:
-
The levels displayed in the search bar's "suggest" window when users beginning typing in a search field.
-
The levels displayed in the "facets" panel.
-
The levels displayed in the window displayed when users click "Show all...". If the window contains 4 or 5 levels, the window will be resized accordingly to accommodate them all.
The number of levels displayed in the facets panel of the Faceted search page is consistent with the number of levels the administrator selects on the Faceted search configuration page.
"Pre-filtered" URLs for Standard Career Sections Redirect Candidates to Mobile Career Sections
When candidates using a mobile device click links to "pre-filtered" searches on a standard career section for which Faceted search is enabled, the candidates are redirected to the associated mobile career section and a Faceted search using the same search parameters is performed. For a more detailed explanation, see "Pre-filtered" URLs for Standard Career Sections Redirect Candidates to Mobile Career Sections
Configuration
Career Section administrators can select the OLF that will be displayed in pop-up windows when candidates type in OLF search fields or click "Show all..." links on the Faceted search page.
| Properties | Location |
|---|---|
| Job Field level displayed Organization level displayed Location level displayed |
Configuration > [Career Section] Administration > Career Sections > (click career section name) > [Career Portal Pages] Show > Faceted Search > Edit Properties |
Migration
OLF elements as search criteria on the Faceted search page are restricted to the OLF elements configured for the career section's properties. This is a new, desired behavior. If no OLF elements are configured for the career section's properties, all OLF elements are displayed as search criteria on the Faceted search page.
The OLF levels selected for a career section's "Levels displayed in the Candidate Profile" property prior to migration to 15A become the OLF level selections on the Faceted search properties page immediately following migration.
Customers are advised to review the levels displayed on the "facets" panel and "Show all..." links following migration.
Save This Search
The Save this Search feature is located above the list of jobs. When candidates click Save this Search, the area is expanded and candidates can provide a name for their search and save the search. Candidates can retrieve the saved search criteria and filters at a later time to look for similar jobs (Save this search > Access My Saved Searches).My Profile
All information related to a candidate such as profile information, account information, saved searches, referrals, jobs matching my profile is grouped under the Profile menu. If the candidates are logged into a career section, they can access this menu by clicking the small triangle next to their name.
Save Job and Job Cart
The Save Job action is displayed in the Actions column, via the Action drop-down list. Once candidates or employees save a job, they can view it by clicking the Job Cart icon located in the top-right corner of the career section page.
Refer a Friend
The Refer a Friend action is displayed at the bottom of the career section page.
Help Panel
When enabled, the help panel is available on the right side of the career section page. It is collapsed by default. To see the content of the help, candidates click the help icon.
Details on Autosuggest and Filters
Autosuggest is used in the search bar fields. Autosuggest behavior may change depending on the field where it is being used.
| Field | Description |
|---|---|
| Keyword |
|
| Job Title |
|
| Organization Location, Job Field |
The list of values displayed is dynamic: each time users type or delete a character in an OLF field, the list of suggested values is updated so the list always displays the most appropriate matches. Users can make a selection from the list while it is displayed and that value will be entered in the field. The list includes only "exact" matches and their "children". For example, if a user typed "jersey" in the Location field, the state "New Jersey, United States", and cities "Atlantic City, New Jersey, United States" and "Cherry Hill, New Jersey, United States" might be displayed in the list but not the country "United States". The list is typically ordered from "highest" level to "lower" levels. For example, if a user typed "cal" in the Location field, "California, United States" would appear before "Fresno, California, United States". Items at the same level are listed in alphabetical order. |
| Requisition Number | No autosuggest. |
| Boolean operators, double quotes and parenthesis | Boolean operators (AND, OR, NOT) are ignored in the search. Double quotation marks and parentheses are also ignored. |
Filters show the exact number of jobs even if some requisitions include multiple locations. For example, if a requisition is for Montreal and Toronto, there will be a single job in the "Canada" filter.
Once a filter is selected, the other filter categories automatically readjust the count, but the filters within the same category do not. For example, if candidates filter the job list using "Toronto", then the count for the number of part-time and full-time jobs will change but the count for other locations will remain the same.
When candidates select multiple filters, the system adjusts the total of other categories so they reflect the multiple items selected.
Faceted Search Properties
| Property | Description |
|---|---|
Displayed |
When set to Yes, the Job Search page is displayed in the career section. The Basic Search and the Job List career portal pages are automatically disabled. However, the Advanced Search and the Personalized Job List pages are still available. |
Help panel displayed |
When set to Yes, the Help icon is displayed in the career section and candidates can access helpful information by clicking the icon. |
Enable job invitations through social networks |
When set to Yes, candidates have an option to share the job listing via social network, or email. |
Search on multilingual jobs |
Career sections can be configured such that if job lists contain jobs posted in multiple languages, candidates and employees can use the "Jobs available in" filter at the top right-hand corner of search pages to limit the jobs displayed to those posted in a specific language. For example, a candidate selects the Spanish language from the "Jobs available in" list. The system then displays the jobs posted in the selected language. The "Jobs available in" list is displayed in a career section provided:
|
Displayed filters |
Filters appearing in the filter panel. The order of how filters are displayed to candidates can be specified using the up and down arrows. An option is available to expand the filter block by default. |
Search bar fields |
Fields appearing in the search bar. A maximum of three fields can be selected. The Keyword field searches the following fields: Requisition Title (Job Title), Requisition Number (Job Number), Requisition Description, Requisition Qualifications. The order of how fields are displayed to candidates can be defined using the up and down arrows. |
Filter panel location |
Three location options are available: Left, Right or Off. |
Default job list layout |
Career Section administrators can determine which job list layout (or view) will be displayed by default on the Faceted search page and whether users will be able to switch between job list layouts. See the "Default job list layout" section in Faceted Search. |
Allow job list layout modification |
Administrators can impose a single layout (single line or multiple line) or they can enable candidates to switch between layouts. If Career Section administrators enable candidates to switch between views, a link is displayed in the career section at the top of the job list, right side of the Faceted search page. Candidates click the corresponding link: "Single-line" to display information about each job on a single line; "Multi-line" to display information about each job on multiple lines. |
Display the job posting date with date and time. If you select No, only the date will be displayed. |
|
Display the job unposting date with date and time. If you select No, only the date will be displayed. |
|
Job list sorting |
The selections made in this section determine the choices that will be displayed in the Sort by list. Faceted search users will be able to make a selection in the list and the job list will be sorted automatically by that criterion. |
Job list columns |
The selections made in this section determine the job list columns displayed on the Faceted search page, single-line mode. |
Sorting Direction |
|
Always show urgent need jobs on top of the job list |
If Yes is selected, jobs flagged as urgent need will be displayed at the top of the job list regardless of sorting criterion. |
Sorting of Faceted Search Results
Visitors to a career section can sort the results of faceted searches.
After performing a faceted search, users click the Sort by field at the top of the job list and select a sorting criterion. The list is sorted automatically to reflect the sorting selection. In addition, they can display the sorted list in ascending or descending order by making the corresponding selection in the Ascending/Descending list. If users (i.e. candidates or employees) switch between "Single-line" and "Multi-line displays, the jobs continued to be sorted according to the sorting selection until the users make a new sorting selection.
Each time users visit the career section, jobs are first sorted using the default sorting criterion chosen by the Career Section administrator.
Career Section administrators can decide which fields users can select to sort faceted search results and they can also set the default sort field. Administrators can make any or all of the following fields available for sorting faceted search results at a particular career section: Job Title, Location (i.e. Primary Location), Posting Date, Relevancy, Schedule, Unposting Date and Urgent Need. In addition, administrators can decide whether the jobs in Faceted search result lists are displayed in ascending or descending order by default (regardless of which sorting selection users will make). The one exception is Relevancy: this field is always present in the Sort by list and if users select Relevancy, jobs are always listed in descending order (i.e. the most relevant jobs at the top of the list and the least relevant jobs at the end of the list).
Career Section administrators can decide that jobs identified as "urgent need" jobs are displayed at the top of faceted search result lists regardless of the sorting selection that users make. Suppose an administrator selects this option and a user later sorts a Faceted search result list by Location and in ascending order. Jobs identified as "urgent need" jobs would be displayed first in alphabetical order of location, followed by the other jobs also sorted in alphabetical order of location.
If system administrators make no selections, jobs are sorted by Relevancy in descending order.
More generally, the sorting engine first considers "urgent need" jobs if Career Section administrators select that option. It then considers the sorting criterion selected by users, then keyword relevancy (alphabetical order), then posting date (numerical order), and finally requisition ID (alpha-numeric order).
Configuration
| Setting | Location |
|---|---|
| Job List Sorting | Configuration > [Career Section] Administration > Career Sections > (click a career section) > [Career Portal Pages] Show > Faceted Search > Edit Properties |
| Sorting Direction | Configuration > [Career Section] Administration > Career Sections > (click a career section) > [Career Portal Pages] Show > Faceted Search > Edit Properties |
| Always show urgent need jobs on top of the job list | Configuration > [Career Section] Administration > Career Sections > (click a career section) > [Career Portal Pages] Show > Faceted Search > Edit Properties |
Dependency for Fields in Faceted Search
If certain fields have been configured such that they are not displayed in career sections generally, they cannot be selected on the Faceted search configuration page for display on the Faceted search page of the career section.
The fields are found in the following three sections on the Faceted search configuration page:
Displayed filters
Search bar fields
Job list columns
This feature is best explained by a series of examples. Take the case where the system administrator has configured the Job Field field such that it is not displayed in career sections generally. The administrator does this by going to Configuration > [Recruiting] Administration > [Fields] Requisition > Job Field > Edit Field Availability, and ensuring the check box next to Career Section is not selected. If the system administrator next goes to the Faceted search configuration page of a career section, Configuration > [Career Section] Administration > Career Sections > (click a career section) > [Career Portal Pages] Show > Faceted Search > Edit Properties, the Job Field field is not displayed in the Displayed filters, Search bar fields and Job list columns lists so it cannot be added.
If the system administrator configures the Job Field field such that it is displayed in career sections generally, the field becomes available for selection in the Displayed filters, Search bar fields and Job list columns lists on the Faceted search configuration page. The administrator can then select Job Field to make it available in the corresponding section of the Faceted search page of the career section.A third case is where a field such a field was added to the Faceted search configuration page and later the system administrator configured the field such that it was not displayed in career sections generally. The field is displayed as a selection on the Faceted search page, however, a yellow icon next to the field serves to indicate that the field was disabled for career sections generally and consequently the field will not be displayed on the Faceted search page in the career section.
If the field is later made available for display in career sections generally, the yellow icon is no longer displayed next to the field on the Faceted search configuration page, indicating that the field is displayed anew in the career section.Configuring Faceted Search
The configuration of the faceted search consists of the following steps.
Oracle Support must enable the Faceted Search protected setting (Configuration > [Career Section] Settings). Once the setting is enabled, the Faceted Search career portal page becomes available.
Configuring the Faceted Search Career Portal Page
The Access the Career Section administration section user type permission grants users access to this feature.
Career section must have Inactive or Draft status.
-
Click the name of a career section.
-
Click Show next to Career Portal Pages.
-
Click the Faceted Search career portal page.
-
Click Edit Properties.
-
Define each property. For details, see Faceted Search Properties.
-
Click Save.
Configuring the Theme for Faceted Search
The Theme elements that currently exist for the career section will automatically map to the new Faceted Search theme elements.
There are a few Theme elements specific to the Faceted Search page.
Path: Configuration > [Career Section] Administration > Themes > select a theme
| Configurable Element | Style Class |
|---|---|
| Background and Color Configuration | 1054 – Faceted Search - Selected Filters Bar: Color used for the bar containing selected search filters. 1050 – Faceted Search - Search Bar: Color used for the search bar located at the top of the page. |
| Text Configuration | 1051 – Faceted Search - Search Label: Color used for the labels on the search bar located at the top of the page. 1055 – Faceted Search - Selected Filters Bar: Style used for the labels on the bar containing selected search filters. 1056 – Faceted Search - Filter Title: Style used for the filter block title on the filters panel. 1057 – Faceted Search - Filter Name: Style used for the filter name on the filters panel. 1058 – Faceted Search - Filter Count: Style used for the filter count on the filters panel. |
| Input and Button Control Configuration | 1052 – Faceted Search - Search Button: Style used for the button on the search bar located at the top of the page. 1053 – Faceted Search - Result List Button: Style used for the button on the search result panel. |
| Link Configuration | 1062 – Faceted Search - Title Link: Style used for the Job Title text. 1063 – Faceted Search - Title Link (Mouse Over Event): Style used for text that displays when the link is moused over. 1064 – Faceted Search - Search Modal Link: Style used for the See all locations link. 1065 – Faceted Search - Search Modal Link (Mouse Over Event): Style used for text that displays when the link is moused over. 1066 – Faceted Search - Expand Facet Link: Style used for the Show more/Show less link. 1067 – Faceted Search - Expand Facet Link (Mouse Over Event): Style used for text that displays when the link is moused over. |
Career Sections - Other Configuration Tasks
Creating a Career Section
The Access the Career Section administration section user type permission grants users access to this feature.
If the system administrator choses to customize the options of the Career Section, the selections used for customization must first be created.
Click Create next to Career Sections.
Complete the properties fields.
Click Save.
The Career Section appears in the Career Sections list.
Previewing a Career Section
The Access the Career Section administration section user type permission grants users access to this feature.
Click the name of a Career Section.
Click Show next to Career Section URL.
Click Preview.
Click the URL presented in the message box.
The system automatically creates a candidate in the Career Section with your current login information and then it logs you directly into the Career Section using this candidate's account. The data you create in the Career Section is saved under this candidate's name. You can afterwards access this data in the Recruiting Center and delete it.
Activating a Career Section
The Access the Career Section administration section user type permission grants users access to this feature.
Career section must have Inactive or Draft status.
-
Click the name of the Career Section.
-
Click Activate next to the name of the Career Section.
The Career Section can be associated to an URL and used by your organization.
Deactivating a Career Section
The Access the Career Section administration section user type permission grants users access to this feature.
Click the name of the Career Section.
Click Deactivate next to the name of the Career Section.
The Career Section properties can be edited and can no longer be associated to an URL.
Deleting a Career Section
The Access the Career Section administration section user type permission grants users access to this feature.
Career section must be inactive or draft.
All requisitions posted on the Career Section must be deleted, not only unposted.
Click Delete located on the same row as the Career Section name.
The Career Section can no longer be associated to an URL and used by your organization.
Editing the Properties of a Career Portal Page
The Access the Career Section administration section user type permission grants users access to this feature.
Career section must have Inactive or Draft status.
Click the name of a Career Section.
Click Show next to Career Portal Pages.
Click the name of a career portal page.
Click Edit Properties.
Make changes.
Click Save.
Displaying a Career Portal Page
The Access the Career Section administration section user type permission grants users access to this feature.
Career section must have Inactive or Draft status.
Click the name of a career portal page.
Click Edit Properties.
Select Yes from the Displayed list.
Click Save.
The career portal page is displayed in the Career Section.
Hiding a Career Portal Page
The Access the Career Section administration section user type permission grants users access to this feature.
Career section must have Inactive or Draft status.
Click the name of a career portal page.
Click Edit Properties.
Select No from the Displayed list.
Click Save.
The career portal page is not displayed in the Career Section.
Hiding the Job List
The Access the Career Section administration section user type permission grants users access to this feature.
The career section must have Inactive or Draft status.
All available languages in the Career Section must be active.
An alternate URL must be populated for each language.
-
Click Job List.
-
Click Edit Properties.
-
Select No in the Displayed list.
-
Click Save.
Changing the Text of a Field in a Career Portal Page
The Access the Career Section administration section user type permission grants users access to this feature.
Text in tabs, links, fields and buttons appearing in career portal pages can be changed if the text has a product resource identification number.
You need the resource identification number of the field. You can look at the list of IDs in the Appendix or you can display the resource identifiers associated to the field.
Access the career portal page where the field is located.
Locate the IDs you wish to modify. You can refine the list by resource number.
Click on the resource.
Click Edit next to Properties.
In the Override field, type the new field label. Maximum of 1,000 characters.
Click Save.
Adding a Line to the Layout of the Job Information
The Access the Career Section administration section user type permission grants users access to this feature.
Career section must be inactive.
Lines cannot be added between two existing lines.
Lines cannot be reordered.
Click the name of a Career Section.
Click Show next to Career Portal Pages.
Click the name of a career portal page.
Click Edit Layout.
Select Add a line from the drop down menu.
Click Add.
Click Save.
A new line is added to the carer portal page.
Removing a Line from the Layout of the Job Information
The Access the Career Section administration section user type permission grants users access to this feature.
Career section must be inactive.
Lines cannot be reordered.
Click the name of a Career Section.
Click Show next to Career Portal Pages.
Click the name of a career portal page.
Click Edit Layout.
Click Delete Line next to the line to delete.
Click Save.
The line is no longer displayed in the Career Section.
Adding a Field to the Layout of the Job Information
The Access the Career Section administration section user type permission grants users access to this feature.
Career section must be inactive.
Fields for the Career Section must have been created by a Recruiting administrator.
Select the name of a Career Section.
Click Show next to Career Portal Pages.
Click the name of a career portal page.
Click Edit Layout.
Select a line.
Select a field from the Available Fields list.
Click Add a Field.
Click Save.
The selected field is added to the layout of the job in the career portal page.
Removing a Field from the Layout of the Job Information
The Access the Career Section administration section user type permission grants users access to this feature.
Career section must be inactive.
Select the name of a Career Section.
Click Show next to Career Portal Pages.
Click the name of a career portal page.
Click Edit Layout.
Select a field in a line of the Job Layout section.
Click Delete Selected Item.
Click Save.
The line no longer includes the field. The field is not longer displayed in the job information.
Adding a Title to the Layout of the Job Information
The Access the Career Section administration section user type permission grants users access to this feature.
Career section must be inactive.
Click the name of a Career Section.
Click Show next to Career Portal Pages.
Click the name of a career portal page.
Click Edit Layout.
Select a line.
Select a label from the Available Labels list.
Click Add a Label.
Click Save.
The title is included in the selected line. The title is displayed in the job information when the career portal page is displayed in a Career Section.
Removing a Title from the Layout of the Job Information
The Access the Career Section administration section user type permission grants users access to this feature.
Career section must be inactive.
Select the name of a Career Section.
Click show next to Career Portal Pages.
Click the name of a career portal page.
Click Edit Layout.
Select a label in a line.
Click Delete Selected Item.
Click Save.
The title no longer appears in the line.
Adding a URL in a Career Section
The Access the Career Section administration section user type permission grants users access to this feature.
Career section must have Inactive or Draft status.
The new URL is now available to be used in the Career Section.
Deleting a URL in a Career Section
The Access the Career Section administration section user type permission grants users access to this feature.
Click the name of a Career Section.
Click Show next to Career Section URL.
Click Delete.
The URL is no longer available to be used in a Career Section.
Adding a URL to a Career Section Field
The Access the Career Section administration section user type permission grants users access to this feature.
The HTML editor must be supported for the field.
Create an additional URL for a Career Section.
Copy the partial URL displayed in the URL column of the Career Section URL list.
Preview the Career Section.
Paste the partial URL copied at step 2 after the desired zone URL.
Example
Partial URL: /cp1/profile.ftl?lang=en
Career Section URL: http://v750sp1.qa.rsft.net/careersection2/jobsearch.ftl?lang=en
Complete URL to use: http://v750sp1.qa.rsft.net/careersection2/cp1/profile.ftl?lang=en
You need the resource identification number of the field. You can look at the list of IDs in the appendix or you can display the resource identifiers associated to the field.
Access the career portal page when the field is located.
Locate the ID you wish to modify. You can refine the list by resource number.
Click on the resource.
Click Edit next to Properties.
In the Override field, click the link icon.
Paste the URL in the URL field
Click OK.
Onboarding (Transitions) Tasks in Career Sections
Onboarding (Transitions) Tasks in Standard Career Sections
If Onboarding (Transitions) is enabled in your organization and a Recruiting Center user starts a process for someone, the candidate or employee can view on the career section Tasks tab the tasks he or she has to perform. The tab is displayed in every career section to which the person has access.
The Tasks tab is divided into two sections. The left panel displays the list of tasks assigned to a person. When clicking a task in the left panel, the information associated with the selected task is displayed in the right panel. The "information" might be forms to be completed, links to PDF documents, electronic offers, email correspondence, rich content tasks that can include images and links and provide information about almost anything (a welcome message, documents about policies within the organization, the specific job and work the new hire will perform, volunteer opportunities, the campus where the person will be working, etc.).
Displaying the Tasks tab in the career section
All career sections that a person can access display the Tasks tab. This includes internal and external career sections. There is no way for a Career Section Administrator to turn off the Tasks tab: it appears if it is relevant for the logged-in user. The Tasks tab for a given candidate appears on every single career section to which the candidate has access. A career section can be configured so that a single URL directs candidates to an external career section before they are hired, and directs candidates to an internal career section once they are hired and become employees.
As soon as the first task in a process gets assigned to the candidate/new hire, the Tasks tab appears on the person's career sections. Processes that are running but have not yet assigned any tasks to the candidate/new hire are not accessible on the career sections. As soon as the last task in a process gets completed and the process reaches 100% Complete, then all of these tasks cease to be accessible on the career sections. If there are no other Onboarding (Transitions) processes running at this time, the Tasks tab disappears. Note that several Onboarding (Transitions) processes can be running for the same person, for example for different requisitions, or for one Pre-Hire process and one New Hire process for the same requisition.
Note that the label "Tasks" can be changed, like any text in any career section. This is helpful for instance if only Offboarding tasks are being handled on a given career section.
In addition, a separate career section can be configured which only contains the Tasks tab. See Onboarding (Transitions)-Only Career Section.
Accessing tasks in the career section
Candidates, new hires or employees can click the Tasks tab while in the career section.
If one process is running with at least one In Progress task, they land on that task. If the process has more than one In Progress task, they land on the first In Progress task.
If one process is running but all the tasks currently assigned to the candidate are Complete, they land on the first Complete task.
If more than one process is running, they land on a page that lists each running process. The name of the process is displayed, there is a graphic of how many tasks are complete out of the total tasks, and candidates can click the tasks of each process.
Candidates, new hires or employees can also receive an email message containing a link to the specific task or to their Tasks tab (and hence to all their tasks).
Displaying completed tasks
If candidates, new hires or employees arrived at the task after clicking the Tasks tab or after clicking the URL in the email they received, the system will automatically show them the next In Progress task after they complete/submit a task. If there is no In Progress task after this one, and if the process is still not 100% complete, the system will bring them back to the first Completed task.
If candidates, new hires or employees arrived at the task by clicking on its name in the left-hand side of the Tasks tab, then the system will remain on the current task after they click to complete it. They can now choose to click another task name in the list at the left-hand side of the page.
If this was the last task and its completion caused the overall process to reach 100% Complete, with no additional tasks waiting for any other assignees, then this process will disappear from the career section. The candidates, new hires or employees can no longer access any completed tasks nor PDF documents or reference hyperlinks within that process. If there are no other Onboarding (Transitions) processes running for this candidate, then the Tasks tab will disappear. Each task gets completed in its own way:
User-defined form task: The person reads the instructions or other text; clicks any hyperlinks to visit any resources or sites; reviews or updates the data in any fields, especially the mandatory required fields; provides any e-Signature that is required; visits the Learn page from the URL if any is configured in the form; clicks the Submit button when done. Note that there is no option to save a partially-completed form; any changes that are made in the form are lost if they are not submitted.
Document task: The only information shown on the right panel of the Tasks tab is the name of the PDF document. When the person clicks the name of the document, the browser opens the PDF in a new tab, depending on the browser version and settings. This PDF can contain personalized information due to any variables that it contains. By clicking to open the PDF, the person has automatically changed this task's status to Completed; there is no additional button to click.
Correspondence task: The person can open and view the email message sent to him/her. The Send Correspondence type of task is automatically in status Completed from the moment it appears; there is no way for the candidate to mark it complete. The email message is a copy of what was emailed by the Send Correspondence type of task. Any additional reminders or notifications for any other tasks are not displayed here; those emails only go to the selected email address of the candidate. Also, this is not related to the Secure Message Center where Recruiting's messages can be displayed, for zones that have configured this feature.
Content Page task: The person can read the content and can also access any hyperlinks or resources that are embedded within the content. Some organizations may find that the history tracking for task completion provides a sufficient audit mechanism, so that using separate forms to gather Eignatures is not necessary.
Partner Service task: This is a special kind of correspondence task, configured to provide partner-related information. It may contain a URL to visit the partner so that the candidate can do any necessary actions, or it may simply contain partner data and updates. This task appears in the status "In Progress", and there is no button/way to mark this task as complete. When the overall partner communication is completed and the final results have been sent from the partner back to the system, then this task is automatically completed.
Configurating the Tasks tab
For the Tasks tab to be displayed in career sections, the Onboarding (Transitions) Administrator must configure an Onboarding (Transitions) process and assign tasks to the New Hire role. When the process starts and a task is assigned to the new hire, the new hire sees the Tasks tab in the career section. There is no configuration to be done in the Career Section Administration menu to make the Tasks tab appear.
The Tasks tab must share the same theme, branding and colors as the rest of the career section. This provides a look and feel that is familiar to people who visited the career section as a candidate and return to perform other tasks while employed at your organization.
Just like any other career section, it is always possible for the Career Section Administrator to select one place in each career section that will be the default landing page for candidates after they log in.Files Uploaded from Tasks Tab Available in Onboarding (Transitions) Center
Organizations can invite or require new hires to submit files through the Career Section Tasks tab as part of their Onboarding (Transitions) processes and the uploaded files will be available in the Onboarding (Transitions) Center.
Tasks on the Career Section Tasks tab can be used to invite or require new hires to upload files. A driver's license, social security card, and academic transcripts are a few examples of documents that some organizations might want new hires to submit in digital form as part of an Onboarding (Transitions) process.
Career Section Tasks Tab
When new hires are involved in a process that includes a content page configured for file uploading, the corresponding task is displayed on the Career Section Tasks tab. The following screenshot is an example of how the task might be displayed on the Tasks tab to new hires.
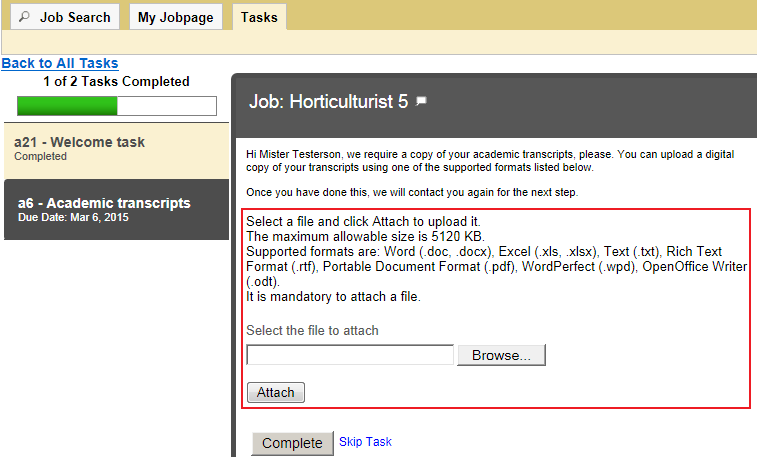
The new hires locate and attach the file they want to upload to complete the task. They can select a different file from the one they initially selected provided they have not yet clicked Complete. Once they click Complete, the file is uploaded immediately and usually cannot be changed afterward.
Files are scanned for viruses before they are uploaded to the Oracle Taleo system.
What if the task was completed and it was necessary to replace the file with another version of the same file or with a different file altogether? There are two possibilities.
The Onboarding (Transitions) administrator could reassign the content page task to the new hire.
The Onboarding (Transitions) administrator could have included a second content page task later in the process, a task assigned the same file category. (The file uploaded first would be replaced by the file uploaded later.)
Onboarding (Transitions) Center
In the Onboarding (Transitions) Center, the uploaded files associated with a process are displayed in the Candidate Files section on the process page, whether the process's status is In Progress or Completed. To display or download an uploaded file, users click the corresponding link.
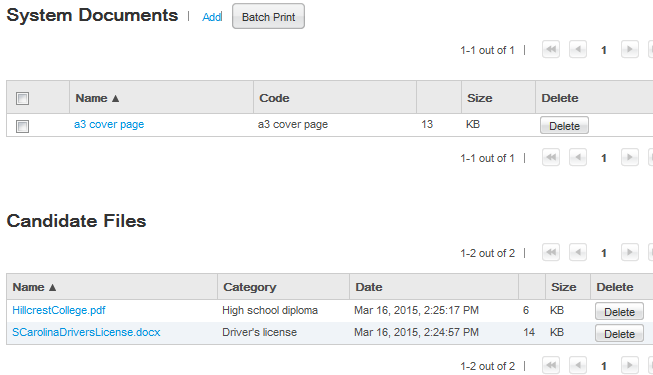
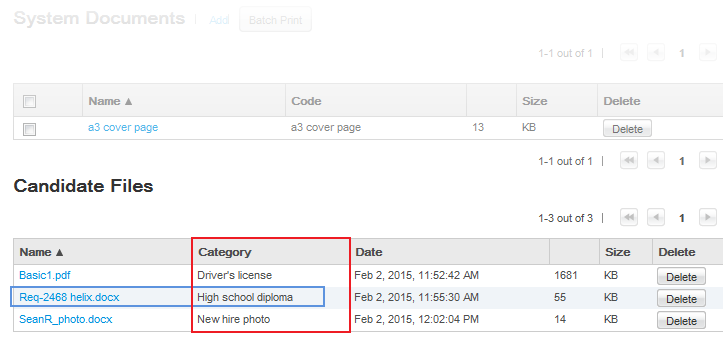
Onboarding (Transitions) Center users can delete file attachments from the Candidate Files section but they cannot upload file attachments to it. A deleted file cannot be restored. The dates and times displayed in the Candidate Files section are the dates and times when the uploads occurred and might differ from the dates and times when the new hires completed the tasks.
Configuration
To create a task enabling new hires to upload a file as part an onboarding process, Onboarding (Transitions) administrators need to create file categories, configure a content page that includes the file upload section, and then create a content page-based task that includes the content page.
Administrators create a file category for the type of document they plan to ask new hires to upload as part of an onboarding process. Perhaps a category for PDFs of university transcripts, or one for new hire photos, or another for a list of references and so forth.
Administrators create or edit a content page, add the file category they created in the previous step, and designate a file upload mandatory or optional.
Administrators create a content page-based task that contains the content page.
File Category
File categories are created in an operation separate from content pages. See the Onboarding (Transitions) Configuration Guide. Only file categories whose status is Draft can be deleted; categories whose status is Active can be disabled at any time.
Though the same file category can be assigned to multiple content pages, a 1:1 relationship is far more typical.
The following file category codes are used by the system and therefore cannot be used by Onboarding (Transitions) administrators: candidate, CONTACT, default, FLIPBOOK, GOAL, MESSAGE_SENT, MESSAGE_TEMPLATE, OFFER, OTHER, recruiter, REQUISITION, RESUME, REVIEW, TALENTUSER. Because these internal codes are case sensitive, administrators could use words as file category codes provided a different case is used.
Content Page - File Upload Section
While creating or editing a content page, Onboarding (Transitions) administrators can add a file upload section, assign a category relevant to the type of file that new hires will be requested to upload, and specify whether uploading a file is mandatory or optional. If the action is mandatory, new hires will be unable to complete the task until they upload a file.
A content page can include only one file category and new hires can upload a single file via a content page. If organizations want to request multiple files, they can create as many categories and content pages as their needs require.
| Permission required to create and configure file categories | Location |
|---|---|
| Manage task definitions, related sources, content pages, images, and file categories | Configuration > [SmartOrg] Administration > User Types > (select a user type) > Recruiting > [Onboarding (Transitions)] Edit |
| Permission required to view, download and delete candidates files in Onboarding (Transitions) Center | Location |
|---|---|
| View, add, print, and delete System Documents (PDFs), and view and delete Candidate Files | Configuration > [SmartOrg] Administration > User Types > (select a user type) > Recruiting > [Onboarding (Transitions)] Edit |
| Setting | Location |
|---|---|
| Attached File Maximum Number | Configuration > [General Configuration] Settings |
| Attached File Maximum Size | Configuration > [General Configuration] Settings |
| Attachments Format Filter | Configuration > [General Configuration] Settings |
| New Content Page Properties | Location |
|---|---|
| Show file upload section below the content page | Configuration > [Onboarding (Transitions)] Administration > Content Pages |
| File upload is mandatory | Configuration > [Onboarding Transitions] Administration > Content Pages > (click content page) |
Candidate files uploaded during Onboarding (Transitions) processes can be exported through integration (TCC, TCB, API, Web services). The TransitionProcess entity includes a relation called "AttachedFiles". Using "AttachedFiles" (in the TransitionsProcess context), organizations can export the following candidate file information: Comment, CreationDate, FileContent, FileName, LastModificationDate, MimeType, Size, FileCategory, Status. Comment is not currently used so the field will not contain any information. Regarding FileCategory, the AttachedFiles entity can determine the code of the file category. Regarding Status, this is always set to "Active" ( status code="ACTIVE"). Uploaded files are available for export immediately even if the new hire has not yet completed the task. It is not possible to import candidate files through integration.
If the export mode is set to "T-XML" or "CSV-entity", filtering on the FileCategory entity fields will work correctly provided the largegraph option is set to "False" in the export query. If the largegraph option is set to "True", filtering on the FileCategory entity fields will work correctly only when a mode other than T-XML or CSV-entity is used.
Onboarding (Transitions)-only Career Sections
An Onboarding (Transitions) career section type was developed for organizations who want to create task-oriented career sections for candidates or employees.
This career section type contains a single tab called "Tasks" where candidates, new hires or employees can complete their tasks. No job-related information such as the Job Search tab, the My Jobpage tab, job lists or application flows is available.
Dedicated Onboarding (Transitions)-Only Career Sections are ideal if you want to create distinct portals for specific purposes and audiences. You can create dedicated Onboarding portals for onboarding, "cross-boarding" (internal mobility), promotion, relocation, offboarding or other purposes. Each one can have theme, branding and colors that are different from your other career sections and you can rename labels if desired. A dedicated Onboarding portal for offboarding processes, for example, could have a unique theme, branding and colors and you could change the default tab name "Tasks" to "Offboarding".Email messages which bring employees to these dedicated Onboarding (Transitions)-Only Career Sections must be configured to include the specific URL for that destination, rather than any variable. This is because only invited employees should find out about this career section; other more standard internal and external career sections should be configured to have earlier sequence numbers, so that these will receive all of the standard candidate traffic.
To create this type of career section, you select the Onboarding Portal type in the career section properties. By default, the Tasks tab appears. The My Account and Access Management career portal pages are enabled by default; the other career portal pages cannot be enabled. For details, see Building an Onboarding (Transitions)-Only Career Section.
Building Onboarding (Transitions)-only Career Sections
The building of an Onboarding (Transitions)-only career section consists of the following steps. These steps are performed from the Career Section Administration menu:
Creating a branding file (optional). It is recommended to put custom information only at the top and bottom of the browser page. Constraining the width of the page by adding navigation or a margin at the left or right around the career section is not recommended. These items make the usable area within the career section very narrow. Though job searching might not be affected too much from a narrow page, the Tasks tab contains its own task list on the left, which occupies some space, leaving considerably less space for displaying forms, content, and other Onboarding (Transitions) tasks.
Creating a privacy agreement. Note that the other types of statement (e-Signature, Background Check Consent, Diversity) are irrelevant to the Onboarding (Transitions)-only career section. The privacy agreement must be associated with the Onboarding Portal career section type.
Configuring security options for career sections. Security options can be configured specifically for the Onboarding (Transitions)-only career section.
Defining the properties of the career section. For details on which properties can be defined, see Onboarding (Transitions)-only Career Section Properties.
Configuring career portal pages. The My Account and Access Management career portal pages are enabled by default; configure the properties as desired. The other career portal pages cannot be turned on.
Changing the label of the Tasks tab (optional). For example, if the Onboarding (Transitions)-only career section is used for offboarding, you could rename the tab Offboarding.
Enabling the Activate SSL encryption setting to ensure data sent from the candidate to the server is encrypted. (Career Sections > select the Onboarding Portal career section > Security Settings).
Creating an Onboarding (Transitions) message template (in the Onboarding (Transitions) Administration menu) and putting the Onboarding portal URL in the message sent to candidates, new hires or employees. This URL is available under Career Sections > select the Onboarding Portal career section > Career Section URL > Show). Do not use the standard variable {TransitionsURLs_Para.TaskAccessURL}.
Onboarding (Transitions)-Only Career Section Properties
| Element | Description |
|---|---|
| General | |
| Code | The code must be unique |
| Name | The name must be unique. |
| Description | A brief description of the Career Section. |
| Type | Select Onboarding Portal. |
| Sequence | Before redirecting a candidate coming from a job specific URL (from a job board, a job posting notification, etc.) to a career section, the system first evaluates the career sections in order of sequence number from lowest to highest. For Onboarding (Transitions)-Only Career Section, make sure to put the Onboarding (Transitions)-only career section last in the sequence to avoid people landing on this career section by mistake. |
| Display the link allowing to deactivate the account in the My account page | Displays the Deactivate link in the My Account page to allow the candidate to deactivate his or her account. This can be useful if the My Account career portal page is enabled in the Onboarding (Transitions)-Only Career Section. |
| Authentication Privacy Agreement | |
| Name | In the Name list, select the privacy agreement you created for the Onboarding (Transitions)-Only Career Section. |
| Display the authentication privacy agreement before | Specify where the privacy agreement will appear in the career section. Possible options are before the Login page or the Registration page. |
| Corporate Brand | |
| Name | Corporate brand that will appear in the Onboarding (Transitions)-Only Career Section. |
| Theme | |
| Name | Theme that will appear in the Onboarding (Transitions)-Only Career Section. |
Candidate Communication Agent
The Candidate Communication Agent module allows candidates to see job submission statuses and to always be informed of where they are in the application process.
You can display links allowing candidates to view:
Their job submission statuses such as rejected, interviewing, screening, etc. on the My submission page and My referral page.
The View Email Messages link on the My Submission page.
View Email Messages link: This feature provides an alternate means for candidates to receive messages. Candidates can also print messages and delete them. Messages can be emails or detailed text regarding the status of their job application. Only job specific email correspondence is displayed. Paper, fax and Onboarding correspondence is not displayed. When viewing a list of messages, the following information is provided:
The title of the message.
The name of the person who is sending the message.
The date and time when the message was sent.
The requisition for which the message is intended.
Messages are retained as long as the candidate's file is active and the candidate has not deleted the message.
All job specific messages generated by templates with a recipient value of All Candidates will appear with View Email Messages. Email messages must have a recipient value of WebTop User to be excluded from the candidates' view.
Displaying the Candidate Job Submission Status
The Access the Career Section administration section user type permission is required to access this feature.
The Enable Customization of Job Submission Statuses Career Section setting must be set to Yes.
Career Section must be draft or inactive.
User-defined Job Submission Status must be created and activated.
-
Click the name of a Career Section.
-
In the Candidate Communication Agent section, select Yes from the Display user-defined job submission statuses in the My submissions page and in the My referrals page.
-
Click Save.
The job submission status of the candidate is displayed in the My submissions page and in the My Referrals page on the career section.
Hiding the Candidate Job Submission Status
The Access the Career Section administration section user type permission is required to access this feature.
The Enable Customization of Job Submission Statuses Career Section setting must be set to Yes.
Career Section must be draft or inactive.
-
Click the name of a Career Section.
-
In the Candidate Communication Agent section, select No from the Display user-defined job submission statuses in the My submissions page and in the My referrals page.
-
Click Save.
The job submission status of the candidate is no longer displayed in the My Submissions page, and in the My Referrals page of the Career Section.
Displaying the View Email Messages Link
The Access the Career Section administration section user type permission is required to access this feature.
The Access to "View Email Messages" Career Section setting must be set to Yes.
Career Section must be draft or inactive.
Click the name of a Career Section.
In the Candidate Communication Agent section, select Yes from the Display the "View Email Messages" link in the My Submissions page.
Click Save.
The View email Messages link is displayed to candidates in the My Submissions page of the Career Section.
Hiding the View Email Messages Link
The Access the Career Section administration section user type permission is required to access this feature.
The Access to "View Email Messages" Career Section setting must be set to Yes.
Career Section must be draft or inactive.
Click the name of a Career Section.
In the Candidate Communication Agent section, select No from the Display the "View Email Messages" link in the My Submissions page.
Click Save.
The View Email Messages link is no longer displayed to candidates in the My Submissions page of the Career Section.
Technical Help Information
Providing technical help improves the candidate experience of those candidates who encounter issues and ensures that they can successfully complete the application process and perform other tasks such as job searches.
Technical help can be added to Career Sections, which can take the form of a text, a URL link, or an email address.
If technical help is enabled, the link is displayed at the upper-right and bottom-right corners of Career Section pages bearing the top and bottom “bars”. The location of the links cannot be modified.
None removes the technical help from the Career Section.
Default displays the technical help information type configured in the Career Section global settings. The global setting default is None. If the global setting is text or link the content of TexTool Resource ID 2116390 in Resource Group Header Panel 102166 will display. If this content hasn't been provided no technical help will display.
Link displays a hyperlink to the help page, or the email of the organizations support contact.
Text displays a plain text help message such as "For help contact customer service 888-999-5555."
The technical help information type is automatically set to Default.
Customers who already provide technical help in another form on Career Sections have the option of disabling the Technical Help Information feature across all their Career Sections or on a specific Career Section.
Technical help information will not be displayed if in the Career Section properties:
Technical Help type is set to none.
Technical Help type is set to Default and the global technical help information type setting is set to none.
Technical Help type is set to text and content is empty. This is not recommended as a technical help icon displays.
Technical Help type is set to text and content is empty. This is not recommended as a technical help icon displays.
Displaying Technical Help
The Access the Career Section administration section user type permission grants users access to this feature.
Career section must have Inactive or Draft status.
-
Click on the name of the Career Section.
-
Click Edit next to Properties.
-
In the Technical Help section, choose Default, Text, or Link.
-
Click Save.
Hiding Technical Help
The Access the Career Section administration section user type permission grants users access to this feature.
Career section must have Inactive or Draft status.
-
Click on the name of the Career Section.
-
Click Edit next to Properties.
-
In the Technical Help section, choose None in the Technical Help Type list.
-
Click Save.
The help text no longer appears on the top right and bottom right of the Career Section.
Editing Technical Help Text
The Access the Career Section administration section user type permission grants users access to this feature.
Career section must have Inactive or Draft status.
Career Section technical help type must be set to text.
-
Click on the name of the Career Section.
-
Click Edit next to Properties.
-
Edit the text in the Content editor.
-
Click Save.
The help text appears on the top right and bottom right of the Career Section.
Editing a Technical Help Link
The Access the Career Section administration section user type permission grants users access to this feature.
Career section must have Inactive or Draft status.
Career Section technical help type must be set to link.
-
Click the name of the Career Section.
-
Click Edit next to Properties.
-
In the Technical Help section, click Source in the Content field.
-
Enter an hyperlink in the format
<a href="http://www.helpwebname.org">Help</a>. -
Click Source to view the hyperlink as it will appear in the Career Section.
-
Click Save.
The help link appears on the top right and bottom right of the Career Section.
Career Section Sequence
The system searches the career sections in the order you configured (see the Sequence column of the Career Sections list) in determining to which career section candidates coming from a job specific URL (from a job board, a job posting notification, etc.) will be redirected.
To put this another way, when a candidate is coming from a job specific URL (from a job board, a job posting notification, etc.), the system has to redirect the candidate to a career section. The system evaluates which career section is the most appropriate one, first evaluating the career section that has the lowest sequence number before evaluating the career section that has the next lowest sequence number and so forth.
When a career section is created, it is automatically assigned the highest number of the sequence.
For internal candidates, the system redirects the candidates to internal career sections first, going from lowest sequence number to the highest one.
For external candidate, the system redirects the candidates to external career sections, going from the lowest sequence number to the highest sequence number.
The sequence is also used in the candidate sourcing manager to sort the career section display in the posting page. Career sections are displayed on this page based on this sequence, all external sites being grouped first, followed by all internal career sites.
1- Internal (1) - (Internal)
2- Corporate - (External)
3- Career Fair - (External)
4- Students - (External)
5- Test - (External)
Defining the Sequence of Career Sections
The Access the Career Section administration section user type permission grants users access to this feature.
The system searches the career sections in the order you configured (see the Sequence column of the Career Sections list) in determining to which career section candidates coming from a job specific URL (from a job board, a job posting notification, etc.) will be redirected.
Public or Private Career Sections
Career Section administrators can configure the Display Type property to designate a career section as public or private. A URL that does not include a precise career section code cannot lead candidates to a career section whose Display Type property is set to Private.
The Display Type property can be used to do two things:
Career sections created to gather additional information from candidates selected for a job or involved in an offer process can be configured such that they will be unavailable to other, "uninvited" candidates (Display Type: Private).
It is possible to "hide" a career section from the sitemap (job scraping) feature (Display Type: Private).
A career section's Display Type property can be set to Private to automatically exclude the career section from the logic used to resolve the Click Here link URL variables in message templates.
Most of the text in this section provides context and explanations regarding the first point.
Ensuring "uninvited" candidates are not directed to career sections created to gather additional information from candidates selected for a job or involved in an offer process.
URLs may or may not include a career section code. An example of a URL that includes a career section code is: https://zone.taleo.net/careersection/ex/jobdetail.ftl?job=1500123 where "ex" is the career section code and "1500123" is the requisition number. An example of a URL that does not include a career section code is: https://stghere.taleo.net/careersection/jobdetail.ftl?job=1500123. Two examples of URLs that do not typically include a career section code are jobs posted on job boards and URLs sent to Job Distribution Enablement (JDE) integrators.
URLs that do not include a career section code use the sequence order as displayed in the Sequence column in the list of career sections (Configuration > [Career Section] Administration > Career Sections) to direct candidates to the most appropriate career section.
For example, a URL that does not include a career section code typically brings external candidates to the external career section that has the lowest sequence number among the career sections on which the job is posted. Similarly, if the system identifies candidates as internal, the system directs them to the internal career section that has the lowest sequence number among the internal career sections on which the job is posted.
Organizations might have situations where their recruiters want to invite selected candidates who completed a job submission through a public career section to visit a second career section to provide additional information (e.g. social insurance number, date of birth) that might be required for background screening or other pre-hire steps. Requisitions might have been "unposted" (removed) from the public career sections but they could continue to be posted on the second career section for the purpose of gathering additional information from candidates selected for a job or involved in an offer process. How can organizations ensure that candidates who access a URL that does not include a career section code are not directed to a career section intended only for candidates who receive an invitation to provide additional information?
One method involves configuring the second career section (the one for requesting additional information from selected candidates) such that it has the highest sequence number among the career sections. Although this method can be very effective, if the second career section is the only place where the job is posted at a point in time, it will necessarily have the lowest sequence number among the career sections regardless of its number as displayed in the Sequence column. In such a case, some candidates who did not receive an invitation to visit the career section might land on the career section nonetheless. This might happen when:
URLs do not include a precise career section code and are published on job boards or at other locations.
Integrations are designed to pull all postings on external career sections.
A second, additional method consists of configuring the second career section as private. When external candidates access a URL that does not include a precise career section code, the system examines the external career sections that the job is posted on and selects the one that has the lowest sequence number while excluding all private career sections. Similarly, when internal candidates access a URL that does not include a precise career section code, the system examines the internal career sections that the job is posted on and selects the one that has the lowest sequence number while excluding all private career sections. To summarize, a URL that does not include a precise career section code cannot bring "uninvited" candidates to a private career section.
The second method also prevents job boards and web crawlers from indexing a career section.
Configuration
Administrators configure a career section as public or private through the Display Type career section property.
| Property Name | Location |
|---|---|
| Display Type | Configuration > [Career Section] Administration > Career Sections > (click career section) > [Properties] Edit |
The Display Type setting can be configured for external and internal career sections.
Because the Display Type property is not new, at migration the value (Public or Private) specified for each career section is maintained. However, if candidates or new hires click a career section URL that does not include a career section code, they will not be directed to any career section whose Display Type is Private.
Masking Personal Information
Some personal information candidates provide while completing a job submission or general profile can be masked after the candidates save the corresponding page.
The Date of Birth, Social Security Number and candidate user-defined fields can be configured such that if candidates enter a value in the field and save the page, the value is no longer displayed in the field and asterisks are displayed in place of the value on the Summary page.
If candidates save a page containing fields configured for masking and later edit their candidate profile or the job-specific application, the values remain masked and are not cleared. If candidates or employees enter a new value into one of those fields, the new value is not masked until the page is saved.
Likewise, if candidates or employees edit a field configured for masking and a drop-down list is involved, the current value is masked in the field, is not masked in the list and the user has no way of knowing which value is the current one. If no selection is made, the current value is retained and masked. If a new selection is made from the drop-down list, the selection is displayed normally in the field and is masked after the user saves the page.
Similarly, if candidates or employees edit a field configured for masking and multiple selections are possible, the current values are masked in the field. If new selections are not made, the current values are retained and masked. If new selections are made, they are displayed normally in the field and are masked after the user saves the page.
Candidates or employees might need to edit a date field configured for masking. In the case of a calendar picker, the calendar contains no indication of the current date selected. In the case of a drop-down list, the current value is masked in the field, is not masked in the list and the user has no way of knowing which value is the current one. If new a selection is not made, the current value is retained and masked. If a new selection is made, it is displayed normally in the field and is masked after the user saves the page.
Candidate user-defined fields that can be configured for masking can be of Text, Multilingual Text, Selection, Date, Number or Boolean type. The values that candidates enter will be masked in the following blocks of application flows that include them: Candidate Personal Information, Referrer Personal Information, Personal Information-Agency, Education, Work Experience, Basic Profile Information.
Configuration
Masking of personal information is not the default behavior at migration or in new zones. The following setting must be selected for each field (Date of Birth, Social Security Number, candidate user-defined field) whose content you want to mask.
| Setting | Location |
|---|---|
| Personally Identifiable Information (in Career Section) | Configuration > [Recruiting] Administration > [Fields] Candidate |
Linking Standard Career Sections to Mobile Career Sections
Customers can specify if a career section can be accessed from mobile devices.
When candidates receive a message on their mobile device regarding a new job opening and decide to take a look at the job using their mobile device, the candidates are automatically redirected to the mobile career section where they can view and apply for the job.
How does this occur exactly? First, the job is posted manually on a regular career section and the system automatically posts the requisition on the mobile career section to which the standard career section is linked. When candidates using a mobile device receive a message regarding the job and choose to learn more about the job, they are directed to a standard career section (this is transparent to candidates). A mobile detection tool ("sniffer") detects the mobile device and redirects the candidates to the mobile career section.
Career section administrators configure two properties on the Career Section Editor page to create a link between a standard career section and a mobile career section. Administrators specify whether a career section is a standard or mobile one by configuring the Mobile Career Section field. If they specify that a career section is a standard one, they can then link it to a mobile career section by configuring the Linked Mobile Career Section field.
When Recruiting Center users are posting a requisition, the mobile career section is not displayed in the Career Sections list. This is to prevent users from posting requisitions directly to a mobile career section.
When Recruiting Center users are posting a requisition, the system calculates the posting start date and end date for the mobile career section. The posting start date and end date on the mobile career section are based on the corresponding dates of the linked standard career section(s).
If a single standard career section is linked to the mobile career section, the posting start date and end date of the standard career section are used.
If multiple standard career sections are linked to the mobile career section: the earliest start date among the standard career sections is used and the latest end date among the standard career sections is used.
When a requisition is posted to a standard career section, the system automatically posts the requisition to the mobile career section to which the standard career section is linked.
A standard career section can be linked to only one mobile career section. Multiple standard career sections can be linked to the same mobile career section however. In the latter case, the open jobs of all the linked standard career sections will be posted on the mobile career section.
Existing themes and branding files can be used for mobile career sections. However, distinct themes and branding better suited to the needs of mobile device users are recommended.
If a single standard career section is linked to the mobile career section, a "Display standard career section" link is displayed on most pages of the mobile career section. Mobile device users can click the link to proceed to the standard career section that typically contains more complete information and features than the mobile career section. The link is displayed on the My Submissions, My Job Cart, My Saved Searches, My Referrals and Basic Search pages. It is not displayed on the pages of application flows.
The standard career section does not include a link back to the mobile career section.
Invitation for Mobile Candidates to Complete Submission on Standard Career Section
Applications flows can be configured such that candidates and employees who make a job submission on a career section optimized for mobile devices receive an acknowledgement message by email inviting them to complete the full job submission on a standard career section.
The acknowledgement message is sent whether the candidates or employees saved an incomplete job submission or completed the submission process on the mobile career section.
Customers will need to create a customized message template for the Sending a Job Submission Acknowledgement Letter for Mobile Candidate action. It is important that the email template contain the URL leading to the standard career section so that candidates and employees can access the career section directly. The application workflow associated with the job in the standard career section is typically longer, contains more fields and presents information within a wider layout.
Configuration
A page in the application flow must include the Sending a Job Submission Acknowledgement Letter for Mobile Candidate action.
| Application Flow Action | Location |
|---|---|
| Sending a Job Submission Acknowledgement Letter for Mobile Candidate |
Linking a Standard Career Section to a Mobile Career Section
-
Click a career section.
-
Click Edit next to Properties.
-
In the Mobile Career Section field, select No.
-
In the Linked Mobile Career Section field, select the desired mobile career section.
-
Click Save.
Plain Text Resume Parsing for Mobile Devices
While completing a job-specific application or general profile using a mobile device, candidates and employees can copy and paste their resume.
The option Paste the resume is available on career sections.
The system parses the pasted text and the information is used to pre-populate the job application or candidate file. The pasted text is also flagged as both a job-specific submission attachment and as a resume. Consequently, it is stored as a text file attached to the job submission and general profile. Recruiting Center users can view the attachment in the same way they can view other attachments.
Naming of the text file conforms to the following conventions:
In the case where the pasted text originated from a job submission: FirstName_LastName_RequisitionNumber_LanguageSymbol.txt. E.g. Clint_Campbell_1400123_EN.txt.
In the case where the pasted text originated from a general profile: FirstName_LastName_LanguageSymbol.txt. E.g. Alejandra_Dos_Santos_ES.txt.
The language is the language of the career section when the candidate submitted the pasted text.
Spaces in names are converted to underscores.
If the Plain Text Resume box displays content, this content is the starting point for text parsing.
Configuration
The application flow must include the Resume Upload block and the Resume pasting enabled setting must be set to Yes.
| Setting | Location |
|---|---|
| Resume pasting enabled |
"Pre-filtered" URLs for Standard Career Sections Redirect Candidates to Mobile Career Sections
When candidates using a mobile device click links to "pre-filtered" searches on a standard career section for which Faceted search is enabled, the candidates are redirected to the associated mobile career section and a Faceted search using the same search parameters is performed.
Customers have long been able to create URLs to specific career section pages (Configuration > [Career Section] Administration > Career Section URLs) including URLs to the Basic and Advanced search pages and add the URLs to career sections (Configuration > [Career Section] Administration > Career Sections > (click career section) > [Career Section URL] Show), email correspondence, image maps, etc. It is not possible to create a URL to a Faceted search page using the same method.
This section explains how to create URL links to specific Faceted searches. It also explains a related feature for mobile device users. When candidates using a mobile device click such links to Faceted searches on a standard career section, they will be redirected to the mobile career section (providing one is associated with the standard career section). A Faceted search using the same search parameters specified in the URL will run automatically in the mobile career section and a list of jobs that satisfies the Faceted search criteria will be displayed in the job list.
Configuration
Career Section administrators first create a fictitious candidate (one with a user name and password), then perform the Faceted search they plan to create a URL for, and save the search.
They can later retrieve and run the saved Faceted search and copy the URL that is generated. The following example of such a URL is loosely based on the previous screenshot:
where LOCATION(50437) represents the Quebec (City) area, JOB_FIELD(150000) represents the Computer and Mathematics Job Field category and LOCATION=1038 represents Canada in the Location field in the top bar.
Administrators keep the URL up to and including "&ignoreSavedQuery" while deleting whatever follows. In our example, administrators would delete &sasNo=20116751886 and the edited URL to be copied would read:
https://your15Azone.taleo.net/careersection/10020/jobsearch.ftl?f=LOCATION(50437)|JOB_FIELD(150000)&LOCATION=1038&a=null&multiline=false&ignoreSavedQuery
It is this "shortened" URL that administrators would use when creating a URL. The "shortened" URL could be included in an email sent to candidates or added as a hotspot to an image map on the organization's Web site. When candidates clicked the link or hotspot, they would be redirected to the specific career section, the Faceted search would run automatically and a list of jobs that satisfied the Faceted search criteria (e.g.: Location: "Canada", Job Field: "Computer and Mathematics", and "Quebec (City)" area) would be displayed in the job list.
When candidates using a mobile device click such links to Faceted searches on a standard career section, they will be redirected to the mobile career section (providing one is associated with the standard career section). A Faceted search using the same search parameters specified in the URL will run automatically in the mobile career section and a list of jobs that satisfies the Faceted search criteria will be displayed in the job list.
Displaying All Candidate Submissions in the My Referrals Tab
Referrers can see all submissions of a candidate who they referred and who is still active.
Employee referrals works as follows:
When a candidate is referred to a job, the referrer can see that candidate's job-specific referral in the career section My Referrals tab as long as the referral is still effective.
If a referred candidate is matched to a job, the referrer can only see the referral in the My Referrals tab if the "Matched Candidate Display" option for the referrer is set to "Always" or is based on a step and the candidate had passed that step in the candidate selection workflow.
If a referred candidate applied on a job by himself/herself, the referrer can see that referral in the My Referrals tab if the "Display to the referrer submissions for which candidates applied by themselves" option is set to Yes.
| "Matched Candidate Display" setting | "Display to the referrer submissions for which candidates applied by themselves" option | The referrer will see: |
|---|---|---|
| Yes | Yes | Jobs for which he referred the candidate. Jobs to which the candidate was matched. Jobs for which the candidate applied by himself. |
| No | Yes | Jobs for which he referred the candidate. Jobs for which the candidate applied by himself. |
| Yes | No | Jobs for which he referred the candidate. Jobs to which the candidate was matched. |
| No | No | Jobs for which he referred the candidate. |
Referrers will only see jobs for which the referral is active. Candidates will see jobs in line with how the settings were configured: the candidate's own submissions, the jobs for which a candidate was referred (even if the referral is inactive), the jobs to which a candidate was matched (according to the "Matched Candidate Display" option).