21Recruiting Fundamentals

Recruiting Fundamentals

    Candidates

      Configuring Candidate File Tabs

      In the candidate file, tabs presented to users are governed by permissions and features configuration.

      Candidate File Tab Description Permission and Configuration Required
      Job Submission/General Profile Contains information on prescreening, resume, employment preferences, EEO, etc. The contents of both the job submission and general profile are configured and activated by the system administrator as candidate files in the Recruiting Administration module. Depending on the candidate card side being viewed, this tab will be either specific Job Submission OR the General Profile. Always displayed.
      Attachments Contains resume and other attachments provided by the candidate and attachments provided by the user. Attachments are added with the Add Attachment icon. Job specific attachments are clearly identified from other attachments, and the name of the person who attached the file is also indicated. All attachments are managed centrally from this tab and when a user uploads an attachment, he/she will be able to specify if it will also be visible to the candidate. Access Attachments tab (Configuration > [SmartOrg] Administration > User Types > Recruiting > Candidates)

      View other attachments (Configuration > [SmartOrg] Administration > User Types > Recruiting > Candidates)

      For any attachments originally created as being only visible by the recruiter (not visible to the candidate), users will only see attachments to the extent that they have been granted access to the submission relating to the attachment. If users are not authorized to view the job submission then they will not be able to view the attachment.

      For information on attachments, see Attachment.

      Tasks Contains a list of tasks to perform regarding the candidate. Tasks are self-assigned by users to remind them to complete a future activity. This tab only appears from the Candidate Submission card side. To be displayed, the feature must be activated and users must also have been granted the permission to manage self-assigned tasks.
      Offers Contains offers submitted to the candidate, offers from competitors, candidate expectations and requisition offer information.

      The Offers tab and offer content are always job specific and visible only from the job submission view.

      • Competitive offers and current jobs are linked to the candidate and are thus shared between submissions for this candidate. Context based permission ownership is applied based on the owners of any requisition this candidate has applied to.

      • Candidate job offers and expectation offers are linked to the submission and can only be viewed by users who can view that submission.

      Displayed if offer management is used.

      The Offers tab is displayed on a candidate submission once an offer is created.

      The Offers tab and offer content are never displayed when viewing a candidate's general profile.

      Offer Approvals Contains the most recent offer approval information. Displayed if offer management and approvals are used.

      The Offer Approvals tab is displayed once an offer approval request is generated. The Offer Approvals tab is visible for any user who can view offers for the candidate submission.

      Referrer Contains both employee/candidate referral and agency referral information and actions. Always displayed if the user can view the candidate's general profile or job submission.
      Fields in the Referrer tab can be specifically controlled by the field level security configurability. Fields in the Referrer tab are controlled by the same configuration done on these fields when used in the main tab of the candidate file because the data model for these fields is shared. Example: The candidate fields First Name and Last Name are also used for the Referrer's first name and last name. Therefore:
      • If the user's field security level permissions allow him/her to see the first name or last name for internal and external candidates, the user will see those fields in the Referrer tab.

      • If the user's field security level permissions allow him/her to see the first name and last name for internal and external candidates, the user will see the referrer name in the History tab.

      • If the user's field security level permissions do not allow him/her to see the first name and last name for internal and external candidates, the user will not see those fields in the Referrer tab.

      • If the user's field security level permissions do not allow him/her to see the first name and last name for internal and external candidates, the user will not see the referrer name in the History tab.

      History Contains a log of all actions performed on the candidate file, including the date and the name of the user who performed the action. Always displayed. However, it only allows users to view history tracking related to submissions they are authorized to view.

      The Attachments tracking category is visible to users who have these two permissions:

      • Access Attachments tab

      • View other attachments

      (Configuration > [SmartOrg] Administration > User Types > Recruiting > Candidates)

      The Offer history tracking is visible to users who have the following permission:

      • View offers

      (Configuration > [SmartOrg] Administration > User Types > Recruiting > Offers )

      Note that if users navigate into the view of a submission they can view but are not authorized to view the offer tab of that submission, then the offer history tracking data will be hidden. All offer history of all types will be hidden – not just "offer" but also the supplementary offer data as well.

      For more details on the candidate file History tab, see Candidate File History Tab.

        Configuring the Candidate Duplicate Check Feature

        The Check for Duplicate action allows Recruiting Center users to verify if a candidate already exists in the database.

        When selecting the Check for Duplicates action, the system performs a duplicate check against a duplicate check condition created by the system administrator. Candidates matching the condition are displayed in a Quick Search Results list. If two candidate files are duplicates, Recruiting Center users then have the ability to merge the files using the Merge Candidate Files icon.

        The configuration of the candidate duplicate check feature consists of the following steps:

        1. Creating a duplicate check condition.

        2. Granting permission for the duplicate check.

          Creating a Duplicate Check Condition

          A duplicate check condition is created to find duplicate candidates in the database.

          By default, the following duplicate check condition is provided:

          First Name AND Last Name AND Phone Numbers OR Email Address OR Social Security Number

          To create a duplicate check, standard fields, user-defined fields, and operators are used.

          Standard Fields User-defined Fields Operators
          Address (Line 1) To use a user-defined field, the field must be made available as a search criterion by selecting the Candidate Search option in the user-defined field properties (Recruiting Administration > Fields > Show User-defined Fields > Edit Field Availability). Note that once a user-defined field is being used in the duplicate check condition, it cannot be deleted from the Fields list nor can it be made unavailable for the candidate search. AND
          Address (Line 2) OR
          City (
          Date of Birth )
          Email Address
          First Name
          Last Name
          Phone Numbers
          Place of Residence
          Social Security Number
          Zip/Postal Code
          Note: The Email Address field is useful only for customers not enforcing email uniqueness (Configuration > [Recruiting] Settings > Email Uniqueness). It is a best practice to use email uniqueness to prevent duplicate entries rather than trying to merge duplicates during the review process.
          If the condition has been modified, clicking Reset restores the default.

          In the example below, the following candidates would be displayed in the results list if the default condition was used.

          Condition=First Name AND Last Name AND Phone Numbers OR Email Address OR Social Security Number

          First Name Last Name Phone Number Email Address Social Security Number Is this a Duplicate File?
          Denis Smith 111 234-5678 dsmith@gmail.com 123 456 789 Yes
          Denis Smith 111 234-5678 dsmith@gmail.com Yes
          Denis Smith 111 234-5678 dsmith@hotmail.com Yes
          Denis Smith 111 234-1234 dsmith@gmail.com No

            To create a duplicate check condition

            Configuration > [Recruiting] Administration > [General Configuration] Duplicate Check
            1. To add a field in the condition, click on the field located in the Available Fields box, then click Add.

              The field appears in the Condition box.
            2. To add an operator in the condition, click on the operator located in the Available Operators box, then click Add.

              The operator appears in the Condition box.
            3. To remove a field from the condition, click on the field located in the Condition box, then click Remove.

              The field no longer appears in the Condition box.

            4. To remove an operator from the condition, click on the operator located in the Condition box, then click Remove.

              The operator no longer appears in the Condition box.

            5. To move an item in the condition, click on the item then use the left and right arrows.

            6. Click Save.

              Granting the Permission to Perform a Duplicate Check

              To use the Check for Duplicates action in the Recruiting Center, users must be granted the Merge candidate files permission.

              User Type Permission Location
              Merge candidate files Configuration > [SmartOrg] Administration > [Users] User Types > Recruiting > Candidates

                Configuring the Candidate File Merge Feature

                Recruiting Center users have the ability to combine several candidate files into one file.

                When using the Check for Duplicate action, or when in a candidates list, or after performing a quick search or advanced search, Recruiting Center users can select from two to ten candidate files and merge them using the Merge Candidate Files icon. To verify if the selected candidate files are duplicate files, the system performs a duplicate check against a duplicate check condition created by the system administrator. Once the duplicate check is done, the system suggests a master candidate file by selecting the candidate file that contains the most up-to-date information or the candidate file that was first referred in the case of a referral.

                The configuration of the candidate file merge feature consists of granting this user type permission.

                User Type Permission Location
                Merge Candidate files Configuration > [SmartOrg] Administration > [Users] User Types > Recruiting > Candidates

                  Configuring the Candidate Comparison Feature

                  Recruiting Center users have the ability to display candidate files side by side for comparison purposes.

                  From a requisition-specific candidate list, a user can select two or more candidate files and invoke the Compare action in the More Actions list.

                  The configuration of the candidate comparison feature consists of enabling a setting and granting a user type permission.

                  Setting Description Default Value Location
                  Candidate Compare Feature Enabled Enables the candidate compare feature. No Configuration > [Recruiting] Settings

                  User Type Permission Location
                  Use candidate compare Configuration > [SmartOrg] Administration > [Users] User Types > Recruiting > Candidates

                    Configuring the Internal Candidate Job Submission Viewing Feature

                    The viewing of internal candidate job submissions is controlled by a permission.

                    User Type Permission Constraints Location
                    View internal candidate job submissions Only if this user is an owner of the requisitions

                    Only if this user is an owner of the requisitions or a collaborator

                    Without restriction

                    Configuration > [SmartOrg] Administration > User Types > Recruiting > Candidates

                    If a candidate is an internal candidate, all of his job submissions will or will not be displayed according to the above permission. The system does not look at each submission to see if it is internal or not. It looks at the profile level to determine if the candidate is internal; if it is internal, the candidate will receive the treatment of this permission.

                    If a user is granted the View internal candidate job submissions permission, the user will be able to see internal job submissions that he/she owns, that he/she owns or collaborates on, or all internal job submissions depending on the constraint enabled.

                    If a user is not granted the permission, he/she will not be able to see job submissions linked to internal candidates.

                    If a user can view an internal candidate job submission, he/she can view the entire submission, including the History tab. Therefore, the History tab on a submission will never be hidden from a user that can view a submission.

                    Note that this permission does not affect the user from being able to see an internal candidate's general profile. General profiles are the initial candidate viewing page for search results and folders. If an internal candidate is placed in a user's folder, a user will be able to view him regardless of what is set on this permission. When performing an advanced search, a user will be able to return general profiles of internal candidates if authorized based on the search permission "Access Internal/External Candidate Criteria".

                      Sharing Candidate Files

                      The Candidate Share functionality allows Recruiting Center users to share one or several candidate files with people via email. When sharing a candidate file, the system generates a PDF file containing candidate data.

                      The Share action is available in the candidates list and the candidate file toolbar.

                      Note: Sharing more than 50 candidate files is not recommended. If more than 50 candidate files are shared, the information shared will be limited to the Personal Information block. Sharing more than 50 candidate files can also affect system performance lengthening considerably the time required to complete the sharing action.

                      Two sharing modes are available (based on specific setting values):

                      • The legacy mode where one PDF is generated for each candidate being shared.

                      • The new mode where a single PDF containing the consolidated data and attachments of all shared candidates is generated and stored on the cloud.

                      The legacy Candidate Share mode

                      When the legacy Candidate Share mode is used:

                      • A PDF is generated for each candidate being shared.

                      • A separate email is sent to each recipient, for each candidate being shared.

                      • The "Share Candidate Notification" message template is used and contains the PDF as well as the attachments.

                      The new Candidate Share and Print mode (Flipbook)

                      When the new Candidate Share and Print mode is used:

                      • A single PDF containing the consolidated data and attachments of all shared candidates is generated and stored in the cloud.

                      • A single email is sent to each recipient (instead of one email per shared candidate).

                      • The message template called "Share Candidate Notification - Link to Access Shared Candidate Information" is used and contains a link to access the PDF and attachments in the cloud (instead of attaching the PDF file and attachments to the email). Token variables such as {Candidate.FullName} can be added to this message template but they will not be populated if more than one candidate is being shared. In such a case, there is only one message for several candidates.

                      • The generated PDF contains a Table of Contents so that users can easily navigate through the candidate files. Clicking the Bookmarks icon in the PDF displays the Table of Contents.

                      • If an attachment cannot be converted, a link to access it directly in the cloud is included in the PDF. A conversion log containing all conversion errors for all selected candidates is inserted at the beginning of the PDF. A "place holder" page is placed in PDF where the conversion file was to be located.

                      • While many common fonts are supported by the PDF converter used to generate PDFs,the system does not support all possible fonts candidates may decide to use as part of the documents they submit during their application.

                      Note: The Candidate Share and Print mode converts submission attachments as a PDF file. However, the PDF file may not be a pixel perfect representation of the original attachments. As a result, there will be formatting differences between the original document and the converted PDF version of the document. Starting version 13C MP7, the new Candidate Share and Print mode (Flipbook) embeds links to the original attachments shared. The links to these attachments are provided at the beginning of each candidate section. Users can click these links to open the original attachments. This allows users to download and view shared submission attachments. Users do not need to log in to access these attachments. The PDF conversion process for the new Candidate Share and Print mode supports UTF-8 encoding.
                      Note: The generated PDF contains links to the original attachments. When sharing candidates, users do not require authentication. The download starts as soon as the user clicks a link. However, when using batch printing to print the PDF, users will require authentication prior to being able to download attachments for security purposes.
                      Note: The Recruiting setting "Share Other Attachments" does not prevent users from printing a PDF including other attachments. When using bulk printing or when sharing multiple candidates/submissions, users will not see a difference when selecting chosen segments. However, the output will differ if the setting is enabled. For example, the printed document will include other attachments not flagged as relevant to the submission.
                      Attachments in the generated PDF

                      Attachments can be included when sharing a candidate file. Three options are available:

                      • Most recent flagged resume

                      • Visible by candidate (Excludes flagged resume)

                      • Not visible by candidate (Excludes flagged resume)

                      History Tracking in the Share Candidate Feature

                      The history can be included when sharing a candidate file.

                      If the History option is selected, the tracking events of the shared candidate is included. When sharing a general profile, only the related general profile history is shared. When sharing a job submission, only the history related to that job submission is shared.

                      Offer history information is included in the file if:

                      • The user sharing the file has the View offers permission.

                      • The user selects the Offer option in the Share Candidate assistant.

                      • The candidate file contains offer data. Offer data is not available when sharing multiple candidates.

                      Candidate Sharing Behavior

                      When a user is sharing a candidate:

                      • Only the content that the user is allowed to access or that a company allows to share is available.

                      • The candidate file content that can be shared is defined by what the user can view. If a section is available to view, it will be available to share.

                      • Attachments can be shared depending on the user's ability to see attached files.

                      • Offer content can be selected for sharing if:
                        • The user can view offer content.

                        • The file being shared is a job submission.

                        • The file contains offer data.

                      • Referrals can be shared.

                      • The history tracking can be shared.

                      • Tasks are never available to share.

                      • Approvals are never available to share.

                      When a recipient receives the shared candidate file:

                      • Sections that contain no data are removed from the shared file even if they were selected. Screening Services, eSignature and Regulation sub-sections are never included even if they are within a section of the candidate file that was included by the share sender when sending the share file.

                      • Shared files follow a restricted profile for field level security. Fields with a Confidential security level are never shared, and fields with the General or Restricted security level are always shared, regardless of the sharing user's permissions. As a result, the shared candidate file may include or exclude content that a user is otherwise able to see while in the Recruiting Center.

                      • Tasks are never included.

                      • Approvals are never included.

                        Sharing Candidate Files - Permissions and Settings

                        The following permissions and settings are used to configure the candidate file sharing feature.

                        Setting Description Default Value Location
                        Candidate and Job Submission Sharing Configuration Determines the method used for sharing candidate and job submission information, including attachments, with recipients.

                        When sharing using a link to an online PDF, a single PDF containing the consolidated data and attachments of all shared candidates is generated and stored on the cloud; an email is sent to each recipient and contains a link to access the PDF and attachments in the cloud; the information remains accessible online for 15 days after the date the information was shared.

                        When sharing by email, one PDF is generated for each candidate being shared and an email containing the PDF and attachments is sent to each recipient.
                        Share using a link to an online PDF Configuration > [Recruiting] Settings
                        Configuration of Sections in the Job Submission/General Profile for the Print and Share Functionalities Enables the ability to configure the sections in the candidate general profile and job submission, including attachments, that can be printed or shared. This setting applies to all users who have the permissions to use the print or share functionality. Available values are:
                        • All sections can be selected

                        • Only the Job Submission/General Profile section and the Attachments section can be selected

                        All sections can be selected Configuration > [Recruiting] Settings
                        PDF Retention Period for Shared Candidate Information Specifies the number of days that candidate information will be retained in the system and available online. After the specified period, the candidate information will no longer be available. The maximum retention period is 15 days. This setting only applies when sharing candidate information via a link.

                        Note that the limit is set to 60 days. Even if the setting is set higher than 60 days, files will not be retained longer than that.

                        15 Configuration > [Recruiting] Settings
                        Share Other Attachments When enabled, users will be able to include "other attachments" in the "Candidate Share" or "Interview Request" actions. "Other attachments" equates to any attachment not directly related to the job submission from which the action is being taken as well as all attachments when sharing from the candidate general profile.

                        The Share Other Attachments setting has been added as a safeguard for companies that are concerned by users gaining access to "other" attachments. Because it is the share sender's security permission that determines what can be shared, this setting safeguards the security of the data from the share recipients where this extra protection is desired. When the setting is enabled, the "Visible by candidates" option in the "Share Candidate" assistant will display other attachments, i.e., attachments visible by the candidate which are not linked to the current submission.

                        Yes Configuration > [Recruiting] Settings
                        Disable External Candidate Sharing

                        Confine candidate sharing to members of the groups to which a user belongs.

                        To be a recipient of a shared candidate file, certain rules apply. Candidate share recipients presented in the selection tool are affected by the Disable External Candidate Sharing setting.
                        When the setting is set to Yes, it is not possible to share the candidate file with external users by typing an email address in the "Share with External Recipients" field. Recipients can only be selected amongst the users displayed in the assistant. To appear in the list of available users, the following conditions must all be met:
                        • The user must be active.

                        • The user must be able to access the Recruiting Center.

                        • The user must belong to at least one user group matching the user group of the user sharing the candidate file.

                        • If a submission is being shared, the user must have access to the staffing type of the requisition.

                        When the setting is set to No, it is possible to share the candidate file with external users by typing their email address. The list of users in the assistant will contain all active users with access to the Recruiting Center.

                        No Configuration > [Recruiting] Settings

                        User Type Permission Description Location
                        Share Candidates This permission is required to share candidates. Configuration > [SmartOrg] Administration > [Users] User Types > Recruiting > Candidates
                        Access Attachments tab Attachments can be included when sharing a candidate file. Configuration > [SmartOrg] Administration > [Users] User Types > Recruiting > Candidates
                        View other attachments Attachments can be included when sharing a candidate file. Configuration > [SmartOrg] Administration > [Users] User Types > Recruiting > Candidates

                        Message Template Description Location
                        Share Candidate Notification Message template used for the legacy Candidate Share mode.

                        The message template contains the PDF as well as the attachments.

                        Configuration > [Recruiting] Message Templates
                        Share Candidate Notification - Link to Access Shared Candidate Information Message template used for the new Candidate Share mode.

                        The message template contains a link to access the PDF and attachments in the cloud (instead of attaching the PDF file and attachments to the email).

                        Note that token variables such as {Candidate.FullName} can be added to this message template but they will not be populated if more than one candidate is being shared. In such a case, there is only one message for several candidates.

                        Configuration [Recruiting] Message Templates

                          Candidate Interview

                          A candidate interview is a formal meeting to evaluate the qualifications and work experience of a candidate.

                          Recruiting Center users can schedule, update and cancel interviews directly in the Recruiting Center. Attendees invited to a meeting receive an interview notification by email and they add the meeting to their calendars. Each time an interview is scheduled, updated or cancelled in the Recruiting Center, an email message is sent to selected attendees.

                          Here is how the candidate interview scheduling feature basically works.

                          A recruiter wants to interview a candidate for a job. For that, the candidate must be at the right interview step/status. From the Candidates list or the requisition-specific candidate list, the recruiter selects the candidate file and chooses the Schedule an Interview action in the More Actions list. The recruiter invites the candidate and can also invite other attendees to the interview meeting. The hiring manager of the requisition is invited by default. However, if the meeting organizer is the hiring manager, the recruiter is invited instead. Non-Recruiting Center users can also be invited to the meeting via their email address.

                          A default interview invitation message is proposed by the system. The most appropriate message template is pre-selected based on the requisition's Organization-Location-Job Field structure and the application language. However, it is possible to select another message.

                          If the recruiter has the appropriate permission, he/she can attach the candidate file and requisition file to the interview being scheduled and the message being sent.

                          When all the interview details are entered, the recruiter sends the interview meeting invitation.

                          The candidate, the meeting organizer and the attendees receive the interview meeting invitation by email and they can add the invitation directly into their calendars. If the candidate has no email address, the interview organizer can print the invitation and send it to the candidate by fax or regular mail.

                          After the interview meeting has been scheduled, the recruiter can view interview scheduling information in the candidate list Interview column and in the candidate file History tab. The Interview column must have been activated and added to the candidate list by the system administrator.

                          The recruiter also has the ability to update the interview meeting by changing the attendees, the schedule or other information, and also cancel the interview.

                          The candidate interview feature generates iCalendar entities that can then be integrated with any mail system that supports this specification, including Microsoft Outlook. Events occurring in MS Outlook calendar or any iCalendar system are not managed by Recruiting. For example, if an interview meeting is modified in Outlook, the new information will not appear in Recruiting.

                          MS Outlook 2000 and higher are supported. Other calendar products may be functional but are not officially supported.

                          When the candidate file and requisition file (or other candidate attachments) are included in the interview meeting invitation, these do not follow in the Calendar meeting.

                          A candidate can only have one interview scheduled per application at a time. If a candidate has no email address, users can still schedule an interview; they simply need to print the interview invitation and send it to the candidate by fax or regular mail.

                          Note: When scheduling or updating a 1st interview, the meeting organizer will not be able to add the appointment to his Outlook calendar using the ics link contained in the interview meeting invitation he will receive. This is a Microsoft Office issue that occurs with Outlook 2007 and Outlook 2010 (version 14). This issue is happening to meeting organizers only.

                            Candidate Interview - Permissions and Settings

                            The following permissions and settings are used for the candidate interview feature.

                            Setting Description Default Value Location
                            Interview Management Activation

                            Activate interview management functionality. The Schedule an Interview action is then available in the More Actions list

                            No Configuration > [Recruiting] Settings
                            Confine Meeting Attendees to User Group Allow meeting requests to be sent only to the members of the groups to which a user belongs No Configuration > [Recruiting] Settings
                            Meeting Scheduling Sharing Mode Indicates how the candidate file and requisition file are shared with attendees in scheduling interviews.

                            Possible values for this settings are:

                            • Via Taleo eShare Center: candidate and requisition files (if included) and any candidate attachments are linked in the eShare Center.

                            • Via email: candidate and requisition files (if included) and any candidate attachments are included in the message as attached files.

                            All interviewers receive the same candidate and requisition file view, regardless of the value selected for the Meeting Scheduling Sharing Mode setting or permissions to view information in the system. As a rule, sections in the file are those the user sending the request is authorized to see, sections include General and Restricted fields (never Confidential fields), the Compensation block is never included in the requisition file, and Regulations and Screening Services blocks are never included in the candidate file. All recipients, including the candidate, will get the same email message. In the message body, tokens for Restricted and General fields are resolved (Confidential fields are never resolved). Any files attached directly to the message template are sent via email, regardless of the value selected for the Meeting Scheduling Sharing Mode setting. Candidates will never receive either the attached files or an eShare link, regardless of the value selected for the Meeting Scheduling Sharing Mode setting. A user can be selected as an interviewer and receive related requisition and candidate information even if he/she cannot access such information in the system.

                            Via Taleo eShare Center Configuration > [Recruiting] Settings
                            Share Other Attachments When enabled, users will be able to include "other attachments" in the "Candidate Share" or "Interview Request" actions. "Other attachments" equates to any attachment not directly related to the job submission from which the action is being taken as well as all attachments when sharing from the candidate general profile.

                            All candidate facing and non-candidate facing attachments linked directly to the job submission are included. Candidate facing "other" attachments are also included, unless the setting Share Other Attachments is set to No.

                            Yes Configuration > [Recruiting] Settings

                            User Type Permission Description Location
                            Manage interviews Configuration > [SmartOrg] Administration > [Users] User Types > Recruiting > Candidates
                            Send candidate files and requisitions to attendees Configuration > [SmartOrg] Administration > [Users] User Types > Recruiting > Candidates
                            Access Attachments tab Attachments can be included in a candidate file if the user sending the interview request has access to the Attachments tab. Configuration > [SmartOrg] Administration > [Users] User Types > Recruiting > Candidates

                              Files Attached to an Interview Invitation

                              Users can attach the candidate file and requisition file to the interview being scheduled and the message being sent.

                              The candidate file attached to the interview meeting never contains the Regulations block and Screening Services results. Blocks available in the candidate file do not display confidential information. Files attached to the candidate file (for example, a resume) are not included in the interview invitation.

                              The requisition file attached to the interview meeting never contains the Compensation block. Blocks available in the requisition file do not display confidential information.

                              User type permissions grant users access to the content of the candidate and requisition files. Depending on the user type permissions granted to the user scheduling the interview, some attendees may not have access to information they normally would have. The candidate will not receive the candidate file nor requisition file.

                              When the candidate file and requisition file (or other candidate attachments) are included in the interview meeting invitation, these do not follow in the Calendar meeting.

                                Attachments Sent with the Interview Request

                                Share Other Attachments setting View Other Attachments permission Job-Specific General Profile
                                Candidate Facing Non-Candidate Facing Offer Candidate Facing: linked to a different submission or directly to the general profile Non-Candidate Facing: linked directly to the general profile
                                * The Schedule an Interview action is available for a single candidate job submission. In the situations described above, the user requesting the interview must have the permission to access the Attachments tab in the candidate file or else no attachments can be included.
                                Yes Yes All candidate facing attachments linked directly to the job submission are included if candidate files are selected to be sent by the user sending the interview request. All non-candidate facing attachments linked directly to the job submission are included if candidate files are selected to be sent by the user sending the interview request Not available All candidate facing "other attachments" and candidate facing attachments linked to the general profile are included if candidate files are selected to be sent by the user sending the interview request. Not Available
                                No All candidate facing attachments linked directly to the job submission are included if candidate files are selected to be sent by the user sending the interview request. All non-candidate facing attachments linked directly to the job submission are included if candidate files are selected to be sent by the user sending the interview request. Not available Not available Not available
                                No Yes All candidate facing attachments linked directly to the job submission are included if candidate files are selected to be sent by the user sending the interview request. All non-candidate facing attachments linked directly to the job submission are included if candidate files are selected to be sent by the user sending the interview request. Not available Not available Not available
                                No All candidate facing attachments linked directly to the job submission are included if candidate files are selected to be sent by the user sending the interview request. All non-candidate facing attachments linked directly to the job submission are included if candidate files are selected to be sent by the user sending the interview request. Not available Not available Not available

                                  Candidate Interview and Candidate Selection Workflow

                                  The candidate interview feature can be configured in the candidate selection workflow for proper candidate selection tracking.

                                  Candidate selection workflows can be configured by the system administrator so that when users schedule an interview, the candidate's status automatically changes to a preset value. To automatically change the candidate's status, the system administrator must activate the Interview Scheduling Behavior option for the statuses in question, that is 1st, 2nd and 3rd interview statuses (available in the Statuses Usage tab of a step).

                                  Example:

                                  A recruiter uses a candidate selection workflow containing the 1st, 2nd and 3rd Interview steps. All three steps have the following statuses:

                                  • To be scheduled

                                  • Scheduled

                                  • Passed

                                  The Interview Scheduling Behavior option is activated for the Scheduled status. The candidate is currently at the 1st Interview step and the To be Scheduled status.

                                  The recruiter schedules an interview for the candidate. When the recruiter sends the interview invitation to the attendees, the status of the candidate automatically changes from To be Scheduled to Scheduled.

                                  The candidate attends the interview as scheduled. The recruiter wants to invite the candidate to a second interview. The recruiter has to perform the following steps:

                                  • Change the status of the 1st Interview step to Passed.

                                  • Move the candidate to the 2nd Interview step and set the status to To be scheduled.

                                  • Schedule a new interview.

                                  Since the Scheduled status is also configured for the 2nd Interview step, the candidate's 2nd Interview status automatically changes to Scheduled once the interview is sent to the attendees.

                                  When using this functionality, a best practice is to configure the Interview steps with a completion status that indicates the successful completion of the interview (for example, Passed, Successful). This helps to ensure that an interview that is past due is not simply forgotten.

                                    Referring Candidates

                                    A candidate can be referred by several referrers (agents and/or employees) and referral ownership can be set at the candidate profile level, the job submission level, or at both levels.

                                    In previous releases, candidates could be referred on multiple jobs by a single referrer only. The referral ownership was kept at the candidate profile level, encompassing all job submissions done through all means by all actors. Now, a candidate can have multiple referrers (agents and employees) and candidate information is shared between multiple referrers.

                                    How it Works for Agents How it Works for Referrers (Usually Employees) How it Works for Referred Candidates How it works for Recruiters

                                    Agents can:

                                    • Refer candidates who already exist in the database.

                                    • Refer an already referred candidate at the job submission level.

                                    • See candidate information entered by other referrers.

                                    • Have a maximum number of job submissions referred per requisition.

                                    Referrers can:

                                    • Refer previously referred candidates.

                                    • Refer an already referred candidate at the job submission level.

                                    • See candidate information entered by other referrers.

                                    Candidates can:
                                    • Receive emails from multiple referrers.

                                    Recruiters can:
                                    • See various referrers for the same candidate.

                                    • Might not always know there are referrers associated to a candidate. The fact that no agent is displayed in the candidate profile Referral tab does not mean that no agent referred the candidate. The referral might exist at the job submission level.

                                    • See only the candidate profile referrer in search list and folder list.

                                      Configuring Candidate Referrals

                                      Several settings are available to configure the referral of candidates.

                                      Important Information

                                      To allow the referrals of candidates who already exist in the database, the following settings are available.

                                      Setting Description Default Value Location
                                      Accept Referrals from Agents for Known Candidates or Submissions

                                      Determines if agents can refer candidates or candidate submissions that already exist in the database.

                                      No Configuration > [Recruiting] Settings
                                      Accept Referrals from Employees for Known Candidates or Submissions Determines if employees can refer candidates or candidate submissions that already exist in the database. No Configuration > [Recruiting] Settings

                                      A referrer can be the owner of a candidate job submission and also the owner of the candidate general profile. To support this candidate ownership mode, the following setting are available.

                                      Setting Description Default Value Location
                                      Ownership Configuration for Agent and Employee Referrals Determines the ownership mode for agent and employee referrals. Three modes of ownership are available. See below for details. Candidate Ownership Configuration > [Recruiting] Settings
                                      Three modes of ownership are available:
                                      • Candidate Ownership: The referrer is the owner of the candidate. Regardless of where the referral occurs (general profile or job submission), there is only one owner.

                                      • Submission Ownership: The referrer is the owner of the candidate job submission. The ownership is limited to where the job submission occurs. If the referral is done at the job submission level, the referrer will only get ownership of this job-specific submission. Referring a candidate general profile is possible, but not recommended.

                                      • Submission and Candidate Ownership: The referrer is the owner of the candidate job submission and the candidate general profile. The ownership is taken on the job-specific submission where it has been done, but also taken on the candidate, if the candidate is not already owned by a referrer.

                                      In the Recruiting Center, when the Candidate Ownership mode is enabled, the candidate submission referrer is displayed in the candidate submission Referral tab. If there is no submission referrer, the candidate referrer is displayed. A submission-specific referrer can only exist if the "Ownership Configuration for Agent and Employee Referrals" setting was changed to the Submission and Candidate Ownership mode or the Submission Ownership mode and was reverted to the Candidate Ownership mode.

                                      In the Recruiting Center, when the Submission Ownership mode or the Submission and Candidate Ownership mode is enabled, only the local referrer is displayed in the candidate submission. If a candidate submission has no referrer, the candidate submission Referral tab is empty even if the candidate has been referred at the profile level.

                                      In the Career Section, under the Referrals tab, the display rules are always the same, regardless of the ownership mode selected.

                                      In the Career Section, a referred candidate submission with an active link is always displayed, regardless of the setting enabled or the ownership mode selected. A non-referred candidate submission is only displayed if the candidate was referred. Candidate referrals are created for all referrals when the Candidate Ownership mode or the Candidate and Submission Ownership mode is enabled (they are not created when the Submission Ownership mode is enabled).

                                      In the Career Section, if a referred candidate applied on a job by himself/herself, the referrer can see that referral in the My Referrals tab if the "Display to the referrer submissions for which candidates applied by themselves" property is set to Yes. (Configuration > [Career Section] Administration > Career Sections > Career Portal Pages > My Referrals).

                                      Note: When matching a candidate to a requisition, if the Candidate Ownership mode is enabled, there will be no job-specific ownership created. If the Submission Ownership mode or the Candidate and Submission Ownership mode is enabled, the current ownership is carried over.
                                      Note: When the Submission Ownership mode or the Submission and Candidate Ownership mode is enabled, there are job-specific submissions with various or no referrer. As such, the referrer ownership is only visible in the context where it applies and might not be visible in another context, like a non-referred job submission or a non-referred profile.

                                      Customers can limit the number of candidate submissions a single agent can submit for a specific requisition. To support such a limit, the following setting was created. When an agent reaches the limit set by the setting, this message is displayed to the agent: "You cannot refer this candidate because you have reached your maximum number of referrals for this requisition."

                                      Setting Description Default Value Location
                                      Maximum number of candidate submissions that an agent can refer per requisition Limits the number of candidate submissions a single agent can submit on a specific requisition. Zero means unlimited submissions. 0 Configuration > [Recruiting] Settings
                                      Best Practices
                                      • Require the email address of the referrers and candidates to prevent duplicate candidates.

                                      • Enable the Email Uniqueness setting to prevent duplicate candidates (Configuration > Recruiting Settings).

                                      • Enable the Activate the identification of potentially duplicate candidates setting for agency and referral flows (Configuration > Career Section Administration > Application Flows > Candidate Personal Information Block).

                                      • When the Submission Ownership mode or the Submission and Candidate Ownership mode is enabled for a single candidate, make sure the functionality is well known by users. A training may be necessary.

                                      • If activating different ownership modes per job-specific submissions, deactivate the general profile flow (Configuration > Career Section Administration > Application Flows).

                                      • Once a referred candidate has been hired and the referrer has been remunerated, the referral link should no longer be displayed to hide future candidate submissions from the original referrer.

                                        ACE Candidate Alert

                                        The ACE candidate alert allows Recruiting Center users to set a threshold to identify the ideal candidates and to send an email to specific recipients to inform them that ACE candidates were found.

                                        The ACE candidate alert allows the system to identify the candidates who achieve or exceed the ACE alert threshold for a job offer. It identifies top candidates based on their responses to the competencies and questions in the Prescreening section of the requisition file. The ACE candidate alert is based on Required and Asset criteria. Candidates are divided into three groups to help users determine which candidate files to review first:

                                        • ACE candidates: Consider these candidates first because they meet all Required criteria and some Asset criteria.

                                        • Minimally qualified candidates: Consider these candidates after the ACE candidates because they meet all Required criteria but not Asset criteria.

                                        • Other candidates: Do not consider these candidates because they do not meet any Required criteria.

                                        Note: A best practice is to always have the ACE candidate alert activated.

                                        When setting the ACE candidate alert, the options presented in the following table are provided:

                                        Option Description
                                        A candidate meeting all the required criteria achieves a result of at least x% (0/0) This option is used to set the minimum result. Select a percentage from the list. At the right of the percentage, the system displays the number of points the candidate must have to match the selected percentage. When changing the percentage, the value to the right is recalculated. Candidates who meet all the required criteria and the result value will be considered ACE candidates. Do not use the percentage weighting option if you do not use the Weight criterion in the Prescreening section of the requisition file. If you utilized weighting on some of the questions you could, if you wish, incorporate into the ACE candidate alert setting as well. For a simple approach, you can start by using 75% weight result and then eventually align that % with your own approach and utilization of weighting that works best for you.
                                        A candidate meeting all the required criteria has at least x assets out of y This option is used to set the minimum number of assets. Select a value from the list. Candidates who meet all the required criteria and the minimum number of assets will be considered ACE candidates.
                                        Identify a candidate as an ACE when either condition is met This option is used to identify ACE candidates using the result or asset condition.
                                        Identify a candidate as an ACE when both conditions are met This option is used to identify ACE candidates using the result and asset conditions.

                                        When setting the ACE candidate alert, Recruiting Center users have the option to send an email to notify specific recipients that an ACE candidate was found. To be an ACE Candidate Alert recipient, a user must meet all these criteria:

                                        • The user must be active.

                                        • The user must have access the Recruiting Center or eShare Response Center.

                                        • The user has access to the requisition type of the requisition.

                                        • The user belongs to the user group of the requisition.

                                        Recruiting Center users can be set up as an ACE Candidate Alert recipient even if they have limited access to information on the candidate file.

                                        All ACE Candidate Alert recipients receive the same candidate file, regardless of permissions to view candidate information in the system. When an ACE Candidate Alert is set, the recipient receives an email with an attached PDF file that contains data from the candidate file. Sections of the candidate file that contain no data do not appear. All PDF files display information as follows regardless of the user's permissions:

                                        • Fields with the General or Restricted security level are displayed. Fields with the Confidential security level are not displayed.

                                        • Labels in the candidate file are displayed in the Recipient's language if there is only one recipient; otherwise labels are displayed in the requisition's base language.

                                        • Values entered in the candidate file are displayed in the job submission language.

                                        • The Regulations block is not included.

                                        • Screening Services results are not included.

                                        • Candidate attachments are not included.

                                          ACE Candidate Alert - Permissions and Settings

                                          The following permissions and settings are used for the ACE Candidate Alert functionality.

                                          The requisition file Alert Tab is visible only if users have one of the following permissions:

                                          User Type Permission Location
                                          View and manage ACE threshold and alert recipients Configuration > [SmartOrg] Administration > [Users] User Types > Recruiting > Requisitions
                                          View and manage the "Request More Information" alert Configuration > [SmartOrg] Administration > [Users] User Types > Recruiting > Requisitions

                                          Setting Description Default Value Location
                                          Delay ACE alert Review candidate files and check for potential ace candidate alert every X hours (0: never check). 4 hours Configuration > [Recruiting] Settings
                                          ACE Alert Option Default Determines which ACE Alert Option to set by default when creating a requisition. Has a dependency on the setting "Submission Scoring Activation". Ace Alert based on requirements and assets Configuration > [Recruiting] Settings
                                          ACE Alert Score Default Default score for the "Ace Alert" when creating a requisition. The values must be greater or equal to 0 and less than 100. 60 Configuration > [Recruiting] Settings

                                            Candidate File History

                                            The History tab in the candidate file contains a log of all actions performed on the candidate file.

                                            When a candidate file is modified, either by the candidate or a user, an event to track this action is generated and is displayed in the candidate file History tab. The name of the user who performed the action is displayed as well as the date and details on the event. Candidate file tracking events belong to one of the following categories:

                                            • Agent and referrer

                                            • Attachments

                                            • Candidate file update

                                            • Candidate information

                                            • Candidate progression

                                            • Comments

                                            • Correspondence

                                            • Questions and competencies

                                            • Regulation

                                            • Resume

                                            • Screening services

                                            • Offer

                                            Comments relating to an event can be added and edited in the History tab if users have the required permissions.

                                            The Correspondence event category allows users to view previously sent correspondence. A user type permission allows users to resend the correspondence directly from the History tab.

                                            Users can see attachments and offer history tracking if they have the required permissions.

                                            A permission allows Recruiting Center users to view the content of deleted attachments in the History tab. When candidates submit attachments as part of their job application, your organization can remove these attachments. Your organization may decide to not provide access to these deleted attachments which are still visible in the History tab. If you have been granted the permission, you can click the attachment link in the History tab and view the content of deleted attachments. If you do not have the permission, you can see and click the attachment link but the system will display a message indicating that you do not have the permission to view the content of the deleted attachment.

                                            Modifying the Date of an Event

                                            Users can modify the date of an event and specify when an action on a candidate's file really took place, provided the feature has been activated and they have the required permissions. The use of the actual date enables reports to more accurately reflect user activity in the selection process. There might be a number of reasons why users would want to change certain dates in a candidate's file.

                                            Example. If a candidate had an interview on September 15, but that user was only able to enter this information in the system on September 20, the event date would indicate September 20. The user could then change this date to September 15, which would be more accurate. If the date and time related to an event can be edited, they appear as a hyperlink. The event date can only be between the application creation date and the current date.

                                            Hiding Confidential Information

                                            When the value of a confidential field is modified, users who do not have the permission to view confidential fields will not see any tracking event in the candidate file Tracking tab. In Recruiting, fields configured with a Confidential security level can be hidden from users who do not have the permission to view confidential fields. If the value of a confidential field is modified, users who do not have the permission to view confidential fields will not see any tracking event in the candidate file History tab regarding that change. If later on, the security level of that confidential field is changed to General or Protected, users will still be unable to see the change in the Tracking tab.

                                              Candidate File History - Permissions and Settings

                                              The following permissions and settings are used to configure the display of elements in the candidate file History tab.

                                              Setting Description Default Value Location
                                              Default History Event Categories Indicates the history event categories shown by default. Attachments, Comments. Configuration > [Recruiting] Settings
                                              Display Incomplete Application Display incomplete submissions in candidate list and in candidate search results. This setting does not apply to the Candidate Quick Search. If the Display Incomplete Application setting is not activated, incomplete submissions will be hidden from view. Yes Configuration > [Recruiting] Settings
                                              UDF Tracking Activation This is a Protected setting. Activates the tracking of changes made to custom candidate fields relating to the personal information, work experience and education. For details, see Field Availability. 20 Configuration > [Recruiting] Settings

                                              User Type Permission Description Location
                                              Edit comments in history summary Users with this permission can modify comments in the candidate file History tab. Configuration > [SmartOrg] Administration > [Users] User Types > Recruiting > Candidates
                                              View deleted attachments content from tracking history Users with this permission can view the content of deleted attachments in the History tab. When candidates submit attachments as part of their job application, your organization have the ability to remove these attachments. Your organization may decide to not provide access to these deleted attachments which are still visible in the History tab. If a user has been granted the permission, he/she can click the attachment link in the History tab and view the content of deleted attachments. If a user does not have this permission, he/she can see and click the attachment link but the system will display a message indicating that the user does not have the permission to view the content of the deleted attachment. Configuration > [SmartOrg] Administration > [Users] User Types > Recruiting > Candidates > Candidate Information
                                              Access Attachments tab Users must have the Access Attachments tab permission AND the View other attachments permission to be able to view the Attachments section of any History tab.

                                              If users have the Access Attachments tab permission but not the View other attachments permission, they will not see the Attachment category and associated history items, but they will have access to the Attachments tab showing the job specific attachments.

                                              If users have the View other attachments permission but not the Access Attachments tab permission, they will not see the Attachment category and associated history items, and they will not have access to the Attachments tab.

                                              If users do not have the Access Attachments tab permission nor the View other attachments permission, they will not see the Attachment category and associated history items, and they will not have access to the Attachments tab.

                                              Configuration > [SmartOrg] Administration > [Users] User Types > Recruiting > Candidates
                                              View other attachments For details, see the description for the Access Attachments tab permission. Configuration > [SmartOrg] Administration > [Users] User Types > Recruiting > Candidates
                                              View offers

                                              The View offers permission and the View and manage offers permission are contextual and a user can have varying levels of access depending on their relationship to the offer. The system will review both permissions and whichever permission grants the greatest access to information will determine whether the Offer history section will appear for the user. For example, a user can view offers without restriction, but can view and manage only offers he owns. The user will see the Offer history on submissions without restriction because this is the highest level access across these two permissions.

                                              If users have the View offers or View and manage offers permission and they are on a requisition that matches the sub-option permission, they will see the Offer category and associated history items.

                                              If users have the View offers or View and manage offers permission, but they are on a requisition that does not match the sub-option permission, they will not be able to see the Offer category and associated history items.

                                              If users do not have the View offers and View and manage offers permission, they will not be able to see the Offer category and associated history items.

                                              Configuration > [SmartOrg] Administration > [Users] User Types > Recruiting > Offers
                                              View and manage offers For details, see the description for the View offer permission. Configuration > [SmartOrg] Administration > [Users] User Types > Recruiting > Offers
                                              Access requisition-specific candidate lists

                                              In the Recruiting Center, the Show History for list can present information on all job submissions, on job submissions in selection process, or on a specific job submission. When users select the Submissions in selection process or All submissions option, the list will only include history tracking related to submissions that users are authorized to view. The following permissions and settings will affect the behavior:

                                              If users do not have the Access requisition-specific candidate lists permission, all candidate submission files and requisition-specific candidate lists will be blocked from the users' view. These users can still access lists of candidates from candidate search and candidate folders but from these contexts can never navigate to see anything other than the candidate's general profile while inside the candidate file.

                                              Configuration > [SmartOrg] Administration > [Users] User Types > Recruiting > Candidates
                                              View candidates in steps whose security level is "Restricted" Users will need this permission to be able to see a candidate that is in a Candidate Selection Workflow step that is restricted. If this permission is not granted, the candidate submission and associated history will not be visible to users. Configuration > [SmartOrg] Administration > [Users] User Types > Recruiting > Candidates
                                              View internal job submissions Users will only be able to see internal candidate job submissions if they are granted this permission. If a candidate is internal at the profile level, then any job submission related to the candidate can be protected from view based on the following permission. Configuration > [SmartOrg] Administration > [Users] User Types > Recruiting > Candidates

                                                New Hire Onboarding

                                                Employee onboarding is the process of integrating a new employee into an organization.

                                                Onboarding begins when a person accepts a position; it can include orientation, communication, filling out forms, getting equipment such as a laptop.

                                                  New Hire Onboarding - Permissions and Settings

                                                  The following permissions and settings are used to configure the employee onboarding feature.

                                                  Setting Description Default Value Location
                                                  Legacy Onboarding Activation Activates Legacy Onboarding functionalities. This is a protected setting. No Configuration > [Recruiting] Settings

                                                  User Type Permission Location
                                                  Initiate a legacy onboarding process for a new resource Configuration > [SmartOrg] Administration > [Users] User Types > Recruiting > Other
                                                  Cancel a legacy onboarding process in progress Configuration > [SmartOrg] Administration > [Users] User Types > Recruiting > Other

                                                    Automatic Candidate Pooling

                                                    The Automatic Candidate Pooling feature allows customers to add autopooling criteria to a requisition or requisition template to find candidates in the database who are available and qualified for a job. Managers can then access the autopool results with a single click.

                                                    The Automatic Candidate Pooling feature is typically used in decentralized hiring environments, for example in high volume retail and hourly hiring where managers may have to quickly identify candidates on their own without the assistance of recruiters.

                                                    For the Automatic Candidate Pooling feature to be available, the feature must be enabled by the system administrator. Users creating or defining autopooling criteria must be granted the required user type permissions, but no permission is required to access the autopool results.

                                                    Autopooling criteria can be added to a requisition via the Autopooling Criteria tab (if autopooling criteria were added to a requisition template, they will be inherited by the requisition). This is like a saved search that managers can use to find candidates who are both available and qualified. The following autopooling criteria may include any criteria from the Advanced Search, plus an additional set of basic criteria. For example:

                                                    • Exclude candidates in selection process

                                                    • Candidate's general profile language must match the requisition language

                                                    • Exclude expired job submissions (selected by default)

                                                    • Exclude rejected candidates - Within the last x days

                                                    • Exclude hired candidates - Within the last x days (selected by default)

                                                    • Candidate's place of residence - Within a radius of x kilometers/miles from the primary location of the job opening

                                                    • Submissions must match the following organization-location-job field structure

                                                    As a best practice, when defining autopooling criteria:

                                                    • Define autopooling criteria in requisition templates so criteria are inherited as requisitions are created.

                                                    • Define the widest possible set of candidates from the database that would be both qualified and available. This way, no time is wasted on unqualified or unavailable candidates. For example:

                                                      • Set Organizations, Locations and Job Fields to only include candidates from other jobs with overlapping skills and/or who applied to nearby locations. Filter by Organization and Location if appropriate (specific country, specific division, etc.).

                                                      • Exclude candidates being considered in another requisition, who were recently hired, whose submissions have expired.

                                                      • Use the parameter to limit results to candidates who live within X kilometers/miles of the primary location of the requisition.

                                                    Once autopooling criteria have been defined and enabled, the system will automatically generate a list of candidates matching the criteria anytime on demand. Only candidates who have applied on another requisition will be considered. This list of candidates is accessible in the requisition-specific candidate list or in the requisition file via the Autopooling icon. A maximum of 300 candidates can be displayed. The user then has the ability to:

                                                    • View candidate files.

                                                    • Match candidates to the current job opening (candidates are moved from the autopool results list to the requisition-specific candidate list, and they can then be moved along the workflow like any other candidate).

                                                    • Match candidates to the current job opening and reject them in a single action (which will remove undesired candidates from continuing to appear in the candidate pool for this requisition; by default this option is disabled).

                                                    • Filter the list of candidates using quick filters defined by the system administrator.

                                                    • Sort the list of candidates by clicking a column heading.

                                                    When viewing a candidate file, the user may be able to view the other job applications that the candidate has submitted, depending on the permissions he/she was granted.

                                                    The user is able to match a candidate to the requisition via the autopooling feature even if he/she was not granted the permission to match candidates to a requisition in general.

                                                    The user may also be able to match and reject candidates in one action if he/she was granted the proper permission. When rejecting a candidate, the manager must specify the qualifiers (motives) and provide comments as required by the workflow.

                                                    If configured by the system administrator, the Automatic Candidate Pooling feature may also provide the ability to create optional repooling rules which automatically set a candidate's submission to an Inactive status after X days of inactivity. If the autopooling criteria for other jobs include the criteria to exclude candidates who are in a selection process, candidates who are automatically set to an inactive status will no longer be excluded and thus will be included in pool results.

                                                      Configuring the Automatic Candidate Pooling

                                                      Configuration > [Recruiting] Administration

                                                      1. Under Recruiting Settings, enable the Automatic Candidate Pooling Enabled setting.

                                                      2. Under List Formats, configure the candidate list format context entitled List of automatically pooled candidates.

                                                        1. Select columns for the list format.

                                                        2. Put columns in the right sequence.

                                                        3. Set column sorting criteria.

                                                        4. Configure quick filters. This list format allows the use of the same quick filters as the Advanced Search list format, plus the Shift Availability filter.

                                                        5. Activate the list format.

                                                      3. Under SmartOrg Administration > User Types > Recruiting > Requisitions, grant the following user type permissions:

                                                        • View autopooling criteria

                                                        • Edit autopooling criteria

                                                        • Perform the "Reject" action from the candidate autopooling list

                                                      4. You can define repooling rules within the Candidate Selection Workflow to automatically return candidates to the pool after X days of inactivity:

                                                        1. Under Recruiting Settings, enable the Inactivate Job Submissions Feature setting.

                                                        2. Under Candidate Selection Workflow/Statuses tab, create an inactive status and select Inactive in the Reference Model list.

                                                        3. Under Candidate Selection Workflow/Steps tab, add this inactive status to each candidate selection workflow step in which you want to repool candidates.

                                                        4. Within each desired candidate selection workflow, in the Steps Usage tab, click on the step, select the Inactivate Job Submissions option and indicate the number of days. Note that different steps may have different durations or none at all.

                                                        Talent Pool

                                                        Talent pools created in Taleo Performance are available in the Recruiting Center.

                                                        A talent pool is a list of people nominated by pool collaborators. In Taleo Performance, talent pools can be created at anytime for any purpose, providing the flexibility to track unlimited groups of employees, such as high-potential employees, future leaders, and successors.

                                                        In the Recruiting Center, authorized users are able to see talent pools and match employees and candidates to their requisitions, file them into folders for additional pooling functionalities, or contact them directly.

                                                        The Talent Pool tab is available in the left panel of the Candidates list.


                                                        Image showing the Talent Pools folder.

                                                        From the Talent Pool tab, users can select a talent pool to display the candidates and employees included in the pool. Users can also use quick filters (Internal, Referred, In selection process, Employer, Program) and advanced filters to filter the list down to relevant information. An advanced filter of interest is the Employee Potential which allows users to display candidates or employees with a low, medium, or high potential.

                                                        As with any other lists, actions can be performed on employees and candidates included in the talent pool using actions in the menu bar, in the More Actions list, and in the contextual action menu. Users can also select another list format or create a personalized list format.

                                                          Configuring the Talent Pool Feature

                                                          The configuration of talent pools consists of the following steps.

                                                          Note: Talent pools are created and managed directly in Taleo Performance.
                                                          1. Configuring the All Candidates / By Talent Pool list format context. This list format context is available to display candidates and employees included in a talent pool. You can use the default Contact Information list format, you can edit it, or you can configure a new list format from scratch.

                                                          2. Granting the following Talent Pool permission.

                                                          User Type Permission Description Location
                                                          View - If this user is the pool owner or a pool user When the View permission is granted, all pools are displayed to the user.

                                                          When the View - If this user is the pool owner or a pool user is granted, only the corresponding subset of pools are displayed.

                                                          If no permission is granted, the Talent Pool tab in the Recruiting Center is not displayed.

                                                          Configuration > [SmartOrg] Administration > [Users] User Types > Common > Pools

                                                            Employee Metrics

                                                            Recruiting Center users are able to see employee metrics directly in the Candidates list and candidate file, to use employee metrics fields as advanced filters, and to search employee metrics.

                                                            The following key employee metrics are available in the Candidates list and candidate file. For these fields to be available, they must be configured and added in the candidate file user-defined form and in the candidates list format. If included, they are available to anyone based on field level confidentiality definition. If the Show Advanced Filters option is selected for the list format context, employee metrics become available as advanced filters in the Recruiting Center.

                                                            Employee metrics in the Candidates list and candidate file are:

                                                            • Competency Rating

                                                            • Employee Potential

                                                            • Employee Risk of Loss

                                                            • Goal Rating

                                                            • Last Review Rating

                                                            • Promotability Readiness

                                                            • Reassignment Candidate

                                                            The following key employee metrics are available in the Advanced Candidate Search page. For these fields to be available in the Advanced Candidate Search page, they must have been configured and added by the system administrator. Once added, they are available to anyone authorized to search internal candidates.

                                                            Employee Metrics in the Advanced Candidate Search Available Values
                                                            Last Review Rating Greater than or equal to a % between 0 and 100.
                                                            Potential Low, Medium, High, Not Specified, Does Not Matter.
                                                            Reassignment Candidate Yes, No, Not Specified, Does Not Matter.
                                                            Readiness for Promotion Ready Now, Ready in 6 months, Ready in 1-2-3-4-5 years, Not Specified, Does Not Matter.
                                                            Risk of Loss Low, Medium, High, Not Specified, Does Not Matter.
                                                            Note: The Last Review Rating is expressed as a % in the Recruiting Center; in Taleo Performance, it is expressed differently and it is a customizable scale.

                                                              Configuring Employee Metrics in the Candidates List

                                                              To have employee metrics available in the Recruiting Center Candidates list, the following configuration steps are required.

                                                              1. Making employee metrics fields available in the Recruiting Center.

                                                              2. Adding employee metrics columns in candidate list formats: Once employee metrics fields have been made available in the Recruiting Center, they can be added as columns in candidate list formats. If the Show Advanced Filters option is selected for the list format context, employee metrics become available as advanced filters in the Recruiting Center.

                                                              3. Setting the security level on field content: This is done with the following user type permissions: "Security level for internal candidates (in view mode)", "Security level for external candidates (in view mode)".

                                                                Making Employee Metrics fields Available in the Recruiting Center

                                                                Configuration > [Recruiting] Administration > Fields
                                                                1. Click Candidate.

                                                                2. In the Show Fields drop-down list, select Employee Metrics.

                                                                3. Click a field.

                                                                4. Click Edit Field Availability.

                                                                5. Select Taleo Recruiting.

                                                                6. Click Save.

                                                                As with any other fields, employee metrics fields are assigned a security level. Organization, Location, and Job Field contextualization and staffing type exceptions are also honored. Note that the Content Required option only displays the Not Required value because employee metrics fields are read-only in the Recruiting Center.

                                                                  Adding a Column in a List Format

                                                                  Configuration > [Recruiting] Administration > List Formats

                                                                  1. Click the Candidate or Requisition tab.

                                                                  2. Select a variation in the Show list.

                                                                  3. Click the name of a context.

                                                                  4. In the Formats for this Context tab, click a list format.

                                                                  5. Select the check box next to a column.

                                                                  6. Click Done.

                                                                    Granting Security Level Permissions for Candidates

                                                                    Configuration > [SmartOrg] Administration > User Types

                                                                    1. Click on a user type.

                                                                    2. In the Recruiting functional domain, click Edit next to Candidates.

                                                                    3. Select the permission Security level for internal candidates (in edit mode).

                                                                    4. Set the desired security level.

                                                                    5. Select the permission Security level for internal candidates (in view mode).

                                                                    6. Set the desired security level.

                                                                    7. Select the permission Security level for external candidates (in edit mode).

                                                                    8. Set the desired security level.

                                                                    9. Select the permission Security level for external candidates (in view mode).

                                                                    10. Set the desired security level.

                                                                    11. Click Save.

                                                                      Configuring Employee Metrics in the Candidate File

                                                                      To have employee metrics available in the Recruiting Center candidate file, the following configuration steps are required.

                                                                      1. Making employee metrics fields available in the Recruiting Center.

                                                                      2. Creating an Employee Metrics user-defined form. You can create the form from scratch or you can use the default form provided with the system. Employee metrics fields that have been made available in Taleo Recruiting can be added to the form.

                                                                      3. Adding the Employee Metrics user-defined form to a candidate file.

                                                                      4. Setting the security level on field content: This is done with the following user type permissions: "Security level for internal candidates (in view mode)", "Security level for external candidates (in view mode)".

                                                                        Making Employee Metrics fields Available in the Recruiting Center

                                                                        Configuration > [Recruiting] Administration > Fields
                                                                        1. Click Candidate.

                                                                        2. In the Show Fields drop-down list, select Employee Metrics.

                                                                        3. Click a field.

                                                                        4. Click Edit Field Availability.

                                                                        5. Select Taleo Recruiting.

                                                                        6. Click Save.

                                                                        As with any other fields, employee metrics fields are assigned a security level. Organization, Location, and Job Field contextualization and staffing type exceptions are also honored. Note that the Content Required option only displays the Not Required value because employee metrics fields are read-only in the Recruiting Center.

                                                                          Candidate Email Address Verification

                                                                          Recruiters can verify whether candidate email addresses entered in the system are valid. Knowing that candidates have not validated their email address, recruiters can use alternate communication channels to send communications.

                                                                          When administrators enable the feature, candidates are sent a message asking them to validate their email address. The message contains a link to the career section. Once candidates click the link, they are taken to the career section login page. On successful login, candidates see the message “Email successfully verified”. If the validation fails, candidates see the message "Email verification failed" with a generic explanation. If the email address was already validated, candidates see the message "Email verification failed" with an explanation that their email address was already validated.

                                                                          In Recruiting Center, recruiters can see that a candidate’s email address was validated. The Email Validated icon appears in the candidates list. It also appears on the candidate card when viewing the general profile or submission of a candidate. The verification is done once per candidate unless the email address is changed.

                                                                          A quick filter is also available to display candidates who have validated their email address.

                                                                          Note: For existing candidates whose email address is yet to be validated, the email address validation message is sent if the candidate is active and when the candidate reaches the step as configured in the setting.

                                                                            Configuring the Candidate Email Address Verification

                                                                            The configuration of candidate email address verification consists of the following steps.

                                                                            1. Set a threshold for sending the email validation message. When candidates’ job submissions reach a specific step of the candidate selection workflow, candidates who have not yet validated their email address receive the message. Use the following setting: Threshold to Send Email Validation Notification to Candidate (Path: Configuration > [Recruiting] Settings)

                                                                            2. A message template is available for the email address validation: Email Address Validation Invitation. You can edit it as needed.

                                                                            3. A column is available to add to list formats: Email Validated Icon.

                                                                            4. A quick filter is available to add to list formats: Email Validated.

                                                                              Confirmed Candidate Accounts

                                                                              Recruiters can know which candidates have viewed and confirmed their profile. This feature ensures that candidates had an opportunity to verify their profile content when their profile was sourced through recruiters, referrals, third party applications, or agencies.

                                                                              When candidates get to the career section Thank You page, the system automatically marks their profile as being confirmed by the candidate. Recruiters are then able to know which candidates have confirmed their profile by viewing the Candidate Confirmed Account icon next to the candidate name.

                                                                                Configuring the Confirmed Candidate Account

                                                                                The configuration of candidate email address verification consists of the following steps.

                                                                                A column is available to add to all candidate list formats: Candidate Confirmed Account Icon.

                                                                                  Creating a User-defined Form

                                                                                  Configuration > [Recruiting] Administration > User-defined Forms

                                                                                  1. Click Create.

                                                                                  2. Select a file type and click Next.

                                                                                  3. Select a form type and click Create. Or, if you want to use the default fields in the form type, select Use the default template.

                                                                                  4. Provide a code, a name, and a description.

                                                                                  5. Add rows, columns and sections using the Toolbox features.

                                                                                  6. In the Field Chooser list, select fields, then drag and drop them in the desired sections.

                                                                                  7. Edit the field properties by selecting a field and scrolling to the Selected Element Properties section at the bottom of the form.

                                                                                  8. Click Save.

                                                                                  The form appears in the User-defined Forms list and is available when creating user-defined files.

                                                                                    Adding a Block in a User-defined File

                                                                                    The user-defined file must have the Inactive or Draft status.

                                                                                    At least one section must be created in the user-defined file.

                                                                                    Configuration > [Recruiting] Administration > User-defined Files
                                                                                    1. Click a user-defined file.

                                                                                    2. Click Edit next to Section Ordering.

                                                                                    3. In the Available Blocks section, select a block.

                                                                                    4. Drag and drop the block in the section.

                                                                                    5. Click Save.

                                                                                      Granting Security Level Permissions for Candidates

                                                                                      Configuration > [SmartOrg] Administration > User Types

                                                                                      1. Click on a user type.

                                                                                      2. In the Recruiting functional domain, click Edit next to Candidates.

                                                                                      3. Select the permission Security level for internal candidates (in edit mode).

                                                                                      4. Set the desired security level.

                                                                                      5. Select the permission Security level for internal candidates (in view mode).

                                                                                      6. Set the desired security level.

                                                                                      7. Select the permission Security level for external candidates (in edit mode).

                                                                                      8. Set the desired security level.

                                                                                      9. Select the permission Security level for external candidates (in view mode).

                                                                                      10. Set the desired security level.

                                                                                      11. Click Save.

                                                                                        Configuring Employee Metrics in the Advanced Search Page

                                                                                        To have employee metrics available in the Recruiting Center Advanced Search Page, the following configuration steps are required.

                                                                                        1. Making employee metrics fields available in the Recruiting Center.

                                                                                        2. Adding employee metrics to the advanced search page.

                                                                                          Making Employee Metrics fields Available in the Recruiting Center

                                                                                          Configuration > [Recruiting] Administration > Fields
                                                                                          1. Click Candidate.

                                                                                          2. In the Show Fields drop-down list, select Employee Metrics.

                                                                                          3. Click a field.

                                                                                          4. Click Edit Field Availability.

                                                                                          5. Select Taleo Recruiting.

                                                                                          6. Click Save.

                                                                                          As with any other fields, employee metrics fields are assigned a security level. Organization, Location, and Job Field contextualization and staffing type exceptions are also honored. Note that the Content Required option only displays the Not Required value because employee metrics fields are read-only in the Recruiting Center.

                                                                                            Customizing the Advanced Candidate Search Form

                                                                                            The Candidate Search option in the Properties page of a field must be selected for a field to appear in the Available Fields list.

                                                                                            When customizing the advanced candidate search form, be sure to only include fields in the form that you want Recruiting Center users to use. If a user has the permission to perform an advanced candidate search, he/she will have the ability to use any fields that you have included in the form regardless of viewing permissions for the fields. When search results are displayed, if the user is not allowed to view internal and/or external candidates, the field will appear in the list if the column is present and the word "Confidential" will appear instead of the data in situations where the user cannot view the data

                                                                                            Configuration > [Recruiting] Administration > Candidate Search Page
                                                                                            1. Select a field in the Available Fields list.

                                                                                            2. Click Add.

                                                                                            3. Click Save.

                                                                                            The field appears in the Selected Fields list. It is available to Recruiting Center users when customizing the advanced candidate search form provided they have access to the advanced search.

                                                                                              LinkedIn Profile Preview

                                                                                              This feature links LinkedIn and Oracle Talent Acquisition Cloud (OTAC) together using the LinkedIn Profile Preview feature in the Recruiting Center and LinkedIn. It allows recruiters to view a candidate's LinkedIn profile with a single click through the candidate file and candidate submission.

                                                                                              LinkedIn in Candidate File and Candidates List

                                                                                              Once the feature is activated, system administrators can define where the LinkedIn Profile Preview is available to Recruiting Center users.

                                                                                              A block called LinkedIn can be added to any candidate files, that is candidate submission and general profile. The LinkedIn block contains a View link. When the LinkedIn block is added to the candidate file, the LinkedIn View option becomes available in the Candidate Compare feature as well. Access is controlled via field contextualization, security level, and file setup.

                                                                                              A column called LinkedIn can be added to any candidates lists (including Quick Search Results list) by system administrators. When this column is added, a View link is also available.

                                                                                              LinkedIn View Link

                                                                                              When clicking the View link in the candidate file or candidates list:

                                                                                              • The candidate's LinkedIn Profile is displayed if the candidate's LinkedIn ID is present.

                                                                                              • The candidate's LinkedIn Profile is displayed if an exact match to the candidate's e-mail is present in a LinkedIn Profile.

                                                                                              • The LinkedIn Search feature is displayed if the candidate does not have a LinkedIn ID and an exact match to the candidate's e-mail cannot be found. From there, users can view and then select the correct candidate's profile to view.

                                                                                              When clicking the View link, the system sends the following data to LinkedIn in order to display the candidate's LinkedIn Profile:

                                                                                              • LinkedIn Unique ID that is stored in the candidate file (if available).

                                                                                              • E-mail address of the candidate.

                                                                                              • First name and last name of the candidate.

                                                                                              • Current employer name of the candidate.

                                                                                              • Current job title of the candidate.

                                                                                              • Country and zip/postal code of the candidate.

                                                                                              When clicking the View link and the LinkedIn Search feature is displayed:

                                                                                              • Search results are based on searching the LinkedIn database based on the candidate's first name, last name, current job title, and current employer's name.

                                                                                              • The way the LinkedIn Search works is that only candidates that meet all the requirements are displayed. As a result, users can remove or change the job title and employer to expand or change search results.

                                                                                              • Once the right candidate's profile is found, users can select to view the profile. This will then store the candidate's LinkedIn ID in the candidate file for future preview. If the customer has a LinkedIn corporate account, this action will also send to LinkedIn the Taleo Candidate ID to allow deep linking back to this record from within LinkedIn (provided the user has access to the Recruiting Center).

                                                                                              • Recruiters can choose to unlink the LinkedIn ID if it is the wrong candidate's LinkedIn Profile. This action will remove the LinkedIn ID from the candidate file. If the customer has a LinkedIn corporate account, the action of unlinking will also remove the Candidate ID from the LinkedIn record.

                                                                                              • The information displayed in the LinkedIn Preview window is entirely owned and defined by LinkedIn. The content presented will vary depending on the user's account level with LinkedIn. No corporate license is required for the LinkedIn Preview window to work, but users must be logged into LinkedIn as a user for content to display.

                                                                                              • If the customer has a LinkedIn Corporate Account or a user has a specific Recruiter user account, more information may display in the LinkedIn Preview window.

                                                                                              The actual LinkedIn ID will not be displayed to users. If users can see the field in Recruiting, they will only ever see the View link according to any other field contextualization and security behavior.

                                                                                              LinkedIn is responsible for the following:

                                                                                              • The LinkedIn Preview window content.

                                                                                              • The LinkedIn Search window, results and content.

                                                                                              • The storing of the Taleo Candidate ID in LinkedIn.

                                                                                              • The display to see if the candidate is already in Taleo from LinkedIn.

                                                                                              Best Practices

                                                                                              Only activate this feature if there are no concerns regarding the transmission of candidate personal data to LinkedIn. Clients will need to acknowledge this during the activation of the feature.

                                                                                              Important Information

                                                                                              The language in which the LinkedIn Preview window is displayed is determined by the display language selected in the user's LinkedIn account. It is not based on the language in which the user logged into Oracle Talent Acquisition Cloud (OTAC). Example: A recruiter set the display language in his/her LinkedIn Profile to French. If the recruiter logs into OTAC in English, the LinkedIn Preview window is displayed in French.

                                                                                              The language of the candidate's profile content in the LinkedIn Preview window is determined by the base language selected in the candidate's LinkedIn Profile. Example: A candidate set the base language in his/her LinkedIn profile to French. If the recruiter logs into OTAC in English and views the LinkedIn Profile in the LinkedIn Preview window, the content is displayed in French.

                                                                                              This feature is not supported in the Remote Manager Experience.

                                                                                              The LinkedIn field is not displayed in the print, share, correspondence, forms, ACE alerts, or PDF forms generated for approvals or interview requests.

                                                                                              The LinkedIn ID field is not available for use in Integration or Reporting.

                                                                                              Clients may want to purchase a LinkedIn Corporate Account and/or LinkedIn Recruiter license for more advanced functionalities to appear in the LinkedIn Profile window.

                                                                                                Configuring the LinkedIn Profile Preview

                                                                                                The configuration of the LinkedIn Profile Preview feature consists of the following steps.

                                                                                                Note: Important information regarding the LinkedIn activation as of September 2012: Clients must go to My Oracle Support (MOS) to request the activation of LinkedIn Preview and LinkedIn Profile Upload. The Taleo Solution Exchange is no longer being used for that process.
                                                                                                  Requesting the Activation of LinkedIn Preview and LinkedIn Profile Upload in My Oracle Support

                                                                                                  System administrators must create a service request in My Oracle Support (MOS).

                                                                                                  The following information must be provided:

                                                                                                  • In the summary field, enter "Activate the LinkedIn Preview and the LinkedIn Profile Upload".

                                                                                                  • In the description, specify for which zones the feature must be activated.

                                                                                                    Deploying the LinkedIn Certification

                                                                                                    Once system administrators have requested the activation in My Oracle Support (MOS), a request will automatically be sent to Oracle Support to have the LinkedIn Certification deployed.

                                                                                                    There are two LinkedIn solutions: LinkedIn Preview and LinkedIn Profile Upload. Both use the same LinkedIn Certification. Once a certification is activated, it is activated for both solutions. Before entering a request, verify if the LinkedIn Certification is not already deployed in the zone.

                                                                                                      Obtaining the API Keys from LinkedIn

                                                                                                      One API key is required for the production zone and one API key is required for all non-production zones.

                                                                                                      1. Navigate to http://developer.linkedin.com.

                                                                                                      2. Click My Apps located in the top right corner.

                                                                                                      3. Enter your LinkedIn credentials.

                                                                                                      4. Once signed in, click the Create Application button.

                                                                                                      5. Fill out all the following required fields:

                                                                                                        • Company Name: Type in the name of your company.

                                                                                                        • Name: Enter the name of your application. Example: Taleo_COMPANYNAME_stage for a staging zone key or Taleo_COMPANYNAME for a production zone key.

                                                                                                        • Description: Enter "For Cross System Awareness".

                                                                                                        • Application Logo URL: Enter the company's picture URL. The best place to find a company's picture URL is by going to their LinkedIn company page, right clicking their company logo, and copying the image URL.

                                                                                                        • Application Use: Select "Jobs and Recruiting".

                                                                                                        • Website URL: Put the URL of the application you are enabling and click Add.

                                                                                                        • Business Email: Enter the email address for a business contact responsible for this application.

                                                                                                        • Business Phone: Enter the phone number for a business contact responsible for this application.

                                                                                                        • Agree: Select the check box to indicate that you have read and agree to the LinkedIn API terms of use.

                                                                                                      6. Click Submit. The Client ID Key and Client Secret Key are generated and displayed on the Authentication page.

                                                                                                      7. Click on the JavaScript tab to open the JavaScript Settings page.

                                                                                                      8. Enter the zone URL(s) for which you are creating an API key.

                                                                                                        For example: https://CompanyXYZ.taleo.net for your production zone; https://stgCompanyXYZ.taleo.net for your staging zone.
                                                                                                      9. Click Add.

                                                                                                      10. Click Update.

                                                                                                      You must send an email to taleointegrations@linkedin.com to get the r_fullprofile and r_contactinfo privileges added to the new API keys you received from the LinkedIn Dev website.

                                                                                                        Sending an Email to LinkedIn to Activate the Integrations

                                                                                                        System administrators can send a single email to LinkedIn for all LinkedIn solutions they wish to have activated (e.g. LinkedIn Preview and LinkedIn Profile Upload). 

                                                                                                        When system administrators create the email, all the information below must be included otherwise this could delay the enablement of the integrations by LinkedIn. In the email to LinkedIn, please create a new body section (as described below) for every zone you wish to have LinkedIn solutions activated in. Also include your LinkedIn Recruiter Contract ID if you are requesting Profile Preview (see the steps below to locate your Contract ID).

                                                                                                        Header:

                                                                                                        To: taleointegrations@linkedin.com

                                                                                                        From: {client contact email address}

                                                                                                        Subject: Request to Activate LinkedIn/Taleo Integration(s) {Profile Upload and/or Profile Preview}

                                                                                                        Body:

                                                                                                        Client Name: {client name}

                                                                                                        Client Contact Name: {client contact name}

                                                                                                        Client Contact Email Address: {client contact email address}

                                                                                                        Zone: {clientzonename.taleo.net}

                                                                                                        Zone Type: {production, staging, or training}

                                                                                                        LinkedIn Solution: {Profile Upload and/or Profile Preview}

                                                                                                        Client ID: {client ID / API Key}

                                                                                                        Contract ID: {contract ID}

                                                                                                        To locate you contract ID:
                                                                                                        1. Sign in LinkedIn Recruiter as an administrator user.

                                                                                                        2. In the menu bar, click More, then Admin Settings.

                                                                                                        3. Note the contract ID located at the top center of the page (just above Usage Information).

                                                                                                        4. Write the contract ID in the message sent to LinkedIn.

                                                                                                          Adding the API Key and Secret Key in Recruiting Administration

                                                                                                          LinkedIn Certification must be deployed in order to have access to the Candidate Sourcing feature.

                                                                                                          System administrators or an Oracle consultant can perform this step.

                                                                                                          The Access integration services configuration permission is required to view and edit information under Candidate Sourcing.

                                                                                                          Configuration > [Recruiting] Administration > [Integration] Candidate Sourcing
                                                                                                          1. In the Candidate Sourcing Services list, click Sourcing.

                                                                                                          2. Enter the API Key and Secret Key that were generated in LinkedIn.

                                                                                                          3. Click Save.

                                                                                                          4. Click Activate.

                                                                                                            Configuring the LinkedIn Preview Feature

                                                                                                            The LinkedIn Preview feature is managed by a candidate field called "LinkedIn ID" that can be configured to be available in candidate files and candidate lists. This field has the same level of security and contextualization options available for all other candidate fields.

                                                                                                            Once the LinkedIn Profile protected setting is activated by Oracle Support, the LinkedIn ID field becomes available in the Candidate Fields page, under the Third Party category.

                                                                                                            To make the LinkedIn ID field available in the Recruiting Center candidate file and candidate list, you must select the Taleo Recruiting option when configuring the properties of the field. Note that the LinkedIn ID field is not available for use in Career Sections, candidate search, and reports. As with any other fields, the LinkedIn ID field is assigned a security level: General, Restricted, or Confidential. Note that the Content Required option only displays the Not Required value because the LinkedIn ID field is read-only in the Recruiting Center.

                                                                                                            The field can be associated to Organizations, Locations, and Job Fields. However, since the General Profile is not contextualized, if the field is in the General Profile or in a list for the General Profile, the contextualization will not apply and the field will be displayed to all users.

                                                                                                              Putting LinkedIn Preview in Candidate Files

                                                                                                              To put the LinkedIn Preview feature in a candidate file, system administrators need to add a block called "LinkedIn".

                                                                                                              Once the LinkedIn Profile protected setting is activated by Oracle Support, the LinkedIn block becomes available for candidate files.

                                                                                                              The LinkedIn View link is in its own block, so it can be added to an existing section, or a new section can be added just for that block. The block layout is not configurable. If the block is in the file and users have the proper security level, they will also see the block in the Candidate Compare feature, but the location is not configurable. See Adding a Block in a User-defined File.

                                                                                                                Adding LinkedIn Preview in Candidates Lists

                                                                                                                To make the LinkedIn Preview feature available in candidate lists, a column called "LinkedIn" must be added to list contexts.

                                                                                                                System administrators can decide to have the LinkedIn Preview feature displayed in any candidate list context. When this column is added, a View link is available to access the LinkedIn Profile Preview. In order to do that, you must add the LinkedIn field to the context. See Adding a Column to a Context.

                                                                                                                  Requisitions

                                                                                                                    Configuring the Create Requisition Assistant

                                                                                                                    When Recruiting Center users create a requisition, the Create a Requisition assistant guides them through the creation. Fields displayed in the assistant depend on several elements configured by system administrators.

                                                                                                                    Screen 1: Requisition Type

                                                                                                                    Recruiting Center users may have the ability to select a requisition type when creating a requisition. The following requisition types may be displayed: Professional, Hourly, Campus, Executives, Contingent, Pipeline - General, and Pipeline - Executive.


                                                                                                                    Image showing the Create a Requisition assistant, with the Select a requisition type window.

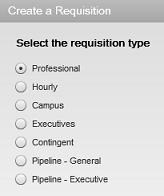
                                                                                                                    The “Select the requisition type” window is visible if there is more than one requisition type available to the user. If only one requisition type is available, it is selected by default and the “Select the requisition type” window is not displayed.

                                                                                                                    To allow users to select a requisition type, you must:

                                                                                                                    1. Activate requisition types under Configuration > [Recruiting] Administration > Requisition Types. Requisition types are displayed to users in the order you activated them.

                                                                                                                    2. Grant users permissions to give them access to different requisition types. The “Select the requisition type” window displays only the requisition types to which users have access according to these permissions.

                                                                                                                    User Type Permission Location
                                                                                                                    Allow access to professional requisitions Configuration > [SmartOrg] Administration > [Users] User Types > Recruiting > Requisitions
                                                                                                                    Allow access to hourly requisitions Configuration > [SmartOrg] Administration > [Users] User Types > Recruiting > Requisitions
                                                                                                                    Allow access to campus requisitions Configuration > [SmartOrg] Administration > [Users] User Types > Recruiting > Requisitions
                                                                                                                    Allow access to contingent requisitions Configuration > [SmartOrg] Administration > [Users] User Types > Recruiting > Requisitions
                                                                                                                    Allow access to executive requisitions Configuration > [SmartOrg] Administration > [Users] User Types > Recruiting > Requisitions
                                                                                                                    Allow access to pipeline - general requisitions Configuration > [SmartOrg] Administration > [Users] User Types > Recruiting > Requisitions
                                                                                                                    Allow access to pipeline - executive requisitions Configuration > [SmartOrg] Administration > [Users] User Types > Recruiting > Requisitions

                                                                                                                    If the Contingent Functionality Activation setting is set to No, the Contingent requisition type will not be displayed in the “Select the requisition type” window.

                                                                                                                    If the Candidate Pipeline Functionality Activation setting is set to No, the Pipeline - General and Pipeline - Executive requisition types will not be displayed in the “Select the requisition type” window.

                                                                                                                    Screen 2: Requisition File

                                                                                                                    The “Select a requisition file” window is visible only if more than one requisition file variation is selected in the user's configuration profile (Configuration > [SmartOrg] Administration > [Users] Configuration Profiles > Requisition File Creation).

                                                                                                                    Screen 3: Requisition Template, Hiring Manager, Department, Position, Job Role

                                                                                                                    There are a number of combinations of fields you can choose to display to Recruiting Center users after they select the requisition type. For example, these combinations may include Requisition Template only, meaning the user will select an existing requisition template, like Accounting, and then some of the fields will automatically be completed, based on how the requisition template was set up. Requisition Template and Hiring Manager so even more information can be automatically completed on the new requisition.

                                                                                                                    The Create a Requisition Assistant will present Recruiting Center users one or two fields based on the following preference sequence:

                                                                                                                    • Job Role* (if activated) else Position (if activated) else Requisition Template

                                                                                                                    • Department (if activated) else Hiring Manager (if activated) else nothing


                                                                                                                    Image showing the Create a Requisition assistant, with the Select Template and Hiring Manager fields.


                                                                                                                    Image showing the Create a Requisition assistant, with the Position and Department fields.

                                                                                                                    To enable these fields, you must either enable a setting or make the field available to Recruiting Center users.

                                                                                                                    Field in the Create Requisition Assistant Enabled by
                                                                                                                    Position Enable Position setting (Configuration > [Recruiting] Settings)

                                                                                                                    Position field (Configuration > [Recruiting] Administration > Fields > Requisition)

                                                                                                                    Department Enable Department setting (Configuration > [Recruiting] Settings)

                                                                                                                    Department Autofill Activation setting (Configuration > [Recruiting] Settings)

                                                                                                                    Department field (Configuration > [Recruiting] Administration > Fields > Requisition)

                                                                                                                    Hiring Manager Hiring Manager field (Configuration > [Recruiting] Administration > Fields > Requisition)

                                                                                                                    Note that the Hiring Manager field will be prefilled automatically if the user has selected a Default Hiring Manager " in his/her user preferences (Resources > My Setup > Preferences).

                                                                                                                    Job Role Job Role field (Configuration > [Recruiting] Administration > Fields > Requisition)
                                                                                                                    Requisition Template Nothing to configure

                                                                                                                    Depending on which settings and fields are enabled, fields in the Create a Requisition Assistant are displayed accordingly.

                                                                                                                    Fields Displayed in the Assistant "Enable Position" setting "Enable Department" setting "Hiring Manager" field "Job Role" field
                                                                                                                    Requisition Template No No No No
                                                                                                                    Requisition Template and Hiring Manager No No Yes No (or if template mandatory)
                                                                                                                    Requisition Template and Department No Yes Irrelevant No (or if template mandatory)
                                                                                                                    Position and Hiring Manager Yes No Yes No
                                                                                                                    Position and Department Yes Yes Irrelevant No
                                                                                                                    Job Role and Department Irrelevant Yes Irrelevant Yes
                                                                                                                    Job Role and Hiring Manager Irrelevant No Yes Yes
                                                                                                                    * Note that if Template is mandatory, Job Role is not present because it is not associated to a template. Position might indirectly become mandatory in the Create a Requisition Assistant.

                                                                                                                    The Hiring Manager field may be automatically filled if configured as such. See Default Hiring Manager Field.

                                                                                                                    Screen 4: Organization-Location-Job Field

                                                                                                                    The last set of fields presented in the Create a Requisition Assistant are Organization, Location, and Job Field. The Location and Job Field fields are always visible. The Organization field is visible only if the Structure block in the requisition file has the property “Display the Organization fields”.


                                                                                                                    Image showing the Create a Requisition assistant, with the Oraganization, Primary Location, and Job Field fields.

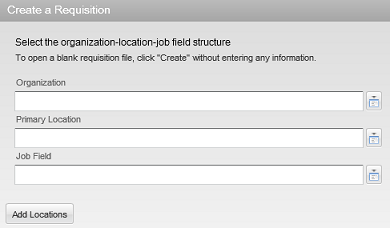
                                                                                                                    Note that Location or Organization can be defaulted to the department value and made read-only based on the following settings:

                                                                                                                    Setting Description Default Value Location
                                                                                                                    Link Requisition Location to Department Location This is a protected setting that can be activated by Oracle Support.

                                                                                                                    If the setting is set to Yes, if there is a department selected for the current requisition, then the location of the requisition will be changed for that of the department, and the Location field will be read-only.

                                                                                                                    If the setting is set to Yes, when a department is selected for the current requisition, if this department has NO location specified, then the requisition location will stay unchanged and will be editable.

                                                                                                                    No Configuration > [Recruiting] Settings
                                                                                                                    Link Requisition Organization to Department Organization This is a protected setting that can be activated by Oracle Support.

                                                                                                                    If the setting is set to Yes, if there is a department selected for the current requisition, then the organization of the requisition will be changed for the one of the department, and the Organization field will be read-only.

                                                                                                                    If the setting is set to Yes, when a department is selected for the current requisition, if this department has NO organization specified, then the requisition location will stay unchanged and will be editable.

                                                                                                                    No Configuration > [Recruiting] Settings

                                                                                                                    Other Information Regarding the Create a Requisition Assistant

                                                                                                                    In the Create a Requisition Assistant, the Default Hiring Manager field may be filled automatically if the user has selected a default hiring manager in his/her preferences (Resources > My Setup > Preferences).

                                                                                                                    Screens 3 and 4 may be deactivated if the Requisition File Automatic Filling setting is enabled in the user's configuration profile. However, it is recommended to not activate this setting because the content of the requisition form depends on the selections made in screens 1, 2, 3, and 4 of the assistant.

                                                                                                                    Setting Default Value Location
                                                                                                                    Requisition File Automatic Filling Yes Configuration > [SmartOrg] Administration > [Users] Configuration Profiles

                                                                                                                      Create Requisition Action - Required Permissions

                                                                                                                      To create requisitions in the Recruiting Center, users must have the following permissions.

                                                                                                                      User Type Permission Location
                                                                                                                      Create requisitions Configuration > [SmartOrg] Administration> User Types > Recruiting > Requisitions > General
                                                                                                                      View requisitions Configuration > [SmartOrg] Administration> User Types > Recruiting > Requisitions > General
                                                                                                                      Allow access to n requisitions

                                                                                                                      Note: For a requisition type currently active.

                                                                                                                      Configuration > [SmartOrg] Administration> User Types > Recruiting > Requisitions > Requisition Types

                                                                                                                        Configuring Requisition File Tabs

                                                                                                                        In the requisition file, tabs presented to users are governed by permissions and configurations.

                                                                                                                        Requisition File Tab Description Permission and Configuration Required
                                                                                                                        Requisition Contains all the details of the job based on what has been configured and activated by the system administrator as the requisition file in the Recruiting Administration module. Always displayed. For details on the Requisition tab content, see Content Displayed in the Requisition Tab.
                                                                                                                        Alerts Allows you to set the ACE candidate alert to be informed when the ideal candidate is found. Displayed only if the requisition file has a Prescreening section.

                                                                                                                        One of the following permissions must be granted:

                                                                                                                        View and manage ACE threshold and alert recipients (Configuration > [SmartOrg] Administration > [Users] User Types > Recruiting > Requisitions)

                                                                                                                        View and manage the "Request More Information" alert (Configuration > [SmartOrg] Administration > [Users] User Types > Recruiting > Requisitions)

                                                                                                                        Attachments Contains attachments for the requisition. The Attachments requisition field must be configured as available in Recruiting (Configuration > [Recruiting] Administration > Fields > Requisition).

                                                                                                                        Users authorized to view the Attachments field based on their field level security permission will be able to view the Attachments tab (Configuration > [SmartOrg] Administration > [Users] User Types > Recruiting > Requisitions > Security level for requisitions).

                                                                                                                        When the Attachments tab is displayed, users can view the attachments contained in the tab.

                                                                                                                        Approvals Displayed when an approval request has been generated. The tab appears for all users that can view the requisition. When no approval request has been generated, the Approvals tab is hidden. This tab provides an easy means to access and review the most recent approval information for the requisition. Authorized users can also modify or resend approval requests from this page. Displayed only if an active approval path has been defined. Once the first approval path is created, it will always appear for anyone who has access.
                                                                                                                        Posting and Sourcing Provides access to posting and sourcing features such as career section posting, job board distribution through eQuest, staffing agents, non-electronic media. Access Posting and Sourcing (Configuration > [SmartOrg] Administration > [Users] User Types > Recruiting > Sourcing)
                                                                                                                        Autopooling Criteria Contains autopooling criteria. View Autopooling criteria (Configuration > [SmartOrg] Administration > [Users] User Types > Recruiting > Requisitions)
                                                                                                                        History Contains a log of all actions performed on the requisition file, including the date and the user who performed the action. Always displayed.
                                                                                                                        Reports Allows users to define if a daily recruiting report will be sent to individuals regarding the status of the requisition's progress. View and manage the daily recruiting report (Configuration > [SmartOrg] Administration > [Users] User Types > Recruiting > Requisitions)

                                                                                                                          Configuring the Content Displayed in the Requisition Tab

                                                                                                                          The Requisition tab in the requisition file is always displayed. However, the content presented to users is configurable and fields or sections may be hidden or not configured for inclusion.

                                                                                                                          Content Configuration
                                                                                                                          The user's configuration profile is used to define which file is to be used for viewing or editing a requisition. For details, see Configuration Profile. View or Edit Requisition File (Configuration > [SmartOrg] Administration > Configuration Profiles)

                                                                                                                          Note that if a configuration profile was not defined for a user, Requisition File 1 is used.

                                                                                                                          Field configuration is used to define field behavior that is, if the field is available or not, if content is required for the field, the confidentiality level of the field, the OLF contextualization, the staffing type exception. For details, see Field. Configuration > [Recruiting] Administration> Fields > Requisition
                                                                                                                          File configuration is used to include sections, sub-sections, and fields according to the file linked and defined to be Requisition File 1, 2 or 3. For details, see Candidate and Requisition File Setup, User-defined File, and User-defined Form.
                                                                                                                          To minimize complexity in the system, the following fields must always be visible to the user, even if they are not editable. In other words, these fields will always be considered as "general" in view mode even if their security level states otherwise.
                                                                                                                          • Requisition ID

                                                                                                                          • Title

                                                                                                                          • Primary Location

                                                                                                                          • Organization

                                                                                                                          • Job Field

                                                                                                                          • Recruiter

                                                                                                                          • Hiring Manager

                                                                                                                          • Status

                                                                                                                          • Status Details

                                                                                                                          • Activated Languages

                                                                                                                          • Requisition Type

                                                                                                                          Configuration > [Recruiting] Administration> Requisition File Setup

                                                                                                                          Configuration > [Recruiting] Administration> User-defined Files

                                                                                                                          Configuration > [Recruiting] Administration> User-defined Forms

                                                                                                                          Configuration > [Recruiting] Administration> Fields

                                                                                                                          Fields included in the file are displayed based on the field security level permission. For details, see Field Security Level. Security level for requisitions (in view mode) (Configuration > [SmartOrg] Administration> User Types > Recruiting > Requisitions)
                                                                                                                          Sections of information are displayed based on permissions. Access Prescreening Information (Configuration > [SmartOrg] Administration> User Types > Recruiting > Requisitions)

                                                                                                                          View Compensation section in requisitions (Configuration > [SmartOrg] Administration> User Types > Recruiting > Requisitions).

                                                                                                                            Configuring Requisition/Staffing Type

                                                                                                                            The requisition/staffing type configuration consists of the following steps:

                                                                                                                            1. Activating requisition types.

                                                                                                                            2. Adding the Requisition Type column in the requisition list format context. This is a best practice for customers using multiple requisition types.

                                                                                                                            3. Granting one or several of the following user type permissions to that Recruiting Center users have access to different requisition types and indirectly, different pools of candidates.

                                                                                                                            User Type Permission Location
                                                                                                                            Allow access to professional requisitions Configuration > [SmartOrg] Administration> User Types > Recruiting > Requisitions
                                                                                                                            Allow access to hourly requisitions Configuration > [SmartOrg] Administration> User Types > Recruiting > Requisitions
                                                                                                                            Allow access to campus requisitions Configuration > [SmartOrg] Administration> User Types > Recruiting > Requisitions
                                                                                                                            Allow access to contingent requisitions Configuration > [SmartOrg] Administration> User Types > Recruiting > Requisitions
                                                                                                                            Allow access to executive requisitions Configuration > [SmartOrg] Administration> User Types > Recruiting > Requisitions

                                                                                                                              Activating a Requisition Type

                                                                                                                              Configuration > [Recruiting] Administration > Requisition Types

                                                                                                                              1. Select a requisition type in the Available Requisition Types list.

                                                                                                                              2. Click Add.

                                                                                                                              3. Use the up and down arrows to order the requisition types in the list.

                                                                                                                                The order you select here will be reflected in the Recruiting Center when users select a requisition type in the requisition creation tool.
                                                                                                                              4. Click Done.

                                                                                                                              The requisition type is available to Recruiting Center users when creating a requisition.

                                                                                                                                Adding a Column in a List Format

                                                                                                                                Configuration > [Recruiting] Administration > List Formats

                                                                                                                                1. Click the Candidate or Requisition tab.

                                                                                                                                2. Select a variation in the Show list.

                                                                                                                                3. Click the name of a context.

                                                                                                                                4. In the Formats for this Context tab, click a list format.

                                                                                                                                5. Select the check box next to a column.

                                                                                                                                6. Click Done.

                                                                                                                                  Reopening Requisitions

                                                                                                                                  The Reopen Requisition action allows Recruiting Center users to reopen a requisition previously filled or canceled, with the option to cancel the current hiring or to add new openings.

                                                                                                                                  The Reopen Requisition action provides two options:

                                                                                                                                  • Add Openings: Users can enter a specific number of additional openings or select Unlimited to have an unlimited number of openings.

                                                                                                                                  • Cancel the Hiring of Candidates: This option will be displayed only if there is at least one hired candidate for the requisition.

                                                                                                                                    Configuring the Reopening Requisition Action

                                                                                                                                    The configuration of the Reopen Requisition action consists in configuring specific settings and permissions.

                                                                                                                                    The Reopen Requisition action is available to users if:

                                                                                                                                    • The Ability to Reopen Requisitions setting is set to Yes.

                                                                                                                                    • The Reopen a filled or cancelled requisition permission was granted to users.

                                                                                                                                    • The requisition status is Filled or Canceled.

                                                                                                                                    When a user is doing the Reopen Requisition action from a canceled requisition, if the Restart Approval Process After "Cancel" Step setting is set to Yes, the status of the requisition will be changed to Draft and the Request Approval action will be triggered. Note that this action does not apply to requisitions that were only draft then cancelled.

                                                                                                                                    When a user is doing the Reopen Requisition action from a filled requisition, if the Restart Approval Process After "Fill" Step setting is set to yes, the status of the requisition will be changed to Draft and the Request Approval action will be triggered.

                                                                                                                                    Setting Description Default Value Location
                                                                                                                                    Ability to Reopen Requisitions Allow the reopening of filled and canceled requisitions. No Configuration > [Recruiting] Administration > Settings
                                                                                                                                    Restart Approval Process After "Cancel" Step Restart the approval process when reopening a requisition after it has been canceled No Configuration > [Recruiting] Administration > Settings
                                                                                                                                    Restart Approval Process After "Fill" Step Restart the approval process when reopening a requisition after it has been filled No Configuration > [Recruiting] Administration > Settings

                                                                                                                                    User Type Permission Location
                                                                                                                                    Reopen a filled or cancelled requisition Configuration > [SmartOrg] Administration > [Users] User Types > Recruiting > Requisitions

                                                                                                                                      Automatically Rejecting Candidate Submissions When Requisitions are Filled and/or Canceled

                                                                                                                                      The auto-rejection of candidate submissions can be set for canceled requisitions and filled requisitions.

                                                                                                                                      System administrators determine when candidate submissions will be automatically rejected:
                                                                                                                                      • When a requisition has been filled.

                                                                                                                                      • When a requisition has been canceled.

                                                                                                                                      • When a requisition has been filled or canceled.

                                                                                                                                      • In neither case.

                                                                                                                                      Recruiters can choose to override the auto-rejection behavior set by the system administrator. In the requisition file Candidate Selection Workflow section, recruiters can select these options:

                                                                                                                                      • Automatically reject all submissions when the requisition is filled

                                                                                                                                      • Automatically reject all submissions when the requisition is canceled

                                                                                                                                      When viewing the History tab of candidate submissions, recruiters can determine the cause of the auto-rejection. The event "Status changed to Rejected" is displayed for both types of rejections, but the details will indicate if the rejection was due to the requisition being canceled or filled.

                                                                                                                                      Configuration

                                                                                                                                      The setting "Automatically Reject Candidates when Closing a Requisition" allows system administrators to enable the auto-rejection independently for canceled requisitions and filled requisitions.

                                                                                                                                      Setting Description Default Value Location
                                                                                                                                      Automatically Reject Candidates when Closing a Requisition When a requisition is filled and/or canceled, all candidate submissions are automatically rejected.

                                                                                                                                      Possible values are:

                                                                                                                                      • No

                                                                                                                                      • Filled requisitions only

                                                                                                                                      • Canceled requisitions only

                                                                                                                                      • Filled and canceled requisitions

                                                                                                                                      No Configuration > Recruiting Settings

                                                                                                                                        Offers

                                                                                                                                          Configuring Offer Fields

                                                                                                                                          The configuration of offer fields is done in the Offer Fields feature in the Recruiting Administration menu.

                                                                                                                                          When editing or creating an offer field, system administrators specify the following:

                                                                                                                                          • The availability of the offer field in the Recruiting Center which is done by selecting the Taleo Recruiting option.

                                                                                                                                          • The content required for the offer field, that is whether the content is not required or required for saving.

                                                                                                                                          • The security level of the offer field, that is General, Restricted or Confidential. See Field Security Level.

                                                                                                                                          • The Organization-Location-Job Field structure associated to the offer field, if any. See Field Contextualization.

                                                                                                                                          • The exceptions based on staffing types being used. See Field Staffing Type Exception.

                                                                                                                                          For details on how to create and edit offer standard fields, see Modifying Standard Fields.

                                                                                                                                          It is possible to filter fields in the Offer Fields list. The Show Fields filter contains the following filtering criteria:

                                                                                                                                          • All Offer Types

                                                                                                                                          • Offer Terms

                                                                                                                                          • Competitive Offer

                                                                                                                                          • Expectations

                                                                                                                                          • Requisition

                                                                                                                                          When configuring requisition fields in the Recruiting Administration menu, all offer user-defined fields that are part of "offer terms" appear in the listing. Offer user-defined fields are displayed because they are available for use in the requisition context. The configuration of the fields is intermixed. That is, if an offer field is configured in the requisition area, that configuration will impact that field and how it is configured in the offer area as well.

                                                                                                                                          This table provides explanations on certain requisition offer fields.

                                                                                                                                          Field Mapped to Notes
                                                                                                                                          Currency - Compensation Section Mapped to the Currency field in the requisition file Compensation section. Also mapped to the Currency field in the offer grid (job submission Offers tab). This field is offer related.
                                                                                                                                          Currency Mapped to the currency field in the requisition file Contingent section. This field is not offer related.
                                                                                                                                          Currency - Bonus Section Mapped to the Currency - Bonus Section field in the requisition file Budget section. This field is not offer related.
                                                                                                                                          Currency - Budget Section Mapped to the Currency - Budget Section field in the requisition file Budget section. This field is not offer related.
                                                                                                                                          Maximum Salary Mapped to the Annualized Salary field in the offer grid (job submission Offers tab).
                                                                                                                                          Minimum Salary Mapped to the Salary (Pay Basis) field in the offer grid (job submission Offers tab). The Salary (Pay Basis) field is updated by two actions (besides manual edits): 1) When copying the minimum requisition pay to this field within the offer grid. 2) When the user calculates compensation by pay basis.

                                                                                                                                          The following offer fields are available in the offer form. They have calculation relationships and it is recommended that the offer form layout be configured to group them together:

                                                                                                                                          • Annualized Salary

                                                                                                                                          • Salary (Pay Basis)

                                                                                                                                          • Pay Basis

                                                                                                                                          When configuring requisition offer fields, both standard and user-defined fields, a distinct configuration of the Content Required attribute is done for the requisition and the offer context. All other contextualization of these fields (that is Security Level) is shared between requisition and offer field configurations.

                                                                                                                                            Configuring the Offer Form

                                                                                                                                            The configuration of the offer form is done in the Offer Field Layout feature in the Recruiting Administration menu.

                                                                                                                                            System administrators specify in which section of the offer grid the field will be displayed (Top Section, General Terms, Bonuses, Details, Other Terms) and the row where it will appear.

                                                                                                                                            The name of the offer form sections can be customized to better align with a company's terminology. To customize the name of offer form sections, a Service Request to Oracle Support to modify TextTool resources is required. Below are the resource IDs of the section names:

                                                                                                                                            • Top Section: 4661357

                                                                                                                                            • General Terms: 4661351

                                                                                                                                            • Bonuses: 4661345

                                                                                                                                            • Details: 4661348

                                                                                                                                            • Other Terms: 4661354

                                                                                                                                              Adding a Field to the Offer Form

                                                                                                                                              Offer fields must first be created. See Creating a User-defined Field.

                                                                                                                                              Configuration > [Recruiting] Administration > [Fields] Offer Field Layout
                                                                                                                                              1. Click Add...

                                                                                                                                              2. Select a field to include in the form.

                                                                                                                                              3. Click Add.

                                                                                                                                              4. Click Done.

                                                                                                                                              The field appears in the Field Layout - Offer page.

                                                                                                                                                Positioning Fields in the Offer Form

                                                                                                                                                Both standard and custom offer fields can be positioned in the offer form.

                                                                                                                                                For custom fields to appear in the Field Layout - Offer page, you must first create them. See Creating a User-defined Field.

                                                                                                                                                Configuration > [Recruiting] Administration > [Fields] Offer Field Layout
                                                                                                                                                1. In the Field Layout - Offer page, for each field select a value under Category to specify in which section of the form the field will be placed.

                                                                                                                                                2. Select a number under Line to specify on which line in the section the field will be placed.

                                                                                                                                                3. Click Apply.

                                                                                                                                                  Adding the RSOffer Step in the Candidate Selection Workflow

                                                                                                                                                  The RSOffer step is a step that can be included in a candidate selection workflow to allow users to use the offer management module.

                                                                                                                                                  The RSOffer step is different than the regular Offer step. It must be included in the candidate selection workflow to trigger the Offer Management dynamic action buttons in the Recruiting Center.

                                                                                                                                                  The RSOffer step must be placed before the Hire step. The RSOffer step cannot be customized or edited (except for qualifier groups and qualifiers that can be added to specific statuses).

                                                                                                                                                  The RSOffer step has the following statuses:

                                                                                                                                                  RSOffer Step Available Status Description
                                                                                                                                                  Offer to be made Initial status of the Offer step.
                                                                                                                                                  Draft Offer terms have been started and saved, but not approved.
                                                                                                                                                  Cancelled A draft offer has been created and then cancelled prior to routing for approval or extending to the candidate.
                                                                                                                                                  Approval in progress Offer has been routed for approval.
                                                                                                                                                  Approval rejected Offer has been rejected.
                                                                                                                                                  Approved Offer has been approved.
                                                                                                                                                  Extended Offer has been extended to the candidate.
                                                                                                                                                  Rescinded After the offer has been extended or the candidate has accepted the offer, the user (company) rescinds/revokes the offer.
                                                                                                                                                  In negotiation Offer was extended to the candidate. The user marked the candidate as wanting to negotiate the offer. If a new offer should be created, the user will need to rescind the offer in order to create a new offer. If a new offer is not required, then either recapture the candidate response (accept or refused) or status them as Rejected or Has Declined.
                                                                                                                                                  Refused Offer was extended to the candidate. The user marked the candidate as refusing the offer. A new offer can be created at this point.
                                                                                                                                                  Accepted Offer was accepted by the candidate.
                                                                                                                                                  Reneged After the candidate has accepted the offer, the candidate refuses the offer (goes back on his or her word).
                                                                                                                                                  Rejected After the offer has been rescinded to a candidate, the user should status the candidate as Rejected in the Offer step. This will allow another offer to be created and extended.
                                                                                                                                                  Has declined After the offer has been refused or reneged by the candidate, the user should status the candidate as Has Declined in the Offer step. This will allow another offer to be created and extended
                                                                                                                                                    Adding a Step to a Candidate Selection Workflow

                                                                                                                                                    The step must be activated in order to add it to the candidate selection workflow.

                                                                                                                                                    There is no limit on the number of steps that can be used in a candidate selection workflow.

                                                                                                                                                    Configuration > [Recruiting] Administration > Candidate Selection Workflow
                                                                                                                                                    1. Click the Workflows tab.

                                                                                                                                                    2. Click a candidate selection workflow.

                                                                                                                                                    3. Under the Steps Usage tab, click Add...

                                                                                                                                                    4. Select a step.

                                                                                                                                                    5. Click Add.

                                                                                                                                                    6. Click Done.

                                                                                                                                                      Configuring Offer Letters

                                                                                                                                                      Offer letters are created via the Message Templates feature in the Recruiting Administration menu.

                                                                                                                                                      There are a number of message templates and paragraphs related to offers. You may want to examine these to see what your organization will use and see if you want to create additional templates and paragraphs.

                                                                                                                                                        Configuring the Offer Channel

                                                                                                                                                        If your organization is using the Offer Management module and wants the Offer channel activated on the Recruiting home page, you will need to contact Oracle Support.

                                                                                                                                                          Adding Channels and Links to a Center Stage

                                                                                                                                                          The center stage must be in the inactive or draft status.

                                                                                                                                                          The Center Stage Configuration user type permission is required.

                                                                                                                                                          Configuration > [Recruiting] Administration > Center Stage
                                                                                                                                                          1. Click on the name of a center stage.

                                                                                                                                                          2. Click Edit next to Channels and Links.

                                                                                                                                                          3. Click Add next to Channels and Links.

                                                                                                                                                          4. Select channels and links.

                                                                                                                                                          5. Click Select.

                                                                                                                                                          6. Click Save.

                                                                                                                                                          When a user associated to that center stage will access the Recruiting Center, the channels and links will appear.

                                                                                                                                                          Ordering channels and links as well as columns in the center stage.

                                                                                                                                                            Offer - Permissions and Settings

                                                                                                                                                            The following permissions and settings can be used to configure offers.

                                                                                                                                                            User Type Permission Description Location
                                                                                                                                                            Offer-related permissions are available in the Recruiting - Offers functional domain. Configuration > [SmartOrg] Administration > [Users] User Type > Recruiting > Offers
                                                                                                                                                            Create Offers The Create offers permission gives users the ability to create offers.

                                                                                                                                                            The Create Offer action is available to users who have the following permissions:

                                                                                                                                                            • Create offers

                                                                                                                                                            • View and manage offers

                                                                                                                                                            • Change submission status

                                                                                                                                                            • Mark candidates has having reach the offer process

                                                                                                                                                            Configuration > [SmartOrg] Administration > [Users] User Type > Recruiting > Offers
                                                                                                                                                            View and manage offers The View and manage offers permission gives a user the ability to edit an existing offer. Configuration > [SmartOrg] Administration > [Users] User Type > Recruiting > Offers
                                                                                                                                                            View offers The View offers permission allows users to see offers but not to create or edit them. Configuration > [SmartOrg] Administration > [Users] User Type > Recruiting > Offers

                                                                                                                                                            Setting Location
                                                                                                                                                            Many offer settings are available. To easily access these settings, it is possible to refine the list by using the Offer category filter. Configuration > [Recruiting] Settings

                                                                                                                                                              Offers and Candidate Selection Workflows

                                                                                                                                                              Candidate selection workflows may be configured to contain an Offer step or an RSOffer step.

                                                                                                                                                              Candidate Selection Workflow and Offer step

                                                                                                                                                              Using the Offer step is a simplified way to track offer activity in a candidate hiring process without enabling the entire Offer Management module functionality. Placing this step in a workflow will not enable the use of the Offers tab and Offer Approvals tab. A candidate selection workflow containing an Offer step allows users to move candidates from one step to another using standard actions (Change Step/Status, Move, Revert).

                                                                                                                                                              When adding the Offer step to a candidate selection workflow, the following actions are available to users via the More Actions list.

                                                                                                                                                              • Make an offer.

                                                                                                                                                              • Reject candidates.

                                                                                                                                                              • Candidate has declined.

                                                                                                                                                              Candidate Selection Workflow and RSOffer step

                                                                                                                                                              The RSOffer step is a special candidate selection workflow step created for the Offer Management module. The Offer Management module provides the tools for the creation of offers, offer approval, offer extension to the candidate, and capture of the candidate response. Users are also be able to capture competitive offer information as well as candidate current and future expectations. 

                                                                                                                                                              With this type of workflow, instead of moving candidates using standard actions (Change Step/Status, Move, Revert), specific offer-related actions are presented in the More Actions list as they become an appropriate next activity in the Offer process.

                                                                                                                                                              System administrators are responsible for adding the RSOffer step in the appropriate candidate selection workflows. The RSOffer step must be placed before the Hire step. The RSOffer step cannot be customized or edited (except for qualifier groups and qualifiers that can be added to specific statuses).

                                                                                                                                                              When adding the RSOffer step to a candidate selection workflow, authorized users are able to:

                                                                                                                                                              • Create offers.

                                                                                                                                                              • Extend offers verbally, in writing, and electronically.

                                                                                                                                                              • Send offers.

                                                                                                                                                              • Capture a candidate response.

                                                                                                                                                              • Capture a candidate expectations.

                                                                                                                                                              • Capture a candidate current job terms.

                                                                                                                                                              • Capture competitive offer information.

                                                                                                                                                              • Approve offers.

                                                                                                                                                              • etc.

                                                                                                                                                                Extending More Offers than Positions Available

                                                                                                                                                                Recruiters may have the ability to create and extend multiple offers for a single position.

                                                                                                                                                                Your organization may choose to activate the Extend More Offers than Positions feature globally, for all requisitions. This is done by enabling the recruiting setting "Extend More Offers than Positions". When this setting is not enabled, recruiters can only extend one offer per position.

                                                                                                                                                                You may also activate this feature at the requisition level, by including it as a field in requisitions. This is done by activating the requisition field called "Extend more offers than positions available". You then need to add the field to a requisition form and then include the form in a requisition file for use in the Recruiting Center. Once activated, recruiters will see the option "Extend more offers than positions available" is available in requisitions.

                                                                                                                                                                  Extending an Offer Electronically (E-Offer)

                                                                                                                                                                  Recruiting Center users can extend offers electronically so that candidates can view and respond to these offers on line.

                                                                                                                                                                  Two E-Offer options are available:

                                                                                                                                                                    Configuring the Standard Electronic Offer

                                                                                                                                                                    The configuration of the standard electronic offer feature consists of the following steps.

                                                                                                                                                                    1. Enabling the Electronic Offers setting.

                                                                                                                                                                    2. Granting the Extend Offers Electronically permission.

                                                                                                                                                                    3. Configuring Electronic Offer message templates.

                                                                                                                                                                    For details on how to configure the advanced electronic offers using Onboarding (Transitions), refer to the Onboarding (Transitions) Configuration Guide.

                                                                                                                                                                      Enabling the Electronic Offers Setting

                                                                                                                                                                      Configuration > [Recruiting] Settings >
                                                                                                                                                                      1. Refine the settings list using the Offer category.

                                                                                                                                                                      2. Click the Electronic Offers setting.

                                                                                                                                                                      3. Click Edit.

                                                                                                                                                                      4. Select Standard Electronic Offer.

                                                                                                                                                                      5. Click Save.

                                                                                                                                                                      Recruiters can extend offers electronically if they have the required user type permission, and candidates will access the career section Offers tab to accept or refuse the offer.

                                                                                                                                                                        Granting the Extend Offers Electronically Permission

                                                                                                                                                                        Configuration > [SmartOrg] Administration > [Users] User Types
                                                                                                                                                                        1. Select a user type.

                                                                                                                                                                        2. Click Recruiting.

                                                                                                                                                                        3. Click Edit next to Offers.

                                                                                                                                                                        4. Select Extend Offers Electronically.

                                                                                                                                                                        5. Click Save.

                                                                                                                                                                        Recruiters can select the E-Offer option when extending offers to candidates, and candidates will access the career section Offers tab to accept or refuse the offer.

                                                                                                                                                                          Configuring Electronic Offer Message Templates

                                                                                                                                                                          Configure message templates created for electronic offers.

                                                                                                                                                                          Message Template Description Location
                                                                                                                                                                          EOffer Candidate Invitation Standard notification for candidates when they have been extended an electronic offer.

                                                                                                                                                                          This message template can be modified. When configuring the message template, you can enter any email address of the candidate in the TO line. You can put more than one recipient in the TO line, but only the candidate will be able to access the career section.

                                                                                                                                                                          A new token is available to redirect the candidate to the career section Offers tab: {CareerSection.OfferViewURL}

                                                                                                                                                                          Configuration > [Recruiting] Message Templates
                                                                                                                                                                          EOffer Response Notification Standard notification for recruiters when candidates acted on electronic offers (accept / refuse). The message gets sent as soon as the candidate responds.

                                                                                                                                                                          By default, the candidate response notification only goes to the recruiter assigned to the requisition.

                                                                                                                                                                          This message template can be modified.

                                                                                                                                                                          A new token is available for the subject line to display the offer status: {OfferHeader.StatusDescription}.

                                                                                                                                                                          A new token is also available to display the candidate response in the message body: {Offer.StatusDescription}.

                                                                                                                                                                          Configuration > [Recruiting] Message Templates
                                                                                                                                                                          Note: When changing an existing company logo, the logo is updated everywhere, including past offer letters. In an offer letter, the logo is saved as a link to the logo. As a result, changing the logo will also update the logo in past offer letters. A workaround would be to upload a new logo using another Custom Correspondence Logo setting instead of changing an existing logo setting.

                                                                                                                                                                            Standard Electronic Offer using Recruiting

                                                                                                                                                                            Customers can use the Standard Electronic Offer feature to extend offers electronically to candidates. Candidates will then access the career section to respond to the offer on line.

                                                                                                                                                                            To send offers electronically, the Electronic Offers setting must be set to the proper value, users must be granted the permission to extend offers electronically, and the candidate selection workflow must contain the RSOffer step.

                                                                                                                                                                            The E-Offer process starts as soon as an offer is ready to be extended. Recruiters select the Extend Offer action in candidate submissions with the status Approved (if an approval cycle is needed) or Draft (if an approval cycle is not needed or is configured to be skipped). In the Extend Offer window, the Extend in writing option is selected by default. In the Send Offer Letter window, the E-Offer option is selected by default. When an offer is extended electronically, a tracking event is created in the candidate file History tab indicating that an electronic offer was extended.

                                                                                                                                                                            Candidates receive an email notification inviting them to access a secure career section portal to view the offer on line. Candidates click the URL link in their email notification, they are directed to the career section portal where they need to log in, they are then directly brought to the Offers tab where they can view the offer details and offer letter attachments, if any. They can also print the offer and the offer letter attachments. Candidates then decide to accept or refuse the offer and they must e-sign the offer by providing their full name and unique identifier. The electronic signature is mandatory but it is not validated and therefore any data can be entered.

                                                                                                                                                                            Note: The Full Name and Unique Identifier labels can be changed by customers.

                                                                                                                                                                            When candidates accept an offer, the time and date of their e-signature is displayed at the bottom of the accepted offer page, along with the full name of the candidate who signed it. The unique identifier or specific other data which candidates entered is not displayed on the page.

                                                                                                                                                                            When candidates accept an offer, the offer remains visible in the career section for future reference. When candidates refuse an offer, the offer disappears from the career section. When candidates have multiple concurrent offers, for example a candidate could be hired for a summer job and a long-term permanent position, the career section Offers tab lists all the offers, that is offers that still need a response and offers that were accepted. If an offer has an expiration date and that date is reached and the candidate has not yet responded to the offer on line, the offer disappears from the career section. If the candidate has accepted the offer before the expiration date, then the accepted offer remains visible in the career section for future reference. If the candidate refuses the offer before the expiration date, then the offer disappears from the career section.

                                                                                                                                                                            As soon as candidates respond to the offer, recruiters receive an email notification. This notification is a configurable message template which contains the candidate's response. This notification can be modified to provide any other information and can also be sent to additional recipients like the Hiring Manager. Depending on the candidate's response, the candidate status is automatically changed to Offer - Accepted or Offer - Refused, and recruiters can then move the candidate to the next step in the candidate selection workflow.

                                                                                                                                                                            Note: It is not possible to build auto-progression rules that would bring candidates forward in the candidate selection workflow beyond the next step. The email notification sent to recruiters could instruct them to do so manually for each candidate.

                                                                                                                                                                            Recruiters can capture the offer response on behalf of candidates after they have extended the offer. For example, if a candidate contacts the recruiter to give his/her response before responding to the offer on line, then the recruiter can capture the response. This can give recruiters the opportunity to capture decline motives or to put the offer into the In Negotiation status. If the response entered by the recruiter is Accepted, then the offer will continue to be displayed in the career section for the candidate to view, just like any accepted electronic offers. The offer will show as being accepted but it will not show the full name of the candidate at the bottom of the offer letter page because the candidate did not enter his/her own electronic signature. If the response entered by the recruiter is Refused, then the offer will disappear from the career section just like when candidates refuse an offer themselves.

                                                                                                                                                                            It is also possible for recruiters to send an offer again once the offer has been extended. For example, an offer was extended in writing via email or printed letter and the recruiter wants to also send it by E-Offer to make it visible on line in the career section. Similarly, if an offer has already been extended and sent as an E-Offer, recruiters can still send it again via email or printed letter.

                                                                                                                                                                            Note:

                                                                                                                                                                            In standard electronic offers, users can adjust the offer and then extend/send it again. The mere act of adjusting the offer will require that the user rescind the already-accepted offer and create a new offer so that it can be extended again.

                                                                                                                                                                              Advanced Electronic Offer using Onboarding (Transitions)

                                                                                                                                                                              Customers who have more complex electronic offer requirements can configure advanced electronic offer workflows in Onboarding (Transitions) for use in Recruiting.

                                                                                                                                                                              Some customers might require additional eSignatures, notifications extended to include additional people, calls to partner services, different tasks for executives. Clients like those who have more complex requirements might consider using the "Onboarding (Transitions) version" of electronic offers because offer workflows in this version can be configured to accommodate a wide variety of needs.

                                                                                                                                                                              To send offers electronically using Onboarding (Transitions), the Electronic Offers setting must be set to the proper value, users must be granted the permission to extend offers electronically, and the Candidate Selection Workflow (CSW) must contain the RSOffer step.

                                                                                                                                                                              The E-Offer process starts as soon as an offer is ready to be extended. Recreuiters select the Extend Offer action in candidate submissions with the status Approved (if an approval cycle is needed) or Draft (if an approval cycle is not needed or is configured to be skipped). In the Extend Offer window, the Extend in writing option is selected by default. In the Send Offer Letter window, the E-Offer option is selected by default. When an offer is extended electronically, a tracking event is created in the candidate file History tab indicating that an electronic offer was extended.

                                                                                                                                                                              Candidates may receive an email notification (if the Onboarding (Transitions) process was configured like that) inviting them to access a secure career section portal to view the offer on line. Candidates click the URL link in their email notification, they are directed to the career section portal where they need to log in, they are then directly brought to the Tasks tab where they can view the offer details and offer letter attachments, if any. They can also print the offer and the offer letter attachments. Candidates then decide to accept or refuse the offer and they must complete any mandatory fields which may include an electronic signature.

                                                                                                                                                                              As soon as candidates respond to the offer, the system task that must be configured into the process will then change the candidate status to Offer - Accepted or Offer – Refused, depending on the candidate's response. This adds a line to the History of the candidate's submission in the Recruiting Center, capturing the candidate's response. Then, recruiters or any other assignees can receive a configurable email notification (if the process is configured like that), which can contain the candidate's response, any e-signature information if desired, and any other data fields. The recruiters can then move the candidate to the next step in the CSW, while the rest of the Onboarding (Transitions) process can also continue automatically in parallel.

                                                                                                                                                                              It is also possible for recruiters to send an offer again once the offer has been extended. For example, an offer was extended in writing via email or printed letter and the recruiter wants to also send it by E-Offer to make it visible on line in the career section. Similarly, if an offer has already been extended and sent as an E-Offer, recruiters can still send it again via email or printed letter.

                                                                                                                                                                              As before, recruiters still retain the ability to capture the offer response on behalf of candidates after they have extended the E-offer, and before the candidates respond to it online themselves. This changes the status in the CSW to Offer - Accepted or Offer - Refused, depending on the candidate's captured response.Capturing this response in the Recruiting Center has no immediate effect on the offer letter that is still displayed to the candidate in the Career Section. However, the candidate's electronic response will not change the CSW status because the offer response was already inputted by the recruiter, and the offer is no longer in the Extended status. The offer letter will continue to be displayed in the Tasks tab as long as the process is running.

                                                                                                                                                                              Just as recruiters can track any process, they can also track the progression of the E-Offer process in the Onboarding (Transitions) Center. They can also view their current tasks regarding an E-Offer process in the Onboarding (Transitions) Center. Recruiters might receive an email notification (if such notification is configured) as soon as candidates respond to an advanced E-Offer.

                                                                                                                                                                                Comparison of the Standard Electronic Offer and the Advanced Electronic Offer

                                                                                                                                                                                Standard Electronic Offer Advanced Electronic Offer
                                                                                                                                                                                Where do offers appear in the career section? In the Offers tab. Several offers can appear in the tab. In the Tasks tab. Several Onboarding (Transitions) processes can appear in the tab.
                                                                                                                                                                                When is the candidate invited?

                                                                                                                                                                                When the offer is sent by the Recruiting Center user, either at the moment the offer gets extended or when an extended offer is sent again.

                                                                                                                                                                                Whenever, as configured within the E-Offer process.

                                                                                                                                                                                Is the e-signature mandatory? Yes. It is configurable.
                                                                                                                                                                                Is it possible to capture several e-signatures?

                                                                                                                                                                                Two e-signatures on a single form for candidate.

                                                                                                                                                                                Unlimited different e-signatures can be configured to appear on any number of forms assigned to any participants.

                                                                                                                                                                                Is it possible to validate the e-signature?

                                                                                                                                                                                No, the two e-signatures are not validated but they are mandatory.

                                                                                                                                                                                Yes, by specifying the electronic signature method (first name, last name, birth date, SSN last 4 digits, etc.).

                                                                                                                                                                                Is it possible to send different notifications or tasks per OLF?

                                                                                                                                                                                No

                                                                                                                                                                                Yes, by configuring different steps, targeted per OLF or per any field, within the E-Offer process. Only one Onboarding (Transitions) process of type "E-Offer" can be created (not several based on OLF).

                                                                                                                                                                                Is it possible to send reminders? No

                                                                                                                                                                                Yes, for the candidate E-Offer form and for any task as it approaches or passes its due date.

                                                                                                                                                                                When is the status updated in the candidate selection workflow?

                                                                                                                                                                                Immediately when the electronic offer is submitted by the candidate on the career section.

                                                                                                                                                                                Whenever desired within the E-Offer process, at the point when the system task gets triggered for this purpose.

                                                                                                                                                                                Can recruiters capture the offer response manually?

                                                                                                                                                                                Yes, the candidate selection workflow gets updated but the candidate can no longer e-sign the offer in the career section. The candidate will still see the accepted offers in the career section.

                                                                                                                                                                                Yes, the candidate selection workflow gets updated and the process can continue. The candidate can still e-sign the offer. However, if the candidate's response is different, the response that was first captured by the recruiter will be considered.

                                                                                                                                                                                Is it possible to configure auto-progression of the candidate selection workflow, after receiving candidate response to an E-Offer?

                                                                                                                                                                                No No

                                                                                                                                                                                Do offers remain available in the career section when candidates refuse it?

                                                                                                                                                                                No

                                                                                                                                                                                Yes, all submitted forms including the E-Offer form remain visible in read-only for the duration of the E-Offer process, until the candidate/new hire process reaches 100% completion (or gets cancelled or suspended).

                                                                                                                                                                                Do offers remain available in the career section after candidates accept them?

                                                                                                                                                                                Yes, the offer remains visible until the candidate/offer information gets archived or purged.

                                                                                                                                                                                Yes, all submitted forms including the E-Offer form remain visible in read-only for the duration of the E-Offer process, until the candidate/new hire process reaches 100% completion (or gets cancelled or suspended).

                                                                                                                                                                                If the candidate accepts the E-Offer while the start date is still tentative, will the system automatically create a task telling the recruiter to finalize it? No No
                                                                                                                                                                                When the candidate accepts the E-Offer, will the system automatically create a task telling the recruiter to confirm the employee's presence on their start date? No No
                                                                                                                                                                                Can recruiters rescind an electronic offer? Yes, an electronic offer can be rescinded just like any other offer in the Extended status. Yes, an electronic offer can be rescinded just like any other offer in the Extended status.

                                                                                                                                                                                What happens when recruiters cancel a requisition containing an electronic offer?

                                                                                                                                                                                The requisition cannot be cancelled until any extended offers have first been rescinded.

                                                                                                                                                                                The requisition cannot be cancelled until any extended offers have first been rescinded.

                                                                                                                                                                                What happens when the expiration date is reached?

                                                                                                                                                                                Candidates can no longer respond to the electronic offer, but recruiters can still respond for them.

                                                                                                                                                                                No effect, the process can continue.

                                                                                                                                                                                What happens when recruiters mark an electronic offer as being accepted before the candidates give their own response on the career section?

                                                                                                                                                                                The candidate selection workflow gets updated (status is Accepted) but the candidate can no longer e-sign the offer in the career section. No e-signature will be visible at the bottom of the accepted offer on the career section because the candidate did not e-sign it. The candidate will still see the accepted offer in the career section.

                                                                                                                                                                                No effect; the process can continue. The candidate selection workflow gets updated (status is Accepted) and the process can continue. The candidate can still e-sign the offer. However, if the candidate's response is different, the response that was first captured by the recruiter will be considered.

                                                                                                                                                                                What happens when recruiters mark an electronic offer as being refused before the candidates give their own response on the career section?

                                                                                                                                                                                The candidate selection workflow gets updated (status is Refused) and the electronic offer disappears from the career section.

                                                                                                                                                                                No effect; the process can continue and the candidate selection workflow gets updated by the recruiter to status Refused. The candidate can still e-sign the offer. However, if the candidate's response is different, the response that was first captured by the recruiter will be considered.

                                                                                                                                                                                What happens when recruiters mark an electronic offer as being in negotiation?

                                                                                                                                                                                No effect. The status of the offer is changed and a row is written into History as usual, but the candidate can still view and respond to the E-Offer as usual.

                                                                                                                                                                                No effect. The status of the offer is changed and a row is written into History as usual, but the candidate can still view and respond to the E-Offer as usual.

                                                                                                                                                                                  Viewing E-Offer Letter PDFs

                                                                                                                                                                                  Recruiting Center users can view and print offer letter PDFs that are electronically accepted or refused by the candidate or employee

                                                                                                                                                                                  This feature is available for both the standard E-Offer in Recruiting and the advanced E-Offer in Onboarding (Transitions). For details, on the advanced E-Offer, refer to the Onboarding (Transitions) documentation.

                                                                                                                                                                                  Recruiters can use the Standard Electronic Offer feature in Recruiting to extend offers electronically to candidates. Once the offer is extended to the candidate, the candidate accesses the career section Offers tab to respond to the offer on line. Depending on the candidate's response, the candidate status is automatically changed to Offer - Accepted or Offer - Refused, and the recruiter can then move the candidate to the next step in the candidate selection workflow. The recruiter, if granted the proper permissions, can view and print the PDF of the completed E-Offer letter in:

                                                                                                                                                                                  • the candidate file History tab, by clicking the hyperlinked name of the offer letter template shown in the Details column.

                                                                                                                                                                                  • the offer grid for the current offer, by clicking the Print icon.

                                                                                                                                                                                  Note: The Print icon is available only for the current offer. In the case where the offer is no longer current, the icon is not available. If the offer was rescinded by the Recruiting Center user or reneged by the candidate, the offer grid will no longer display the icon to access the completed offer letter. However, the entry in the History tab will always remain available to access all past E-Offer PDFs, even those rescinded or reneged.

                                                                                                                                                                                  Image showing the History tab with an entry to access past E-Offers.

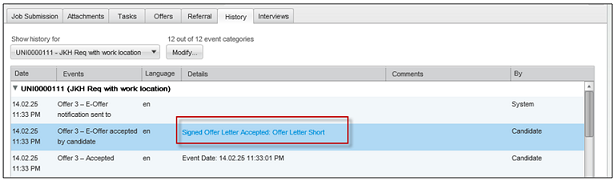
                                                                                                                                                                                  The E-signature information is displayed at the end of each E-Offer letter PDF:

                                                                                                                                                                                  • Acceptance or refusal of the offer.

                                                                                                                                                                                  • Time and date of the candidate e-signature (in the timezone of the recruiter who extended the offer).

                                                                                                                                                                                  • IP address.

                                                                                                                                                                                  • Full name of the candidate who signed the E-Offer.

                                                                                                                                                                                  Note: Recruiters can view accepted and refused offers that were electronically signed in version 12C and beyond. The candidate file History tab displays a clickable link to view the PDF of these E-Offers.

                                                                                                                                                                                    Configuring the Access to Offer Letter PDFs

                                                                                                                                                                                    Several elements must be configured to provide users access to Offer Letter PDFs and their content.

                                                                                                                                                                                    1. Granting the View offers permission. The View offers permission allows users to view offer information for their requisitions. You must grant this permission so users can access the Offers tab and view the offer grid in candidate submissions.

                                                                                                                                                                                    2. Setting the security level of Offer fields. The security level of offer fields can be defined to restrict their access. You can define how sensitive each offer field is by assigning the General, Restricted or Confidential security level. Offer fields appear in the offer grid. Offer fields can also appear within the offer letter. If the paragraphs of the offer letter are configured to contain any offer tokens, these fields will be printed in the offer letter. Setting the security level of offer fields does not control whether or not these fields are displayed to viewers of the offer letter PDFs.

                                                                                                                                                                                    3. Setting the security level of the "Letter Used" Offer field. You can also define how sensitive offer letters are. This is done by assigning the General, Restricted or Confidential security level to the Letter Used field. This field controls the display of the offer letter link in the offer grid Letter Used field and also the display of the offer letter link in the candidate submission History tab.

                                                                                                                                                                                    4. Granting the Security Level for Offers (in view mode) permission. You must grant users the Security level for offers (in view mode) permission to define if they have a general, restricted or confidential access to offer fields displayed in the offer grid.

                                                                                                                                                                                    Below are examples of how the system will behave depending on the above permissions and elements are configured.

                                                                                                                                                                                    Example 1: Prevent users from viewing E-Offer PDFs

                                                                                                                                                                                    In this example:

                                                                                                                                                                                    • Recruiter Jane Smith has the permission to view offers for requisitions that she owns ("View offers - Only if this user is an owner of the requisitions").

                                                                                                                                                                                    • Recruiter Jane Smith has the permission to view offer fields that are marked General ("Security level for offers (in view mode) - General").

                                                                                                                                                                                    • The Letter Used field is marked Restricted.

                                                                                                                                                                                    For requisitions she owns, Recruiter Jane Smith:

                                                                                                                                                                                    • Can see the Offers tab and offer grid in the candidate submissions.

                                                                                                                                                                                    • Cannot see the offer letter name (Letter Used field) in the offer grid.

                                                                                                                                                                                    • Cannot see the name of the offer letter in the candidate submission's History tab and thus cannot click it to view the PDF.

                                                                                                                                                                                    • Cannot view the Print signed offer letter icon on the current offer in the offer grid, and thus cannot open the PDF.

                                                                                                                                                                                    • Cannot see the name of the offer letter in the offer grid, neither for the current offer nor for any past offers.

                                                                                                                                                                                    Example 2: Allow users to view E-Offer PDFs

                                                                                                                                                                                    In this example:

                                                                                                                                                                                    • Recruiter Jane Smith has the permission to view offers for requisitions that she owns ("View offers - Only if this user is an owner of the requisitions").

                                                                                                                                                                                    • Recruiter Jane Smith has the permission to view offer fields that are marked Restricted ("Security level for offers (in view mode) - Restricted").

                                                                                                                                                                                    • The Letter Used field is marked Restricted.

                                                                                                                                                                                    For requisitions she owns, RecruiterJane Smith:

                                                                                                                                                                                    • Can see the Offers tab and offer grid in the candidate submissions.

                                                                                                                                                                                    • Can see the name of the offer letter in the candidate submission's History tab.

                                                                                                                                                                                    • Can see the name of the offer letter in the offer grid and click the link to view the offer letter content.

                                                                                                                                                                                    Note: Make sure that the security level of the Letter Used field is as secure as the fields contained in the offer letter. Users who have the permission to view offers can view the whole content of the offer letter, regardless of how sensitive some fields may be. Specific fields such as Salary can be marked Confidential. But all fields that are configured to appear in the offer letter will be displayed in the offer letter, regardless of their security level. So even if the Letter Used field is marked Restricted, the more-sensitive Salary field marked Confidential will still appear in it. Thus users who cannot see Confidential data such as Salary can still see the offer letter which is Restricted, and this offer letter can reveal the value of the Salary field. The offer letter containing the salary is less secure than the salary field itself.

                                                                                                                                                                                      Granting the View Offers Permission

                                                                                                                                                                                      Configuration > [SmartOrg] Administration > [Users] User Types
                                                                                                                                                                                      1. Select a user type.

                                                                                                                                                                                      2. Click Recruiting.

                                                                                                                                                                                      3. Click Edit next to Offers.

                                                                                                                                                                                      4. Select View offers.

                                                                                                                                                                                      5. Click Save.

                                                                                                                                                                                        Setting the Security Level of Offer Fields

                                                                                                                                                                                        Configuration > [Recruiting] Administration > Fields
                                                                                                                                                                                        1. Click the Offer field category.

                                                                                                                                                                                        2. Click an offer field.

                                                                                                                                                                                        3. Click Edit Field Availability next to Properties.

                                                                                                                                                                                        4. Specify the security level of the field, that is General, Restricted, or Confidential.

                                                                                                                                                                                        5. Click Save.

                                                                                                                                                                                          Setting the Security Level of the "Letter Used" Offer Field

                                                                                                                                                                                          Configuration > [Recruiting] Administration > Fields
                                                                                                                                                                                          1. Click the Offer field category.

                                                                                                                                                                                          2. In the Show Fields drop-down list, select Offer Terms.

                                                                                                                                                                                          3. Click the Letter Used field.

                                                                                                                                                                                          4. Click Edit Field Availability next to Properties.

                                                                                                                                                                                          5. Specify thesecurity level of the field, that is General, Restricted, or Confidential.

                                                                                                                                                                                          6. Click Save.

                                                                                                                                                                                            Granting the Security Level for Offers (in view mode) Permission

                                                                                                                                                                                            Configuration > [SmartOrg] Administration > [Users] User Types
                                                                                                                                                                                            1. Select a user type.

                                                                                                                                                                                            2. Click Recruiting.

                                                                                                                                                                                            3. Click Edit next to Offers.

                                                                                                                                                                                            4. Select Security level for offers (in view mode).

                                                                                                                                                                                            5. Select a security level, that is General, Restricted or Confidential.

                                                                                                                                                                                            6. Click Save.

                                                                                                                                                                                              Offer Statuses

                                                                                                                                                                                              An offer can go through different statuses.

                                                                                                                                                                                              Status Description
                                                                                                                                                                                              Offer to be made Initial status of the Offer step.
                                                                                                                                                                                              Draft Offer terms have been started and saved, but not approved. If offer approvals are not required, the offer may be extended at this point.
                                                                                                                                                                                              Cancelled A draft offer has been created and then cancelled prior to routing for approval or extending to the candidate.
                                                                                                                                                                                              Approval in progress Offer has been routed for approval.
                                                                                                                                                                                              Approval rejected Offer approval request has been rejected.
                                                                                                                                                                                              Approved Offer approval request has been approved and the offer is ready to be extended to the candidate.
                                                                                                                                                                                              Extended Offer has been extended to the candidate.
                                                                                                                                                                                              Rescinded After the offer has been extended or the candidate has accepted the offer, the user (company) rescinds/revokes the offer.
                                                                                                                                                                                              In negotiation Offer was extended to the candidate. The user marked the candidate as wanting to negotiate the offer. If a new offer should be created, the user will need to rescind the offer in order to create a new offer. If a new offer is not required, then either recapture the candidate response (accept or refused) or status them as Rejected or Has Declined.
                                                                                                                                                                                              Refused Offer was extended to the candidate. The user or the candidate marked the candidate as refusing the offer. A new offer can be created at this point.
                                                                                                                                                                                              Accepted Offer was accepted by the candidate.
                                                                                                                                                                                              Reneged After the candidate has accepted the offer, the candidate refuses the offer (goes back on his or her word).
                                                                                                                                                                                              Rejected After the offer has been rescinded to a candidate, if the user does not wish to create and extend a different offer to the same candidate, the user should status the candidate as Rejected in the Offer step. This will allow an offer to another candidate be created and extended.
                                                                                                                                                                                              Has declined After the offer has been refused or reneged by the candidate, if the user does not wish to create and extend a different offer to the same candidate, the user should status the candidate as Has Declined in the Offer step. This will allow another offer to be created and extended.

                                                                                                                                                                                                Hourly Hiring

                                                                                                                                                                                                  Hourly Manager Home Page and Center Stage

                                                                                                                                                                                                  Oracle Talent Acquisition Cloud (OTAC) supports managers doing self-service hiring and managers working in a decentralized environment. This includes options to use one or more simple home page configurations for various populations of users.

                                                                                                                                                                                                  Home pages are configured via the SmartOrg Configuration Profiles feature. A pre-defined Hourly Manager configuration profile is provided with the application and this profile references a pre-defined Hourly Manager center stage. Both provides a reasonable set of default settings which customers can use as a starting point and modify to meet their needs.

                                                                                                                                                                                                  The configuration of the Hourly Manager home page consists of the following:

                                                                                                                                                                                                  • configuring the Hourly Manager center stage.

                                                                                                                                                                                                  • associating the Hourly Manager center stage to the Hourly Manager configuration profile.

                                                                                                                                                                                                  • associating the Hourly Manager configuration profile to user accounts.

                                                                                                                                                                                                  • configuring the mini requisition list.

                                                                                                                                                                                                  Center Stage: The default Hourly Manager center stage uses a channel called the Mini Requisition List. By default, the Hourly Manager center stage also contains the Legacy Onboarding channel and a link to the Performance Management Suite (both of which only appear if these modules are deployed and available to the user). The Center Stage feature is available in the Recruiting Administration menu. For details, see the Center Stage chapter.

                                                                                                                                                                                                  Configuration Profile: Once the center stage is created, the system administrator must associate it to a configuration profile. The system administrator can use the pre-defined Hourly Manager configuration profile. By default, the Hourly Manager center stage is tied to the Hourly Manager configuration profile. If desired, the system administrator can create a new configuration profile. The configuration and creation of configuration profiles are done in the SmartOrg Configuration Profiles feature. For details, see the Configuration Profile chapter.

                                                                                                                                                                                                  User Account: To quickly and easily give users to hourly related capabilities, the system administrator only needs to update the user account by associated it to the Hourly Manager configuration profile. This is done in the SmartOrg User Accounts feature, under the Account Information section.

                                                                                                                                                                                                  Mini Requisition (or Job Openings) List: This is a center stage widget option created specifically to help support distributed hourly hiring deployments. This list lets users click directly from the center stage channel into a requisition's candidate list without having to first load the Requisition list page. This mini requisition list can contain up to four columns of summary information about each requisition, including the number of candidates. It can also display up to 30 requisitions (the ones with the most recent submission activity).

                                                                                                                                                                                                  The system administrator configures the mini requisition list (if used) via the List Formats feature available in the Recruiting Administration menu. See List Format Configuration for more details. The mini requisition list is called "Job Openings" to better support continuous hiring scenarios. This name can be edited.

                                                                                                                                                                                                  Note that the mini requisition list honors the permissions set by the Show filter (e.g., Show Requisitions I Own, I Collaborate On, etc.), if it is made visible on the home page. However, a typical hourly manager configuration is to define user permissions by Personal Coverage Area (for details, see the Personal Coverage Area chapter). This is done via the configuration profile feature by selecting the My coverage area value in the Show Information For Filter Default setting and by hiding this filter from the user via the Show information for Filter Visibility setting. This will make the user's permissions simple and automatic if you can define them in terms of Organizations, Locations and Job Fields.

                                                                                                                                                                                                    Hourly Manager User Type

                                                                                                                                                                                                    A default user type configuration has been created to support hourly manager's need for a more simplified user experience.

                                                                                                                                                                                                    Although system administrators can create their own personalized user types, the hourly manager user type is designed to help managers in hourly hiring deployments. The Hourly Manager user type is intended to reflect the combination of permissions that will provide a reasonable starting point for customers to use for their managers involved in self-service, continuous and/or high volume hiring scenarios.

                                                                                                                                                                                                    Hourly Manager User Type - Permissions Granted Permissions Not granted
                                                                                                                                                                                                    Access to hourly requisitions Edit candidate information
                                                                                                                                                                                                    Access to requisitions that the user owns, is a collaborator on, or are in the user's Personal Coverage Area Access Professional, Campus, Contingent or Executive requisition

                                                                                                                                                                                                    Post requisitions to career sections

                                                                                                                                                                                                    Access job boards, staffing agents, internet mining
                                                                                                                                                                                                    Access prescreening information Perform advanced search and save searches
                                                                                                                                                                                                    Add comments to submissions
                                                                                                                                                                                                    Unlock candidate accounts, reset password
                                                                                                                                                                                                    Customize correspondence before sending

                                                                                                                                                                                                    The default Hourly Manager user type may be used as is or an organization may decide to modify the permissions and rename the user type name to meet their organization needs. System administrators should review and modify all default permissions to meet their company's specific needs.

                                                                                                                                                                                                      Fifth Level of Location

                                                                                                                                                                                                      A fifth level of location can be added to the location structure to support more granular location specification requirements of some customers.

                                                                                                                                                                                                      System administrators have the option to update their SmartOrg location structure and add up to 5 levels in this structure. Once the structure is updated, it will be possible to create location elements across all activated levels in the location structure.

                                                                                                                                                                                                      This accommodates customers who want to capture more specific location information within their Location tree, especially organizations with thousands of locations in different countries. The location structure could be defined as follows:

                                                                                                                                                                                                      • Country

                                                                                                                                                                                                      • State/Province

                                                                                                                                                                                                      • Metro/Region

                                                                                                                                                                                                      • City/District

                                                                                                                                                                                                      • Store/Location

                                                                                                                                                                                                      With individual worksites part of the Location tree, even for large decentralized operations, locations can be assigned down to the work site level. Customers will also be able to use the lowest level in their structure as work locations. Also, data access can be controlled down to the Location level using either the User Group and/or the Personal Coverage Area feature.

                                                                                                                                                                                                        Evergreen Hiring

                                                                                                                                                                                                        Evergreen hiring is used in continuous hiring situations such as retail stores where employers want to enable candidates to apply at all times, and also want a ready supply of candidates available to move quickly when a need is identified.

                                                                                                                                                                                                        Often such employers will want to implement a definite validity period and expiration for the candidate's submission, with the easy ability for the candidate to re-apply after his/her submission expires. It is not uncommon for workers in the hourly retail world to have held several different jobs within the span of a year. Employers need to ensure they are collecting all of the most recent information regarding a candidate's relevant history. This may also help to limit legal exposures in addition to confirming candidate's continued interest in employment with the employer.

                                                                                                                                                                                                        A submission validity period may be enabled for any requisition, before that requisition reaches the Sourcing status. The number of days for the validity period is inherited from a default setting (initially 90 days), but may be changed for specific requisitions by users with sufficient permissions. The Validity Period and Validity Period Enabled fields may also be inherited from a requisition template. The submission validity period must be between 1 and 730 days (2 years).

                                                                                                                                                                                                        The validity period starts when a candidate submits his/her completed submission. The candidate submission remains valid for the number of days defined in the requisition. For submissions created when matching or referring a candidate, the period starts on the date that the candidate was matched or referred. If a submission is incomplete and the candidate later completes it, the validity period is restarted.

                                                                                                                                                                                                        The Evergreen Hiring feature basically works as follows:

                                                                                                                                                                                                        For the Evergreen Hiring feature to be available, the system administrator must make the following two requisition fields available in the Recruiting application:

                                                                                                                                                                                                        • Validity Period Enabled

                                                                                                                                                                                                        • Validity Period

                                                                                                                                                                                                        If desired, the security level can be set for those fields to hide them from some users. Once these fields are activated, the system administrator can add them to the requisition and/or requisition template, in the Identification block. It is necessary to have the Validity Period Enabled field in either the requisition template and/or the requisition file in order to enable submission expiration.

                                                                                                                                                                                                        Note: If the expiration for all requisitions is the same (following the default setting), consider to either not display the Validity Period field in the requisition file, or to set the field to read-only. If different validity periods are needed for different jobs, consider adding the Validity Period field in the requisition template where authorized users can set it, but not in the requisition file itself.

                                                                                                                                                                                                        In the Recruiting application, when creating a requisition or requisition template, users can use the default validity period set by the system administrator or set a different validity period for the requisition or requisition template being created. The validity period must be set before the requisition is posted. The submission validity period is displayed in the requisition card (located on the left hand side of the requisition), when hovering the mouse over the Submission Expired icon.

                                                                                                                                                                                                        Once the requisition is posted, candidates applying on the requisition will be informed of the expiration date of their submission on the Thank You page. Within the Recruiting Center, the submission validity period is displayed in the candidate submission card, when hovering the mouse over the Submission Expired icon.

                                                                                                                                                                                                        If the candidate's submission has expired and the requisition is still posted, the Modify link is replaced with the Reapply link on the candidate's My Jobs page. When candidates re-apply for a job:

                                                                                                                                                                                                        • The submission's validity period and expiration date are reset.

                                                                                                                                                                                                        • A summary of the candidate's current information will be displayed to allow him/her to make any necessary changes.

                                                                                                                                                                                                        • Depending on how the zone was configured, the candidate selection workflow of the submission may be reset back to the beginning.

                                                                                                                                                                                                        • A tracking history is automatically added in candidate file History tab. If during the reapply process, the system forces the candidate selection workflow to be reset, a second tracking history is added in the History tab stating that.

                                                                                                                                                                                                        Once candidates have applied on the requisition, the column in the Requisitions list indicating the candidate count considers if the submission validity period is enabled or not for the requisition. If the validity period is enabled, the count only includes candidate submissions that are not expired.

                                                                                                                                                                                                        The system administrator also has the ability to add the following columns in the candidate lists and requisition lists. When these columns are made available in list formats, users can select them to display the desired information:

                                                                                                                                                                                                        Candidate List Columns Description
                                                                                                                                                                                                        Submission Expired This column is represented by the Submission Expired icon. When a submission is expired, the red icon is displayed.
                                                                                                                                                                                                        Latest Submission Date Date when the candidate has submitted his/her submission or has reapplied.
                                                                                                                                                                                                        Submission Expiration Date Date when the candidate submission expires/expired.
                                                                                                                                                                                                        Days before Submission Expiration Displays as a countdown the number of days left before the expiration of the submission.

                                                                                                                                                                                                        Requisition List Columns Description
                                                                                                                                                                                                        Submission Validity Period Enabled This column is represented by the Submission Expired icon.
                                                                                                                                                                                                        Submission Validity Period Number of days of the validity period.

                                                                                                                                                                                                        The Hide expired submissions quick filter can be added to Candidates list to let users show or hide expired candidate submissions. Expired submissions are hidden by default. This filter is only available for requisition-specific candidate list formats.

                                                                                                                                                                                                        The system administrator can also enable a setting to determine under which conditions the Candidate Selection Workflow (CSW) is reset to the initial step/status after a candidate re-applies for the same requisition (after submission expiration). Note that the CSW will never change if the submission has reached the Offer step or if an interview has been scheduled.

                                                                                                                                                                                                        Configuration

                                                                                                                                                                                                        Setting Description Default Value Location
                                                                                                                                                                                                        Default Submission Validity Period When enabling the submission validity period on a newly created requisition, the default number of days before a submission shall be considered "Expired". Must be between 1 and 730 days. 90 Configuration > [Recruiting] Settings
                                                                                                                                                                                                        Reset Candidate Selection Workflow after Candidate Re-applies Reset the candidate selection workflow to the 1st step/status after a candidate re-applies for the same requisition (after submission expiration). By default the candidate's status remains the same. The CSW will not change if the submission has reached the "Offer" step or if an interview has been scheduled. If the submission has reached the status Hired, Inactive or Withdrawn Configuration > [Recruiting] Settings

                                                                                                                                                                                                          Setting Up the Evergreen Hiring Feature

                                                                                                                                                                                                          Configuration > [Recruiting] Administration

                                                                                                                                                                                                          1. Under Recruiting Settings, set the validity period of the Default Submission Validity Period setting.

                                                                                                                                                                                                          2. Under Fields/Requisition:

                                                                                                                                                                                                            1. Make the Validity Period Enabled field available to be used in Recruiting. Note that the Validity Period field is automatically enabled when the Validity Period Enabled field is activated.

                                                                                                                                                                                                            2. You can set the security level of the Validity Period Enabled and Validity Period fields.

                                                                                                                                                                                                          3. Under User-defined Forms, add the Validity Period, Validity Period Enabled, and Number of Openings fields in the Identification user-defined form.

                                                                                                                                                                                                          4. Under User-defined Files, add the Identification user-defined form to a requisition template or requisition file.

                                                                                                                                                                                                          5. Under Requisition File Setup, associate the requisition file and/or requisition template to a specific purpose.

                                                                                                                                                                                                          6. Under User-defined Files, you can select a Prescreening Hourly file and add the Submission Validity Period block.

                                                                                                                                                                                                          7. Under Candidate File Setup, associate the candidate file to a specific purpose.

                                                                                                                                                                                                          8. Under List Formats, you can add the following columns to a candidate list format:

                                                                                                                                                                                                            • Submission Expired

                                                                                                                                                                                                            • Latest Submission Date

                                                                                                                                                                                                            • Submission Expiration Date

                                                                                                                                                                                                            • Days before Submission Expiration

                                                                                                                                                                                                          9. Under List Formats, you can add the following quick filter to a candidate list format:

                                                                                                                                                                                                            • Show unexpired submissions

                                                                                                                                                                                                          10. Under List Formats, you can add the following columns to a requisition list format:

                                                                                                                                                                                                            • Submission Validity Period Enabled

                                                                                                                                                                                                            • Submission Validity Period

                                                                                                                                                                                                          11. Under Recruiting Settings, enable the Reset Candidate Selection Workflow after Candidate Re-applies setting.

                                                                                                                                                                                                            This setting allows users to determine whether the CSW is reset to the 1st step/status after a candidate re-applies for the same requisition (after submission expiration). By default the candidate's status remains the same. The CSW will not change if the submission has reached the Offer step or if an interview has been scheduled.

                                                                                                                                                                                                            Questions and Competencies

                                                                                                                                                                                                              Questions and Competencies - Permissions and Settings

                                                                                                                                                                                                              The following permissions and settings are used to configure questions, disqualification questions, and competencies.

                                                                                                                                                                                                              User Type Permission Description Location
                                                                                                                                                                                                              Access the question and competency libraries Gives Recruiting Center users access to the Questions, Disqualification Questions, and Competencies libraries. Configuration > [SmartOrg] Administration > [Users] User Types > Recruiting > Prescreening and Electronic Feedback
                                                                                                                                                                                                              Associate questions and competencies with structure elements Gives Recruiting Center users the ability to associate questions and competencies to Locations and/or Job Fields. Configuration > [SmartOrg] Administration> [Users] User Types > Recruiting > Prescreening and Electronic Feedback
                                                                                                                                                                                                              Manage disqualification questions Allows Recruiting Center users to use disqualification questions. Configuration > [SmartOrg] Administration> [Users] User Types > Recruiting > Prescreening and Electronic Feedback
                                                                                                                                                                                                              Remove or delete questions and competencies Configuration > [SmartOrg] Administration> [Users] User Types > Recruiting > Prescreening and Electronic Feedback
                                                                                                                                                                                                              Edit questions and competencies Gives Recruiting Center users the ability to modify questions and competencies in the Libraries. Configuration > [SmartOrg] Administration> [Users] User Types > Recruiting > Prescreening and Electronic Feedback
                                                                                                                                                                                                              Add and remove competencies Configuration > [SmartOrg] Administration> [Users] User Types > Recruiting > Prescreening and Electronic Feedback
                                                                                                                                                                                                              Create questions Configuration > [SmartOrg] Administration> [Users] User Types > Recruiting > Prescreening and Electronic Feedback

                                                                                                                                                                                                              Setting Description Default Value Location
                                                                                                                                                                                                              Differentiate Internal and External Candidates in Prescreening Forms When creating requisitions, differentiate prescreening for internal and external candidates. Recruiting Center users will see drop-down menus on the requisition Prescreening tab. No Configuration > [Recruiting] Settings
                                                                                                                                                                                                              Differentiate Internal and External Questions Allows the questions and skills visibility for candidates to be set. If you use profilers, this setting allows you to create different profiler questions for internal and external candidates. No Configuration > [Recruiting] Settings
                                                                                                                                                                                                              Enable Disqualification Questions Enables candidate disqualification questions. No Configuration > [Recruiting] Settings
                                                                                                                                                                                                              Explanation in Disqualification Questions Enables an explanation for disqualification question specific answers. Candidates are then required to provide explanations for specific answers. This feature provides candidates a greater opportunity to accurately explain their qualifications and it also reduces the need for users to make follow-up contact with candidates to obtain details regarding their responses. Yes Configuration > [Recruiting] Settings
                                                                                                                                                                                                              Skill Assessment Format System administrators can define if competency proficiency levels can be selected by users when creating a requisition. Three configurations are available:
                                                                                                                                                                                                              • Detailed: When this option is selected, Recruiting Center users can select the minimum proficiency level of a competency as well as the minimum years of experience required when they create a requisition.

                                                                                                                                                                                                              • Simple: When this option is selected, Recruiting Center users cannot select the minimum proficiency level of a competency when they create a requisition.

                                                                                                                                                                                                              • Detailed or Simple: When this option is selected, Recruiting Center users must select the option "Modify the minimum requirements of proficiency and experience" before being able to select a minimum proficiency level of a competency and the minimum years of experience required.

                                                                                                                                                                                                              Detailed Configuration > [Recruiting] Settings
                                                                                                                                                                                                              Skill Experience Level Indicates the baseline for the years of experience. This setting is set globally for the entire organization. Possible values are:
                                                                                                                                                                                                              • Less than 1 year

                                                                                                                                                                                                              • 1-3 years

                                                                                                                                                                                                              • 3-5 years

                                                                                                                                                                                                              • 5 years or +

                                                                                                                                                                                                              1-3 years Configuration > [Recruiting] Settings
                                                                                                                                                                                                              Skill Proficiency Level Expresses proficiency collected via simple skills format in terms of the selected minimum level. It indicates the baseline for proficiency level. This setting is set globally for the entire organization. Possible values are:
                                                                                                                                                                                                              • Novice

                                                                                                                                                                                                              • Intermediate

                                                                                                                                                                                                              • Expert

                                                                                                                                                                                                              • Guru

                                                                                                                                                                                                              Intermediate Configuration > [Recruiting] Settings
                                                                                                                                                                                                              Competency Selector Default View in Requisition Activates this view by default in the competency selector. It determines from which library users will select competencies. Possible values are:
                                                                                                                                                                                                              • Organization Competencies ( competencies resulting from the mapping of your company job fields to the Taleo job fields so that the competencies list contains competencies that are considered relevant for your company).

                                                                                                                                                                                                              • Taleo Competencies (the complete Taleo competencies library, classified according to generic job fields).

                                                                                                                                                                                                              • Competency Library (competencies selected by your company among the Taleo competencies library. These competencies are classified according to the location and job fields of your company).

                                                                                                                                                                                                              Organization Competencies Configuration > [Recruiting] Settings

                                                                                                                                                                                                                Competency Definitions

                                                                                                                                                                                                                Proficiency Level
                                                                                                                                                                                                                None Candidates have no experience or training regarding the competency.
                                                                                                                                                                                                                Beginner Candidates have received basic training and can perform the competency with some assistance. They received classroom or field training, either as an apprentice or through an internship.
                                                                                                                                                                                                                Intermediate Candidates have completed at least one successful experience. Help from an expert may be required occasionally, but candidates can usually perform the competency themselves.
                                                                                                                                                                                                                Advanced Candidates can perform the competency without any assistance. They are recognized within their company as "the people to ask" regarding the competency. They might be known in the industry as a specialist. They have extensive experience and could teach the subject if they had teaching competencies.
                                                                                                                                                                                                                Expert Candidates can answer all questions about the competency and industry-related questions. They have contributed to developing, defining, or improving the competency. They have published a paper on the subject and advanced people actively seek their advice. They are often offered jobs.

                                                                                                                                                                                                                Experience Level
                                                                                                                                                                                                                None Candidates have no experience or training regarding the competency.
                                                                                                                                                                                                                Less than 1 year Candidates possess between 1 and 11 months of work experience during which they had to perform the competency.
                                                                                                                                                                                                                1 to 3 years Candidates possess between 12 and 35 months of work experience during which they had to perform the competency.
                                                                                                                                                                                                                3 to 5 years Candidates possess between 36 and 59 months of work experience during which they had to perform the competency.
                                                                                                                                                                                                                5 years + Candidates possess 60 months or more of work experience during which they had to perform the competency.

                                                                                                                                                                                                                Last Used Level
                                                                                                                                                                                                                None Candidates have never performed the competency.
                                                                                                                                                                                                                Current Candidates perform the competency as part of their current employment.
                                                                                                                                                                                                                Last Year Candidates successfully performed the competency within the last 11 months.
                                                                                                                                                                                                                1 to 3 years ago Candidates successfully performed the competency between 12 and 35 months ago.
                                                                                                                                                                                                                3 to 5 years ago Candidates successfully performed the competency between 36 and 59 months ago.

                                                                                                                                                                                                                Interest Level
                                                                                                                                                                                                                None Candidates have absolutely no interest in performing or learning the competency.
                                                                                                                                                                                                                Low Candidates have a lot of experience and key knowledge regarding the competency but have little interest in performing the competency often.
                                                                                                                                                                                                                Medium Candidates would be willing to perform the competency daily in their job.
                                                                                                                                                                                                                High Candidates have a high interest in jobs that require them to perform the competency. Performing the competency is a high source of motivation. They are willing to participate in improving how the competency is performed at the company.

                                                                                                                                                                                                                  Competency Assessment

                                                                                                                                                                                                                  A competency is used to gather proficiency level and years of experience of a candidate in order to find the best candidate for a job.

                                                                                                                                                                                                                  There are two ways to display competency assessment:

                                                                                                                                                                                                                  • Simple Competency Assessment: Allows candidates to assess their competencies by selecting—using check boxes—the competencies for which they possess a certain level of proficiency and experience.

                                                                                                                                                                                                                  • Detailed Competency Assessment: Allows candidates to assess their competencies by selecting—from lists or radio buttons—the appropriate level of experience, proficiency, last used, and interest. The process is repeated for each competency.

                                                                                                                                                                                                                  The format available to candidates depends on a setting enabled by system administrators. Your organization can choose to display both or just one form of competency assessment to candidates. This determination can be made for each different career section your organization maintains. 

                                                                                                                                                                                                                  If using the Simple Competency Assessment display, a minimum baseline needs to be established for the entire organization. This baseline defines the minimum levels of proficiency and experience needed for a candidate to "have" a competency. In career sections, a statement is displayed to candidates explaining what constitutes "having a competency" in terms of your global baseline - there's only a single check box to mark if they "have" that competency.

                                                                                                                                                                                                                  If using the Detailed Competency Assessment display, candidates are asked to select their proficiency, experience, when the competency was last used, and their interest level in that competency. Explanations of the different choices are displayed to candidates in the career section.

                                                                                                                                                                                                                    Partner Competencies

                                                                                                                                                                                                                    Oracle has the ability to partner with competency providers and offer a wide range of competency solutions to customers.

                                                                                                                                                                                                                    When a third party competency library has been associated with the system, it can be enabled by Oracle Support in the Configuration section. Once enabled, system administrators can configure individual competencies within the library to be displayed or hidden.

                                                                                                                                                                                                                    The complete feature is described in the Taleo Performance Guide. Below is a summary of this feature in Recruiting.

                                                                                                                                                                                                                    • Partner competencies can be activated by Oracle Support if bought by a customer.

                                                                                                                                                                                                                    • Partner competencies appear in the Competencies section under the Global Configuration menu.

                                                                                                                                                                                                                    • It is possible to rename standard competencies. If a competency is renamed, it is carried through not only in Taleo Performance but also in Recruiting.

                                                                                                                                                                                                                    • When a partner's competencies are activated for a specific customer, these competencies are visible in Recruiting. In Taleo Performance, these competencies have more details and content like sub-competencies; in Recruiting, a small set of new behavioral competencies are available.

                                                                                                                                                                                                                      Tasks

                                                                                                                                                                                                                        Task

                                                                                                                                                                                                                        A task is an action a user needs to perform regarding a requisition, a candidate file, or an offer.

                                                                                                                                                                                                                        Tasks are generated by the system and displayed in the Tasks channel (home page) and in the Tasks list.

                                                                                                                                                                                                                        Tasks Channel

                                                                                                                                                                                                                        The Tasks channel may display tasks related to requisitions, candidates, offers, Legacy Onboarding, Onboarding (Transitions) and self-assigned tasks. Clicking an hyperlink in the Tasks channel gives access to the Tasks list where users can see all tasks in one list view and use quick filters to filter the list. For details regarding elements in the Tasks channel, see Center Stage (Home Page).

                                                                                                                                                                                                                        Tasks List

                                                                                                                                                                                                                        The Tasks list presents task information in different columns and provides quick filters. Columns and quick filters are not configurable.

                                                                                                                                                                                                                        In the Tasks list, a task can only be executed by the owner of the task or his/her delegate. A task that can be executed is underlined and clickable. All system-generated tasks show the due date as "blank" and the priority as "normal". These fields are present to support any candidate self-assigned tasks which do have due dates and priority set.

                                                                                                                                                                                                                        In the Tasks list, when selecting the "I own" filter, tasks related to requisitions the user owns (as a user and user assistant) are displayed. If a system-generated task is assigned to the user, both the user and user's assistant will be able to perform the task. If a system-generated task is assigned to the user assistant, both the user assistant and user will be able to perform the task. In both cases the task will be displayed as a link.

                                                                                                                                                                                                                        Available Tasks

                                                                                                                                                                                                                        Tasks are related to requisition files, candidates files, and offers.

                                                                                                                                                                                                                        Tasks Related to Requisitions Description
                                                                                                                                                                                                                        To be completed

                                                                                                                                                                                                                        Reminds the user that a requisition still has to be completed before it can be posted. The task is generated at the creation of a requisition. The task is assigned to the recruiter assistant. If there is none, it is assigned to the recruiter.

                                                                                                                                                                                                                        Approve requisition Reminds the user to approve a requisition.
                                                                                                                                                                                                                        Ready for sourcing

                                                                                                                                                                                                                        Reminds the user that a requisition is ready to be posted. The Ready for sourcing task is generated once the requisition is Approved and the completion level is Ready for sourcing.

                                                                                                                                                                                                                        If the requisition is approved by the Save As Open action, the Ready for sourcing task is assigned to the recruiter assistant. If there is none, it is assigned to the recruiter.

                                                                                                                                                                                                                        If the requisition is approved by the Request Approval action, the Ready for sourcing task will be assigned to the user specified in the After Approval section of the Request Approval window.

                                                                                                                                                                                                                        Amend Approval Path

                                                                                                                                                                                                                        Reminds the user to perform the Amend Approval Path action for a requisition. The Amend Approval Path task is generated when an other user has performed the action Request Approval Path Amendment and selected the user as the assignee.

                                                                                                                                                                                                                        Sourcing strategy to be defined

                                                                                                                                                                                                                        Reminds the user that the Posting and Sourcing must be defined for a specific requisition.

                                                                                                                                                                                                                        Contribute

                                                                                                                                                                                                                        The Contribute task is the result of the Request Contribution action assigned to the contributor. It reminds the user that a contribution is required for a specific requisition.

                                                                                                                                                                                                                        To be filled

                                                                                                                                                                                                                        Reminds the user that a requisition has to be manually filled because it was not automatically filled for some reasons.

                                                                                                                                                                                                                        Complete Selection Process Reminds the user to complete the selection process. The task appears when something is preventing the hire process. The task is assigned to the recruiter assistant. If there is none, it is assigned to the recruiter.
                                                                                                                                                                                                                        Extend posting Reminds the user to extend the posting of a requisition.

                                                                                                                                                                                                                        Tasks Related to Candidate Files Description
                                                                                                                                                                                                                        Finalize Start Date Reminds the user to set as final the start date for the offers accepted with a tentative start date.
                                                                                                                                                                                                                        Duplicate Check When a candidate applies on a career section and a duplicate check is not performed immediately, a Duplicate Check task is generated. The task is assigned to the recruiter assistant. If there is none, it is assigned to the recruiter. See Duplicate Check.
                                                                                                                                                                                                                        Self-Assigned Task A self-assigned task is a task a user creates for himself/herself. See Self-Assigned Task.

                                                                                                                                                                                                                        Tasks Related to Offers Description
                                                                                                                                                                                                                        Extend Offer Reminds the user to extend an offer.
                                                                                                                                                                                                                        Approve Offer Reminds the user to approve an offer.
                                                                                                                                                                                                                        Confirm Employee Presence Reminds the user to set as Hired candidates who have accepted an offer with a non-tentative start date. The task is assigned to the recruiter assistant. If there is none, it is assigned to the recruiter.

                                                                                                                                                                                                                        Rules Regarding Task Assignment

                                                                                                                                                                                                                        Tasks are assigned to a user or to the user's assistant according to these rules:

                                                                                                                                                                                                                        • When a system-generated task is created, the assignee is always the "user's assistant" (if a user assistant is identified). Otherwise, the assignee is always the user. However, the user also has access to these tasks even though they were assigned to the assistant.

                                                                                                                                                                                                                        • Both the user and the user's assistant can access the linked task regardless to whom (user or assistant) the task was assigned to.

                                                                                                                                                                                                                        • If a user assistant is identified after a system-generated task was created, the task will remain assigned to the user, but the linked task will be available to both the user and user's assistant.

                                                                                                                                                                                                                        • If a user assistant was assigned a task and the user assistant was later removed, the task will automatically be re-assigned to the user.

                                                                                                                                                                                                                          Columns in the Tasks List

                                                                                                                                                                                                                          The Tasks list presents task information in different columns.

                                                                                                                                                                                                                          Column Description
                                                                                                                                                                                                                          Attention indicator flag Draws the user's attention to items that he/she owns and that require viewing.
                                                                                                                                                                                                                          Tasks Link that brings the user to the activity to be completed. A callout containing the task type, the assignment date and the owner is displayed when hovering the mouse on the task.
                                                                                                                                                                                                                          Candidate Link to the associated candidate file. A callout containing phone numbers and email address is displayed when hovering the mouse on the candidate.
                                                                                                                                                                                                                          Requisition Link to the associated requisition file. A callout with requisition ID, activated languages and features is displayed when hovering the mouse on the requisition.
                                                                                                                                                                                                                          Assignee Person who will perform the task.
                                                                                                                                                                                                                          Comments Callout displaying the comment.
                                                                                                                                                                                                                          Due date Only relevant for self-assigned tasks.
                                                                                                                                                                                                                          Priority Only relevant for self-assigned tasks.
                                                                                                                                                                                                                          Status Status of the task.
                                                                                                                                                                                                                            Quick Filters in the Tasks List

                                                                                                                                                                                                                            The table presents quick filters available in the Tasks list.

                                                                                                                                                                                                                            Quick Filter Description
                                                                                                                                                                                                                            Requiring attention Displays tasks that have the Item Requiring Attention icon. Self-assigned tasks are the only type of tasks that do not have an Item Requiring Attention icon because it is always the assignee who creates the task.
                                                                                                                                                                                                                            Hide completed tasks Removes tasks that have the Completed status.
                                                                                                                                                                                                                            Due date Displays tasks for which the due date matches the selected value (All, Next Week, Today, Overdue). When the option "Exclude task without due date" is selected, tasks without a due date will not appear in the list.
                                                                                                                                                                                                                            Task type Displays the type of task selected. If no task type is specified, all task types appear in the list.
                                                                                                                                                                                                                            Related to Candidate Displays tasks related to the selected candidate.
                                                                                                                                                                                                                            Related to Requisition Displays tasks related to the selected requisition.
                                                                                                                                                                                                                            Related to Assignee Displays tasks related to the selected user.

                                                                                                                                                                                                                            "Tasks assigned to me" filter

                                                                                                                                                                                                                            The "Tasks assigned to me" filter was created to eliminate the confusion of mixing tasks that users own with tasks that users might not own, but are for requisitions they own.

                                                                                                                                                                                                                            The "Tasks assigned to me" filter is available in the Tasks list and Tasks channel. In the Tasks list, the filter is available in the "Show tasks for requisitions:" drop-down menu. It is the default value when accessing the Tasks list. In the Tasks channel, the "Tasks assigned to me" link brings users to the Tasks list which displays tasks assigned to them.


                                                                                                                                                                                                                            Image showing the Tasks assigned to me filter in the Tasks list.

                                                                                                                                                                                                                            In the Tasks channel, when a task is clicked under Self-assigned Tasks, users are brought to the Tasks list. The "Tasks assigned to me" value in the Tasks list is selected by default no matter what the "Show the following information" filter on the home page is set to.


                                                                                                                                                                                                                            Image showing the Self-assigned Tasks in the Tasks channel.

                                                                                                                                                                                                                            In the Tasks channel, when a task is clicked under Requisitions, Candidates, Offers, etc., users are brought to the Tasks list and the value in the "Show tasks for requisitions:" filter is identical to the value selected in the "Show information for requisitions:" filter of the home page. Example: If "I own" is selected in the home page, then "I own" will be selected by default in the "Show tasks for requisitions:" filter of the Tasks list. If a group is selected in the "Show information for requisitions:" filter on the home page, then the same group will be selected in the Tasks list.

                                                                                                                                                                                                                            Note: The Default Value for the Show Information Filter setting that can be set in a configuration profile has no effect on the Tasks list view and the Tasks channel view.

                                                                                                                                                                                                                              Duplicate Check Task

                                                                                                                                                                                                                              The Duplicate Check task in the Recruiting Center Tasks list can be performed on any potential duplicates found within flows where the duplicate check action is activated, that is agency, referrer, or candidate flows.

                                                                                                                                                                                                                              When this feature is enabled, if a potential duplicate is found by the system, a Duplicate Check task is sent to the requisition's owner, that is the recruiter assistant. If no recruiter assistant was defined, it is sent to the recruiter. For a duplicate check task performed in a profile context, if a potential duplicate is found, since there is no recruiter the task is redirected to the person defined in a setting configured by the system administrator.

                                                                                                                                                                                                                              The task assignee runs the Duplicate Check task. Duplicates are displayed in a Quick Search Results list. The task assignee can then merge the duplicate files.

                                                                                                                                                                                                                              Note: The Duplicate Check Task uses the advanced search indexing, which may create a small delay.

                                                                                                                                                                                                                                Configuring the Duplicate Check Task

                                                                                                                                                                                                                                The configuration of the duplicate check task is done in the Recruiting Administration menu as well as in the Career Section Administration menu.

                                                                                                                                                                                                                                The duplicate check task configuration involves the following steps:

                                                                                                                                                                                                                                • When configuring a career section application flow, select the Activate the identification of potentially duplicate candidates option in the Personal Information block.

                                                                                                                                                                                                                                • Specify the person who will perform the duplicate check task in the Recruiting Center for candidate general profiles.

                                                                                                                                                                                                                                Setting Description Default Value Location
                                                                                                                                                                                                                                General Profile Duplicate Check Task Assignee Indicates the person responsible for the duplicate check task among the candidate general profiles. Configuration > [Career Sections] Settings

                                                                                                                                                                                                                                  Self-assigned Task

                                                                                                                                                                                                                                  A self-assigned task is a task a Recruiting Center user creates for himself/herself.

                                                                                                                                                                                                                                  Recruiting Center users can select a candidate file, create a self-assigned task to act on at a later time, and activate a reminder to ensure the task is completed on time. The self-assigned task feature is also available while changing the step of a candidate.

                                                                                                                                                                                                                                  For example, let say that you want to call the candidate John Doyle by the end of the week to invite him for an interview the following Monday. You need to open John Doyle candidate file, create a self-assigned task (for example "Confirm Monday's Interview") and set a reminder for Friday. On Friday morning, you will receive an email message reminding you to call John to see if he is available for an interview the following Monday. The email message contains a link that you can click in order to access all the information regarding this task. Then, in your list of tasks, click on the task regarding John Doyle to obtain details regarding this task as well as information regarding the candidate and the requisition he applied to. Look at John's phone number in his candidate file and can call him to invite him for the interview. When the task is completed (i.e., you phoned John), you simply need to indicate that the task is completed by selecting the Completed status. The Confirm Monday's Interview task is no longer displayed in the Tasks list.

                                                                                                                                                                                                                                  A self-assigned task can also be created for several candidate files. For example, you could have a pre-filtered lists of candidates that are to be phone screened and create a single self-assigned task to perform an initial phone screen. The system automatically creates a separate self-assigned task for each candidate that was selected.

                                                                                                                                                                                                                                  Self-assigned tasks can only be viewed by their creator. They cannot be redirected to delegates or transferred to a new user taking over.

                                                                                                                                                                                                                                  Reminders are sent daily and users receive them in the morning (according to the appropriate time zone).

                                                                                                                                                                                                                                  Self-assigned tasks are not reportable; reports showing self-assigned tasks cannot be created.

                                                                                                                                                                                                                                    Granting the Permission to Create Self-Assigned Tasks

                                                                                                                                                                                                                                    Grant the Manage my self-assigned tasks user type permission in the SmartOrg User Types feature.

                                                                                                                                                                                                                                    The Create Self Assigned Task action in available to users in the More Actions list allowing users to create tasks for themselves.

                                                                                                                                                                                                                                      Confirm Employee Presence Task

                                                                                                                                                                                                                                      The Confirm Employee Presence task is used to remind users to set as Hired candidates who have accepted an offer with a non-tentative start date.

                                                                                                                                                                                                                                      The Confirm Employee Presence task is assigned to the recruiter assistant. If there is none, the task is assigned to the recruiter.

                                                                                                                                                                                                                                      The Confirm Employee Presence task is displayed once the offer start date has been reached.

                                                                                                                                                                                                                                      When a user confirms the employee presence at work, the following options may be displayed:

                                                                                                                                                                                                                                      • Yes, the employee is present: Confirms the employee presence at work. If the Automatic Hire feature is enabled, the candidate is automatically hired.

                                                                                                                                                                                                                                      • Yes, the employee is present - Complete the selection process now: Confirms the employee presence at work. In the Change Step and Status window, if the current status is a completion status, the Move action is offered. Otherwise, the Change Status is offered.

                                                                                                                                                                                                                                      • No, the candidate could not be present. I want to specify a new Start Date: The Update Start Date window is displayed and the user can enter a new start date.

                                                                                                                                                                                                                                      • No, the candidate has reneged the offer: The Renege Offer window is displayed and the user must enter a comment indicating why the candidate changed his mind and decided to refuse the offer.

                                                                                                                                                                                                                                      The system administrator has the ability to send a reminder to users so they confirm the employee presence at work before the start date of a new hire. This is done by configuring the setting Confirm Employee Presence Reminder and putting a value between 1 and 7 days.

                                                                                                                                                                                                                                      Setting Description Default Value Location
                                                                                                                                                                                                                                      Confirm Employee Presence Reminder Remind user to confirm employee presence X days before the start date of a new hire. No Reminder Configuration > [Recruiting] > Settings

                                                                                                                                                                                                                                        General Features

                                                                                                                                                                                                                                          Attachment

                                                                                                                                                                                                                                          Files can be attached to requisitions and candidate files.

                                                                                                                                                                                                                                          The following file formats are supported by the system. System administrators define which formats are available to users.

                                                                                                                                                                                                                                          • Any File Format

                                                                                                                                                                                                                                          • Excel (.xls and .xlsx)

                                                                                                                                                                                                                                          • Hypertext Markup Language (.htm and .html)

                                                                                                                                                                                                                                          • OpenOffice Writer (.odt)

                                                                                                                                                                                                                                          • Portal Document Format (.pdf)

                                                                                                                                                                                                                                          • Rich Text Format (.rtf)

                                                                                                                                                                                                                                          • Text (.txt)

                                                                                                                                                                                                                                          • Word (.doc and .docx)

                                                                                                                                                                                                                                          • Word Perfect (.wpd)

                                                                                                                                                                                                                                          • Zip Format

                                                                                                                                                                                                                                          When attaching a file to a requisition, the attachment appears in the requisition file Attachments tab. The attachment can be shared with approvers and users having access to the requisition.

                                                                                                                                                                                                                                          When attaching a file to a candidate file (general profile or job submission), Recruiting Center users can indicate if the attachment will be visible to the candidate. They can also indicate if the attachment is a candidate resume. The Resume column in the Attachments tab allows users to easily view which attachments are resumes. Once a file is tagged as being a resume, users can remove the Resume tag by clicking the Edit button in the Attachments section and selecting No. Files attached through the resume parsing feature are automatically marked as being resumes.

                                                                                                                                                                                                                                          Recruiting Center users can view candidate attachments of type .docx or .odt directly from a browser without having to download and open the file with a native application. In the candidate file Attachments tab, when users click an attachment of type .docx and .odt files, the attachment is converted into HTML and can be viewed directly from a browser. HTML conversion for these other document types is still supported:

                                                                                                                                                                                                                                          • Excel (.xls and .xlsx)

                                                                                                                                                                                                                                          • Hypertext Markup Language (.htm and .html)

                                                                                                                                                                                                                                          • OpenOffice Writer (.odt)

                                                                                                                                                                                                                                          • Portal Document Format (.pdf)

                                                                                                                                                                                                                                          • Rich Text Format (.rtf)

                                                                                                                                                                                                                                          • Text (.txt)

                                                                                                                                                                                                                                          • Word (.doc and .docx)

                                                                                                                                                                                                                                            Attachments in Message Templates

                                                                                                                                                                                                                                            Files can be attached to message templates and correspondence sent to candidates.

                                                                                                                                                                                                                                            Supported file formats are:

                                                                                                                                                                                                                                            • Any File Format (default value)

                                                                                                                                                                                                                                            • Excel (.xls, .xlsx)

                                                                                                                                                                                                                                            • Hypertext Markup Language (.htm and .html)

                                                                                                                                                                                                                                            • OpenOffice Writer (.odt)

                                                                                                                                                                                                                                            • Portal Document Format (.pdf)

                                                                                                                                                                                                                                            • Rich Text Format (.rtf)

                                                                                                                                                                                                                                            • Text (.txt)

                                                                                                                                                                                                                                            • Word (.doc and .docx)

                                                                                                                                                                                                                                            • Word Perfect (.wpd)

                                                                                                                                                                                                                                            • Zip Format

                                                                                                                                                                                                                                            Note: The value Any File Format includes all the above file formats as well as any other format.

                                                                                                                                                                                                                                            Using the setting Attachments Format Filter in Correspondence, system administrators select which file formats are supported. The selected file formats will restrict the types of files that can be attached to message templates for both the Recruiting and Onboarding (Transitions) products and also in correspondence sent manually using the Send Correspondence action in Recruiting. After a file is attached, the system validates if the file format is supported. The validation is performed whether the file is attached by the system administrator on a message template or by a recruiter on a correspondence. If the file format is not supported, the system prevents the operation and an error message is displayed listing the supported file formats.

                                                                                                                                                                                                                                            This functionality helps prevent unsafe files from being maliciously or inadvertently sent to candidates. It also helps avoid the use of file formats that are not desired or not supported based on corporate policies or best practices.

                                                                                                                                                                                                                                              Attachment - Permissions and Settings

                                                                                                                                                                                                                                              The following permissions and settings are used to configure the attachment functionality.

                                                                                                                                                                                                                                              Setting Description Default Value Location
                                                                                                                                                                                                                                              Attachment Formats Filter File formats allowed for the attachments. This setting is used for the entire Oracle Talent Acquisition Cloud (OTAC) suite.
                                                                                                                                                                                                                                              • Any File Format

                                                                                                                                                                                                                                              • Excel (.xls and .xlsx)

                                                                                                                                                                                                                                              • Hypertext Markup Language (.htm and .html)

                                                                                                                                                                                                                                              • OpenOffice Writer (.odt)

                                                                                                                                                                                                                                              • Portal Document Format (.pdf)

                                                                                                                                                                                                                                              • Rich Text Format (.rtf)

                                                                                                                                                                                                                                              • Text (.txt)

                                                                                                                                                                                                                                              • Word (.doc and .docx)

                                                                                                                                                                                                                                              • Word Perfect (.wpd)

                                                                                                                                                                                                                                              • Zip Format

                                                                                                                                                                                                                                              Any File Format Configuration > [General Configuration] Settings
                                                                                                                                                                                                                                              Attachment Formats Filter in Correspondence

                                                                                                                                                                                                                                              List of file attachments formats allowed for correspondences and message templates.

                                                                                                                                                                                                                                              • Any File Format

                                                                                                                                                                                                                                              • Excel (.xls and .xlsx)

                                                                                                                                                                                                                                              • Hypertext Markup Language (.htm and .html)

                                                                                                                                                                                                                                              • OpenOffice Writer (.odt)

                                                                                                                                                                                                                                              • Portal Document Format (.pdf)

                                                                                                                                                                                                                                              • Rich Text Format (.rtf)

                                                                                                                                                                                                                                              • Text (.txt)

                                                                                                                                                                                                                                              • Word (.doc and .docx)

                                                                                                                                                                                                                                              • Word Perfect (.wpd)

                                                                                                                                                                                                                                              • Zip Format

                                                                                                                                                                                                                                              Any File Format Configuration > [General Configuration] Settings
                                                                                                                                                                                                                                              Attached File Maximum Number This is a Protected setting. Indicates the maximum number of file attachments allowed per entity record. This setting is used for the entire Oracle Talent Acquisition Cloud (OTAC) suite.

                                                                                                                                                                                                                                              See details below regarding attachment size and number of attachments.

                                                                                                                                                                                                                                              10 files Configuration > [General Configuration] Settings
                                                                                                                                                                                                                                              Attached File Maximum Size This is a Protected setting. Indicates the maximum size of a file attachment (in bytes) allowed. This setting is used for the entire Oracle Talent Acquisition Cloud (OTAC) suite.

                                                                                                                                                                                                                                              See details below regarding attachment size and number of attachments.

                                                                                                                                                                                                                                              1048576 bytes (1 MB) Configuration > [General Configuration] Settings
                                                                                                                                                                                                                                              Block Macros in Attachments The system will scan attachments for macros. When the setting is set to Yes, macros will be disabled in the uploaded file. Yes Configuration > [General Configuration] Settings
                                                                                                                                                                                                                                              Share Other Attachments When enabled, users will be able to include "other attachments" in the "Candidate Share" or "Interview Request" actions. "Other attachments" equates to any attachment not directly related to the job submission from which the action is being taken as well as all attachments when sharing from the candidate general profile. Yes Configuration > [Recruiting] Settings
                                                                                                                                                                                                                                              Candidate maximum attachment updates Maximum number of possible candidate attachment updates per period. This is a protected setting activated by Oracle Support. 5 Configuration > [Career Sections] Settings
                                                                                                                                                                                                                                              Maximum attempts to attach file period Period during which the maximum number of candidate attachment attempts apply. This is a protected setting activated by Oracle Support. 30 Configuration > [Career Sections] Settings
                                                                                                                                                                                                                                              Attachments searched by Candidate Keyword Search

                                                                                                                                                                                                                                              Determines the list of attachments searched by the Candidate Advanced Search with keywords.

                                                                                                                                                                                                                                              Possible values are:

                                                                                                                                                                                                                                              • All Attachments

                                                                                                                                                                                                                                              • All Candidate Visible

                                                                                                                                                                                                                                              • All Resumes

                                                                                                                                                                                                                                              When "All Resumes" is selected, the system will only search attachments tagged as resumes.

                                                                                                                                                                                                                                              All Candidate Visible Configuration > [Recruiting] Settings

                                                                                                                                                                                                                                              Important Information Regarding Attachment Size and Number of Attachments

                                                                                                                                                                                                                                              The allocated number of attached files, the attached file size limit, and the attached file formats are controlled with one set of settings for the entire Oracle Talent Acquisition Cloud (OTAC) suite. This means that the same rules apply for attachments to candidate files, requisitions, offers, submissions, Legacy Onboarding and Onboarding (Transitions) PDFs, etc.

                                                                                                                                                                                                                                              For customers with Oracle Taleo Platform Cloud Service (Basic package offering):

                                                                                                                                                                                                                                              • the attached file maximum size is 1 MB per file

                                                                                                                                                                                                                                              • the maximum number of attached files is of 10 files per entity

                                                                                                                                                                                                                                              Any combination of attachment size multiplied by the number of attachments is allowed as long as it does not exceed 5 MB per file or the package offering options. For example, for the Basic package offering, if the attached file maximum size is 1 MB per file and the maximum number of attached files is of 10 files per entity, the following possibilities would be allowed.

                                                                                                                                                                                                                                              Attachment Size Number of Attachments Total Allowed
                                                                                                                                                                                                                                              2 MB 5 10 MB Yes
                                                                                                                                                                                                                                              5 MB 2 10 MB Yes
                                                                                                                                                                                                                                              5 MB 5 25 MB No. Exceeds the 10 MB limit.
                                                                                                                                                                                                                                              To change the attachment limit values, customers must enter a service request. An Oracle Support representative will validate the request and make sure the combination of attachment size multiplied by the number of attachments does not exceed the package offering option.

                                                                                                                                                                                                                                              For the Attached File Maximum Number setting, a maximum number of attachments is allowed per entity record. Candidate-facing attachments are counted together across all general profiles and job submissions. Recruiter-facing attachments are counted together across all general profiles, but separately per job submission. For example, if the setting is set to 10 attachments, attachments will be counted as follows:

                                                                                                                                                                                                                                              • Offer attachments: they are counted per offer, so 10 attachments would be allowed per offer.

                                                                                                                                                                                                                                              • Candidate-facing attachments: these are files attached by the candidate, or attached by the recruiter and flagged as "Visible by candidate". A total of 10 attachments would be allowed for all general profiles and job submissions of a given candidate.

                                                                                                                                                                                                                                              • Recruiter-facing attachments: these are files attached by the recruiter and not flagged as "Visible by candidate". A total of 10 attachments would be allowed for all general profiles of a given candidate (a candidate can have more than one general profile, one per language for example). Ten additional attachments would be allowed for each job submission

                                                                                                                                                                                                                                              User Type Permission Description Location
                                                                                                                                                                                                                                              Access Attachments tab Attachment visibility in lists reflects the use of the View other attachments and Access Attachments tab permissions. See below for details. Configuration > [SmartOrg] Administration > [Users] User Types > Recruiting > Candidates
                                                                                                                                                                                                                                              View other attachments Attachment visibility in lists reflects the use of the View other attachments and Access Attachments tab permissions. See below for details. Configuration > [SmartOrg] Administration > [Users] User Types > Recruiting > Candidates
                                                                                                                                                                                                                                              Remove files attached by other users To safeguard against users inadvertently removing files attached by other users or candidates, the Remove files attached by other users permission was created. This permission defines the rights users have to remove files that they did not themselves directly attach to the candidate file. When this permission is not granted, users are only able to remove files they have uploaded themselves. Configuration > [SmartOrg] Administration > [Users] User Types > Recruiting > Candidates
                                                                                                                                                                                                                                              Attach a file (general). Configuration > [SmartOrg] Administration > [Users] User Types > Recruiting > Candidates > General
                                                                                                                                                                                                                                              Attach a file (on preselected candidates). Configuration > [SmartOrg] Administration > [Users] User Types > Recruiting > Candidates > General

                                                                                                                                                                                                                                              Attachment visibility in lists reflects the use of the View other attachments and Access Attachments tab permissions:

                                                                                                                                                                                                                                              • The Attachments column is always present if configured in the list format, regardless of a user's permissions.

                                                                                                                                                                                                                                              • The Attachments icon appears if a user has the Access Attachments tab permission.

                                                                                                                                                                                                                                              • The Attachments icon appears in the search results list and folders list if a user has the View other attachments permission.

                                                                                                                                                                                                                                              • The Attachments icon callout displays only candidate facing attachments. The display of attachments respects a user's viewing permissions. If a user has the View Attachments tab permission, but not the View other attachments permission, attachments that exist may be hidden; the callout will display "Restricted Visibility" if files attached to the candidate file are classified as "other attachments" and the user is not authorized to view them.

                                                                                                                                                                                                                                                Print

                                                                                                                                                                                                                                                The print functionality allows Recruiting Center users to create a PDF version of a requisition file or candidate file and to print the PDF.

                                                                                                                                                                                                                                                The print function is available in the candidates list and requisitions list as well as within candidate files and requisition files. When using the print function, users can decide to print the content in a list format where information is presented in different columns, or they can choose to print the details of the file where content is presented into sections.

                                                                                                                                                                                                                                                • When users are printing the content in a list format, the content of the file is presented in different columns and the content of each file is displayed in a row. The format of the list (that is, the columns used to display the information) is identical to the requisition or candidate list format used. A maximum of 1000 lines can be printed in the list.

                                                                                                                                                                                                                                                • When users are printing the details of the file, all sections of the file or only specific sections can be printed. For example, a user can choose to print from a candidate file only prescreening and basic profile information. Sections selected by a user when using the print function are saved as defaults for the next print action, but blocks selected within the main submission file section are not. Also, sections available to a user are based on how the file is configured and on user permissions. This means, if a system administrator wanted to allow users to more precisely control what is printed, he/she can do this by increasing the sections in the file layout. For candidate files, a maximum of 50 files can be printed. For requisition files, a maximum of 15 files can be printed.

                                                                                                                                                                                                                                                When printing candidate files:

                                                                                                                                                                                                                                                • Attachment content is included within the generated PDF, along with the candidate information. When clicking the Print icon, users can select the type of attachments they wish to include in the generated PDF. These attachments are part of the generated PDF, along with the candidate information. Three options are available: Most recent flagged resume, Visible by candidate (Excludes flagged resume), Not visible by candidate (Excludes flagged resume).

                                                                                                                                                                                                                                                • A Table of Contents is available in the generated PDF so that users can easily navigate through the candidate files. Clicking the Bookmarks icon in the PDF will display the Table of Contents.

                                                                                                                                                                                                                                                • Print candidate actions are tracked in the candidate file History tab.

                                                                                                                                                                                                                                                When using the print functionality, only fields containing data are visible in the view/print mode; this means fields with no data will not be rendered when printing. The PDF generated by the print function is identical to the data presented to the user for the selected sections while looking at the information in view mode.

                                                                                                                                                                                                                                                When selecting one or several candidate files in a candidates list or requisition-specific candidate list in order to print them, the Submission file is printed. When selecting one or several candidate general profiles in a search results list or folders list, the General Profile file is printed.

                                                                                                                                                                                                                                                Regarding tracking information in the candidate file History tab, the system displays the 1000 most recent tracking items no matter if printing 1 or 50 candidate files. Therefore, if printing one candidate file, the 1000 most recent tracking items are displayed. If printing five candidate files for example, 200 tracking items are displayed per candidate. For a given candidate, when the maximum is reached, the following message is displayed: "The history contains the {0} most recent items".

                                                                                                                                                                                                                                                Note: When printing a candidate file and the Candidate Share mode (Flipbook) is enabled, it is possible to include attachments in the printed document, as long as the user is choosing to print 50 candidates or less. When printing a candidate file and the Candidate Share mode (Flipbook) is not enabled, it is not possible while printing to include the name of candidate facing attached files. Attachments appear in the Attachments tab; they are not part of the candidate file and they are not printed with the file.

                                                                                                                                                                                                                                                  Print Function - Settings

                                                                                                                                                                                                                                                  The following setting is used to configure the prin functionality.

                                                                                                                                                                                                                                                  A setting allows system administrators to select which sections of the candidate job submission or general profile users will be able to print. Two values are available:

                                                                                                                                                                                                                                                  • All sections can be selected

                                                                                                                                                                                                                                                  • Only the Job Submission/General Profile section and the Attachments section can be selected

                                                                                                                                                                                                                                                  Setting Description Default Value Location
                                                                                                                                                                                                                                                  Configuration of Sections in the Job Submission/General Profile for the Print and Share Functionalities Enables the ability to configure the sections in the candidate general profile and job submission, including attachments, that can be printed or shared. This setting applies to all users who have the permissions to use the print or share functionality. All sections can be selected Configuration > [Recruiting] Settings

                                                                                                                                                                                                                                                    Folder

                                                                                                                                                                                                                                                    In the Recruiting Center, folders are used for organizing candidate files and search queries.

                                                                                                                                                                                                                                                    Recruiting Center users who have been granted the proper permissions can organize folders in ways that best suit their needs. They can store candidate files as well as candidate search queries in folders. They can create, delete, and rename folders and they can also share folders with other users.

                                                                                                                                                                                                                                                    The Folder tab is available in the left panel of the Candidates list and Search Queries list.


                                                                                                                                                                                                                                                    Image showing the Folders tab.

                                                                                                                                                                                                                                                      Folder - Permissions

                                                                                                                                                                                                                                                      The following permissions are used to configure the folder functionality.

                                                                                                                                                                                                                                                      User Type Permission Location
                                                                                                                                                                                                                                                      Use personal folders Configuration > [SmartOrg] Administration > [Users] User Types > Recruiting > Candidates
                                                                                                                                                                                                                                                      Share personal folders Configuration > [SmartOrg] Administration > [Users] User Types > Recruiting > Other
                                                                                                                                                                                                                                                      Access shared folders Configuration > [SmartOrg] Administration > [Users] User Types > Recruiting > Other
                                                                                                                                                                                                                                                        Understanding Languages

                                                                                                                                                                                                                                                        Oracle Talent Acquisition Cloud (OTAC) products are available in different optional languages.

                                                                                                                                                                                                                                                        Not all languages are available for all OTAC products. Languages must be activated by the system administrator before they can be used in an application.

                                                                                                                                                                                                                                                        There are several concepts around languages:

                                                                                                                                                                                                                                                        The application language is the language used for a product. This is the language selected by the user when signing in the OTAC suite. The language selected defines the language of every UI labels and elements of the product.

                                                                                                                                                                                                                                                        The content language is the language of a specific entity. The content language is selected when creating an entity. For example, it is possible to create a requisition in French even when using the Recruiting Center in English. The content language of a user is set in the user's account by the system administrator. However, a user can change this default content language under My Setup > Preferences > Content Language. The preferred content language is used by the system as the default content language which is the same across all OTAC products. If a product does not support the same set of content languages, it will have its own preference configuration.

                                                                                                                                                                                                                                                        The correspondence language is the language used for email messages. The correspondence language of a user is set in the user's account by the system administrator. However, a user can change this default correspondence language under My Setup > Preferences > Correspondence Language.

                                                                                                                                                                                                                                                        In Oracle Talent Acquisition Cloud (OTAC) products, the languages in which an element (for example, a requisition) is available are indicated in the Activated Languages field. When creating or editing an element, the user can choose a base language as well as languages in which the element will be available. The base language of an element is the item's reference language, usually used as a reference for other languages or fallback display in list mode. The user's preferred content language is used as the default base language when the user creates an element. The base language of an element can be changed at any time by the user. A language must be activated before it can be designated as a base language.

                                                                                                                                                                                                                                                        When an element is available in one language, the name of the language is displayed in the list; for example "en". When only one language is used within a company, there is no special indicator. When an element is available in several languages, the Earth icon is displayed. Hovering the mouse over the icon displays the languages in which the element is available.


                                                                                                                                                                                                                                                        Image showing the language in which an element is available.

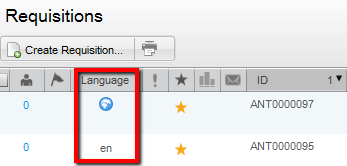
                                                                                                                                                                                                                                                          Languages - Settings and Preferences

                                                                                                                                                                                                                                                          The following settings and preferences are used to configure languages.

                                                                                                                                                                                                                                                          Setting Description Default Value Location
                                                                                                                                                                                                                                                          Application Languages List of application languages, presented according to the organization's preferences. The application language is the language in which a product can be viewed. This is a private setting. Contact Oracle Support for details. French, English, German, Spanish Configuration > [General Configuration] Settings
                                                                                                                                                                                                                                                          Correspondence Language Indicates the correspondence language. Configuration > [General Configuration] Settings
                                                                                                                                                                                                                                                          Content Language Indicates the content language. Configuration > [General Configuration] Settings

                                                                                                                                                                                                                                                          Preference Description Location
                                                                                                                                                                                                                                                          Application Language Allows users who log in using Single Sign-on to change their application language. Configuration > [SmartOrg] Administration > [Users] User Accounts > General Preferences

                                                                                                                                                                                                                                                          Recruiting Center > Resources > My Setup

                                                                                                                                                                                                                                                          Correspondence Language Indicates the preferred correspondence language of a user. Configuration > [SmartOrg] Administration > [Users] User Accounts > General Preferences

                                                                                                                                                                                                                                                          Recruiting Center > Resources > My Setup

                                                                                                                                                                                                                                                          Content Language Indicates the preferred content language of a user. Configuration > [SmartOrg] Administration > [Users] User Accounts > General Preferences

                                                                                                                                                                                                                                                          Recruiting Center > Resources > My Setup

                                                                                                                                                                                                                                                            Multilingual Deployment

                                                                                                                                                                                                                                                            Below are items worty of note for multlingual deployments and system behavior.

                                                                                                                                                                                                                                                            Requisition Search: When using the search within a requisition, the system will always try to search using the user's Recruiting Center session language. If a requisition is not translated into the User's Recruiting Center session language, then the search criteria used will be empty and the results will have no bearing on the requisition used to conduct the search. To work past this, users should ensure that requisitions are translated into their application language if they are looking to use the "Search from this requisition" feature.

                                                                                                                                                                                                                                                            Language Fallback: Currently, there is no graceful fallback for the data presented to users when it is not available in their preferred language. This will impact customers with multilingual deployments where managers and candidate language preferences are not the same or jobs are created for managers but not in that manager's language preference (extreme edge case).

                                                                                                                                                                                                                                                            Here are two examples to illustrate this point as well as guidance on how to resolve it:

                                                                                                                                                                                                                                                            Scenario 1: Candidate data presented in PDF to share recipient during share function.

                                                                                                                                                                                                                                                            If a candidate applies in Japanese and the share sender's content language preference is English, the share file generated as well as all labels will be in English. Data for the submission file will be unilingual and will render for the user in English for selector fields and Japanese for text fields (this means things like resume text, cover letter text, work experience and education will come through fine). However, any profile based multilingual text and text area fields will not render for the user. This means for example that if the candidate has entered data into a candidate UDFs text field, it will not render to the share recipient if sent by an English content language share sender.

                                                                                                                                                                                                                                                            To work past this: If the share sender is sending a Japanese candidate submission and wants the data to be rendered in Japanese to the share recipient, he/she should change his/her content language preference under My Setup to Japanese prior to conducting the share action.

                                                                                                                                                                                                                                                            Scenario 2: Offer approval request for offer created in user's preferred correspondence language.

                                                                                                                                                                                                                                                            If an offer is created in English but a user's access language for the file is French based on the defined rules, fields which are multilingual text and text area will be missing data when it is routed for approval to that user when conducting an approval via eShare. For example, compensation text fields would be impacted by this.

                                                                                                                                                                                                                                                            To work past this: Customers should ensure that the approver's preferred message content language or Recruiting Center logged in language matches the language in which the offer exists (depending on how the user is conducting his/her approval). Users can update their user preference or login using the right language if needed to view offer data and regenerate the PDF if there is a mismatch.

                                                                                                                                                                                                                                                              Multilingual Requisition and Requisition Template Behavior

                                                                                                                                                                                                                                                              Users can configure multiple languages on a requisition or requisition template.

                                                                                                                                                                                                                                                              When editing one of these files in a language other than the Recruiting Center language in use, all labels and drop-down menus will still appear in the language of the Recruiting Center, not the language of the file being edited. Prescreening and text based content will display in the edit view of the file in the language selected. In addition, users can use the language indicator on the left panel to know which language of the file they are working with. Edits can be made to drop-down menus in the file in any language; a value selected in one language will apply to all languages.

                                                                                                                                                                                                                                                                Multilingual Behavior with PDFs

                                                                                                                                                                                                                                                                To better understand the multilingual behavior of system-generated PDF files used for approvals and other system-generated candidate files and requisition files included in system-generated correspondence in the Recruiting Center, we are providing some clarification of what to expect from a language perspective.

                                                                                                                                                                                                                                                                If you are using Oracle Talent Acquisition Cloud (OTAC) in only one language, this section does not apply to your implementation and can be skipped.

                                                                                                                                                                                                                                                                PDF files are used throughout the Recruiting Center. The following table shows in which files PDFs are available and for which feature.

                                                                                                                                                                                                                                                                Feature Requisition File Candidate File Offer File
                                                                                                                                                                                                                                                                Requisition Approval Yes
                                                                                                                                                                                                                                                                Offer Approval Yes Yes Yes
                                                                                                                                                                                                                                                                Interview Request* Yes Yes
                                                                                                                                                                                                                                                                ACE Candidate Alert Yes
                                                                                                                                                                                                                                                                Share Candidate Yes
                                                                                                                                                                                                                                                                * Interview request file behavior is not outlined yet as it is still being researched.

                                                                                                                                                                                                                                                                The following table explains the type of data being translated in a PDF file as well as when a translation is available for each type of data.

                                                                                                                                                                                                                                                                When is it available? When is it not available?
                                                                                                                                                                                                                                                                Container=Field labels and Section headers throughout the file. If translated by a system administrator, or is a system field and has a system provided language.

                                                                                                                                                                                                                                                                Note: The candidate file container is always translated into all candidate facing languages. The requisition file container may not always be completely translated into all candidate facing languages because only career section exposed sections need to be translated into all available system languages.

                                                                                                                                                                                                                                                                If the field is a custom field that the system administrator has not translated.
                                                                                                                                                                                                                                                                Data=Information provided by an end user in the file. If it was provided by an end user in that language.

                                                                                                                                                                                                                                                                When the value specified by the end user has an equivalent selection value available in that language.

                                                                                                                                                                                                                                                                When the field used is unilingual and presented to the user in the same text regardless of language.

                                                                                                                                                                                                                                                                If the end user has not provided a value in that language and the field is a multilingual text field (for example, most compensation fields are multilingual text fields).

                                                                                                                                                                                                                                                                The following table indicates in which language the PDF content (container and data) is being translated.

                                                                                                                                                                                                                                                                Container Data
                                                                                                                                                                                                                                                                Requisition File
                                                                                                                                                                                                                                                                • Requisition Approval

                                                                                                                                                                                                                                                                • Offer Approval

                                                                                                                                                                                                                                                                From Tasks: The approver's connected language.

                                                                                                                                                                                                                                                                From eShare: The approver's preferred message language, or if a login to eShare is required, the language specified upon entering the eShare Response Center.

                                                                                                                                                                                                                                                                Same as container except there is a fallback if data is not translated into the user's language.

                                                                                                                                                                                                                                                                Fallback: Requisition base language.

                                                                                                                                                                                                                                                                Candidate File
                                                                                                                                                                                                                                                                • ACE Candidate Alert

                                                                                                                                                                                                                                                                • Share Candidate

                                                                                                                                                                                                                                                                If the recipient is a Recruiting Center user, the recipient's preferred correspondence language is used; otherwise, the eShare sender's content language is used. Candidate file submission language.
                                                                                                                                                                                                                                                                Candidate File
                                                                                                                                                                                                                                                                • Offer Approval

                                                                                                                                                                                                                                                                From Tasks: The approver's connected language.

                                                                                                                                                                                                                                                                From eShare: The approver's preferred message language, or if a login to eShare is required, the language specified upon entering the eShare Response Center.

                                                                                                                                                                                                                                                                Candidate file submission language.
                                                                                                                                                                                                                                                                Offer File
                                                                                                                                                                                                                                                                • Offer Approval

                                                                                                                                                                                                                                                                From Tasks: The approver's connected language.

                                                                                                                                                                                                                                                                From eShare: The approver's preferred message language, or if a login to eShare is required, the language specified upon entering the eShare Response Center.

                                                                                                                                                                                                                                                                Same as container. No fallback exists in this case.

                                                                                                                                                                                                                                                                File recipients will receive files based on the situations outlined. File content will appear in the language(s) specified. When a language is not available in the language specified, the PDF will render but impacted container/data will be absent.

                                                                                                                                                                                                                                                                Here are two examples to illustrate this point as well as guidance on how to resolve it:

                                                                                                                                                                                                                                                                Scenario 1: Candidate data presented in PDF to share recipient during share function.

                                                                                                                                                                                                                                                                If a candidate applies in Japanese and the share sender's content language preference is English, the share file generated as well as all labels will be in English. Data for the submission file will be unilingual and will render for the user in English for selector fields and Japanese for text fields (this means things like resume text, cover letter text, work experience and education will come through fine). However, any profile based multilingual text and text area fields will not render for the user. This means for example that if the candidate has entered data into a candidate UDFs text field, it will not render to the share recipient if sent by an English content language share sender.

                                                                                                                                                                                                                                                                To work past this: If the share sender is sending a Japanese candidate submission and wants the data to be rendered in Japanese to the share recipient, he/she should change his/her content language preference under My Setup to Japanese prior to conducting the share action.

                                                                                                                                                                                                                                                                Scenario 2: Requisition approval request not translated into the user's specified content language.

                                                                                                                                                                                                                                                                If a requisition is created in English but a user's preferred content language is French, if the requisition has not been translated into French and is routed to that user for approval, fields which are multilingual text will be missing data when it is routed for approval to that user. For example, compensation text fields and job description fields would be impacted by this.

                                                                                                                                                                                                                                                                To work past this: Customers should ensure that requisitions are translated into all content languages used by approvers on a specific requisition. If a user does happen to receive a requisition approval request and some data does not come through because it was not translated into the user's content language, the user can log into the system and change his content preference to the appropriate language and then go to generate the requisition file again. This time, it will render in the updated language preference specified that contains all of the data.

                                                                                                                                                                                                                                                                  JavaScript API

                                                                                                                                                                                                                                                                  A JavaScript API can be used by customers to dynamically extract information from fields displayed in specific pages of the Recruiting Center, send the information to an external system, and capture the information back into the Oracle Talent Acquisition Cloud (OTAC) fields. A JavaScript API can be disabled if the customer is worried about various security threats.

                                                                                                                                                                                                                                                                  A Recruiting setting is available: Enable JavaScript API. If the setting is set to No and a recruiter creates a method in JavaScript and attempts to run it, the system will see that the JavaScript API is disabled and it will not execute the method. This functionality prevents malicious extraction or insertion of information with scripting from the Recruiting product.