Create a New Business Flow Instance
As a founder, you can create a business flow instance from a business flow template, and provide details on the trading partners involved, their roles as viewers and submitters of the transaction documents.
-
Click Menu (
 ) and then click Configurations.
-
Click Business Flows (
 ).
).
-
Under Configurations : Business Flows dashboard, click
Create New Business Flow (
 ).
).
-
Click Create.
The business flow instance based on the selected template opens in an edit mode.
-
Click Edit (
 ).
The Edit : Business Flows > [Flow Name] page is displayed.
).
The Edit : Business Flows > [Flow Name] page is displayed. -
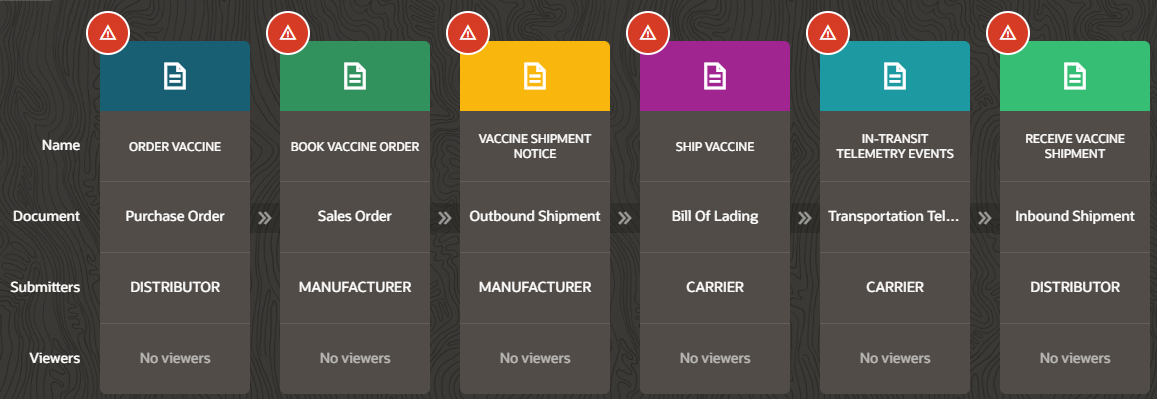
Open each step of the business flow by clicking the flow step header (
 ) icon and provide the
following information:
) icon and provide the
following information:
- Submitters with role "BUYER": Select the trading partners who will be the document submitter for this step. You can select multiple submitters in a step. The drop-down lists all the trading partners with the user role specified in the template for the submitter of this step. For example, if you have selected "buyer" for this field in the template, then all the trading partners with the "buyer" role are listed in the drop-down.
-
Viewers: Select Business Roles or Trading Partners or
both to set step viewers. The document submitter and the founder can setup zero
or more viewers for the business step.
- Business Roles: Select viewers based on the assigned roles. All tradings partnters with the assigned roles will be grouped and become viewers of that step.
- Trading Partners: Select specific trading partners who can view this business step and all the documents associated with it. The drop-down lists all the trading partners in the network.
- Enable Document Versioning: (Optional) This option enables you to submit multiple versions of a transaction document for a flow step of a business flow instance. For more details, see Access Document Versions.
-
If there is any error while adding steps or the configuration is incomplete, you
see a Warning (
 ) icon on top of that step. Click Warning
() and fix the
error.
) icon on top of that step. Click Warning
() and fix the
error.
Results:
Note: If you've successfully completed the required configurations for all the steps of the new business flow, then:
-
The Finish Editing button is enabled.
-
Click Finish Editing to change the state to Disabled.
-
You cannot delete the business flow after you have clicked Finished Editing.
- When the business flow is ready to receive documents, use the Document Submission slide bar to enable it. The business flow gets activated in the Enabled state.