Customizing an Interactive Grid with the Column Heading Menu
Use the Column Heading menu to quickly customize a column in an interactive grid.
About the Column Heading Menu in an Interactive Grid
The Column Heading Menu contains buttons and icons to sort, break, aggregate, freeze, and hide a column, as well as a text filter for searching within a column.
Overview
The Column Heading menu contains Sort Order buttons, a Toolbar, a Text Filter, and a unique list of the column’s contents.
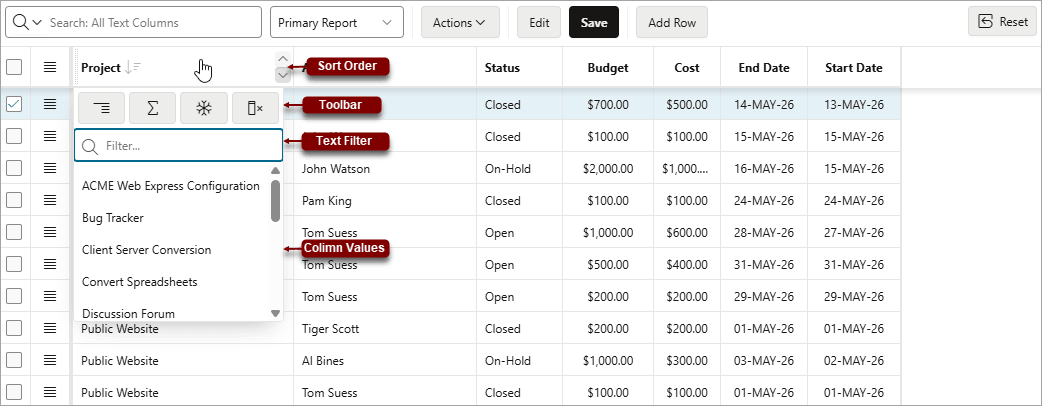
Description of the illustration ig_column_heading_menu_about.png
Sort Order Buttons
The Sort Ascending and Sort Descending buttons appear at the right of every column heading.
See Sorting Columns in an Interactive Grid.
Column Heading Toolbar
The toolbar on the Column Heading menu contains the following options:
-
Control Break - Creates a Control Break in the interactive grid based on the selected column.
-
Aggregate - Opens the Aggregation dialog to define an aggregation against the selected column.
-
Freeze - Freezes the selected column in place, preventing horizontal scrolling.
-
Hide - Hides the selected column from view.
-
Text Filter - The text filter dynamically limits the list of column contents based on the text string entered into the filter field.
For more information, see Filtering with the Column Heading Menu.
Displaying the Column Heading Menu
Display the Column Heading menu by clicking the column heading.
To display a column’s Column Heading menu:
- Click the heading of a column in an interactive grid.
The Column Heading menu displays.
Creating a Control Break in an Interactive Grid
Create a break group in an interactive grid by clicking the Control Break icon in the Column Heading menu.
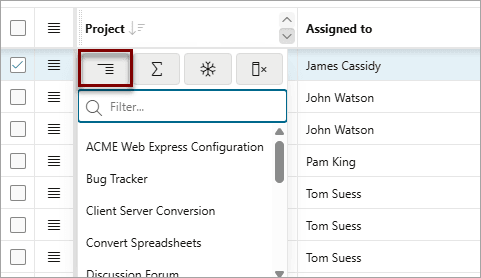
Description of the illustration ig_column_heading_button_control_break.png
Creating a break group pulls the columns out of the interactive grid and displays them as a master record.
To create a control break:
-
Click the heading of the desired break group column.
The Column Heading menu appears.
-
Click the Control Break icon.
The interactive grid reloads with the control break applied for the selected column, and a control break filter appears above the grid near the toolbar.
In the following example, a control break has been applied to the interactive grid for the Project column.
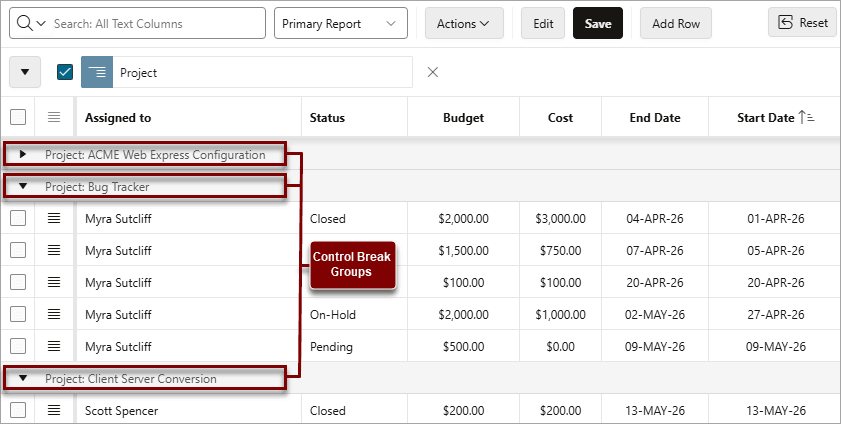
Description of the illustration ig_control_break_after.png
To remove a control break, click the Remove Control Break icon (X) on the control break filter.
See Also:
Creating an Aggregation with the Column Heading Menu
Quickly apply an aggregation to an interactive grid by clicking the Aggregate icon in the Column Heading menu.
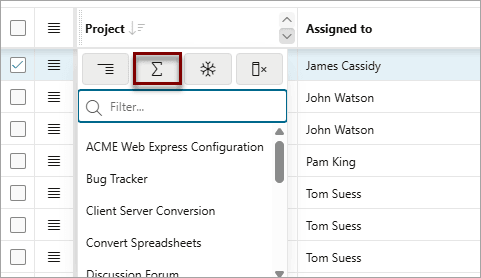
Description of the illustration ig_column_heading_button_aggregate.png
To apply an aggregation against a selected column:
-
Click the heading of the column to display the Column Heading menu.
-
Click the Aggregate icon.
The Aggregation dialog appears.
-
Configure the aggregation.
-
Click Save.
The interactive grid reloads with the aggregation applied.
See Also: Creating an Aggregation in an Interactive Grid
Freezing Columns in Place
Freeze a column in place by clicking the Freeze icon in the Column Heading menu. Freezing a column excludes it from the scrollable area so that the frozen column is always visible.
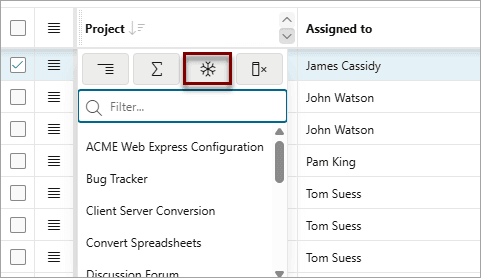
Description of the illustration ig_column_heading_button_freeze.png
To freeze a column in place:
-
Click the heading of the column that you wish to freeze.
The Column Heading menu appears.
-
Click the Freeze icon.
The scroll bar resizes to fit the new scrollable area.
To unfreeze a frozen column, reopen the Column Heading menu and click the Unfreeze icon (snowflake).
Hiding Columns in an Interactive Grid
Hide a column in an interactive grid from view by clicking the Hide icon in the Column Heading menu.
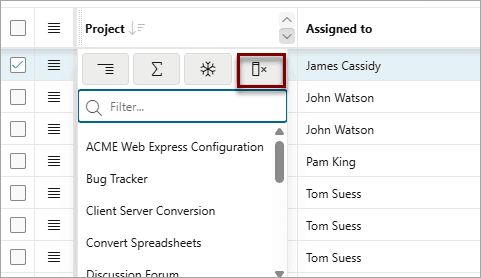
Description of the illustration ig_column_heading_button_hide.png
To hide a column in an interactive grid:
-
Click the heading of the column to display the Column Heading menu.
-
Click the Hide icon.
The column disappears. Remaining columns shift sideways to fill the space.
To redisplay hidden columns:
-
Click the Actions menu.
-
Select Columns.
The Columns dialog displays.
-
In the Displayed column, select the check box adjacent to the name of the hidden column.
Tip: Narrow the list of columns to only the hidden columns by clicking the Columns icon and selecting Not Displayed.
-
Click Save.
Tip: You can also reset the grid to redisplay a hidden column. Resetting an interactive grid reverts it to a previously saved state. Any changes since that time may be lost. To reset the grid, click the Reset button.
Unhiding Columns in an Interactive Grid
Show a hidden column in an interactive grid by opening the Columns dialog and enabling it in the Displayed column.
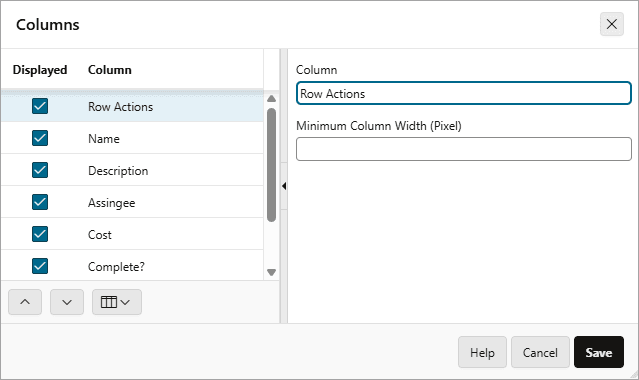
Description of the illustration ig_columns_dialog_displayed.png
To show a hidden column in an interactive grid:
-
Click the Actions menu.
-
Select Columns.
The Columns dialog displays.
-
In the Displayed column, select the check box adjacent to the name of the hidden column.
Tip: Narrow the list of columns to only the hidden columns by clicking the Columns icon and selecting Not Displayed.
-
Click Save.
The column appears in the interactive grid.
Filtering with the Column Heading Menu
Filter an interactive grid by the contents of a column by entering keywords in the Search field of the Column Heading menu.
To filter an interactive grid by column:
-
Click the heading of the column that you wish to sort by.
The Column Heading menu displays.
-
Do one of the following:
-
Click within the Filter... text area.
-
Press the Tab key until the cursor is within the Filter... text area.
-
-
Enter the text string you wish to filter by. Wildcards (such as quotation marks) are valid.
-
Do one of the following:
-
Press Enter to run the filter.
-
Select an entry from a list of valid strings that autogenerates when you start typing.
-
The interactive grid redisplays with the filter applied.
To remove a filter, click the adjacent Remove Filter icon (X).
See Also: Filtering an Interactive Grid