- Core User Manual
- File Upload
- User File Identifier Mapping
- User File Identifier Mapping – Administrator - Create
53.3.3 User File Identifier Mapping – Administrator - Create
Using this option the administrator can map the file identifiers to a
user.
To map a user to a file identifier:
- Navigate to one of the above paths.The User File Identifier Mapping screen appears, enter any one search criteria.
- Click Search.The User File Identifier Mapping screen with search results appears.
OR
Click Cancel to cancel the transaction.
OR
Click Clear to clear the search parameters.
- Click
 icon against the file identifier record, for which you want to map the
user.The User File Identifier Mapping screen appears.
icon against the file identifier record, for which you want to map the
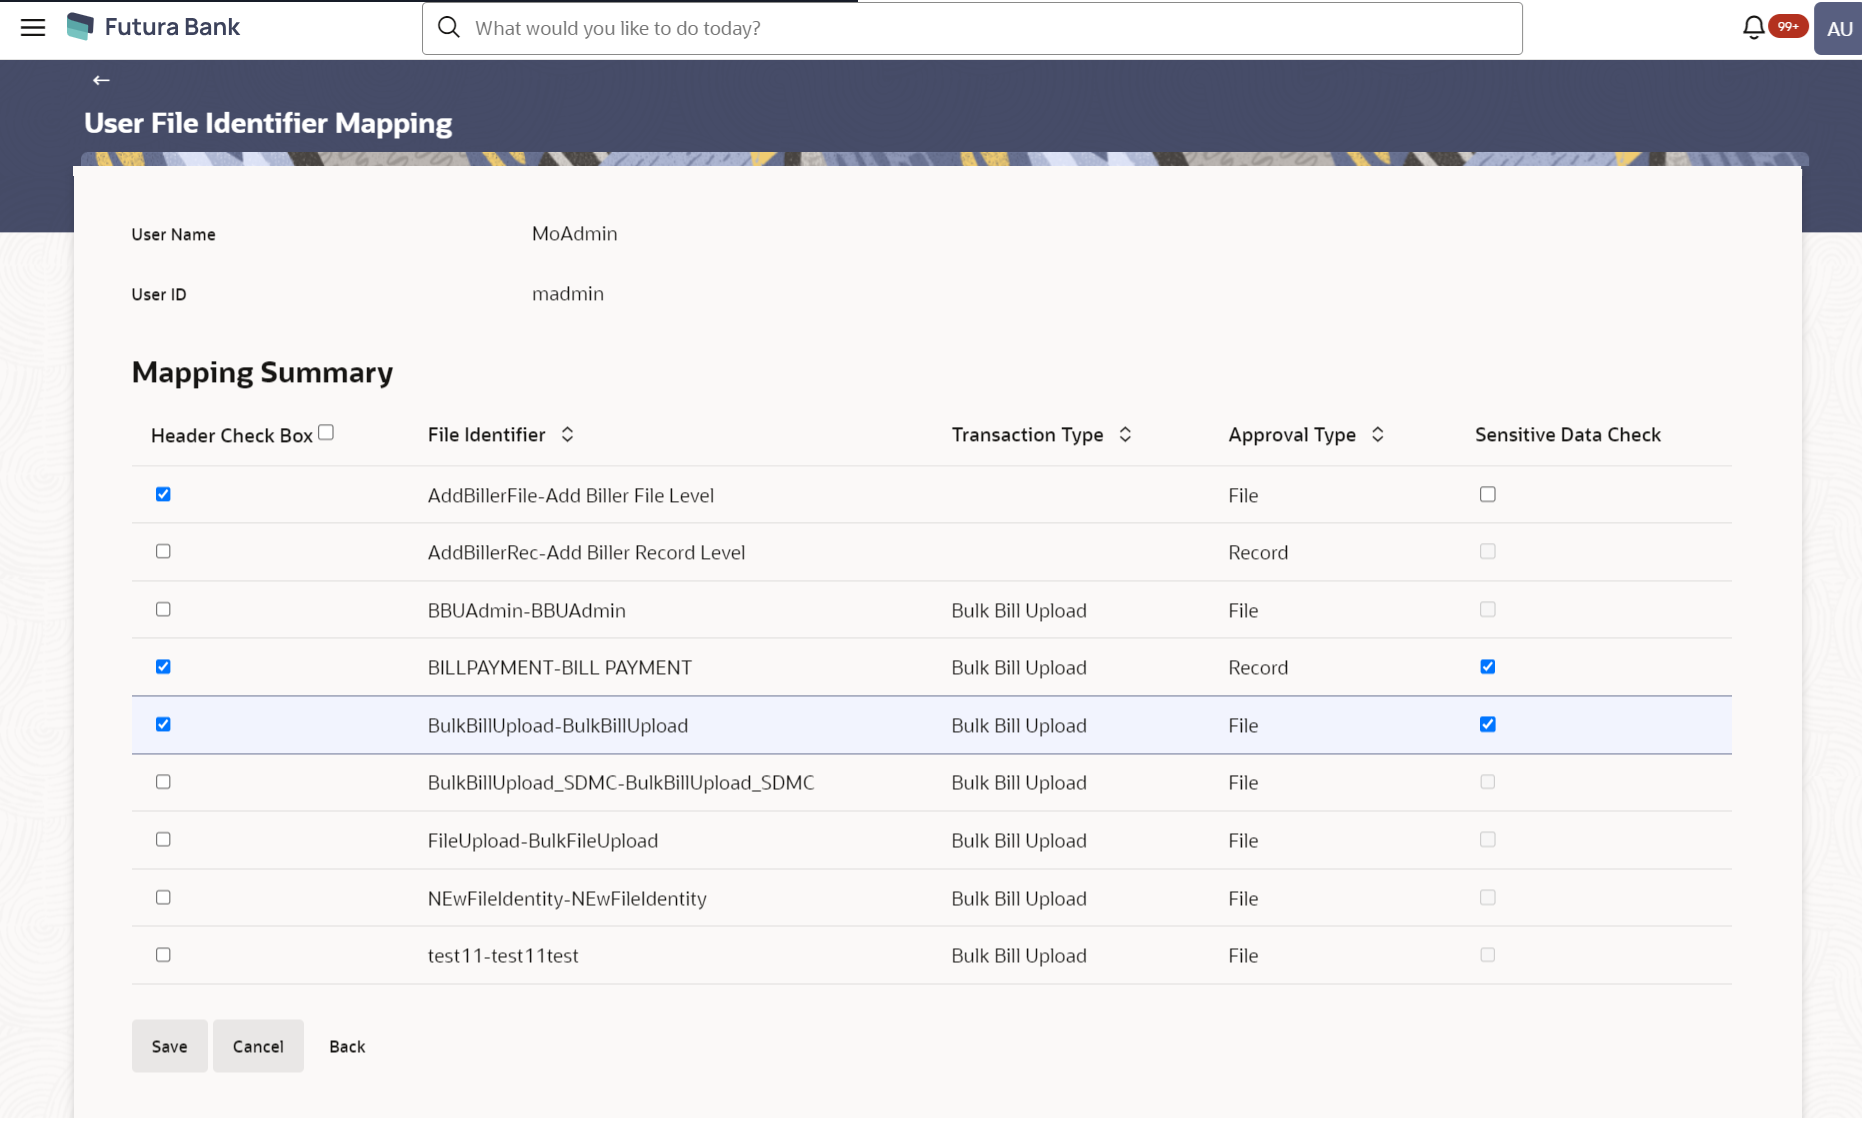
user.The User File Identifier Mapping screen appears.Figure 53-15 User File Identifier Mapping - Create
Table 53-11 Field Description
Field Name Description User Name User name. User Id User id of the user. Mapping Summary Header Check Box The check box to select the records for mapping. File Identifier Unique code assigned to the uploaded file. Transaction Type Type of transaction: The Transaction type could be:- Bulk Bill Upload
Approval Type The approval type is at file level or record level. - File Level - The approver accepts or rejects the entire file, and all records are either processed or rejected
- Record Level - The approver could approve some records, and reject others. Payments are processed only for approved records
Sensitive Data Check If selected, the users are barred from viewing the contents of the file. - In the Mapping Summary section, select the file identifier which you want to map to the user.
- Check / Uncheck the Sensitive Data check field, to enable / disable access to the contents of the file.
- Click Save.OR
Click Cancel to cancel the transaction.
OR
Click Back to navigate to the previous screen.
- The User File Identifier Mapping - Review screen
appears.Verify the details, and click Confirm.
OR
Click Cancel to cancel the operation.
OR
Click Back to navigate to the previous screen.
- The success message appears along with the transaction reference number and
status of the transaction.Click OK to complete the transaction.
Parent topic: User File Identifier Mapping
