Attributes
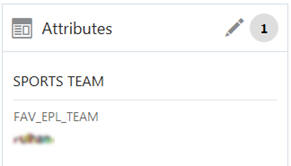
The Attributes panel of the Customer Dashboard displays all the attributes and attribute values associated with the customer:
Figure 4-19 Customer Attributes

-
A badge with the total number of attributes assigned to the customer is displayed on the right side of the title bar, as in **INTERNAL XREF ERROR**, above.
-
An Edit icon is displayed next to the badge as in as in **INTERNAL XREF ERROR**, above. This lets you access controls for editing, creating and deleting attributes.
-
The Customer Attribute section contains the following information for each customer attribute:
-
Group - The group associated with the attribute.
-
Name - The name of the attribute.
-
Value - The value set for the attribute.
-
Description - Description of the information provided by the attribute.
-
-
The name of the attribute appears above the attribute value.
-
If attributes are assigned to a group, those attributes are sorted by group, and the group name is displayed above the attributes.
-
Scroll bars are available if the number of attributes do not fit in the display area of the panel.
-
If there are no attributes assigned to the customer, a pop-up appears indicating
No Attributes assigned.
Creating an Attribute
-
Click the Edit icon at the top of the Attributes panel.
This displays a window with details of the customer's attributes:
Figure 4-20 Customer Attributes Details

The following controls are available in the toolbar:
-
Actions menu – The Actions menu has options that correspond to the Add, Edit, and Delete icons.
-
Add icon - Displays a dialog that lets you create a new customer attribute
-
Edit icon - Displays a dialog that lets you edit a selected customer attribute.
-
Delete icon - Deletes a selected customer attribute.
The following information is displayed for each attribute:
-
Group – The group associated with the attribute.
-
Name – The name of the attribute.
-
Description – Description of the information provided by the attribute.
-
Value – The value set for the attribute.
-
Data Type – The type of data contained in the attribute value.
-
Unique - Only one value can be added to the attribute when it is identified as unique.
-
Editable - Identifies whether the associate is allowed to edit the value for the attribute once it is added.
-
Open Access – Indicates whether there is open access to this attribute.
-
Publish to Batch Folder – Indicates whether the attribute has been made available for export to a marketing system such as Responsys.
-
-
-
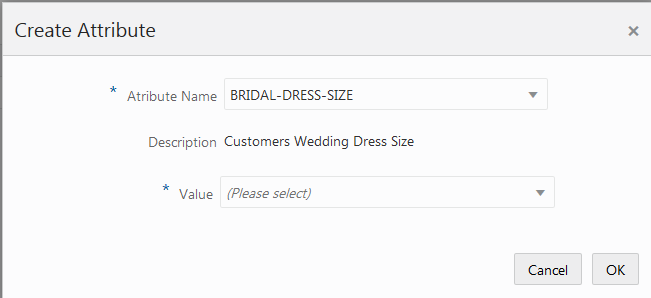
Click Add, or click the Actions Menu and select Add. This displays the Create Attribute dialog:
Figure 4-21 Create Attributes Dialog

-
Select a name from the Attribute Name list.
-
Select a value from the Value list.
-
Click OK. This adds the new attribute to the list of attributes for the customer
Editing an Attribute
-
Click Edit at the top of the Attributes panel.
-
Select the attribute that you want to edit.
-
Click Edit at the top of the detail window, or choose Edit from the Actions menu.
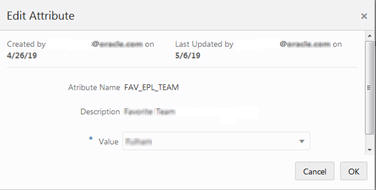
This displays an Edit Attribute dialog with details of that attribute:
Figure 4-22 Edit Attribute Dialog

-
Select a new Value for the Attribute form the list in the Value field.
-
Click OK to accept the value. The attribute is displayed with the new value.
Deleting an Attribute
-
Click Edit at the top of the Attributes panel.
This displays a window with details of the customer's attributes:
-
Select the attribute that you want to delete.
-
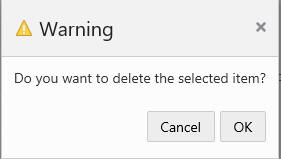
Click Delete, or click the Actions Menu and select Delete. This displays a Warning message:
Figure 4-23 Warning

-
Click OK to verify that you want to delete the message.
-
When you are finished adding, editing or deleting customer attributes, click Done, to return to the Customer Dashboard.