Creating a Scheduled Job
There are a two choices available to start the process of creating a Scheduled Job. Access the Create Scheduled Job button from either:
-
Job Home
-
Job Search
-
To access the Create Scheduled Job wizard: Proceed to Step 2.
Or use this alternate method:
To Create a new Scheduled Job from Job Search: Click the Create Scheduled Job button, which will open the Scheduled Job wizard on the Information tab. .
-
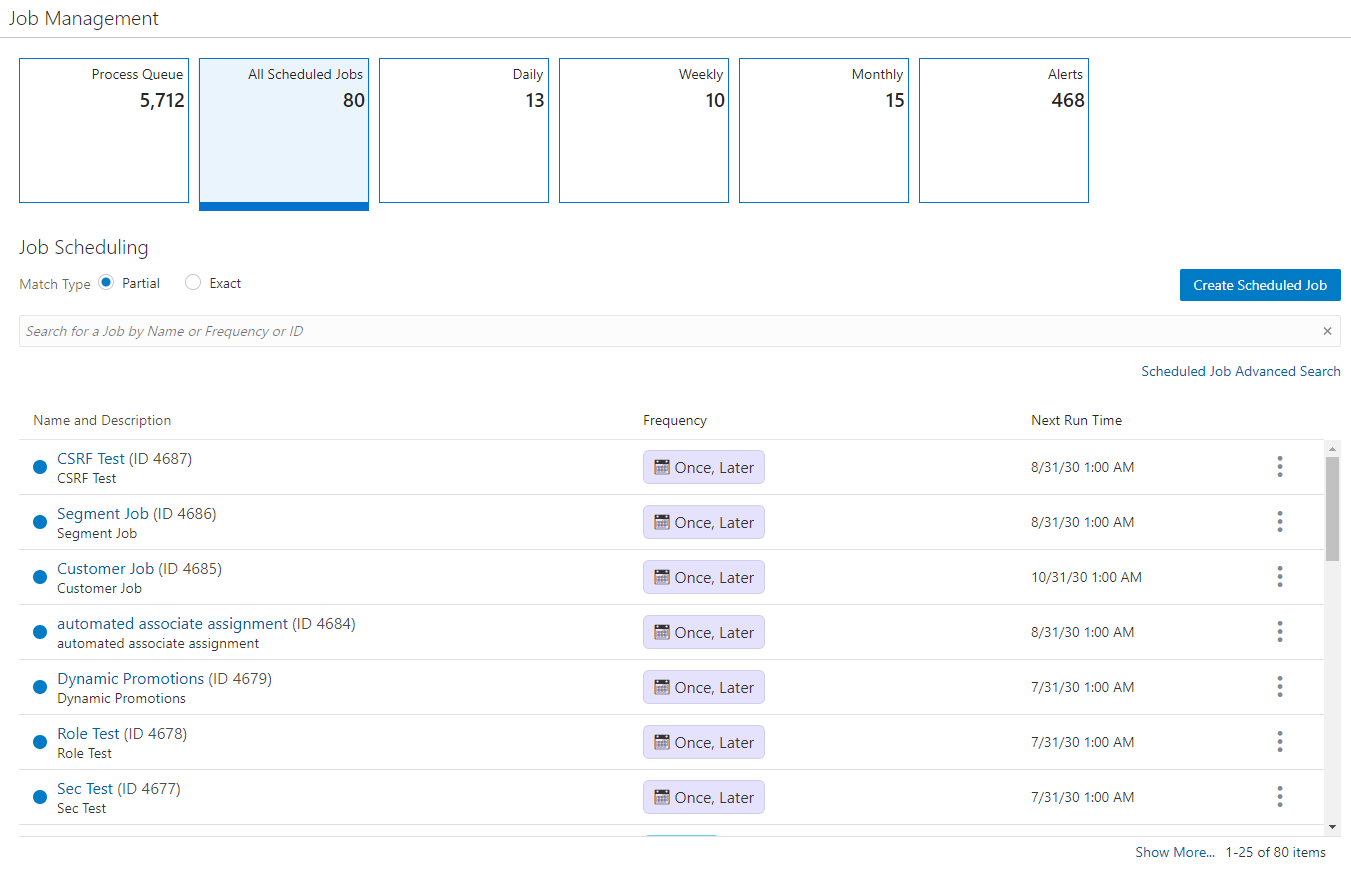
From Job Home, click Create Scheduled Job which opens the Schedule Job Wizard on the information tab. Proceed to Step 2
Figure 11-12 Job Home
Note:
To access the Create Scheduled Job button, you must select either the All Scheduled Jobs, Daily, Weekly, or Monthly tile.
-
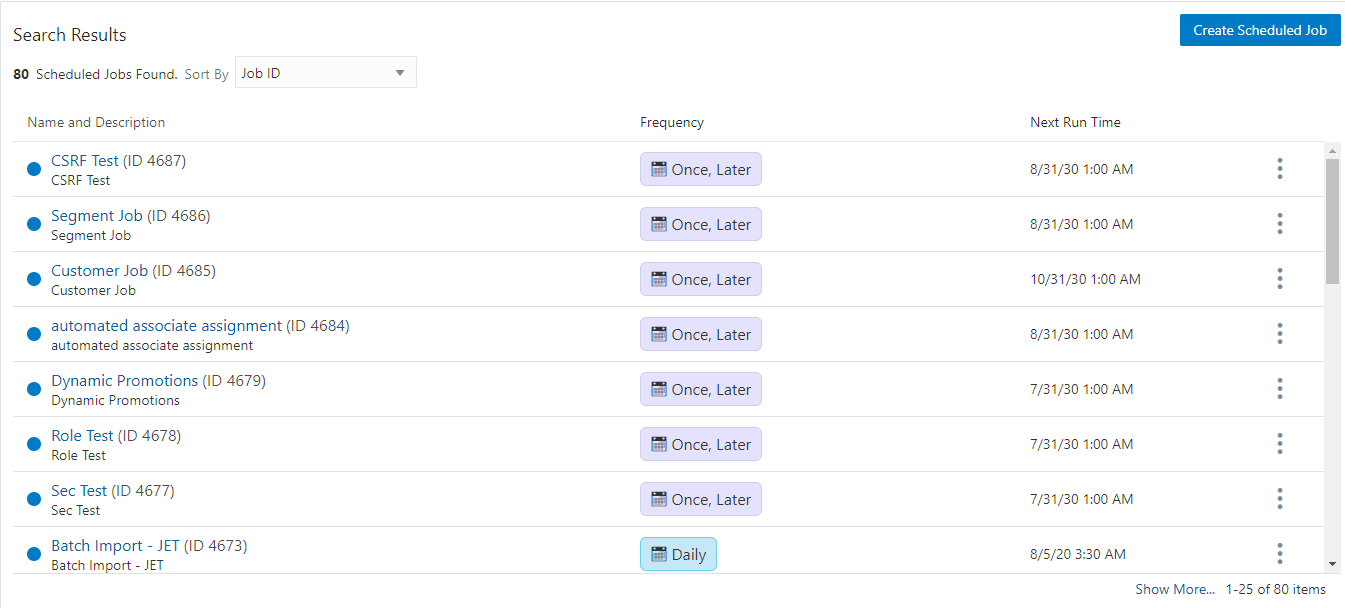
From Job Search, click Create Scheduled Job which opens the Scheduled Job wizard on the Information tab. Proceed to Step 2
Figure 11-13 Job Search
-
-
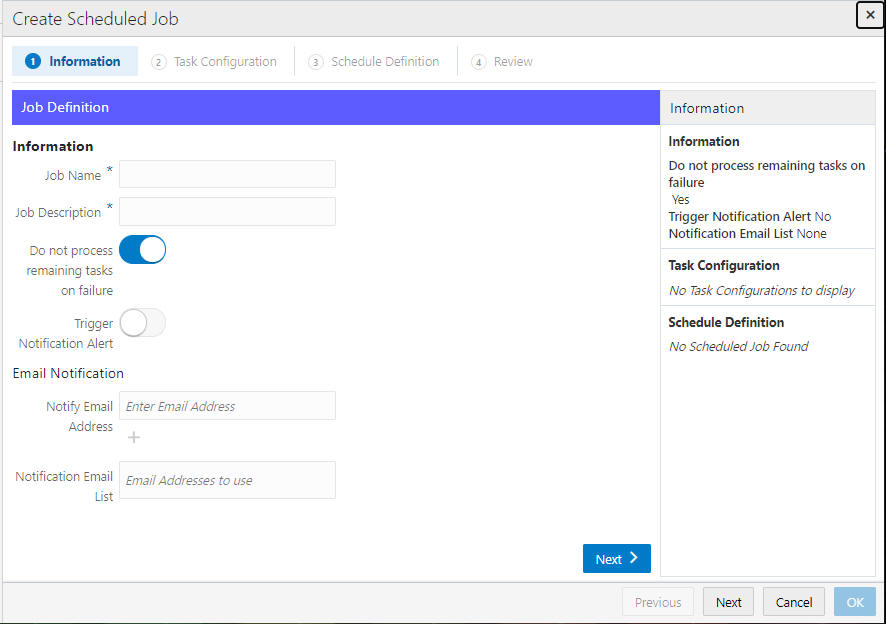
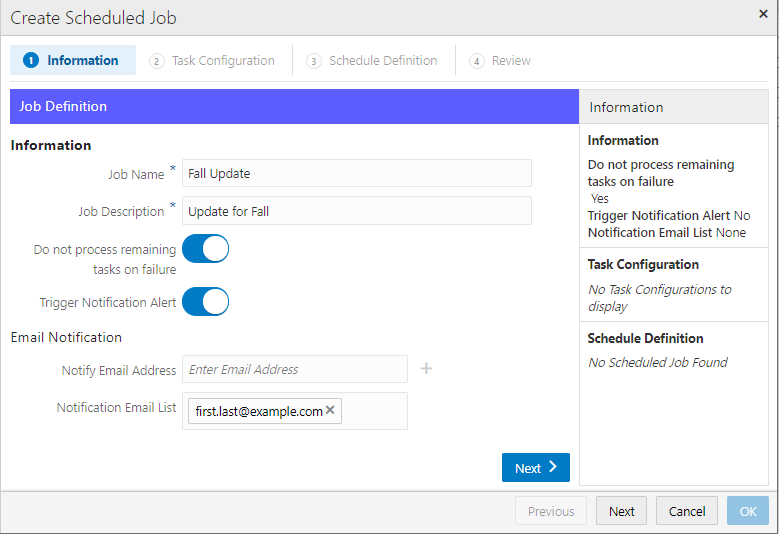
Enter the following for the Information tab.
Figure 11-14 Information Tab
-
Job Name (required)
-
Job Description (required)
-
Do Not Process Remaining Tasks on Failure - Default is ON.
-
Trigger Notification Alert - Toggle to ON to set up an alert that notifies users to items needing their attention when creating a scheduled job to be run in Customer Engagement. See Notifications for more information.
-
Notify Email Address - Enter one or more email addresses using the Plus icon to move each email address to the Notification Email List.
-
Notification Email List - This field populates as email addresses are entered.
Figure 11-15 Information Tab - Notification Email List
-
-
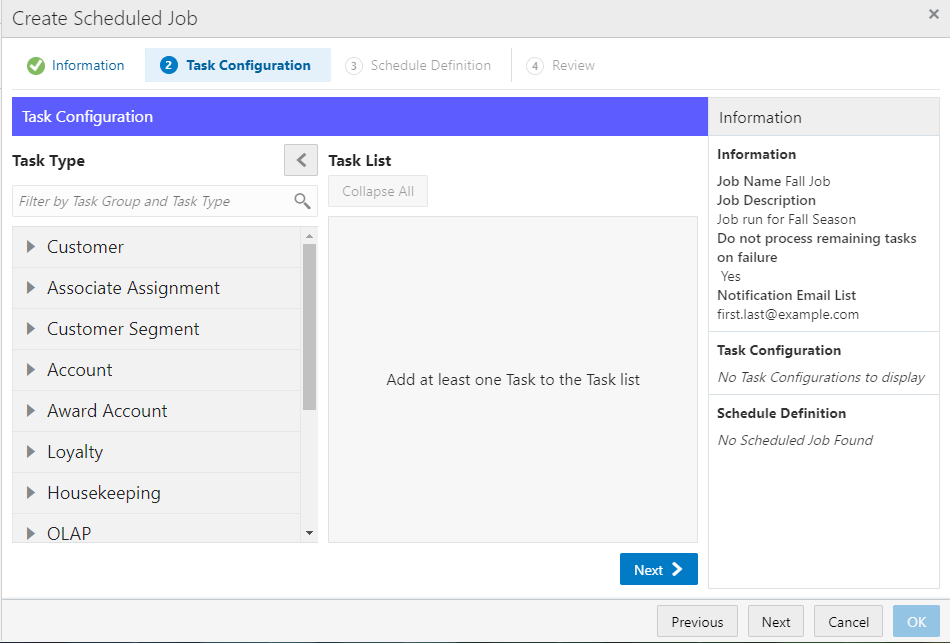
Click Next to continue to the Task Configuration tab.
Figure 11-16 Task Configuration
Building the Task List
-
To start the Task List selection, you can either filter by Task Group and Task Type or you can select one of the Templates to expand the Task Type selections.
-
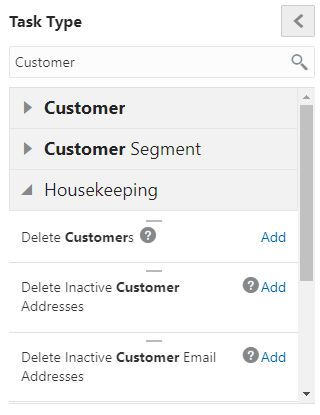
To filter by Task Group and Task Type: In the Filter by Task Group and Task Type box, enter part or all of a Task Group or Task Type.
-
Press Enter, or click the Search icon.
Figure 11-17 Task Type - Filtered
Note:
To see the available tasks in your filtered list, expand the Template to see the available choices from which to select.
To reset the filter, highlight the words and press Delete. Then press Enter, or click the Search icon.
-
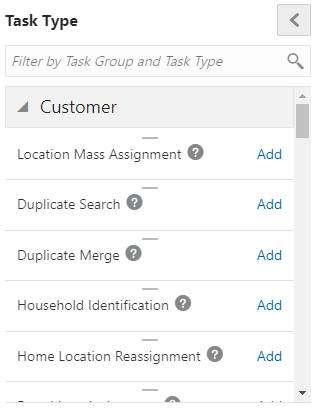
In the Task Type selection list, click a Template Group to expand its list of Task List options. See Jobs and Tasks for more information about Task Type group organization.
Figure 11-18 Expanded Task Type List
-
Click the Add link, or drag and drop the Task Type Name into the Task List window.
Figure 11-19 Adding Task Types to Task List
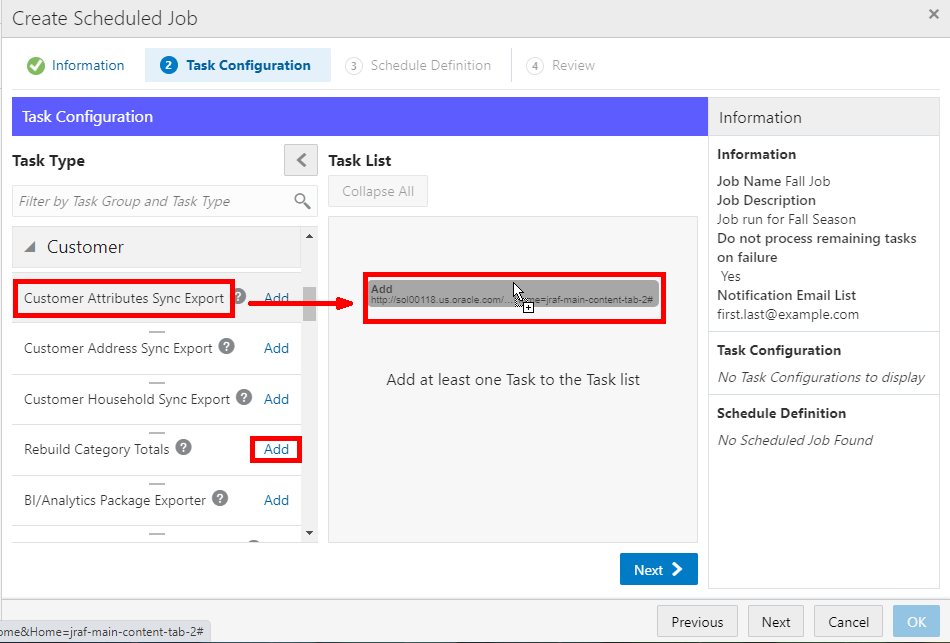
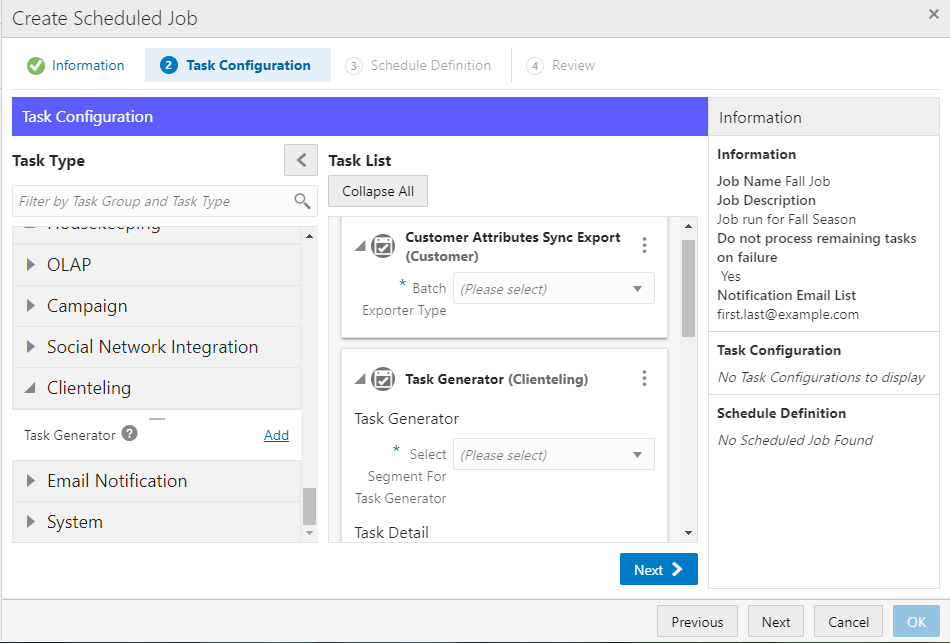
Figure 11-20 Added Task Types
-
Repeat Step 3.e until all tasks are added.
-
Enter the Task List Criteria into the appropriate fields. See Jobs and Tasks for more information about Task List fields.
Figure 11-21 Tasks
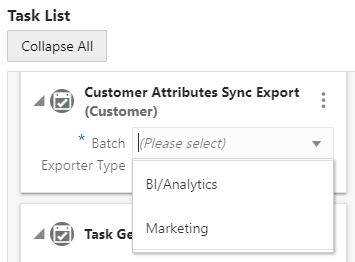
Figure 11-22 Task List Options
-
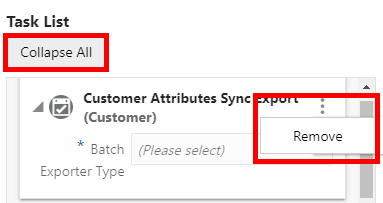
After entering the search criteria you can collapse or expand the details at any time. To collapse a task in the list, click the arrow next to each task. To change all tasks at once, click Collapse All/Expand All to Collapse/Expand.
-
When you need to clear a task from the Task List, click the Action Menu and then click Remove.
-
-
Click Next to go to the Schedule Definition tab.
-
Enter the following for the Schedule Definition tab:
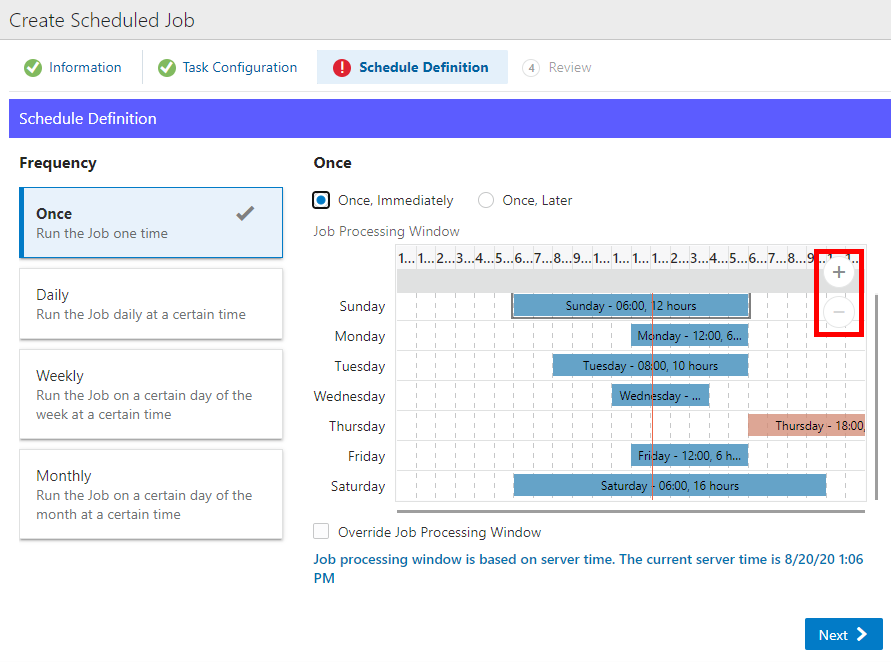
Figure 11-23 Schedule Definition Tab
Note:
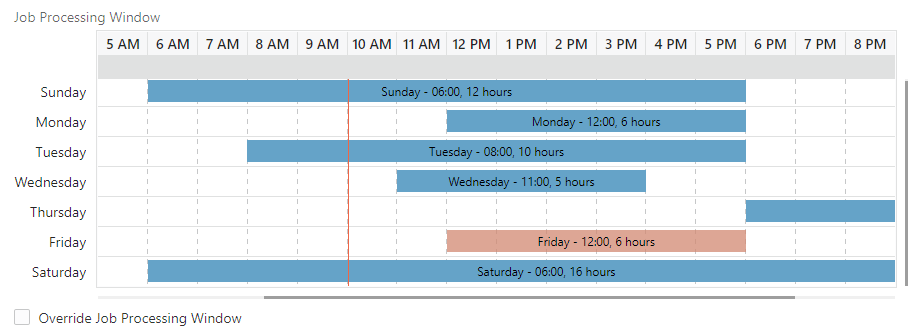
As shown in Figure Figure 11-23, hovering the mouse over the Job Processing Window enables the Zoom in and Zoom out icons. Click these icons to better view the days and times.
-
Select one of the following Job Execution Frequencies:
-
Once, Immediately to run the Job immediately, once you have finished creating/saving this job. If you select this option, continue with Step 6.f.
-
Once, Later to run the Job at a later date. If you select this option, continue with Step 6.a.
-
Daily to run the Job every day. If you select this option, continue with Step 6.a.
-
Daily, Business Days Only to run the Job only on business days (that is, Monday through Friday). If you select this option, continue with Step 6.a.
-
Weekly to run the Job once each week. If you select this option, continue with Step 6.a.
-
Monthly to run the Job once each month. If you select this option, continue with Step 6.a.
-
Use the Start Date Calendar Menu to select the start of the date range in which the Job will run. If you selected a Job Execution Frequency of Once, Later, continue with Step 6.e.
-
Use the End Date Calendar Menu to select the end of the date range in which the Job will run.
Note:
For Daily, Daily, Business Days Only, Weekly, and Monthly, if Disable End Date is selected, the End Date configuration is deactivated, leaving the Job in effect, forever. To enable the End Date Calendar Menu, clear the check box.
If you selected a Job Execution Frequency of Daily, or Daily, Business Days Only, continue with Step 6.e.
If you selected a Job Execution Frequency of Weekly, continue with Step 6.c.
If you selected a Job Execution Frequency of Monthly, continue with Step 6.d.
-
Use the Day of Week Selection check boxes to select the days of the week that you want the Job to run. Continue with Step 6.e.
-
Use the Day of Month Selection Menu to select the day of the month on which the Job will run.
-
Use the Job Execution Time Menus to determine the time at which the Job will run.
It is recommended that you select a time that is within the Job Processing Window. If you select a time outside the Job Processing Window, the Override Job Processing Window setting (see Step 6.f) must be checked for the Job to run.
-
Use the Override Job Processing Window Check Box to indicate whether the Job should run, even if it is scheduled outside the Job Processing Window. See the Job Processing Window for more information on how the Job Processing Window works.
-
-
After defining the schedule, click Next to proceed to the Review tab.
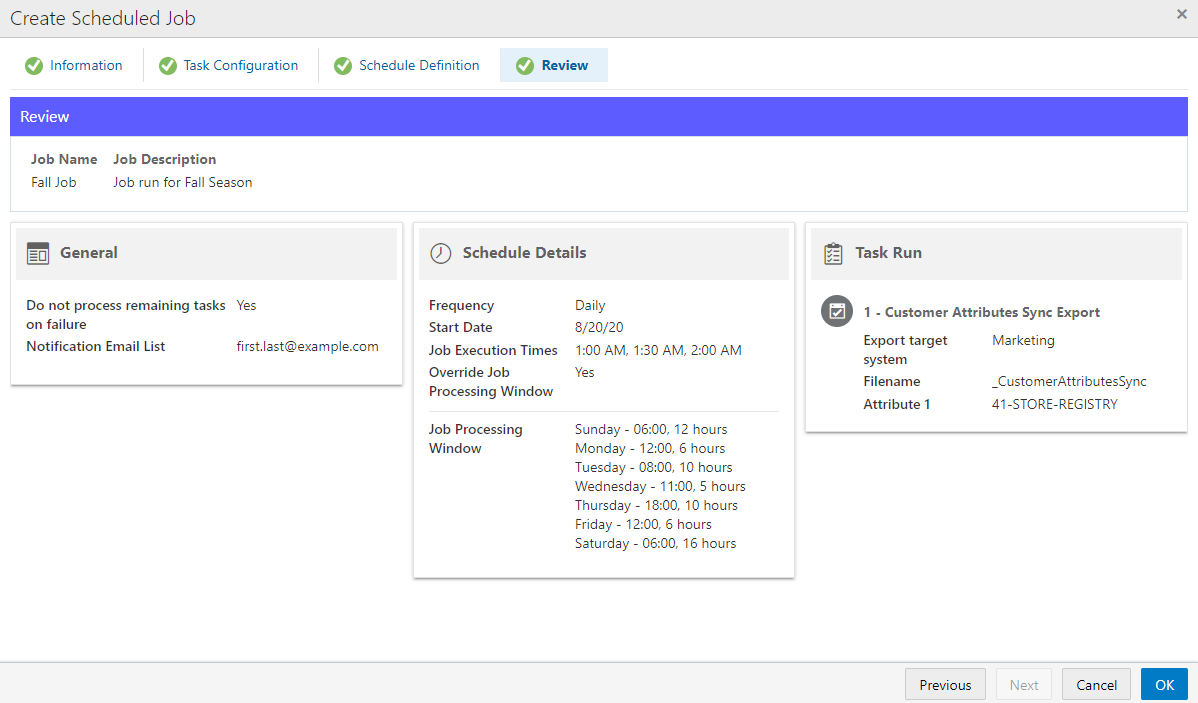
Figure 11-24 Review Tab
Note:
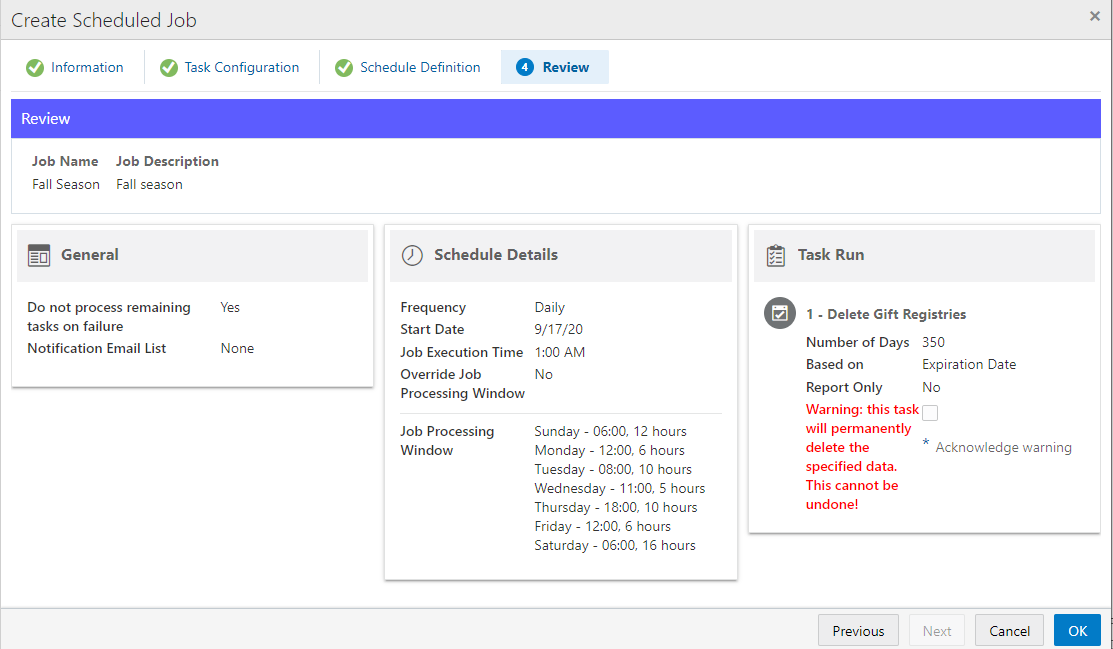
Before you can submit certain jobs, you need to acknowledge any warning in the Review step.
Figure 11-25 Review Tab - Confirm Choice Warning
-
Review the entered information to ensure that it is correct. Click OK to save the Job, or click Cancel to close the Job without saving. Click Previous or any Tab to return to any point of the Create Scheduled Job process.
Note:
Clicking OK triggers a confirmation notification to confirm the job has been created successfully.
Figure 11-26 Confirmation Notification

