Inventory Count Documents
An Inventory Count document can be created at the home office and downloaded to a store, or a store can create its own Inventory Count documents, if allowed by store policy. An Inventory Count document contains the summary information for the count, specifies the date the count should be started, and identifies the items for the count.
-
If an Inventory Count document exists for the count you want to perform, see Finding an Existing Inventory Count Document below.
-
If an Inventory Count document does not exist for the count you want to perform, see Creating a New Inventory Count Document. This option will only be available if your store policy allows store-created Inventory Count documents.
Finding an Existing Inventory Count Document
-
At the Register Login screen, select the Back Office option, and log in to the Back Office by entering your employee ID and password when prompted.
-
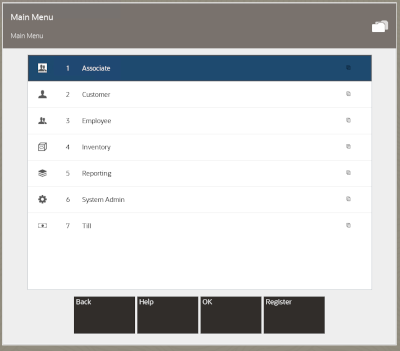
Select the Inventory option from the Main Menu and press Enter.
Figure 5-1 Back Office Main Menu - Inventory
-
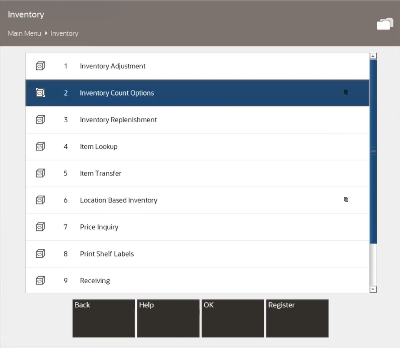
At the Inventory menu, select Inventory Count Options and press Enter.
Figure 5-2 Inventory Menu - Inventory Count
-
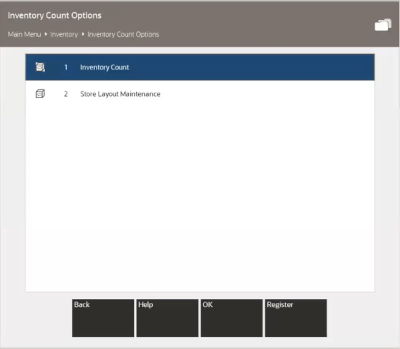
Select Inventory Count.
Figure 5-3 Inventory Count Options
-
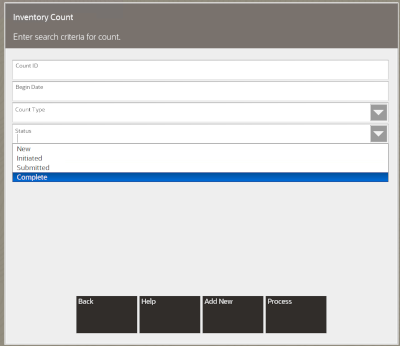
At the Inventory Count search form, enter search criteria to find the Inventory Count document, then select Process to initiate the search.
Note:
This form is based on security privilege. If the logged in user does not have the search privilege, the search form will not display. Instead, Xstore displays a list of Initiated and Submitted counts.
Figure 5-4 Inventory Count Search Form
Note:
Leave all fields blank and select Process to list all Inventory Count documents.
The Inventory Count search form contains the following fields:
-
Count ID: This is the auto-generated count identifier associated with the Inventory Count document. Type or scan the count identifier in this field.
-
Begin Date: This is the date the count is to be performed.
-
Count Type: Select the type of count from the list: Physical Count, Cycle Count, or Supply Count. See the chapter summary Physical Inventory Counting for more information about these three different types of inventory counts.
-
Status: Select the count document status from the list:
-
New: No action has been taken on this Inventory Count document.
-
Initiated: A snapshot of the database has been taken for this Inventory Count document.
-
Submitted: All count sheet status for this Inventory Count is submitted.
-
Complete: Items on this Inventory Count document have been counted, submitted, and completed.
Note:
If an Inventory Count document matching your search criteria is not found, or you want to create a new inventory count, select the Add New option. See Creating a New Inventory Count Document for a step-by-step procedure describing how to create a new Inventory Count document.
-
-
-
Xstore displays a list of Inventory Count documents based on your search criteria. Use the up and down arrows to select the document you want, and press Enter.
Figure 5-5 List of Existing Inventory Count Documents
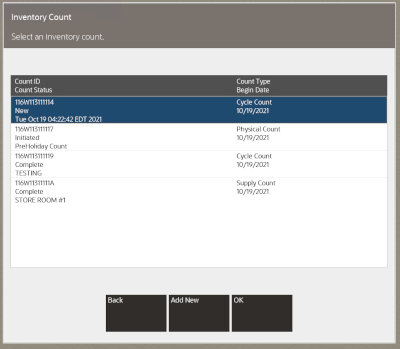
The Inventory Count list shows the following information for each document:
-
Count ID: The inventory count identifier.
-
Description: The brief description of the Inventory Count.
-
Count Type: The type of count: Physical Count, Cycle Count, or Supply Count.
-
Count Status: The current status of the count: New, Initiated, Submitted, or Complete.
-
Begin Date: The date the count is scheduled to begin.
Note:
Inventory Count documents created by the Home Office cannot be cancelled or edited.
-
-
Xstore displays the count screen for the selected Inventory Count document:
-
If you are performing a Cycle Count, continue with Cycle Count Process for step-by-step instructions.
-
If you are performing a Supply Count, continue with Supply Count Process for step-by-step instructions.
-
If you are performing a Physical Count, continue with Physical Count Process for step-by-step instructions.
-
Creating a New Inventory Count Document
The following steps describe how to create a new Inventory Count document. Any Inventory Count documents you create will be flagged as Store Created for tracking purposes.
Note:
Inventory Counts cannot be created or initiated in offline mode. Creating a new Inventory Count document is based on security privilege.
-
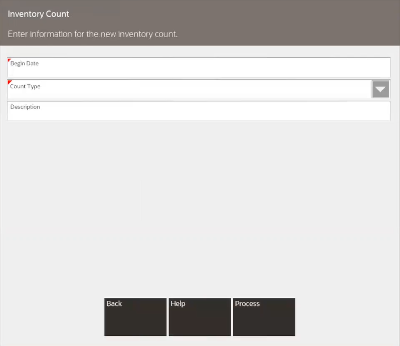
After selecting the Add New option at the Inventory Count Search form (refer to Figure 5-4), Xstore displays the Inventory Count document form. Enter the information in the fields as required to create a new Inventory Count document for the type of count you want to perform and select Process.
Figure 5-6 Inventory Count Document Form
-
Begin Date: Enter the date on which the counting should be started.
-
Count Type: Select the type of count for this Inventory Count document. The following count types are available in Xstore:
-
Cycle Count - Counts a subset of the entire stock. See Cycle Count Type Setup for setup instructions.
-
Supply Count - Counts internally used supplies, rather than saleable items.
See Supply Count Type Setup for setup instructions.
-
Physical Count - Counts all in-stock items. See Physical Count Type Setup for setup instructions.
-
-
Description: Type a brief description of the Inventory Count. The description does not need to be unique.
-
Inventory Location: Select an inventory location or leave as Default. See leave as Default. See Location Based Inventory for more information.
-
Refer to the count types below for the specific information required for each type of count.
Cycle Count Type Setup
Note:
You can create multiple initiated Cycle Count documents. Xstore will not check for overlap of inventory so be sure to create counts for different areas of the store.
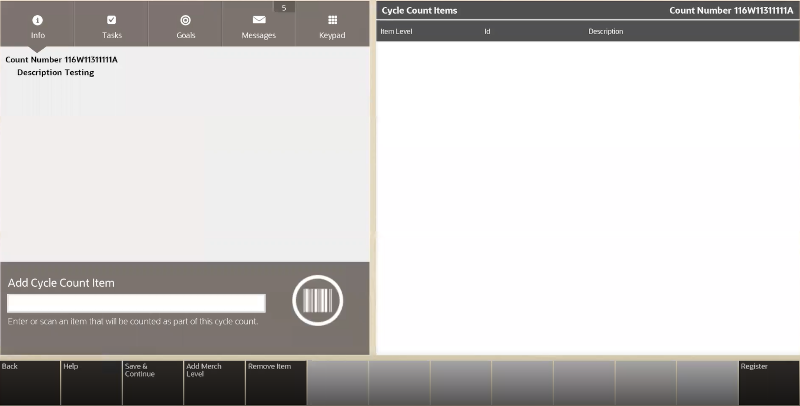
...continued from step 1
Figure 5-7 Cycle Count Setup Screen
-
Choose one of the following options to add the items to the new Cycle Count document:
Scan or enter the item IDs to be counted on this Inventory Count document.
<OR>
Select the Add Merch Level option to add all items in a merchandise level.
If you select the Add Merch Level option, you will be prompted to select a merchandise level to be added to the Inventory Count document:
Department, SubDepartment, Class, Subclass.
The actual items associated with each merchandise level are not shown in the list of items to be counted on the Inventory Count document. The merchandise level identifier (CLASS, DEPARTMENT, and so on) is displayed as a place holder and will be expanded to show the items within this merchandise level on the count sheets created in a later step.
Figure 5-8 Cycle Count Items - Item Level

Note:
Select the Remove Item option if you need to remove a count item from the list. You will be prompted to select the item/merchandise level to be removed from the Inventory Count document.
-
After adding the items to be counted on this Inventory Count document, select Save & Continue to create the new Cycle Count. Cycle Counts only use a single count sheet for all items.
-
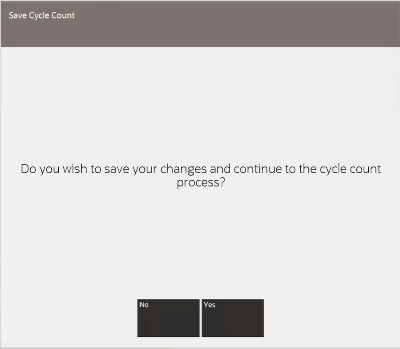
At the confirmation prompt, select Yes to save the Cycle Count items you added.
Figure 5-9 Save Cycle Count Items Confirmation Prompt
-
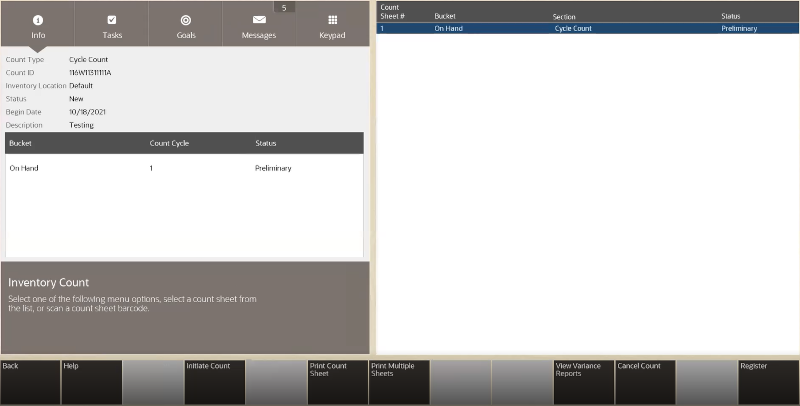
The system displays the Cycle Count screen:
Figure 5-10 Cycle Count Screen
-
Refer to Cycle Count Process to continue with the counting process.
<OR>
-
Press Esc at the Cycle Count screen if you are not ready to begin counting at this time. The Cycle Count document will be available in the list of existing Inventory Count documents when you are ready to continue with the count process.
-
Supply Count Type Setup
...continued from step 1
Figure 5-11 Supply Count Example
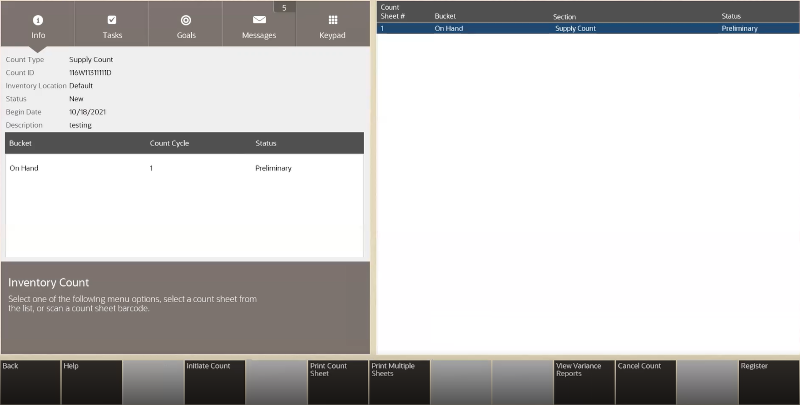
For a Supply Count, all items identified as supplies in your store are automatically added to the count sheet. Supply Counts use a single count sheet for all items. You cannot remove supply items or add any items to this sheet.
Note:
Supply Count items are listed automatically. You do not need to create the list.
Press Esc if you are not ready to begin counting at this time. The Supply Count document will be available in the list of existing Inventory Count documents when you are ready to continue with the count process.
Refer to Supply Count Process to continue the counting process.
Physical Count Type Setup
...continued from step 1
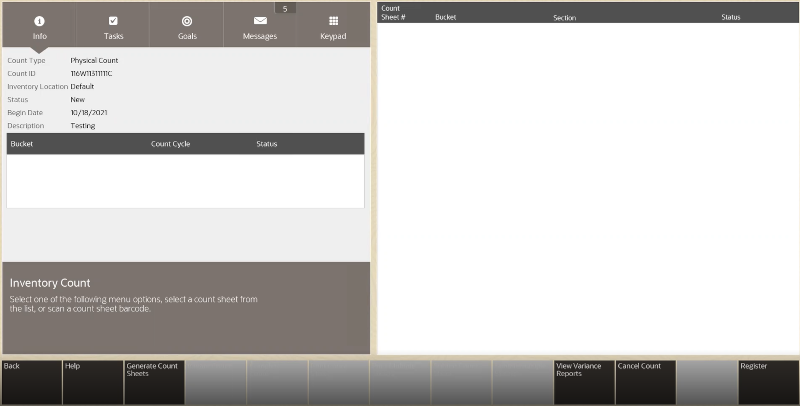
Figure 5-12 Physical Count Screen
-
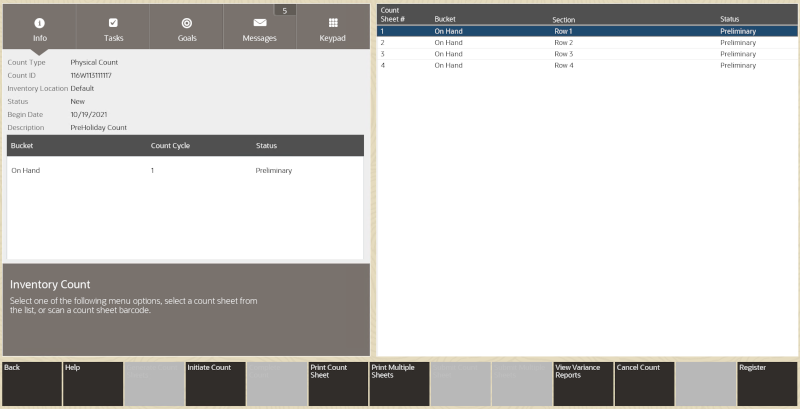
Select the Generate Count Sheets menu option to add the items in each section to this new Inventory Count Document.
Figure 5-13 Sheets and Count Section
Note:
For a Physical Count, the Store Layout defined for your store is used to add items to be counted. See Store Layout Maintenance for detailed information about defining sections and items for your store.
The actual items associated with each section are not shown in the list of items to be counted on the Inventory Count document. The section identifier is displayed as a place holder and will be expanded to show the items within this section on the count sheets created in a later step.
Once the count is created, do one of the following:
-
To continue the counting process, refer to Physical Count Process.
-
If you are not ready to begin counting at this time, press Esc. The Physical Count document will be available in the list of existing Inventory Count documents when you are ready to continue with the count process.
-