Add a Customer Record
To create a new customer record:
-
Click New at a customer prompt.
If customer information consent functionality is not enabled, continue at step 5.
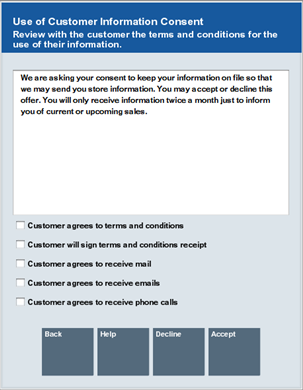
If customer information consent functionality is enabled, a terms and conditions screen opens showing consent preferences and requesting that the customer accepts or declines to the terms and conditions listed. See Customer Information Consent for more information.
Figure 8-3 Customer Information Consent Form

Select the relevant check boxes if the customer agrees to accept the terms and conditions, and consent preferences.
To refuse consent, select Decline to return to the previous screen.
-
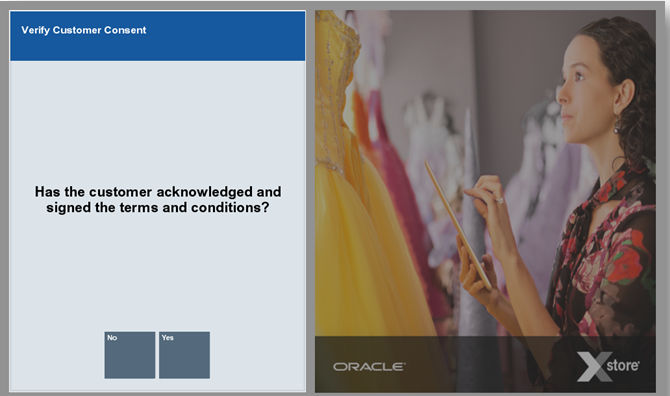
Select Accept. The terms and conditions print on the receipt for the customer to sign manually and a prompt is displayed to confirm the customer acknowledges the terms and conditions. Ask the customer to sign the receipt.
Figure 8-4 Verify Customer Consent

-
Select Yes to confirm the customer has acknowledged the terms and conditions and signed the receipt. The customer's acceptance is associated to the customer record.
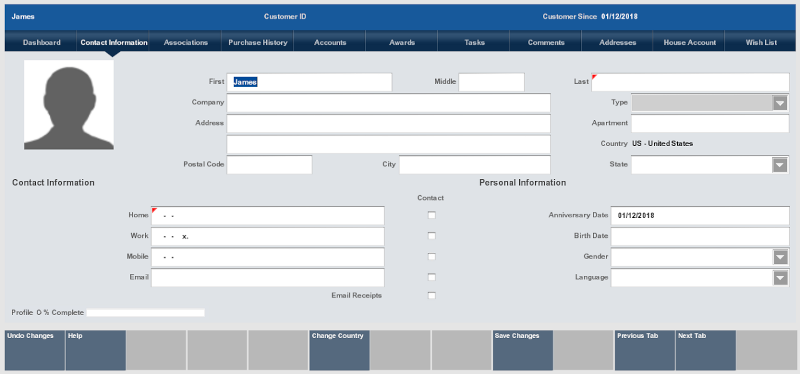
A confirmation screen is displayed indicating that the customer's consent selections have been updated in the system. Select OK to continue. The customer maintenance screen opens with editable fields.
If No is selected on the consent confirmation screen, the customer's refusal of consent is recorded.
-
Figure 8-5 Contact Information Tab

Note:
If you provided consent as part of Customer Search rather than Add New Customer, Xstore Point of Service automatically populates the new customer fields with the information from the customer search.
-
Enter the information into the customer maintenance fields.
-
See Customer Maintenance Fields for a description of the organization of the Customer Maintenance screen and the information in each field.
-
Required fields are marked with a red triangle
 in the upper-left corner.
-
Fields with a selectable list of options are labeled with a down arrow button in the right side of the field.
-
If your system is configured to provide Address Lookup functionality, an Address Lookup button will be available to allow you to quickly look up customer addresses using minimal information.
Note:
When you enter a valid postal code for the customer, the system automatically enters the city and state information.
-
-
Click Save Changes when all information has been added to the customer record.
-
If necessary, indicate whether to add the customer to the loyalty program:
-
Scan or enter the card number, the click Process to add the customer to the loyalty program (card-centric programs).
-
Click Yes to add the customer to the loyalty program (non-card-centric programs).
-
Click Not Now to not add the customer to the loyalty program but open the prompt the next time the customer performs a transaction.
-
Click Never to not add the customer to the loyalty program and never ask the customer again.
-
-
If necessary, click Assign Customer To Tran to add the customer to the transaction and return to the sale.