Create a Work Order
A work order must be associated with a regular sale transaction and a customer name. To create a work order:
-
Click Extended Transaction in the Register Sale screen.
-
Click Work Order.
A window will open prompting for more information. The type of window will depend upon whether there is a customer currently associated with the transaction, and whether the customer currently has any work orders open.
-
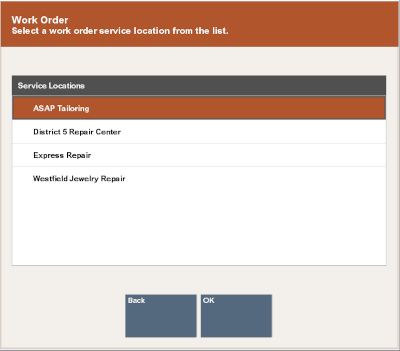
Click Set Up New.
-
If necessary, associate a customer with the transaction. See Associate a Customer with a Transaction.
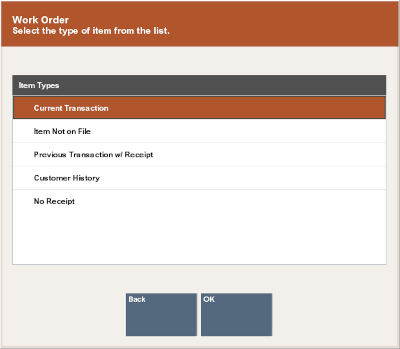
Figure 13-1 Work Order Item Type
-
Click the method to use to find the item on which the work order will be performed, then click OK:
-
Current Transaction - The item is in the current sale transaction. This option is only available if there is at least one item in the current sale transaction.
Xstore Point of Service displays a list of items in the current transaction that are eligible for a work order. Continue with Current Transaction.
-
Item Not on File - The item requiring work is not in the system.
Xstore Point of Service prompts for a description of the item. Continue with Item Not on File.
-
Previous Transaction w/ Receipt - The item is identified on the receipt from a previous transaction.
Xstore Point of Service prompts you to enter information from the original transaction receipt. Continue with Previous Transaction with Receipt.
-
Customer History - Find the item by searching the customer's previous purchase transaction history.
Xstore Point of Service displays a list of items previously purchased by the customer that are eligible for a work order. Continue with Customer History.
-
No Receipt - The item has no receipt available or is not referenced on a receipt.
Xstore Point of Service prompts for an item ID. Continue with No Receipt.
-
Current Transaction
After selecting Current Transaction in Step 5, do the following:
-
Select the items in the Message Window.
-
Click the items.
-
Use the up and down arrows to highlight the correct items and press the Spacebar.
-
-
Click OK.
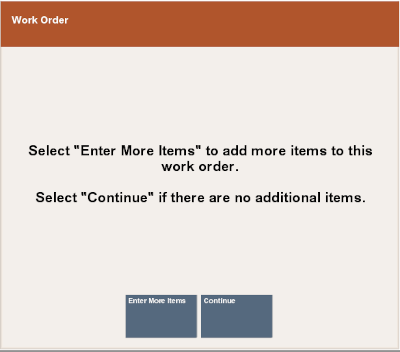
Xstore Point of Service prompts whether there are additional work order items.
Figure 13-2 Work Order Prompt for Additional Work Order Items
-
Select whether to add additional work order items:
-
Click Enter More Items to add more work order items. Repeat Steps 1 to 3.
-
Click Continue to continue with Work Order Categories.
-
Item Not on File
After selecting Item Not on File in Step 5, do the following:
Figure 13-3 Work Order Item Description Prompt

-
Enter a description of the item and press Enter.
Xstore Point of Service prompts for the value of the item.
Figure 13-4 Work Order Item Value Prompt

-
Enter the value of the item and press Enter.
Xstore Point of Service prompts whether there are additional work order items. See Figure 13-2.
-
Select whether to add additional work order items:
-
Click Enter More Items to add more work order items. Repeat Steps 1 to 3.
-
Click Continue to continue with Work Order Categories.
-
Previous Transaction with Receipt
After selecting Previous Transaction w/ Receipt in Step 5, do the following:
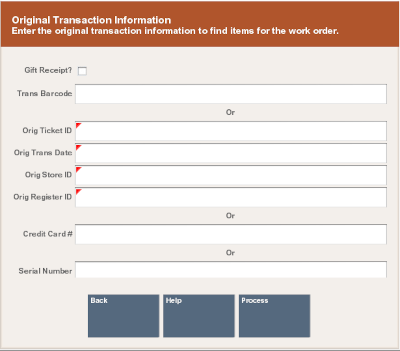
Figure 13-5 Work Order Original Transaction Search Form
-
Enter information about the original transaction:
-
Gift Receipt - Indicates whether the receipt is a gift receipt.
-
Trans Barcode - Barcode for the transaction.
-
Orig Ticket ID - ID of the original ticket.
-
Orig Trans Date - Date of the transaction.
-
Orig Store ID - ID of the store where the transaction was performed.
-
Orig Register ID - ID of the register that performed the original transaction.
-
Credit Card # - Number of the credit card used in the original transaction.
-
Serial Number - Serial number of the item.
-
-
Click Process.
Xstore Point of Service displays a list of items from the original transaction that are eligible for a work order.
-
Select the items to add to the work order.
-
Click the items.
-
Use the up and down arrows to highlight the correct items and press the Spacebar.
-
-
Click OK.
Xstore Point of Service prompts whether there are additional work order items. See Figure 13-2.
-
Select whether to add additional work order items:
-
Click Enter More Items to add more work order items. Repeat Steps 3 to 5.
-
Click Continue to continue with Work Order Categories.
-
Customer History
After selecting Customer History in Step 5, do the following:
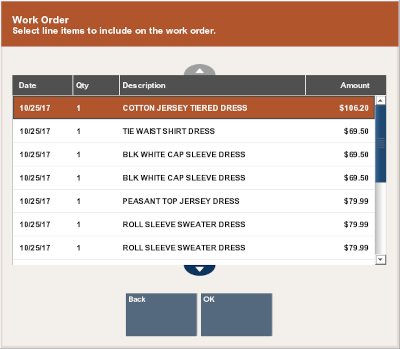
Figure 13-6 Work Order Customer History-Previous Items Purchased
-
Select the items to add to the work order.
-
Click the items.
-
Use the up and down arrows to highlight the correct items and press the Spacebar.
-
-
Click OK.
Xstore Point of Service prompts whether there are additional work order items. See Figure 13-2.
-
Select whether to add additional work order items:
-
Click Enter More Items to add more work order items. Repeat Steps 1 to 3.
-
Click Continue to continue with Work Order Categories.
-
No Receipt
After selecting No Receipt in Step 5, do the following:
Figure 13-7 Work Order Item ID Prompt

-
Enter the item:
-
Scan the item.
-
Enter the ID of the item and press Enter.
Note:
If you do not know the item ID but your system has a Work Order SKU, you can enter that instead of the actual item ID. You can also use Item Not On File functionality to capture the item information
-
-
If necessary, enter the value of the item and press Enter.
-
If necessary, enter a description of the item.
-
Select whether to add additional work order items, see Figure 13-2:
-
Click Enter More Items to add more work order items. Repeat Steps 1 to 4.
-
Click Continue to continue with Work Order Categories.
-
Work Order Categories
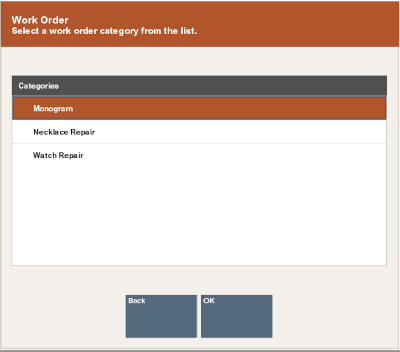
Once you have identified the item(s) for the work order, you are prompted to select a work order category. Categories may include repairs, alterations, or any other categories that are determined by your store operations.
For example, repairs may include work order categories such as jewelry and watch repairs. Work order alterations may include categories such as men's clothing and children's clothing.
-
Select the work order category.
Figure 13-8 Work Order Categories
Note:
The work order categories available depend upon the configuration of your system.
-
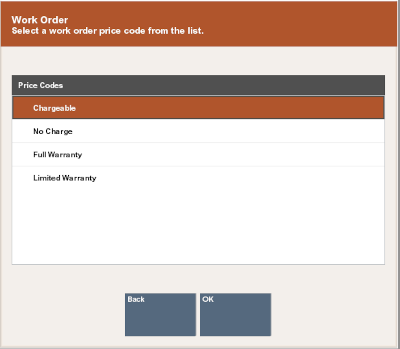
If necessary, select or enter additional information about the work order in the prompts. For example, you may need to enter warranty information or select a work order price code.
Figure 13-9 Work Order Warranty Plan

Figure 13-10 Work Order Price Code List
-
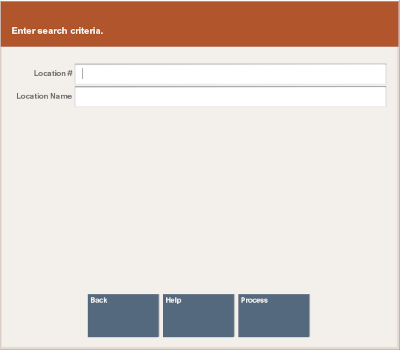
If necessary, enter the information about where the work will be performed:
Figure 13-11 Work Order Location Search Form
-
If necessary, select the location where the work will be performed, then click OK:
-
Click the location.
-
Use the up and down arrows to highlight the correct location and press the Spacebar.
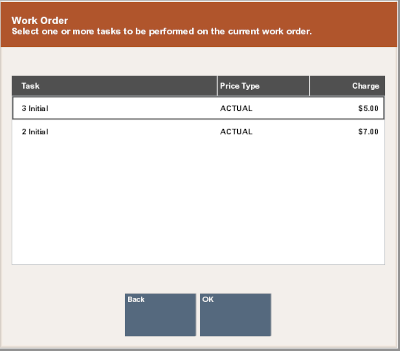
Figure 13-13 Work Order Tasks List
-
-
Select the tasks to be performed on the item:
-
Click the task.
-
Use the up and down arrows to highlight the correct task and press the Spacebar.
Note:
A task may not have a cost associated with it. If it does not have a cost, it may be an estimate. Estimates must be converted to actual amounts before the customer can pick up the item. Price categories such as No Charge and Warranty have zero amounts in the Charge column on the Task List form.
-
-
Click OK.
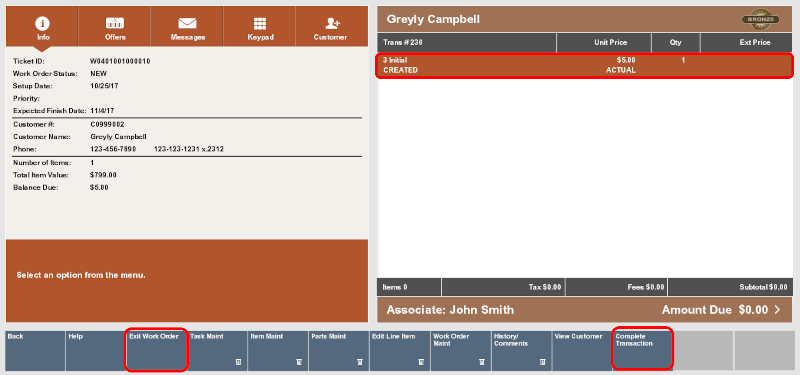
The work order appears in the View Port.
Figure 13-14 Work Order Summary Information
-
Click the appropriate option:
-
Click Exit Work Order to exit work order mode and perform additional transaction processing.
-
Click Complete Transaction to proceed to tendering.
-
