Tendering a Transaction
The tendering process requires that you select or enter two basic items of information:
-
Tender type (for example, cash, check or credit card)
-
Amount paid with that tender type
Depending upon the form of payment and your store's policies, you may have to enter or select additional information, for example:
-
Credit card account number, CID number, and expiration date
-
Customer name
-
Customer address
-
Security approval for large sales or refunds
-
Additional tender types if the first tender type did not pay the total due
-
Additional forms of customer ID (driver's license number, birth date, credit card number, or other ID)
Refer to Processing Tenders for additional information about specific tenders.
Start Tendering
-
Start tendering by doing one of the following:
-
Press Enter in the empty item prompt.
-
Click Add Tenders.
-
-
Tender the transaction. See Processing Tenders
-
If prompted to round up the amount for a charitable donation:
-
Click No to continue with tendering without adding the amount.
-
Click Yes to add the charitable donation to the transaction, then continue with tendering.
-
-
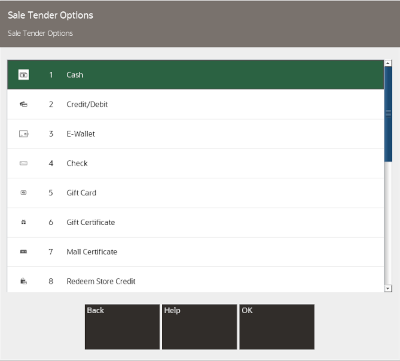
Select the tender by doing one of the following:
Figure 3-35 List of Tender Types

-
Click the tender in the list.
-
Use the up and down arrows to highlight the tender.
A tender amount prompt opens.
-
-
Add the tender amount by doing one of the following:
Figure 3-36 Tender Cash Amount Prompt

-
Enter the amount to apply to the tender.
-
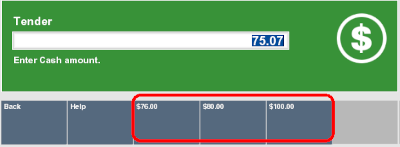
For cash tenders, click a quick cash amount in the Menu Buttons.
Figure 3-37 Quick Cash Buttons

-
-
Press Enter.
-
If you are prompted whether to complete the transaction:
Note:
Your system may automatically print receipts without prompting whether to complete the transaction.
-
Click Y to print receipts.
-
Click N to return to the Sale Tender screen (Step 4).
Oracle Retail Xstore Point of Service prints receipts.
Note:
If you are prompted for e-mail receipt information, see E-mail Receipt Options.
-
-
Depending on the configuration of your system, you may be prompted to scan a cash drawer. Scan the appropriate cash drawer, if necessary.
-
On occasion, upon completing a transaction, a prompt may open asking whether to apply a system update. If you are prompted to apply a system update:
Note:
If you agree to perform the system update, you will not be able to create any new transactions for a certain grace period. Existing transactions can be completed during the grace period.
Once the system is not in a transaction, or if the required period has expired, the update will be automatically applied without asking the user. You cannot use the system during system updates.
-
Click No to be asked again after a period.
-
Click Yes to apply the update.
A confirmation prompt opens:
-
Click Apply to perform the update.
-
Click Cancel to cancel the update and be asked to perform the update after a period.
-
The transaction completes.
-