Stores
Note:
This Data Manager Stores option allows you to search for and modify store information for an existing store only. To set up a new store, see Managing the Organization Hierarchy.
Use this feature to search for and modify store information.
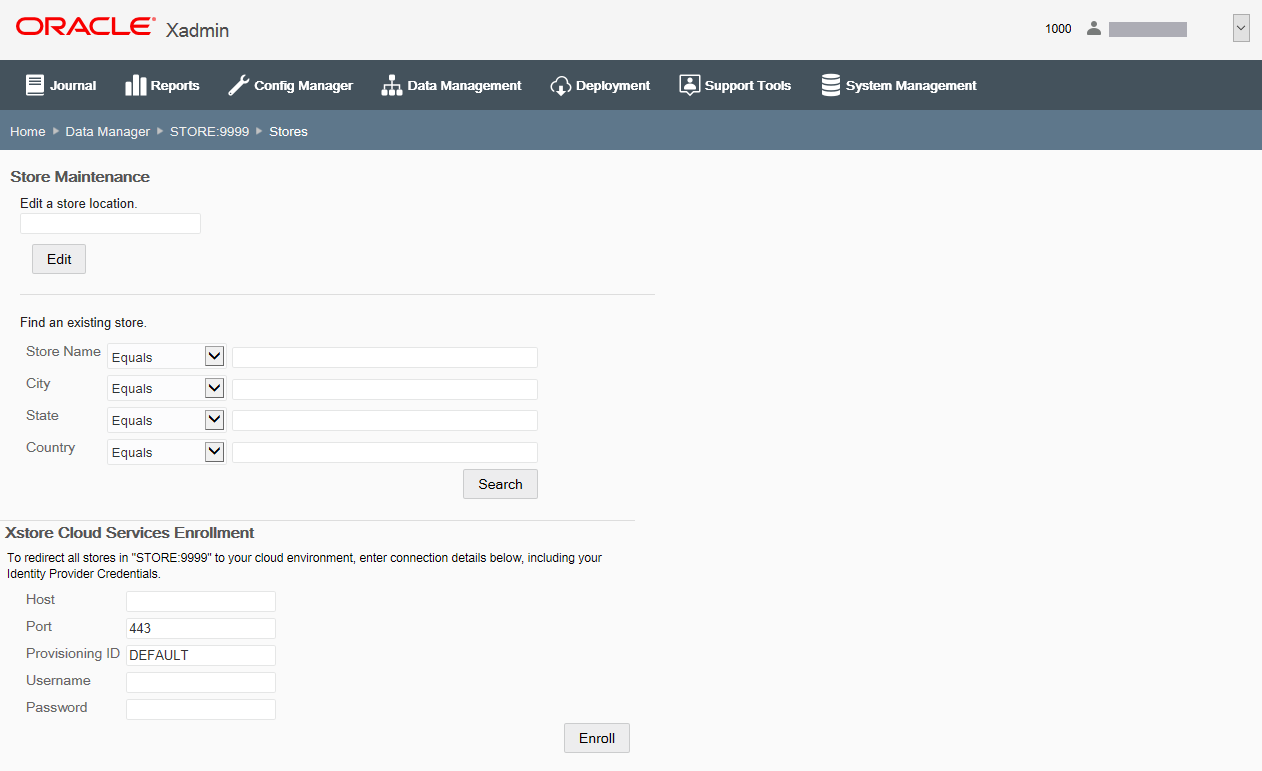
Figure 6-36 Stores Maintenance Page

To edit an existing store:
-
Find the store to be edited:
-
If you know the store ID, enter the store ID in the Edit a Store Location field at the Stores Maintenance page.
-
To search for a store, enter search criteria and click Search to find/edit an existing store in your organization. If you do not enter any criteria before selecting Search, all stores in your organization will be returned in the search. To edit information for an existing store, select the row from the search results list.
-
-
Click Edit at the Store Information screen.
-
Complete the fields as required, then click Save.
See step 6 on page 4 for additional procedural information. The following Stores fields are available:
Table 6-34 Store Location Attributes
Field Description Store #
The store identifier. This value cannot be changed.
Store Name [Required]
Edit the store name.
Alternate Store #
Enter the Shop ID (alternate store number) assigned to a store number as a reference to an outside/downstream integration.
Airport code
Select the airport code (IATA) assigned to a store number as a reference to calculate the TAX_FREE, TAX_NORMAL, and PRICE_SPECIAL amounts for transactions in an Airside location. Valid values are derived from data from the com_airport table in the Xcenter database.
Store Description check box
Select this option to enter a text description for the store. Type the description in the description field when prompted.
Address 1
Enter the first line of the mailing address.
Address 2
Enter the second line of the mailing address.
City
Enter the city component of the mailing address.
State
Enter the State/Province component of the mailing address.
Postal Code
Enter the Postal or ZIP code component of the mailing address.
Country
Enter/select the country component of the address.
Geographic Parameters check box
Select this option to enter the latitude and longitude values for this location.
Table 6-35 Store Detail Attributes
Field Description Tax Location
Select the identifier of the tax location.
Currency
Select the base currency used in the store.
Locale
Select the base locale for the store.
Organization Hierarchy Position
View only. This shows the store's position in the organizational hierarchy.
Legal Entity
Select a legal entity associated to the country of the store.
Note: This field is only available for country packs.
Additionally,
The table below describes Store Detail fields, which are only available for country packs. The Store Detail fields may differ depending on your local fiscal requirements.
Table 6-36 Store Detail Attributes [Country Pack ONLY]
Field Description Legal Entity
Select a legal entity associated to the country of the store.
State Tax ID
Enter the Tax ID.
Note: Only available for country pack Brazil.For more information on country packs, see the Xstore Suite Configuration Accelerator Guide.
City Tax ID
Enter the Tax ID of the city.
Note: Only available for country pack Brazil.For more information on country packs, see the Xstore Suite Configuration Accelerator Guide.
Official Name
Enter the official name of the store.
Note: Only available for country pack Brazil. For more information on country packs, see the Xstore Suite Configuration Accelerator Guide.
NFe Fiscal Regime Code
Enter the Nota Fiscal Eletrônica regime code.
Note: Only available for country pack Brazil. For more information on country packs, see the Xstore Suite Configuration Accelerator Guide.
SIRET number
Enter the SIRET number. The SIRET number identifies the store and must be used in the invoices.
Note: Only available for country pack France. For more information on country packs, see the Xstore Suite Configuration Accelerator Guide
Table 6-37 Registers/Tills Attributes
Field Description Deposit Bank Name
Enter the deposit bank name to be printed when franking. The default value here is from Xadmin Settings.
Deposit Bank Account Number
Enter the deposit bank account number to be printed when franking. The default value here is from Xadmin Settings.
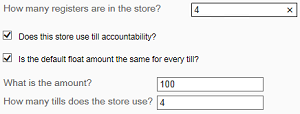
Number of Registers in the Store
Enter the number of registers in the store.
Use Till Accountability check box
IMPORTANT] If this setting is changed, you must deploy the changes at the end of the day, during the store close.
Downloading this change during the day, while the store is open, will cause problems in Oracle Retail Xstore Point of Service.
This setting determines whether the store uses Till Accountability mode or Register mode. Select the check box to use Till Accountability mode. The default value here is from Oracle Retail Xstore Office System Settings.
Default Float Amount check box
In Register Mode:
-
If the default float amount is the same for every register/till (check box selected), enter the default float amount that applies to all registers/tills.
-
If the default float amount is not the same for every register/till (check box not selected), enter an amount for the till and click Add. Repeat this step for all registers/tills in the store.
A Delete option is available if you need to make a change.
Note: In Register Mode, the number of tills cannot be greater than the number of registers.
In Till Accountability Mode:

-
If the default float amount is the same for every till (check box selected), enter the default float amount that applies to all tills, then enter the number of tills used in the store.
-
If the default float amount is not the same for every till (check box not selected), enter an amount for the till and click Add. Repeat this step for all registers/tills in the store.
A Delete option is available if you need to make a change.
Note: The store bank float amount is auto-calculated as the sum of all till float amounts.
Store Manager
Enter the store manager's name.
Telephone 1 through 4
Enter the telephone numbers for the store.
Telephone 1 is the primary telephone number for the store.
Store Email
Enter the store's email address.
-