Configure RAID Using the Avago MegaRAID Configuration Utilities
Before you begin this procedure, create at least one virtual drive, or RAID volume, using the BIOS Configuration Utility or RSTe.
Perform this procedure to make a RAID volume (virtual drive) bootable if you created more than one RAID volume. You do not need to perform this procedure if you only created one virtual drive.
-
Access the host console locally or through Oracle ILOM.
For instructions, see Accessing Oracle ILOM.
-
Reset or power on the server.
For example, to reset the server:
-
From the local server, press the On/Standby button on the front panel of the server for approximately 1 second to power off the server, and then press the On/Standby button again to power on the server.
-
From the Oracle ILOM web interface, select Host Management → Power Control, and then select Reset from the Select Action list box. Click Save, and then click OK.
-
From the Oracle ILOM CLI, type: reset /System
The power-on self-test (POST) sequence begins.
-
-
On the BIOS Setup Utility screen, select the Advanced tab, select Avago
MegaRAID Configuration Utility, and press Enter.
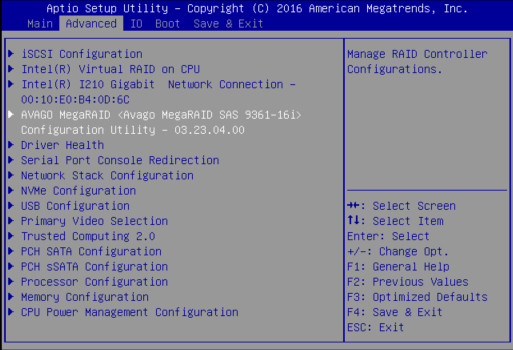
-
From the ACTIONS Menu, select Configure.
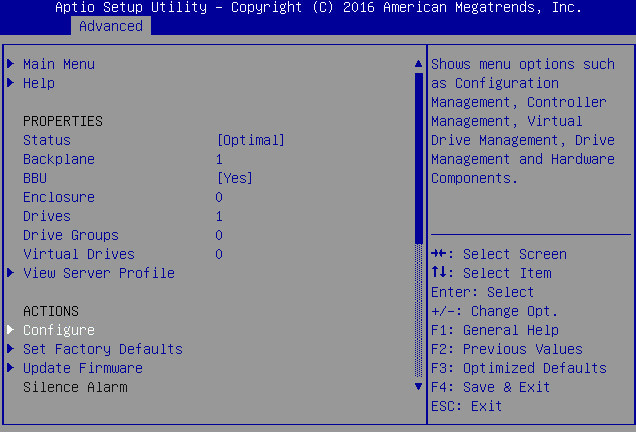
-
Select Create Virtual Drive and press
Enter.
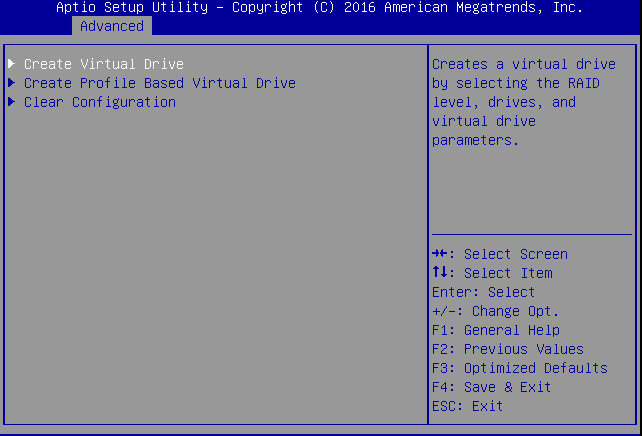
The Create Virtual Drive – menu appears.
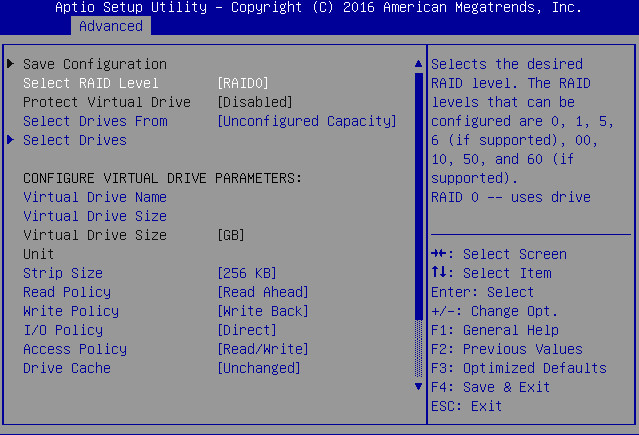
-
Select RAID Level and press Enter to
set the RAID level.
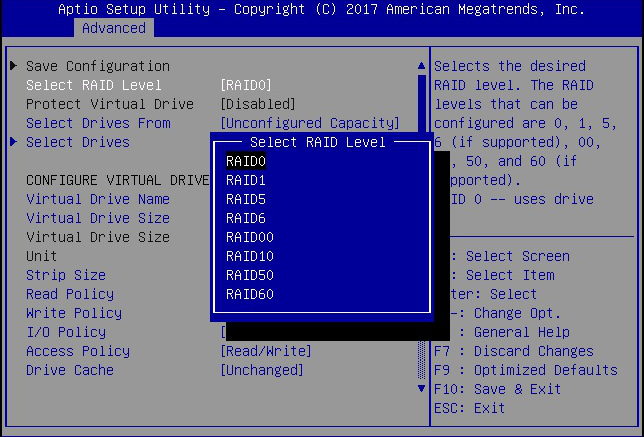
-
Navigate to Select Drives and press
Enter.
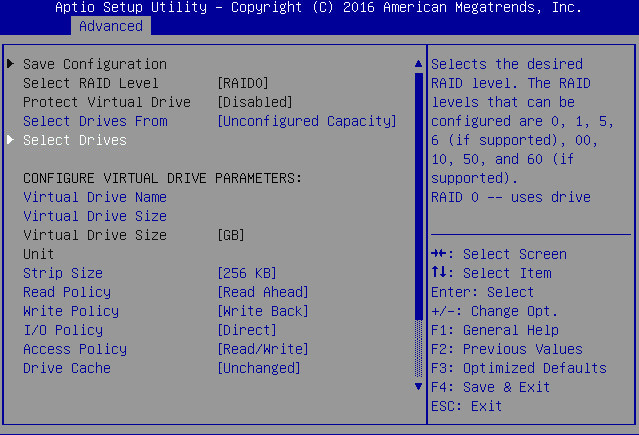
- Select the drives you want to configure.
-
To enable drives, press Enter and select
Enabled. Press ESC to close the
pop up.
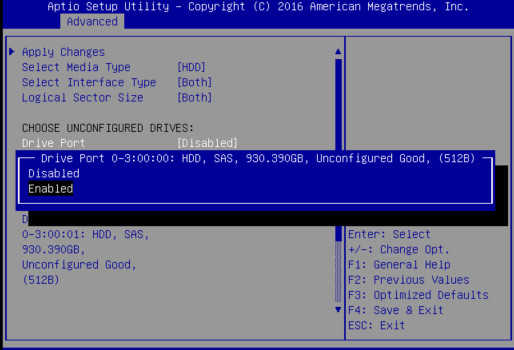
-
Select Apply Changes, and press
Enter.
For more information on performing this procedure, refer to the 12GB/s MegaRAID SAS Software User's Guide located at https://docs.broadcom.com/docs/pub-005110.
- To return to the Create Virtual Drive Advanced Menu, press ESC.
- Select Save Configuration.
-
Select Confirm, select Enabled, and
press Enter.
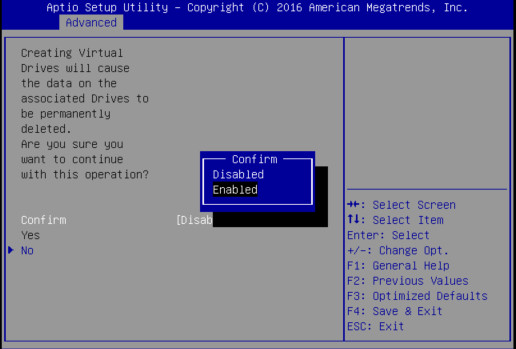
- To save your new boot configuration, select Yes.
- To exit the Avago MegaRAID Utility, press the ESC.