import java.util.AbstractMap.SimpleEntry;
import java.util.Map.Entry;
import javafx.application.Application;
import javafx.scene.Scene;
import javafx.scene.control.*;
import javafx.scene.effect.DropShadow;
import javafx.scene.effect.Effect;
import javafx.scene.effect.Glow;
import javafx.scene.effect.SepiaTone;
import javafx.scene.image.Image;
import javafx.scene.image.ImageView;
import javafx.scene.layout.VBox;
import javafx.stage.Stage;

public class MenuSample extends Application {

    final PageData[] pages = new PageData[] {
        new PageData("Apple",
            "The apple is the pomaceous fruit of the apple tree, species Malus "
            + "domestica in the rose family (Rosaceae). It is one of the most "
            + "widely cultivated tree fruits, and the most widely known of "
            + "the many members of genus Malus that are used by humans. "
            + "The tree originated in Western Asia, where its wild ancestor, "
            + "the Alma, is still found today.",
            "Malus domestica"),
        new PageData("Hawthorn",
            "The hawthorn is a large genus of shrubs and trees in the rose "
            + "family, Rosaceae, native to temperate regions of the Northern "
            + "Hemisphere in Europe, Asia and North America. "
            + "The name hawthorn was "
            + "originally applied to the species native to northern Europe, "
            + "especially the Common Hawthorn C. monogyna, and the unmodified "
            + "name is often so used in Britain and Ireland.",
            "Crataegus monogyna"),
        new PageData("Ivy",
            "The ivy is a flowering plant in the grape family (Vitaceae) native to"
            + " eastern Asia in Japan, Korea, and northern and eastern China. "
            + "It is a deciduous woody vine growing to 30 m tall or more given "
            + "suitable support,  attaching itself by means of numerous small "
            + "branched tendrils tipped with sticky disks.",
            "Parthenocissus tricuspidata"),
        new PageData("Quince",
            "The quince is the sole member of the genus Cydonia and is native to "
            + "warm-temperate southwest Asia in the Caucasus region. The "
            + "immature fruit is green with dense grey-white pubescence, most "
            + "of which rubs off before maturity in late autumn when the fruit "
            + "changes color to yellow with hard, strongly perfumed flesh.",
            "Cydonia oblonga")
    };

    final String[] viewOptions = new String[] {
        "Title",
        "Binomial name",
        "Picture",
        "Description"
    };

    final Entry<String, Effect>[] effects = new Entry[] {
        new SimpleEntry<>("Sepia Tone", new SepiaTone()),
        new SimpleEntry<>("Glow", new Glow()),
        new SimpleEntry<>("Shadow", new DropShadow())
    };

    final ImageView pic = new ImageView();
    final Label name = new Label();
    final Label binName = new Label();
    final Label description = new Label();

    public static void main(String[] args) {
        launch(args);
    }

    @Override
    public void start(Stage stage) {
        stage.setTitle("Menu Sample");
        Scene scene = new Scene(new VBox(), 400, 350);

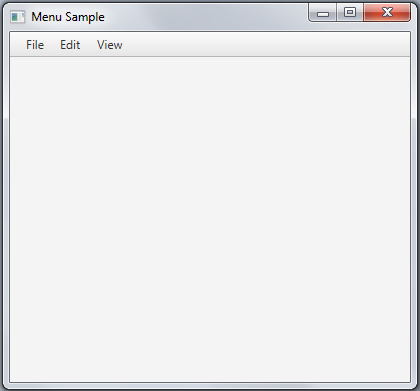
        MenuBar menuBar = new MenuBar();

        // --- Menu File
        Menu menuFile = new Menu("File");

        // --- Menu Edit
        Menu menuEdit = new Menu("Edit");

        // --- Menu View
        Menu menuView = new Menu("View");

        menuBar.getMenus().addAll(menuFile, menuEdit, menuView);


        ((VBox) scene.getRoot()).getChildren().addAll(menuBar);

        stage.setScene(scene);
        stage.show();
    }


    private class PageData {
        public String name;
        public String description;
        public String binNames;
        public Image image;
        public PageData(String name, String description, String binNames) {
            this.name = name;
            this.description = description;
            this.binNames = binNames;
            image = new Image(getClass().getResourceAsStream(name + ".jpg"));
        }
    }
}
import java.util.AbstractMap.SimpleEntry;
import java.util.Map.Entry;
import javafx.application.Application;
import javafx.event.ActionEvent;
import javafx.geometry.Insets;
import javafx.geometry.Pos;
import javafx.scene.Scene;
import javafx.scene.control.*;
import javafx.scene.effect.DropShadow;
import javafx.scene.effect.Effect;
import javafx.scene.effect.Glow;
import javafx.scene.effect.SepiaTone;
import javafx.scene.image.Image;
import javafx.scene.image.ImageView;
import javafx.scene.layout.VBox;
import javafx.scene.paint.Color;
import javafx.scene.text.Font;
import javafx.scene.text.TextAlignment;
import javafx.stage.Stage;

public class MenuSample extends Application {

    final PageData[] pages = new PageData[] {
        new PageData("Apple",
            "The apple is the pomaceous fruit of the apple tree, species Malus "
            +"domestica in the rose family (Rosaceae). It is one of the most "
            +"widely cultivated tree fruits, and the most widely known of "
            +"the many members of genus Malus that are used by humans. "
            +"The tree originated in Western Asia, where its wild ancestor, "
            +"the Alma, is still found today.",
            "Malus domestica"),
        new PageData("Hawthorn",
            "The hawthorn is a large genus of shrubs and trees in the rose "
            + "family, Rosaceae, native to temperate regions of the Northern "
            + "Hemisphere in Europe, Asia and North America. "
            + "The name hawthorn was "
            + "originally applied to the species native to northern Europe, "
            + "especially the Common Hawthorn C. monogyna, and the unmodified "
            + "name is often so used in Britain and Ireland.",
            "Crataegus monogyna"),
        new PageData("Ivy",
            "The ivy is a flowering plant in the grape family (Vitaceae) native"
            +" to eastern Asia in Japan, Korea, and northern and eastern China."
            +" It is a deciduous woody vine growing to 30 m tall or more given "
            +"suitable support,  attaching itself by means of numerous small "
            +"branched tendrils tipped with sticky disks.",
            "Parthenocissus tricuspidata"),
        new PageData("Quince",
            "The quince is the sole member of the genus Cydonia and is native"
            +" to warm-temperate southwest Asia in the Caucasus region. The "
            +"immature fruit is green with dense grey-white pubescence, most "
            +"of which rubs off before maturity in late autumn when the fruit "
            +"changes color to yellow with hard, strongly perfumed flesh.",
            "Cydonia oblonga")
    };

    final String[] viewOptions = new String[] {
        "Title",
        "Binomial name",
        "Picture",
        "Description"
    };

    final Entry<String, Effect>[] effects = new Entry[] {
        new SimpleEntry<>("Sepia Tone", new SepiaTone()),
        new SimpleEntry<>("Glow", new Glow()),
        new SimpleEntry<>("Shadow", new DropShadow())
    };

    final ImageView pic = new ImageView();
    final Label name = new Label();
    final Label binName = new Label();
    final Label description = new Label();
    private int currentIndex = -1;

    public static void main(String[] args) {
        launch(args);
    }

    @Override
    public void start(Stage stage) {
        stage.setTitle("Menu Sample");
        Scene scene = new Scene(new VBox(), 400, 350);
        scene.setFill(Color.OLDLACE);

        name.setFont(new Font("Verdana Bold", 22));
        binName.setFont(new Font("Arial Italic", 10));
        pic.setFitHeight(150);
        pic.setPreserveRatio(true);
        description.setWrapText(true);
        description.setTextAlignment(TextAlignment.JUSTIFY);

        shuffle();

        MenuBar menuBar = new MenuBar();

        final VBox vbox = new VBox();
        vbox.setAlignment(Pos.CENTER);
        vbox.setSpacing(10);
        vbox.setPadding(new Insets(0, 10, 0, 10));
        vbox.getChildren().addAll(name, binName, pic, description);

        // --- Menu File
        Menu menuFile = new Menu("File");
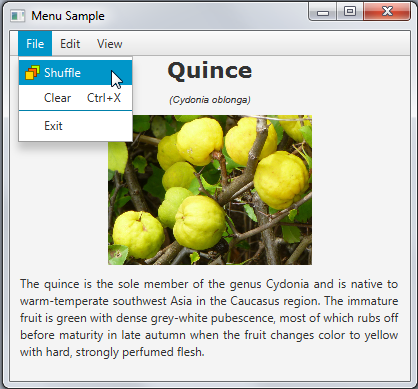
        MenuItem add = new MenuItem("Shuffle",
            new ImageView(new Image("menusample/new.png")));
        add.setOnAction((ActionEvent t) -> {
            shuffle();
            vbox.setVisible(true);
        });

        menuFile.getItems().addAll(add);

        // --- Menu Edit
        Menu menuEdit = new Menu("Edit");

        // --- Menu View
        Menu menuView = new Menu("View");

        menuBar.getMenus().addAll(menuFile, menuEdit, menuView);
        ((VBox) scene.getRoot()).getChildren().addAll(menuBar, vbox);
        stage.setScene(scene);
        stage.show();
    }

    private void shuffle() {
        int i = currentIndex;
        while (i == currentIndex) {
            i = (int) (Math.random() * pages.length);
        }
        pic.setImage(pages[i].image);
        name.setText(pages[i].name);
        binName.setText("(" + pages[i].binNames + ")");
        description.setText(pages[i].description);
        currentIndex = i;
    }


    private class PageData {
        public String name;
        public String description;
        public String binNames;
        public Image image;
        public PageData(String name, String description, String binNames) {
            this.name = name;
            this.description = description;
            this.binNames = binNames;
            image = new Image(getClass().getResourceAsStream(name + ".jpg"));
        }
    }
}
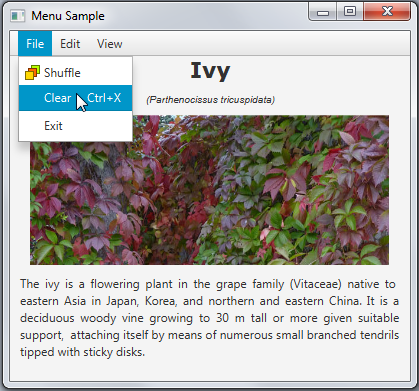
MenuItem clear = new MenuItem("Clear");
clear.setAccelerator(KeyCombination.keyCombination("Ctrl+X"));
clear.setOnAction((ActionEvent t) -> {
    vbox.setVisible(false);
});
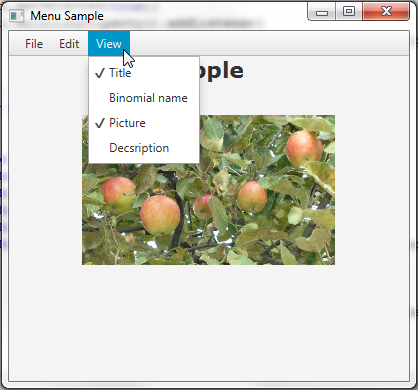
// --- Creating four check menu items within the start method
CheckMenuItem titleView = createMenuItem ("Title", name);
CheckMenuItem binNameView = createMenuItem ("Binomial name", binName);
CheckMenuItem picView = createMenuItem ("Picture", pic);
CheckMenuItem descriptionView = createMenuItem ("Description", description);
menuView.getItems().addAll(titleView, binNameView, picView, descriptionView);

...

// The createMenuItem method
private static CheckMenuItem createMenuItem (String title, final Node node){
    CheckMenuItem cmi = new CheckMenuItem(title);
    cmi.setSelected(true);
    cmi.selectedProperty().addListener(
        (ObservableValue<? extends Boolean> ov, Boolean old_val,
        Boolean new_val) -> {
            node.setVisible(new_val);
    });
    return cmi;
}
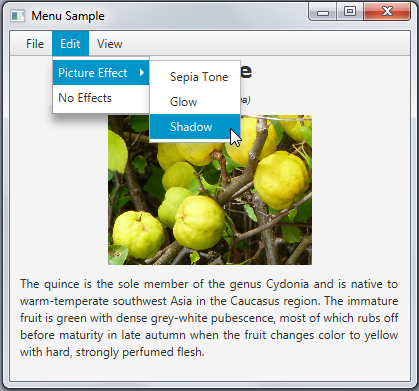
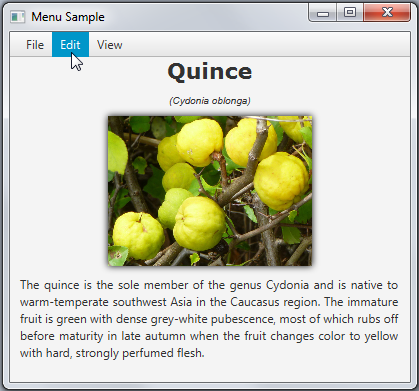
//Picture Effect menu
Menu menuEffect = new Menu("Picture Effect");
final ToggleGroup groupEffect = new ToggleGroup();
for (Entry<String, Effect> effect : effects) {
    RadioMenuItem itemEffect = new RadioMenuItem(effect.getKey());
    itemEffect.setUserData(effect.getValue());
    itemEffect.setToggleGroup(groupEffect);
    menuEffect.getItems().add(itemEffect);
}
//No Effects menu
final MenuItem noEffects = new MenuItem("No Effects");

noEffects.setOnAction((ActionEvent t) -> {
    pic.setEffect(null);
    groupEffect.getSelectedToggle().setSelected(false);
});

//Processing menu item selection
groupEffect.selectedToggleProperty().addListener(new ChangeListener<Toggle>() {
    public void changed(ObservableValue<? extends Toggle> ov,
        Toggle old_toggle, Toggle new_toggle) {
            if (groupEffect.getSelectedToggle() != null) {
                Effect effect =
                    (Effect) groupEffect.getSelectedToggle().getUserData();
                pic.setEffect(effect);
            }
        }
 });
groupEffect.selectedToggleProperty().addListener(
    (ObservableValue<? extends Toggle> ov, Toggle old_toggle,
    Toggle new_toggle) -> {
        if (groupEffect.getSelectedToggle() != null) {
             Effect effect =
                 (Effect) groupEffect.getSelectedToggle().getUserData();
             pic.setEffect(effect);
        }
});

//Adding items to the Edit menu
menuEdit.getItems().addAll(menuEffect, noEffects);
Menu menuEffect = new Menu("Picture Effect");
final ToggleGroup groupEffect = new ToggleGroup();
for (Entry<String, Effect> effect : effects) {
     RadioMenuItem itemEffect = new RadioMenuItem(effect.getKey());
     itemEffect.setUserData(effect.getValue());
     itemEffect.setToggleGroup(groupEffect);
     menuEffect.getItems().add(itemEffect);
}
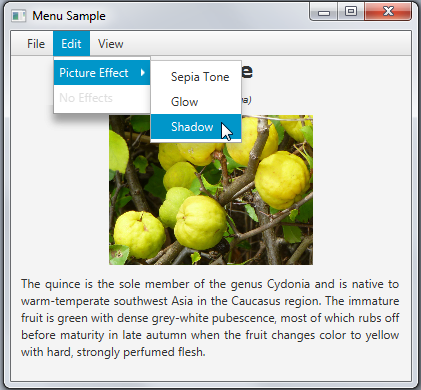
final MenuItem noEffects = new MenuItem("No Effects");
noEffects.setDisable(true);
noEffects.setOnAction((ActionEvent t) -> {
    pic.setEffect(null);
    groupEffect.getSelectedToggle().setSelected(false);
    noEffects.setDisable(true);
});

groupEffect.selectedToggleProperty().addListener(
    (ObservableValue<? extends Toggle> ov, Toggle old_toggle,
    Toggle new_toggle) -> {
        if (groupEffect.getSelectedToggle() != null) {
            Effect effect =
                (Effect) groupEffect.getSelectedToggle().getUserData();
            pic.setEffect(effect);
            noEffects.setDisable(false);
        } else {
                noEffects.setDisable(true);
            }
});

menuEdit.getItems().addAll(menuEffect, noEffects);
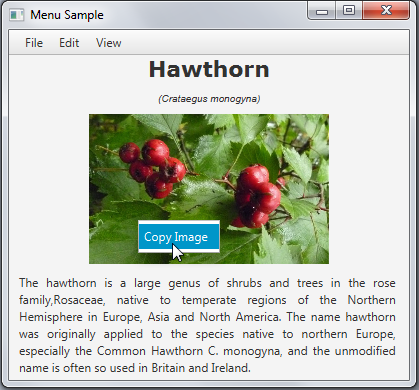
final ContextMenu cm = new ContextMenu();
MenuItem cmItem1 = new MenuItem("Copy Image");
cmItem1.setOnAction((ActionEvent e) -> {
    Clipboard clipboard = Clipboard.getSystemClipboard();
    ClipboardContent content = new ClipboardContent();
    content.putImage(pic.getImage());
    clipboard.setContent(content);
});

cm.getItems().add(cmItem1);
pic.addEventHandler(MouseEvent.MOUSE_CLICKED, (MouseEvent e) -> {
    if (e.getButton() == MouseButton.SECONDARY)
       cm.show(pic, e.getScreenX(), e.getScreenY());
});
