22 Working with Navigation Models
This chapter describes how to create, modify, and manage a navigation model in WebCenter Portal.
This chapter includes the following topics:
Permissions:
To perform the tasks in this chapter on shared navigation models, you need the application-level permissionCreate, Edit, and Delete Navigations. Users with the Application Specialist role have this permission by default. For more information about application-level permissions, see the "About Application Roles and Permissions" section in Administering Oracle WebCenter Portal.
To perform the tasks in this chapter on portal-level navigation models, you need the portal-level permission Create, Edit, and Delete Assets (standard permissions) or Create, Edit, and Delete Navigations (advanced permissions). For more information about portal-level permissions, see Section 29.1, "About Roles and Permissions for a Portal."
For information about how to visualize a navigation model within a page template, see Section 21.7, "Adding Navigation to a Page Template."
22.1 About Portal Navigation
Navigation is a fundamental aspect of your portal. Users need to be able to see what is available in the portal, move around the portal, and orient themselves within the portal.
Navigation is essentially a set of links pointing to the pages in the portal, and potentially other portal content or external items. Examples of navigation include:
-
A series of tabs or menus along the top of each page
Figure 22-1 Navigation Rendered Along the Top of a Page
Description of ''Figure 22-1 Navigation Rendered Along the Top of a Page''
-
A tree structure or list of links on the side of each page
Figure 22-2 Navigation Rendered on the Side of a Page
Description of ''Figure 22-2 Navigation Rendered on the Side of a Page''
-
A trail of breadcrumbs showing the location of the current page within the portal's structure
Figure 22-3 Navigation Rendered as Breadcrumbs
Description of ''Figure 22-3 Navigation Rendered as Breadcrumbs''
In WebCenter Portal, you can break portal navigation down into two main concepts:
-
The navigation model defines the content, structure, and metadata of the portal navigation. For more information, see Section 22.1.1, "About the Portal Navigation Model."
-
The navigation visualization determines how the navigation appears on the pages of the portal, say as a menu, a tree, or breadcrumbs. For more information, see Section 22.1.2, "About Navigation Visualization."
22.1.1 About the Portal Navigation Model
The portal navigation model defines the content, structure, and metadata of the portal navigation. When you create a portal, a navigation model called Portal Default Navigation Model is created for the portal. When you add a page to the portal in the portal editor, that page is automatically added to the portal's navigation model. This keeps the navigation model automatically synchronized with the structure of your portal. You can also use the portal editor to add other navigation items, such as content and external links.
Note:
You cannot assign a different navigation model to a portal, however you can edit the Portal Default Navigation Model to add other items to it, including references to other navigation models.The navigation model is aware of the security policies that have been applied to the navigation items that it displays. For example, if the current user is not authorized to see a particular page, the navigation model hides any navigational links to that page. Navigation model metadata can also be determined contextually using EL expressions. These expressions are evaluated at runtime to determine exactly which pieces of the navigation model are rendered in the navigation visualization and to whom.
Other navigation models can be imbedded in the Portal Default Navigation Model as a Navigation Reference (see Section 22.3.3, "Adding Items to a Navigation Model"). If a navigation model is a shared asset (available to all portals), it is shown on the Assets page of all portals along with portal-specific navigation models.
22.1.2 About Navigation Visualization
The navigation visualization determines how the navigation model should appear in the portal. For example, portal navigation can be provided as a set of tabs along the top of each page, or perhaps as a tree-like structure down the side of the page.
Navigation visualization is built into the page template. To change the way your portal navigation appears, you should first consider choosing a different page template.
If you cannot find a page template that meets your requirements for portal navigation, you can create a new page template in which to design your preferred navigation visualization.
For more information about navigation visualization, see Section 21.7, "Adding Navigation to a Page Template."
22.2 Creating a Navigation Model
When you create a portal, a navigation model called Portal Default Navigation Model is created for the portal. You can edit this navigation model as required to define your portal's navigation. For more information, see Section 22.3.1, "Editing the Portal Default Navigation Model in the Portal Editor."
While in the majority of cases, the Portal Default Navigation Model should be the only navigation model you need, in some circumstances you may want to create additional navigation models. For example, if there are some items that you want to be available in multiple portals, you can create an application-level navigation model that contains all those items and then reference the application-level navigation model within each individual portal's Portal Default Navigation Model.
When you create a navigation model, you can create an entirely new one or use an existing navigation model as a starting point.
You can create navigation models at the application level or at the portal level. Application-level, or shared, navigation models are available for use in all portals, unless a portal has been specifically excluded. Portal-level navigation models are available for use only in the portal in which they are created.
Note:
Portal pages are only automatically added to the Portal Default Navigation Model. If you want to include a portal's pages within a navigation model that you create, you must add them to the navigation model yourself, or add a Pages Query item to the navigation model.To create a navigation model:
-
Navigate to one of the following:
-
To create an application-level navigation model, go to the Shared Assets page. For more information, see Section 59.2, "Accessing Shared Assets."
-
To create a portal-level navigation model, go to the Assets page for the portal in which you want to create the navigation model. For more information, see Section 20.2, "Accessing Portal Assets."
-
-
Under Structure, click Navigations.
-
In the toolbar, click Create.
-
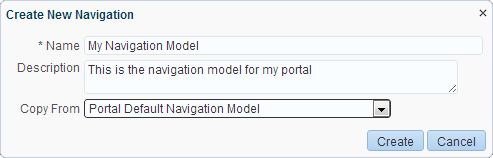
In the Create New Navigation dialog (Figure 22-4), in the Name field, enter a name for the navigation model.
The name is displayed on the Assets or Shared Assets page and in lists when selecting a navigation model. You should make the name as descriptive as possible.
Figure 22-4 The Create New Navigation Dialog
Description of ''Figure 22-4 The Create New Navigation Dialog''
-
In the Description field, enter a description for the navigation model.
The description is displayed below the name on the Assets or Shared Assets page and as a tool tip when selecting a navigation model. You should ensure that the description helps other users determine if they want to use this particular navigation model.
-
From the Copy From drop-down list, select an existing navigation model to use as the starting point for your new navigation model, if desired. If you leave this blank, an empty navigation model is created.
Tip:
You can also create a copy of an existing navigation model as described in Section 20.5.4, "Copying an Asset." -
Click Create.
The newly created navigation model is listed on the Assets or Shared Assets page. The empty check box in the Available column indicates that the navigation model is not yet published and hence is not available to other users. To publish the navigation model, select the check box. For more information see Section 20.5.3, "Showing and Hiding Assets."
22.3 Editing a Navigation Model
When you add new pages in the portal editor, they are automatically added to the portal's navigation model (Portal Default Navigation Model). You can also add other navigation items.
Note:
If you create other navigation models, you can edit them on the Assets page (for portal-level navigation models) or Shared Assets page (for application-level navigation models). However this is not the recommended method of editing the Portal Default Navigation Model.This section includes the following topics:
-
Section 22.3.1, "Editing the Portal Default Navigation Model in the Portal Editor"
-
Section 22.3.2, "Editing a Navigation Model on the Assets or Shared Assets Page"
-
Section 22.3.4, "Setting Properties for an Item in the Navigation Model"
22.3.1 Editing the Portal Default Navigation Model in the Portal Editor
To edit the Portal Default Navigation Model in the portal editor:
-
In the portal editor (see Section 6.1, "Opening the Portal Editor"), click the Pages tab.
-
To add an item to the portal navigation, click the Add icon, then select the type of item that you want to add:
-
To add an existing portal page to the portal navigation, see Section 13.2, "Adding an Existing Page to the Portal Navigation."
-
To create and add a new page, subpage, or page variant (for device groups) to the portal navigation, see Section 12.2, "Creating Pages or Subpages in a Portal" and Section 12.3, "Creating a Page Variant for a Device Group."
-
To add other items to the portal navigation, see Section 22.3.3, "Adding Items to a Navigation Model."
-
-
To edit an existing item:
-
Click the view switcher to
 .
. -
Select the item that you want to edit.
-
For pages, click the Advanced tab.
-
Edit the properties as desired.
For more information, see Section 22.3.4, "Setting Properties for an Item in the Navigation Model."
-
Click Save.
-
-
To move an existing item within the navigation model, select the item, click the Move icon, then select Move Up or Move Down icon. Repeat as necessary until the item is in the desired location.
Tip:
You can also move an item by selecting it and dragging it to the desired location. -
To indent an item under another, move the child item so that it is immediately below the parent item, click the Move icon, then select Indent.
Note:
If you indent an item under another item, the parent item is no longer navigable.To move an indented item so that it is no longer indented below another item, select the indented item, click the Move icon, then select Outdent.
-
To copy an existing item, right-click the item, then select Copy.
A copy of the item is placed just below the selected item. You can edit the new item and change its properties, as described in Section 22.3.4, "Setting Properties for an Item in the Navigation Model."
-
To hide an item from the portal navigation, without deleting it:
-
For pages, see Section 13.9, "Showing or Hiding a Page in the Portal Navigation."
-
For non-page navigation items, deselect the Visible property, as described in Section 22.3.4, "Setting Properties for an Item in the Navigation Model."
-
-
To delete an existing item from the navigation model, right-click the item, then select Delete.
In the Delete dialog, click Delete to confirm that you want to delete the item from the navigation model.
Note:
If you delete an item from a navigation model in the portal editor, you are also deleting the item itself.
22.3.2 Editing a Navigation Model on the Assets or Shared Assets Page
If you want to edit the Portal Default Navigation Model, it is strongly recommended that you use the portal editor, as described in Section 22.3.1, "Editing the Portal Default Navigation Model in the Portal Editor."
However, if you create other navigation models (see Section 22.2, "Creating a Navigation Model"), you can edit them on the Assets page (for portal-level navigation models) or Shared Assets page (application-level navigation models). For example, if there are some items that you want to be available in multiple portals, you can create an application-level navigation model that contains all those items and then reference the application-level navigation model within each individual portal's Portal Default Navigation Model.
To edit a navigation model on the Assets or Shared Assets page:
-
Navigate to one of the following:
-
To edit an application-level navigation model, go to the Shared Assets page. For more information, see Section 59.2, "Accessing Shared Assets."
-
To edit a portal-level navigation model, go to the Assets page for the portal that owns it. For more information, see Section 20.2, "Accessing Portal Assets."
-
-
In the left panel, under Structure, click Navigations.
-
Click the Edit quick link in the row for the navigation model that you want to edit.
-
To add an item to the navigation model, click the Add icon, then select the type of item that you want to add. For more information, see Section 22.3, "Editing a Navigation Model."
-
To edit an existing item:
-
Select the item, then click the Edit icon.
-
Edit the properties as desired. For more information, see Section 22.3.4, "Setting Properties for an Item in the Navigation Model."
-
Click OK.
-
-
To move an existing item within the navigation model, select the item, then click the Move Up or Move Down icon as many times as necessary until the item is in the desired location.
Tip:
You can also move an item by selecting it and dragging it to the desired location. -
To indent an item under another, move the child item so that it is immediately below the parent item and click the Indent icon.
To move an indented item so that it is no longer indented below another item, select the indented item and click the Outdent icon.
-
To copy an existing item, select the item, then click the Copy icon.
A copy of the item is placed just below the selected item. You can edit the new item and change its properties, as described in Section 22.3.4, "Setting Properties for an Item in the Navigation Model."
-
To delete an existing item from the navigation model, select the item, then click the Delete icon.
In the Delete dialog, click Delete to confirm that you want to delete the item from the navigation model.
-
Click Save and Close.
22.3.3 Adding Items to a Navigation Model
You can add many different types of item to a navigation model. Mostly, a navigation model provides links to portal pages, but it can also include documents, external web sites, portlets, and task flows.
Note:
If the portal navigation includes many nodes, depending on the page template used for your portal, there may be more nodes than fit in the area of the page template used for navigation. In this case, a >> icon provides access to a drop-down list of the remaining nodes. However, if this drop-down list is longer than the available screen size, you will not be able to access the nodes at the end of the list. For example, this situation may arise if you are using a page template where the navigation is displayed in a bar along the top of the page.To work around this issue, consider using a different page template that displays navigation down the side of the page. Alternatively, you can use folders in your navigation model to group similar nodes together and reduce the number of nodes displayed at any one level of the navigation model.
To add items to a navigation model:
-
Edit the navigation model. For more information, see one of the following:
-
To edit the Portal Default Navigation Model, open the portal editor. For more information, see Section 22.3.1, "Editing the Portal Default Navigation Model in the Portal Editor."
-
To edit any other navigation model, use the Assets or Shared Assets page. For more information, see Section 22.3.2, "Editing a Navigation Model on the Assets or Shared Assets Page."
-
-
Click the Add icon, then select the type of item that you want to add:
-
(Portal editor only) New Page, New Subpage, New Page Variant to add a new page, subpage, or page variant (for device groups) (see Section 12.2, "Creating Pages or Subpages in a Portal" and Section 12.3, "Creating a Page Variant for a Device Group")
-
(Portal editor only) Page Link to add an existing page (see Section 13.2, "Adding an Existing Page to the Portal Navigation")
-
Content Item to add a document
-
Content Query to add a collection of documents that meet specific query criteria
-
Link to add a link to a web page, portal page, portlet, task flow, or external application
-
Pages Query to add a list of pages
-
Portal Query to add a list of subportals
-
Navigation Reference to embed another navigation model
-
Folder to add a folder to the portal navigation
-
Separator to add a separator to the portal navigation
Tip:
To add an item within a folder, select the folder first and then click Add. -
-
Edit the properties as desired.
For more information, see Section 22.3.4, "Setting Properties for an Item in the Navigation Model."
-
Click OK to add the item to the navigation model.
22.3.4 Setting Properties for an Item in the Navigation Model
You can specify various properties and display options for non-page navigation items to determine their appearance and behavior when the portal navigation is rendered. The options available depend on the type of item.
See Also:
To set properties on page navigation items, see Section 13.16, "Setting Navigation Properties and Display Options for a Page."To set properties for a non-page portal navigation item:
-
Edit the navigation model, and select an item:
-
On the Target tab, specify information about the item. Table 22-1 lists the fields available for all the different item types.
Tip:
All fields in the Edit dialog accept EL expressions. If you need EL assistance, an application developer can provide an EL expression; see the "Expression Language Expressions" appendix in Developing Portals with Oracle WebCenter Portal and Oracle JDeveloper.Note to writer: Keep all properties/descriptions in synch with WCPOH/assets_cs/Edit Navigation Item dialog
Table 22-1 Fields for Specific Navigation Model Items
Field Applies to Description ID
All item types
Enter a unique ID for the item.
This field is automatically populated with a generated ID, for example,
newcontentlink. but as it is used to create the URL to access the node in the navigation model, you may want to change it to something more descriptive.The ID must be unique within the navigation model. The first character must be either an uppercase or lowercase letter or the underscore character (
_). Subsequent characters can be any alphanumeric character or a dash (-), period (.), or underscore (_).If the item is at the top level of the navigation model, the ID must not be
wc_navtitleorwcnav_externalId. These IDs are reserved.Name
All item types
Enter a name to display for the item in the navigation model.
Description
All item types
Enter a brief description of the item.
Visible
All item types
Select to display a node for this item when the navigation model is displayed on a page.
Alternatively, you can specify an EL expression to determine under which conditions the item is included in the navigation. For example, to specify that the item should be visible only to users with the
Moderatorrole, use the following EL expression:#{WCSecurityContext.userInScopedRole['Moderator']}If you need EL assistance, an application developer can provide an EL expression; see the "Expression Language Expressions" appendix in Developing Portals with Oracle WebCenter Portal and Oracle JDeveloper.
Path
Content Item
Link
Page Link
Enter an external URL, or click the search icon to select a target resource to include in the portal navigation.
Note: In the Select dialog, the Select button is active only when you select an item that can be included in the navigation model. For example, if you expand the Portlets node and select a portlet producer, then the Select button is disabled. If you expand the portlet producer and select a portlet, then the Select button is enabled.
Content Presenter Template
Content Item
Select the Content Presenter display template to use to render the document when it is selected in the navigation.
For more information about Content Presenter, see Chapter 33, "Publishing Content Using Content Presenter."
Hide Top-Level Folder
Content Query
Pages Query
Portal Query
Navigation Reference
Select to display the results of the query or reference directly rather than displaying them under a folder.
Page Template
Content Item
Link
Page Link
Pages Query
Select the page template to use to display the item when it is selected in the portal navigation.
Select [system default] to use the portal or application default page template.
Query String
Content Query
Enter the query criteria to identify the content to include in the navigation model, for example:
SELECT * FROM cmis:document
WHERE cmis:name LIKE 'Foo%'
For more information about how to format the query and for more examples, see the "Content Management REST API" chapter in Developing Portals with Oracle WebCenter Portal and Oracle JDeveloper.
Find Pages in
Pages Query
Select:
-
Home Portal to include the Home portal and all its pages in the navigation model.
-
Portal to add the home page of a specific portal and all its other pages to the navigation model.
Enter the name of the portal, or click the Select Portal icon to select from all available portals. In the Select Portal dialog, you can filter the list of portals to those that you have joined, those that you moderate, or those that are public.
-
Path to add a specific page to the navigation model.
Enter the path of the page, or click the Select Page icon to select from all available pages.
Page Style
Pages Query
Select the style of page to include in the navigation model. For example, if you select Wiki, only pages that use the Wiki page style are included in the navigation model.
Select [system default] to display all pages, regardless of style.
Excluded Page Styles
Pages Query
Enter a comma-separated list of page style paths to exclude pages that use those styles from the navigation model. For example:
/oracle/webcenter/siteresources/scopedMD/s8bba98ff_4cbb_40b8_beee_296c916a23ed/
pageStyle/gsr1b60e8a7_2e23_48ff_9571_31ede592de1a/TemplateWiki.jspx,
/oracle/webcenter/siteresources/scopedMD/s8bba98ff_4cbb_40b8_beee_296c916a23ed/
pageStyle/gsr1b60e8a7_2e23_48ff_9571_31ede592de1b/TemplateBlog.jspx
Tip: You can find the path of a page style by selecting it on the Assets page and choosing Show Properties from the Actions menu.
Visibility
Pages Query
Select:
-
Show all items to expose in the portal navigation every page in the results of the query, regardless of their individual Visibility property setting.
-
Show only visible items to filter the results of the query to expose in the portal navigation only those pages whose individual Visibility property is selected.
-
Show all but visible items to filter the results to the query to expose in the portal navigation only those pages whose individual Visibility property is deselected.
See also Section 13.9, "Showing or Hiding a Page in the Portal Navigation."
Portal
Portal Query
Enter the name of the portal for which you want to display subportals, or click the Select Portal icon to select from all available portals.
Leave blank to specify the current portal.
Display Subportal Pages
Portal Query
Select to also include the pages within the subportals in the navigation model.
Advanced Query
Portal Query
Enter an EL expression to further refine the list of subportals included in the navigation model.
If you need EL assistance, an application developer can provide an EL expression; see the "Expression Language Expressions" appendix in Developing Portals with Oracle WebCenter Portal and Oracle JDeveloper.
Include Navigation
Navigation Reference
Select the navigation model to nest within the current navigation model.
-
-
On the Options tab, set the navigation model display options for the item. For more information, see Table 22-2.
Table 22-2 Navigation Model Item Display Options
Option Description Access Key
Enter a key mnemonic (single character) that can be used to access the navigation item without using the mouse.
Icon URI
Enter a path and file name of an image to use to represent the item in the navigation model.
Search Keywords
Enter keywords to facilitate searching of the navigation item.
Tool Tip
Enter brief descriptive text to display when users hover the mouse over the item in the navigation model.
External ID
Enter an ID to enable a direct reference to the item from a static link in the page.
Navigation items in the portal's default navigation model with this attribute defined can be accessed using
/faces/wcnav_externalId/externalIdfrom anaf:goLink componentin a page or by using/wcnav_externalId/externalIdfrom an External Link navigation item in the navigation model. The alternative is to access the node by its hierarchy, which is faster, but may change as the application develops.Tip: To directly access a node in the default navigation model for a particular portal, you must specify the portal by setting the
wc.contextURLparameter, for example:/faces/wcnav_externalId/myNavigationItem?wc_contextURL=/spaces/myProjectSpace
To directly access a node in a non-default navigation model, you must specify the path of the navigation model by setting the
wcnav.modelPathURL parameter, for example:/faces/wcnav_externalId/myNavigationItem?wcnav.model= /oracle/webcenter/siteresources/scopedMD/ s7f446cab_f622_4b68_a83e_b7eaf28b52ec/navigation/ gsr0271c712_721a_4565_9f0e_755784a7093b/myNavigation.xml
Depending on where you are using the link, you may need to encode the URL parameters (for example, if the External ID contains spaces or special characters, such as
%2Fspaces%2FmyProjectSpace).Open Link in
Select where to display the navigation item when it is selected. The options available depend on the type of navigation item.
Note: Popups are not supported for pages.
Redirect
Select to redirect the URL specified for the item. If you do not select this option, then the URL is rendered within the current page template.
Tip: This display option is available for all items except for Navigation Reference, Folder, and Separator.
For Link items that point to business role pages (for example, the My Profile page), Redirect has no effect; clicking the link always displays the page in the Home portal.
For Link and Page Link items that point to a page in a different portal, you must select Redirect to open the page inside the portal to which the page belongs. You cannot view another portal's page in the current portal, but you can redirect there to view the other portal's page in that portal
New Attribute Name
Enter the name of an attribute that has been defined for the item but not exposed in the dialog. You can also select an attribute from the drop-down list.
You can also create your own attributes that can then be referenced in page templates to render the item.
New Attribute Value
Enter a value for the attribute specified in the New Attribute Name field, and click Add.
-
On the Parameters tab, enter values for any parameters supported by the item, or add new parameters by entering values in the New Parameter Name and New Parameter Value fields.
22.4 Rendering a Navigation Model
For information about how to render a navigation model in your portal, including how to use the built-in navigation task flows, see Section 21.7, "Adding Navigation to a Page Template."
22.5 Managing a Navigation Model
The following options are available on the Assets or Shared Assets page to enable you to manage navigation models:
-
Create—For more information, see Section 22.2, "Creating a Navigation Model."
-
Delete—You can delete a navigation model when it is no longer required.
For more information, see Section 20.5.9, "Deleting an Asset."
Note:
You can delete a navigation model even if it is referenced in navigation components, page templates, pages, other navigations, and so on, so caution should be taken.You cannot delete the Portal Default Navigation Model.
-
Upload—You can upload an archive file that contains a navigation model that has been developed in another portal or in JDeveloper.
For more information, see Section 20.5.8, "Uploading an Asset."
-
Download—You can download a navigation model into an archive file for uploading into another portal or for importing into JDeveloper.
For more information, see Section 20.5.7, "Downloading an Asset."
-
Actions
-
Copy—You can create a copy of a navigation model. You can use this feature when you want to back up a navigation model, or update a navigation model while keeping the original in use.
For more information, see Section 20.5.4, "Copying an Asset."
-
Security Settings—You can control whether all users or only specific users or groups can access the navigation model.
For more information, see Section 20.5.6, "Setting Security for an Asset."
-
Show Properties—Each navigation model has an associated Show Properties dialog that summarizes useful information about it.
For more information, see Section 20.5.1, "Viewing Information About an Asset."
-
Edit Source—You can directly edit the source code of a navigation model.
For more information, see Section 20.4.2, "Editing the Source Code of an Asset."
-
Edit Properties—Each navigation model has certain properties associated with it that control how it is displayed in the portal. You can edit these properties through the Edit Properties dialog.
For more information, see Section 20.5.5, "Setting Properties on an Asset."
-
-
Available—You can control whether or not a navigation is available for use in a portal by selecting or deselecting this check box.
For more information, see Section 20.5.3, "Showing and Hiding Assets."
Tip:
In addition to showing or hiding a navigation model, you can also control whether a shared navigation model is available to any, all, or selected portals in WebCenter Portal. For more information, see Section 20.5.5, "Setting Properties on an Asset." -
Edit—For more information, see Section 22.3, "Editing a Navigation Model."
22.6 Use Case Examples
Table 22-3 provides solutions to common navigation scenarios, and refers to documentation that provides the information you need.
Table 22-3 Common Navigation Use Cases
| If I want to.... | What do I need to understand and do? |
|---|---|
|
In my portal navigation, create a nested hierarchy |
You can create a two-level hierarchy in your portal navigation in either of the following ways:
|
|
In my portal navigation, add a link to an existing page (including a wiki or blog page) in my portal |
By default, portal pages are automatically added to the portal navigation when they are created (see Section 12.2.2, "Creating a Page or Subpage in an Existing Portal"). Personal pages, system pages, and business role pages are not automatically added to the portal navigation. For information about the different types of pages in WebCenter Portal, see Section 1.3.7, "What Are Pages?" If a portal page is not shown in the portal navigation, it has likely been hidden. To show the page, edit the properties of the page and select the Visibility property. See Section 13.9, "Showing or Hiding a Page in the Portal Navigation." If you want to expose a personal page, system page, or business role page, or add a portal page to a second location in the portal navigation:
See also, Section 13.2, "Adding an Existing Page to the Portal Navigation." |
|
In my portal navigation, add a link to an existing page (including a wiki or blog page) in another portal, choosing whether to show or hide the other portal's navigation when viewing the page |
To create a link to a page that exists in the connected content repository, outside of your portal:
If you enter the URL of the target page as shown in the browser address field, the target page displays within its portal, as shown in this example using top navigation:
To hide the target portal navigation and show only the target page, edit the target page and copy the value of its Path property (on the Advanced tab of the page properties) into the Path field of the navigation item. When you click the navigation item, the page displays without its enclosing portal, as shown here:
Note: If you add a link to a wiki document rather than a page, you cannot use this method to hide the target portal navigation for the wiki. Instead, add a new page containing the wiki document, as described in the rows below for "Working with Wikis and Other Documents." Then, edit the page and copy the value of its Path property (on the Advanced tab of the page properties) into the Path field of the navigation item. |
|
In my portal navigation, add non-page navigation items, such as content item, content query, navigation reference, folder, separator, and so on |
See Section 22.3.3, "Adding Items to a Navigation Model." Note: If you create a Content Item link to a document/wiki, the target will not expose editing controls. |
|
In my portal navigation, create a menu or label, which can be expanded to reveal associated target locations |
Edit the portal or in portal administration, click the Add icon, and select Folder. Name the folder, then add beneath it navigation items such as page links, links, or a navigation model that you defined (see Section 22.2, "Creating a Navigation Model"). You can also drag and drop existing navigation items under the folder.
The menu is added to your portal navigation:
See also, Section 22.3.3, "Adding Items to a Navigation Model." |
|
In my portal navigation, rearrange pages |
See Section 13.3, "Adjusting Page Order and Hierarchy in the Portal Navigation." |
|
In my portal navigation, delete a page (without deleting the page itself) |
To hide a page in the navigation, see Section 13.9, "Showing or Hiding a Page in the Portal Navigation." Note: To delete a page, see "Section 13.5, "Deleting a Page." |
|
Change the portal navigation from side to top tabs, or vice versa |
The tabs along the top and side can be changed by simply changing the page template for the portal, overriding the page template established by the portal template that was used to create the portal. See "Section 7.3.2, "Changing the Page Template for a Portal." |