33 Publishing Content Using Content Presenter
This chapter describes how to publish content on a page in WebCenter Portal using the Content Presenter task flow.
This chapter includes the following topics:
-
Section 33.2, "Adding a Content Presenter Task Flow to a Page"
-
Section 33.3, "Displaying the Content Presenter Configuration Dialog"
-
Section 33.8, "Adding Links from Content to Navigation Nodes"
-
Section 33.9, "Authoring Site Studio Content to Optimize Presentation in Content Presenter"
-
Section 33.11, "Creating and Editing Files In-Context in a Content Presenter Task Flow"
-
Section 33.13, "Setting Content Presenter Task Flow Properties"
Permissions:
To perform the tasks in this chapter, you need the following portal-level permissions:-
Basic Services: Edit Page Access and Structure(standard permissions) orPages: Edit Pages(advanced permissions) -
Documents(advanced permissions)
For more information about permissions, see Section 29.1, "About Roles and Permissions for a Portal."
33.1 About the Content Presenter Task Flow
Content Presenter enables you to precisely customize the selection and presentation of content in a portal. The Content Presenter task flow is available only when the connected content repository is Content Server and your system administrator has completed the prerequisite configuration.
See Also:
-
"Configuring an Oracle WebCenter Content Server Repository" in Administering Oracle WebCenter Portal
-
"Creating a Content Repository Connection Based on the Oracle Content Server Adapter" in Developing Portals with Oracle WebCenter Portal and Oracle JDeveloper
-
"Creating and Using Templates for the Content Presenter Task Flow" tutorial (
http://www.oracle.com/technetwork/middleware/webcenter/portal/learnmore/wcp-cp-templates-1555892.pdf) on the Oracle Technology Network.
With Content Presenter, you can select a single item of content, contents under a folder, a list of items, query for content, or select content based on the results of a Personalization Conductor scenario, and then select a template to render the content on a page in a portal.
Notes:
-
Content Presenter is intended to render (present) content, not to host HTML content. To host HTML content, use the Web Page component to render the HTML content from Content Server. For more information, see Section 15.11, "Working with the Web Page Component."
-
Content Server exposes a content item only after it has a revision status of Released. If a content item does not have Released status, you will not be able to configure Content Presenter to show the item. You can find the status of a content item in Content Server on the Content Information Page, as described in the "Revision Status" section in the Using Oracle WebCenter Content.
In addition to displaying the folders and files in Content Server, Content Presenter integrates with Oracle Site Studio to allow you to create, access, edit, and display Site Studio contributor data files. For more information, see Section 33.1.1, "Understanding Site Studio Integration."
Content Presenter has no dependency on the Documents tool for adding or managing the content it displays.
33.1.1 Understanding Site Studio Integration
Oracle Site Studio is a powerful, flexible web development application suite that offers a comprehensive approach to designing, building, and maintaining enterprise-scale web sites. Site Studio uses Content Server as the main repository for a web site.
Content Presenter integrates with Site Studio to allow you to create, access, edit, and display Site Studio contributor data files in either a custom Content Presenter display template that makes use of region definitions or a Site Studio region template.
Tip:
Oracle recommends that you use Content Presenter ADF templates (that use region definitions) to integrate Site Studio and WebCenter Portal rather than use Site Studio region templates. The region templates display the details of the contributor data file rather than the contributed content. For more information, see the "Creating Content Presenter Display Templates" chapter in Developing Portals with Oracle WebCenter Portal and Oracle JDeveloper.Note:
Oracle Site Studio files can also be included in the Folder Viewer, Document Explorer, and Document Manager task flows, and previewed using the Document Viewer. For more information, see Section 34.1.7, "Understanding the Document Viewer Task Flow."Before you can display Site Studio contributor data files in Content Presenter, the system administrator must complete the followings tasks, described in Administering Oracle WebCenter Portal:
-
Enable Site Studio components, and configure the cookie path to the context root of your application to prevent losing your session when editing Site Studio content, as described in the "Configuring Content Server" chapter in Administering Oracle WebCenter Portal, specifically the "Setting Up Site Studio" section.
-
Enable the
WebCenterConfigurecomponent to allow for adding and editing Site Studio documents from within Content Presenter, as described in the "Enabling the WebCenterConfigure Component" section in Administering Oracle WebCenter Portal.
For proper surfacing in Content Presenter, the following link types can be used in a Site Studio contributor data file (or in a Site Studio region template):
-
Links to nodes in the default navigation model, as described in Section 33.8, "Adding Links from Content to Navigation Nodes"
-
Links to inline images
-
Links to documents (except for absolute or relative path links)
When clicking the link at runtime, it renders within the context of the application and displays the document using the Default View display template.
-
Absolute HTTP links, whether created in Site Studio contributor mode or in Site Studio Designer region template HTML
The following Site Studio link types are not supported in Content Presenter:
-
Links to Site Studio sections
-
Absolute or relative path links to Site Studio documents
For guidelines on authoring recommendations for displaying a Site Studio contributor data file in Content Presenter, see Section 33.9, "Authoring Site Studio Content to Optimize Presentation in Content Presenter."
You can create and edit Site Studio contributor data files from the Content Presenter Configuration dialog (see Section 33.10, "Creating or Editing Site Studio Content in the Content Presenter Configuration Dialog") or in-context when displayed in Content Presenter at runtime (see Section 33.11, "Creating and Editing Files In-Context in a Content Presenter Task Flow").
For more information about creating and using Site Studio contributor data files and Site Studio region templates, refer to the Oracle WebCenter Content documentation library (http://docs.oracle.com/cd/E28280_01/webcontent.htm).
33.2 Adding a Content Presenter Task Flow to a Page
To add a Content Presenter task flow to a page:
-
Open the page in edit mode (see Section 12.4.3, "Opening a Page in the Page Editor (Composer)").
Note:
By default, the view switcher is set to and Composer displays the page in Design view showing the inline resource catalog.
 -
Navigate to the section of the resource catalog that provides access to the folders and files in the connected content repository.
Tip:
The presence or location of this section depends on how the resource catalog is configured. For example, in the Default Portal Catalog, next to Content Management, click Open to expose the content selections (Figure 33-1).Figure 33-1 Opening the Content Management Section in the Resource Catalog
Description of ''Figure 33-1 Opening the Content Management Section in the Resource Catalog''
For information about the selections shown in the Default Portal Catalog, see Section 32.2, "About Content Management Selections in the Resource Catalog."
-
Add the Content Presenter task flow to the page in one of two ways:
-
Next to Content Presenter, click Add (Figure 33-2).
Figure 33-2 Adding a Content Presenter Task Flow to a Page
Description of ''Figure 33-2 Adding a Content Presenter Task Flow to a Page''
A new empty region appears on your page (Figure 33-3).
Figure 33-3 Adding a Content Presenter Task Flow to a Page

Description of ''Figure 33-3 Adding a Content Presenter Task Flow to a Page''
-
Drill down in the resource catalog to the folder or file you want to display on the page: In the Default Portal Catalog, next to All Content (or, in a portal, Portal Documents or Personal Documents), click Open until you locate the target content, then click Add, and select Content Presenter from the menu (Figure 33-4).
Note:
Content Server exposes a content item only after it has a revision status of Released. If the content item does not have Released status, you will not be able to configure Content Presenter to show the item. You can find the status of a content item in Content Server on the Content Information Page, as described in the "Revision Status" section in the Using Oracle WebCenter Content.Figure 33-4 Adding Content to a Content Presenter Task Flow
Description of ''Figure 33-4 Adding Content to a Content Presenter Task Flow''
The selected folder or file displays in a default display template, as shown in Figure 33-5 and Figure 33-6.
Figure 33-5 Content Presenter Task Flow: Default Template for Word Document
Description of ''Figure 33-5 Content Presenter Task Flow: Default Template for Word Document''
Figure 33-6 Content Presenter Task Flow: Default Template for Image File
Description of ''Figure 33-6 Content Presenter Task Flow: Default Template for Image File''
-
33.3 Displaying the Content Presenter Configuration Dialog
The Content Presenter Configuration dialog enables you to easily configure the Content Presenter task flow to select or change content, or select a different display template.
Note:
You can also specify content and a display template by clicking the properties Edit icon (the second wrench icon in the task flow chrome) and specifying parameters on the Parameters tab of the Component Properties dialog. However, specifying parameters in this way is generally intended for use at design time by developers creating a WebCenter Portal Framework application, or for advanced users who want to bind a parameter to an EL expression. If you modify a property value in the Component Properties dialog, the new value overrides the value specified in the Content Presenter Configuration dialog, and that value cannot subsequently be changed through the Content Presenter Configuration dialog. For information about Content Presenter task flow parameters, see Section 33.13, "Setting Content Presenter Task Flow Properties."To display the Content Presenter Configuration dialog:
-
In the Content Presenter task flow (see Section 33.3, "Displaying the Content Presenter Configuration Dialog"), click the task flow Edit icon (the first wrench icon in the task flow chrome) (Figure 33-7).
Figure 33-7 Editing a Content Presenter Task Flow

Description of ''Figure 33-7 Editing a Content Presenter Task Flow''
The Content Presenter Configuration dialog opens (Figure 33-8).
Figure 33-8 Content Presenter Configuration Dialog
Description of ''Figure 33-8 Content Presenter Configuration Dialog''
A check mark alongside an item indicates that the required information is complete and valid.
33.4 Selecting Content
Note:
Content Presenter does not support non-ASCII characters in files that are encoded using the non-UTF-8 character encoding. When users preview such files in Content Presenter, non-ASCII characters appear garbled.Depending on the type of content you want to display, complete the steps in one of the following sections:
-
Section 33.4.3, "Selecting Content Based on the Results of a Query"
-
Section 33.4.5, "Selecting Content Based on the Results of a Scenario"
33.4.1 Selecting a Single Content Item
To select a specific item (including a Site Studio contributor data file) to display in a Content Presenter display template or Site Studio region template (see Section 33.1.1, "Understanding Site Studio Integration"):
Tip:
Oracle recommends that you use Content Presenter ADF templates (that use region definitions) to integrate Site Studio and WebCenter Portal rather than use Site Studio region templates. The region templates display the details of the contributor data file rather than the contributed content. For more information, see the "Creating Content Presenter Display Templates" chapter in Developing Portals with Oracle WebCenter Portal and Oracle JDeveloper.-
In the Content Presenter Configuration dialog (see Section 33.3, "Displaying the Content Presenter Configuration Dialog"), click Select Content or the Content tab.
-
On the Content page, expand the Content Source list, and select Single Content Item (Figure 33-9).
Figure 33-9 Selecting the Content Source: Single Content Item
Description of ''Figure 33-9 Selecting the Content Source: Single Content Item''
Note:
For information on creating new content, see Section 33.10, "Creating or Editing Site Studio Content in the Content Presenter Configuration Dialog." -
Click Browse to locate the content item.
Note:
Content Server exposes a content item in the Browse list only after it has a revision status of Released. The revision status of a new content item changes from Done to Released after it has reached its specified release date (specified by thedInDateproperty). Content items that do not have Released status will not appear in the Browse list. You can find the status of a content item in Content Server on the Content Information Page, as described in the "Revision Status" section in the Using Oracle WebCenter Content.An alternative way to display a single content item in Content Presenter is to navigate to the file and select Content Presenter from its Add menu, as described in Section 34.3, "Adding a Selected Folder or File to a Page." However, even though you are able to select the content item in this way, it will display in Content Presenter only if it has a revision status of Released. If the content item has a different revision status, but had a status of Released in the past, then Content Presenter will display the Released version of the content item, not the latest version that is not yet released.
If WebCenter Portal is connected to multiple Content Server repositories, the browse tree shows the parent folder for the current user, or for the current portal, in the repository that is specified as the primary connection. To access other connected repositories, click the navigation list icon in the toolbar to expose the VCR parent node. Click VCR to show all connected content repositories (Figure 33-10).
Figure 33-10 Navigating to Other Content Repositories
Description of ''Figure 33-10 Navigating to Other Content Repositories''
Note:
If the content repository includes an invalid type configuration, then no content displays when you click Browse. Instead, an error message reportsUnable to retrieve content type information.
33.4.2 Selecting the Contents of a Folder
To display the contents of a folder on a page (in the order stored in the folder) in a Content Presenter display template:
-
In the Content Presenter Configuration dialog (see Section 33.3, "Displaying the Content Presenter Configuration Dialog"), click Select Content or the Content tab.
-
On the Content page, expand the Content Source list, and select Contents Under a Folder (Figure 33-11).
Figure 33-11 Selecting the Content Source: Contents Under a Folder
Description of ''Figure 33-11 Selecting the Content Source: Contents Under a Folder''
-
Click Browse to locate a folder. To select the folder as the content source, click in the folder row, not on the folder name (clicking the folder name opens the folder).
If WebCenter Portal is connected to multiple Content Server repositories, the browse tree shows the parent folder for the current user, or for the current portal, in the repository that is specified as the primary connection. To access other connected repositories, click the navigation list icon in the toolbar to expose the VCR parent node. Click VCR to show all connected content repositories (Figure 33-10).
Note:
If the content repository includes an invalid type configuration, then no content displays when you click Browse. Instead, an error message reportsUnable to retrieve content type information.
33.4.3 Selecting Content Based on the Results of a Query
Note:
To select content based on the results of a query against the connected Content Server repository, full-text search must be enabled in Content Server through OracleTextSearch, as described in the "Configuring OracleTextSearch for Content Server" section in Installing and Configuring Oracle WebCenter Content.To enter query criteria to refine the selection of the content to display in a Content Presenter display template:
-
In the Content Presenter Configuration dialog (see Section 33.3, "Displaying the Content Presenter Configuration Dialog"), click Select Content or the Content tab.
-
On the Content page, expand the Content Source list, and select Results of a Query (Figure 33-12).
Figure 33-12 Selecting the Content Source: Results of a Query
Description of ''Figure 33-12 Selecting the Content Source: Results of a Query''
-
In the Results of a Query pane (Figure 33-13 and Figure 33-14), enter desired values in the fields that you want the query to retrieve, as described in Table 33-1.
Figure 33-13 Results of a Query Pane: All Content Types
Description of ''Figure 33-13 Results of a Query Pane: All Content Types''
Figure 33-14 Results of a Query Pane: Selected Content Type
Description of ''Figure 33-14 Results of a Query Pane: Selected Content Type''
Table 33-1 Specifying Query Criteria for Results of a Query
Element Description File Name
Enter the name of a file in the specified Repository that you want to display in the selected template. You can use
*as a wild card character to retrieve multiple files; for example:*.jpg.Keywords
Enter any value that might be present in the content of the documents. The value may be one or more words or phrases.
Content Type
Select All Content Types to retrieve content items regardless of the content type, or select the name of a content type profile or Site Studio region template definition (see Section 33.1.1, "Understanding Site Studio Integration") defined in Content Server. A content type profile specifies properties that define a specific type of content (for example, a press release, or a news flash, or an image). The content type IDC:GlobalProfile is the name of a default content type profile defined in Content Server that can be applied if no other content type profiles are defined.
Limit Results
Specify the maximum number of content items to be returned by the query. The default is 100.
Dates
In the Created and/or Last Modified fields, select a modifier to search for content items matching an exact date (is), a following date (is after), a preceding date (is before), or a date between two other dates (is between), which adds an additional date field for entering the second date. Click the Select Date icon to select a date, or enter a date manually (the required format is determined by your WebCenter Portal preferences.
Users
In the Created By (user who uploaded) and Last Modified By fields, enter a user name for the creator or last modifier of the content item, or click the Browse icon to open the Select user dialog where you can select from a list of users or search for a user name. For tips on searching for a user in the identity store, see Section 30.5.1, "Searching for a User or Group in the Identity Store."
Additional Query Filters
Not applicable when Content Type is set to All Content Types. For a selected content type profile (for example, those prefixed with IDC: or WCM:), click the Add icon to list all the properties that are defined for the selected profile (Figure 33-14). Select one or more properties to refine the query to find content items with specific property settings.
Sort Order
Not applicable when Content Type is set to All Content Types. For a selected content type profile (for example, those prefixed with IDC: or WCM:), specify a sort order for the properties shown in the Sort On list.
-
Click Preview Results to see the results of the query.
Note:
If the content repository includes an invalid type configuration, then no content displays when you click Preview Results. Instead, an error message reportsUnable to retrieve content type information.
33.4.4 Selecting a List of Content Items
Content Presenter allows you to create a list of multiple content items. The order you use when creating the list is the order in which they are presented at runtime.
To browse or search for any number of items to add to a list, and delete or reorder the items before adding the list to a page in a Content Presenter display template:
-
In the Content Presenter Configuration dialog (see Section 33.3, "Displaying the Content Presenter Configuration Dialog"), click Select Content or the Content tab.
-
On the Content page, expand the Content Source list, and select List of Items (Figure 33-15).
Figure 33-15 Selecting the Content Source: List of Items
Description of ''Figure 33-15 Selecting the Content Source: List of Items''
-
In the Select Items to Display pane (Figure 33-16), click Add to browse or search for any number of items to add to a list.
-
In the Select One or More Content Items dialog, select multiple content items using Ctrl+click or Shift+click.
Note:
Content Server exposes a content item in the Browse list only after it has a revision status of Released. The revision status of a new content item changes from Done to Released after it has reached its specified release date (specified by thedInDateproperty). Content items that do not have Released status will not appear in the Browse list. You can find the status of a content item in Content Server on the Content Information Page, as described in the "Revision Status" section in the Using Oracle WebCenter Content.If WebCenter Portal is connected to multiple Content Server repositories, the browse tree shows the parent folder for the current user, or for the current portal, in the repository that is specified as the primary connection. To access other connected repositories, click the navigation list icon in the toolbar to expose the VCR parent node. Click VCR to show all connected content repositories (Figure 33-10).
Note:
If the content repository includes an invalid type configuration, then no content displays when you click Browse. Instead, an error message reportsUnable to retrieve content type information.
33.4.5 Selecting Content Based on the Results of a Scenario
If WebCenter Portal is configured to run Personalization Conductor scenarios using Content Presenter, you can select content based on the results of a WebCenter PersonalizationConductor scenario. For more information, see the "Managing Personalization" chapter in Administering Oracle WebCenter Portal, specifically the "Configuring the WebCenter OPSS Trust Service" and "Configuring Content Presenter" sections.
To enter Personalization Conductor scenario criteria to refine the selection of the content to display in a Content Presenter display template:
-
In the Content Presenter Configuration dialog (see Section 33.3, "Displaying the Content Presenter Configuration Dialog"), click Select Content or the Content tab.
-
On the Content page, expand the Content Source list, and select Results of a Scenario (Figure 33-17).
Figure 33-17 Selecting the Content Source: Results of a Scenario
Description of ''Figure 33-17 Selecting the Content Source: Results of a Scenario''
-
In the Results of a Scenario pane, review the list of scenarios that have been tagged for Content Presenter consumption, select those for which you want to generate results, and enter required parameters (Figure 33-18).
-
Click Preview Results to see the results of the selected scenarios.
Note:
If the content repository includes an invalid type configuration, then no content displays when you click Preview Results. Instead, an error message reportsUnable to retrieve content type information.Any results that are returned from a scenario for use by Content Presenter must return a valid CMIS query, as Content Presenter takes the return value and runs it (as a CMIS query) against the repository specified within the Conductor URL. Your WebCenter Portal developer must format the scenario as described in the "Using the CMIS Provider" section in Developing Portals with Oracle WebCenter Portal and Oracle JDeveloper.
33.5 Selecting a Display Template
The display template for the content you have selected on the Content page of the Content Presenter Configuration dialog may be one of the out-of-the-box templates provided with WebCenter Portal (see Table 33-2 and Table 33-3), a custom template designed for your organization in JDeveloper, or a Site Studio region template (see Section 33.1.1, "Understanding Site Studio Integration").
Tip:
Oracle recommends that you use Content Presenter ADF templates (that use region definitions) to integrate Site Studio and WebCenter Portal rather than use Site Studio region templates. The region templates display the details of the contributor data file rather than the contributed content. For more information, see the "Creating Content Presenter Display Templates" chapter in Developing Portals with Oracle WebCenter Portal and Oracle JDeveloper.For information about creating custom display templates in JDeveloper, and uploading them for use by WebCenter Portal, see the "Creating Custom Content Presenter Display Templates" section in Developing Portals with Oracle WebCenter Portal and Oracle JDeveloper. For information about creating and using Site Studio region templates, refer to the Oracle WebCenter Content documentation library (http://docs.oracle.com/cd/E28280_01/webcontent.htm).
By default, WebCenter Portal selects an appropriate display template based on the type of content selected. You can change the default template as required.
The system administrator can show, hide, and manage the custom display templates on the Assets page of the application administration settings. For more information, see Chapter 23, "Working with Resource Catalogs."
To change the display template for the selected content:
-
In the Content Presenter Configuration dialog (see Section 33.3, "Displaying the Content Presenter Configuration Dialog"), click Select Template or the Template tab.
The templates that are available for selection in the Template list are those that are identified by Content Presenter as suitable for displaying the selected content item(s). For more information, see the "Identifying Display Templates for Selected Content Items" section in Developing Portals with Oracle WebCenter Portal and Oracle JDeveloper.
-
On the Template page:
-
If the Content Source selected on the Content page is a Site Studio contributor data file or any other single content item, select a Content Presenter display template or a Site Studio region template from the Template list.
The list of available Site Studio region templates includes only the templates that match the region definition of the Site Studio contributor data file selected on the Content page. To identify the Site Studio region templates, hover your mouse pointer over the templates in the list to display hint text identifying the Site Studio region templates. For more information, see Section 33.1.1, "Understanding Site Studio Integration."
Note:
If you create a Site Studio contributor data file directly from the Content Presenter Configuration dialog, as described in Section 33.10, "Creating or Editing Site Studio Content in the Content Presenter Configuration Dialog," the Site Studio region templates that match the region definition of the Site Studio contributor data file might not be immediately shown in the Template list. In this case, select the default template, and click Save. Then, open the Content Presenter Configuration dialog again to find the Site Studio region templates in the Template list.The Content Presenter display templates in the list include the out-of-the-box templates for single content items (see Table 33-2). Other selections that might be available in the list are custom display templates that have been uploaded to WebCenter Portal (see Section 20.5.8, "Uploading an Asset"). Custom Content Presenter display templates are created in JDeveloper, as described in the "Creating Content Presenter Display Templates" section in Developing Portals with Oracle WebCenter Portal and Oracle JDeveloper.
Figure 33-19 shows the Template list, with a Site Studio region template named Full Article View selected.
Figure 33-19 Selecting the Custom Display Template
Description of ''Figure 33-19 Selecting the Custom Display Template''
-
If the Content Source selected on the Content page is a multiple content item source (Contents Under a Folder, Results of a Query, or List of Items), select the desired Template Category (Figure 33-20), then the Template (Figure 33-21).
Figure 33-20 Selecting the Template Category (for Multiple Content Items)
Description of ''Figure 33-20 Selecting the Template Category (for Multiple Content Items)''
Figure 33-21 Selecting the Display Template (for Multiple Content Items)
Description of ''Figure 33-21 Selecting the Display Template (for Multiple Content Items)''
By default, there are two categories: Default Templates and Site Studio Templates. This selection defines the collection of out-of-the-box templates available for multiple content items (see Table 33-3).
Other selections that might be available in the list are custom display templates that have been uploaded to WebCenter Portal (see Section 20.5.8, "Uploading an Asset"). Custom Content Presenter display templates are created in JDeveloper, as described in the "Creating Content Presenter Display Templates" section in Developing Portals with Oracle WebCenter Portal and Oracle JDeveloper.
Table 33-2 Out-of-the-Box Templates for Displaying Single Content Items
Single Content Item Templates View ID Description Default Document Details View
oracle.webcenter.content.templates.default.document.detailsDisplays detailed information about any single content item including creation date, modification date, created by username, modified by username, path, and any comments.
Default List Item View
oracle.webcenter.content.templates.default.list.itemDisplays a single line with an icon and item name as a link that either displays or downloads the item when clicked.
Default View
(default when no template is selected)oracle.webcenter.content.templates.default.detailDisplays any single content item, either directly in the browser (images, HTML, text) or as a link that downloads the associated file when clicked.
For example, when the selected document type is
.doc, the Default View template is assigned to be the Default Document Details View template.Full Article View
oracle.webcenter.content.templates.sitestudio.fullarticleDisplays a full article, including the Title, Image, and Body of an article.
This template requires Site Studio to be enabled on the Content Server, as it uses the
RD_ARTICLESite Studio region definition.Table 33-3 Out-of-the-Box Templates for Displaying Multiple Content Items
Multiple Content Item Templates View ID Description Accordion View
oracle.webcenter.content.templates.default.list.panel.accordionDisplays multiple content items in an accordion format, where each item can be expanded to display its details.
Articles View (under the Site Studio Template category)
oracle.webcenter.content.templates.sitestudio.articleDisplays the summaries of multiple articles, including the Title, Image, and Summary of articles.
This template requires Site Studio to be enabled on the Content Server, as it uses the
RD_ARTICLESite Studio region definition.Bulleted View
oracle.webcenter.content.templates.default.list.bulletedDisplays multiple content items in a bulleted list format. Only content items display; folder items are omitted.
Bulleted with Folder Label View
oracle.webcenter.content.templates.default.list.bulleted.labelDisplays multiple content items in a bulleted list format. The name of the folder containing the first item in the list displays as a label above the list. This template is intended to be used with Content Source set to Contents Under a Folder to ensure that all items have the same parent folder. Only content items display; folder items are omitted.
Carousel View
oracle.webcenter.content.templates.default.list.carouselDisplays multiple content items in a carousel format, where items can be browsed by moving a slider left or right.
Icon View
oracle.webcenter.content.templates.default.list.tileDisplays multiple content items in a tiled format with large icons and file names.
List View
(default when no template is selected)oracle.webcenter.content.templates.default.list.simpleDisplays multiple content items in a simple list.
List with Details Panel View
oracle.webcenter.content.templates.default.list.details.panelDisplays multiple content items in a list on the left, with a panel to the right displaying the details of a selected item.
Sortable Table View
oracle.webcenter.content.templates.default.list.tabularDisplays multiple content items in a sortable table that includes the document name, date created, and date modified.
Tabbed View
oracle.webcenter.content.templates.default.list.panel.tabbedDisplays multiple content items as tabs that can be selected to display item details.
-
33.6 Previewing the Results
To see a preview of your selected content before adding it to the page:
-
Click Preview or the Preview tab.
The appearance of the content on the Preview page is dependent on whether the selected display template uses a stretch or flow layout. While the final view of the task flow can be configured to use either a stretch layout or a flow layout, the Preview page only uses a flow layout. As a result, the preview of content using templates that were designed for a stretch layout displays unstretched at a fixed default size. This is the normal behavior of stretchable content when displayed in non-stretching flow layout. To allow stretchable content to stretch to its full size and fill the task flow space entirely, click the Edit icon for the task flow to display the Component Properties dialog, and select the Stretch Content property (on the Display Options tab). For more information, see Section 14.3.4, "Working with Component Display Options."
Note:
Content Presenter does not support non-ASCII characters in files that are encoded using the non-UTF-8 character encoding. When users preview such files in Content Presenter, non-ASCII characters appear garbled.From the Preview tab, you can click Edit Web Content (Figure 33-22) to edit HTML and Site Studio files in-context, as described in Section 33.11, "Creating and Editing Files In-Context in a Content Presenter Task Flow."
If the file is in workflow, you will see a workflow notification area at the top, as described in Section 33.12, "Approving and Rejecting Files in Workflow."
Figure 33-22 Previewing an Oracle Site Studio Contributor Data File
Description of ''Figure 33-22 Previewing an Oracle Site Studio Contributor Data File''
33.7 Using Responsive Templates
The Articles View and Full Article View templates use responsive layouts to display their content. The Articles View template can be used to list articles, providing links to a page displaying the full details of an article. The full details of the article are displayed using the Full Article View template.
The following sections describe how to use responsive templates:
33.7.1 Prerequisites
The Articles View or Full Article View template rely on the Site Studio RD_ARTICLE region definition, so Site Studio must be enabled in Content Server and seed the RD_ARTICLE region definition:
-
Enable Site Studio (see Section 33.1.1, "Understanding Site Studio Integration").
-
Start (or restart) WebCenter Portal after Site Studio has been enabled (this will seed the
RD_ARTICLEregion definition).
33.7.2 About the Articles View Template
The Articles View template includes different layouts based on the width of the browser. The font sizes and image sizes also vary depending on the width of the browser.
If the browser is narrow (up to 480 pixels; for example, an iPhone), then the template lists the articles in a single column (Figure 33-23).
Figure 33-23 Articles View Single Column Layout
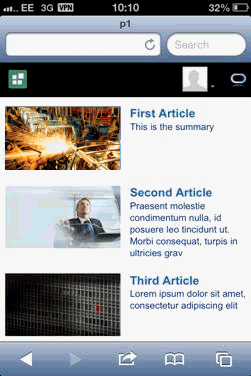
Description of ''Figure 33-23 Articles View Single Column Layout''
If the browser is slightly wider (up to 780 pixels, for example, an iPad in portrait orientation), then the template lists the articles in two columns (Figure 33-24).
Figure 33-24 Articles View Two Column Layout
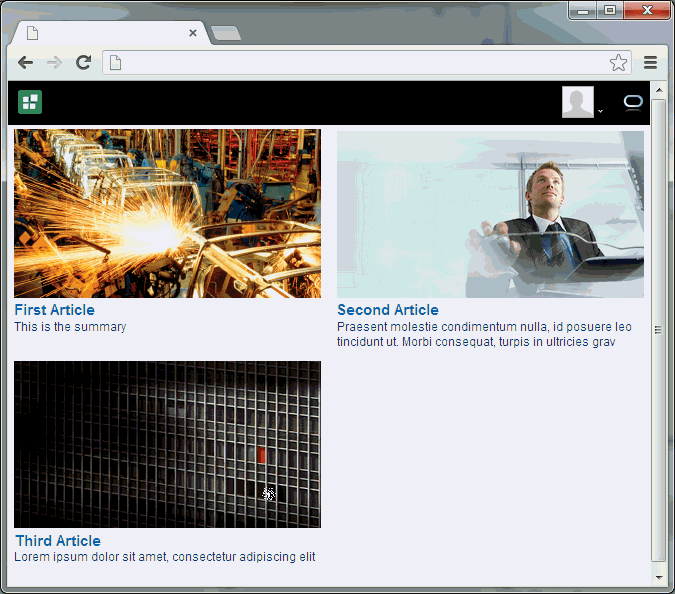
Description of ''Figure 33-24 Articles View Two Column Layout''
If the browser is wide (over 780 pixels), then the template lists the articles in three columns (Figure 33-25).
Figure 33-25 Articles View Three Column Layout
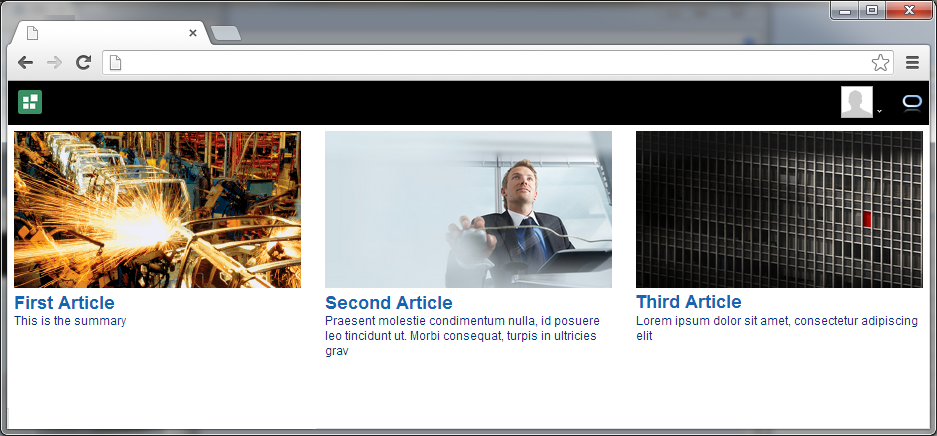
Description of ''Figure 33-25 Articles View Three Column Layout''
33.7.3 Using the Articles View Template
To use the Articles View template:
-
Add the Content Presenter task flow to a page (see Section 33.2, "Adding a Content Presenter Task Flow to a Page").
-
Select the content (see Section 33.4, "Selecting Content"). The content should be either Results of a Query or List of Items. If the content is Results of a Query, then you need to set the Content Type to WCM:RD:RD_ARTICLE, which restricts the query to just content created using the
RD_ARTICLEregion definition. -
Select the display template (see Section 33.5, "Selecting a Display Template"). Set the Template Category to Site Studio Templates and the Template to Articles View.
Note:
To create content for the Articles View template, see Section 33.10, "Creating or Editing Site Studio Content in the Content Presenter Configuration Dialog."33.7.4 About the Full Article View Template
The Full Article View template includes different layouts based on the width of the browser.
If the browser is narrow (up to 480 pixels, for example, an iPhone), then the template displays an article with the image taking up the full width of the template (Figure 33-26).
Figure 33-26 Full Article View Template Narrow View
Description of ''Figure 33-26 Full Article View Template Narrow View''
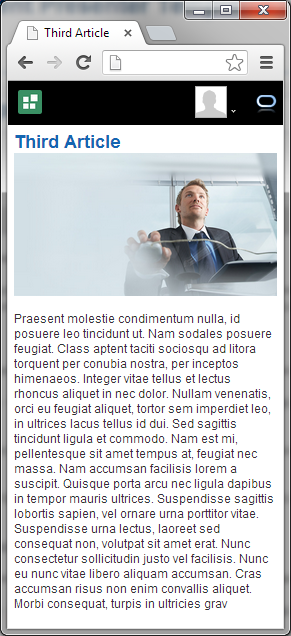
If the browser is wider (over 480 pixels), then the template displays an article with the image displayed to the right (Figure 33-27).
Figure 33-27 Full Article View Template Wide View
Description of ''Figure 33-27 Full Article View Template Wide View''
33.7.5 Using the Full Article View Template
To use the Full Article View template:
-
Add the Content Presenter task flow to a page (see Section 33.2, "Adding a Content Presenter Task Flow to a Page").
-
Select the content (see Section 33.4, "Selecting Content"). The content should be Single Content Item. Then either click Browse and select an existing item (this must be an item created using the
RD_ARTICLEregion definition), or click Create Web Content to create a new item (see Section 33.10, "Creating or Editing Site Studio Content in the Content Presenter Configuration Dialog") using theRD_ARTICLEregion definition. -
Select the display template (see Section 33.5, "Selecting a Display Template"). Set the Template Category to Site Studio Templates and the Template to Full Article View.
33.7.6 Optimizing Display on Mobile Devices
If you use the Articles View or Full Article View template on a page and want to optimize the layout for a mobile device, you must use a page template with the correct viewport (see Section 9.3.1, "Editing a Device Group"). You can use either the Skyros Top Navigation (Mobile) page template, Skyros Side Navigation (Mobile) page template, or a custom page template with the viewport parameter.
To set the viewport parameter for a page template:
-
Navigate to the Assets page for the portal (see Section 7.5.1, "Accessing Assets Administration for a Portal").
-
Click Page Templates.
-
Select the page template (note that you can't edit the out-of-the-box templates, but you can copy an out-of-the-box template and then edit the copy).
-
From the Actions menu, select Edit Source.
-
Click the Page Definition tab.
-
Within the
<parameters>section, add the following:<parameter id="viewport" value="width=device-width, initial-scale=1.0"/>
Note:
The value of theviewportparameter will be used as the value for the content attribute of the<meta name="viewport" content="..."/>tag, so if you set it the recommended value of"width=device-width, initial-scale=1.0"then the following meta tag will be added to the page:<meta name="viewport" content="width=device-width, initial-scale=1.0"/>
-
Click Save and Close.
33.8 Adding Links from Content to Navigation Nodes
When you expose content stored in a Content Presenter task flow, consider whether you want to add one or more links from the content to a node in the default navigation model (see Section 13.16, "Setting Navigation Properties and Display Options for a Page").
When the content displays in Content Presenter at runtime, an end user can click the links to navigate to the desired navigation node.
You can create a link in the following content items:
-
a document of MIME type
text/html(typically HTML files) -
a Site Studio contributor data file (in a Rich Text element)
-
a Site Studio region template
To add a link to a node in the default navigation model from a content item:
-
Edit the content item, as described in:
-
Add a link using the following syntax:
$wcUrl('externalId')where
externalIdis the value of the External ID property of the navigation node to link to (see Table 13-3, "Page Navigation Item Settings: Options Pane").For example:
<a target="" href="$wcUrl('NEWCUSTOMERSLINK')">New Customers</a>
33.9 Authoring Site Studio Content to Optimize Presentation in Content Presenter
Content Presenter integrates with Oracle Site Studio to allow you to create, access, edit, and display Site Studio contributor data files in either a custom Content Presenter display template or a Site Studio region template. For more information, see Section 33.1.1, "Understanding Site Studio Integration."
Tip:
Oracle recommends that you use Content Presenter ADF templates (that use region definitions) to integrate Site Studio and WebCenter Portal rather than use Site Studio region templates. The region templates display the details of the contributor data file rather than the contributed content. For more information, see the "Creating Content Presenter Display Templates" chapter in Developing Portals with Oracle WebCenter Portal and Oracle JDeveloper.To optimize the presentation of Oracle Site Studio content in Content Presenter, follow the guidelines provided in the following sections:
33.9.1 Best Practices for Images
Keep the following guidelines in mind as you work with images in Site Studio that will be displayed using Content Presenter:
-
Store images in Content Server in a common location.
-
Insert images into WYSIWYG elements using the Site Studio Contributor image wizard.
-
Set the
imagetagsrcattribute to a relative link to an image file in Content Server. This attribute is rewritten by Content Presenter during rendering to use theGET_FILEservice. -
For performance improvement, use web proxy to cache artifacts at URLs from Content Server, and set expiration based on tolerance for updates in Content Server.
Example for Apache
mod_cache:-
CacheEnable mem /cs -
CacheDefaultExpire 3600 (one hour)
-
33.9.2 Best Practices for Defining Styles
Keep the following guidelines in mind as you work with style definitions for Site Studio contributor data files that will be displayed using Content Presenter:
-
Define styles in CSS files.
-
Store CSS files either in Content Server or in WebCenter Portal.
-
If stored in Content Server, add
<link>in<head>of page template.
-
-
Load style class names into WYSIWYG region element definitions.
-
Select your CSS to format HTML in WYSIWYG elements.
-
For performance improvement, use web proxy to cache artifacts at URLs from Content Server, and set expiration based on tolerance for updates in Content Server.
Example for Apache
mod_cache:-
CacheEnable mem /cs -
CacheDefaultExpire 3600 (one hour)
-
33.9.3 Best Practices for JavaScript
Keep the following guidelines in mind as you work with JavaScript in Site Studio contributor data files that will be displayed using Content Presenter:
-
Recommended: Do not use JavaScript within web content that is rendered within WebCenter Portal.
-
If your web content uses JavaScript, follow these guidelines:
-
Add
<link>in<head>of page template. -
For performance improvement, use web proxy to cache artifacts at URLs from Content Server, and set expiration based on tolerance for updates in Content Server.
Example for Apache
mod_cache:-
CacheEnable mem /cs -
CacheDefaultExpire 3600 (one hour)
-
-
33.10 Creating or Editing Site Studio Content in the Content Presenter Configuration Dialog
Content Presenter integrates with Oracle Site Studio to allow you to create, access, edit, and display Site Studio contributor data files in either a custom Content Presenter display template or a Site Studio region template. For more information, see Section 33.1.1, "Understanding Site Studio Integration."
Note:
To create or edit Oracle Site Studio content in a seamless interface within WebCenter Portal, both of the following two requirements must be met:-
You must access WebCenter Portal through Oracle HTTP Server (OHS) to expose Content Server and WebCenter Portal under the same host and port. For information about setting up OHS as the front end to WebCenter Portal, see the "Content Server - Configuration" section in Administering Oracle WebCenter Portal.
-
WebCenter Portal must be connected to a Content Server repository, with the
webContextRootparameter set to a Content Server host name. For information on settingwebContextRoot, see the "Registering Content Repositories" section in Administering Oracle WebCenter Portal. To setwebContextRootthrough WLST, see the "createJCRContentServerConnection" and "setJCRContentServerConnection" sections in the WebLogic Scripting Tool Command Reference.
Without this configuration, it is still possible to create or edit Site Studio content from within Content Presenter, but the create and edit actions launch new browser windows (or tabs) rather than opening within the Content Presenter task flow.
Oracle recommends that you use Content Presenter ADF templates (that use region definitions) to integrate Site Studio and WebCenter Portal rather than use Site Studio region templates. The region templates display the details of the contributor data file rather than the contributed content. For more information, see the "Creating Content Presenter Display Templates" chapter in Developing Portals with Oracle WebCenter Portal and Oracle JDeveloper.
To create or edit Oracle Site Studio content from the Content Presenter Configuration dialog:
-
In the Content Presenter Configuration dialog (see Section 33.3, "Displaying the Content Presenter Configuration Dialog"), click Select Content or the Content tab.
-
On the Content page, click Create Web Content (Figure 33-28).
Figure 33-28 Selecting the Content Source: Site Studio
Description of ''Figure 33-28 Selecting the Content Source: Site Studio''
Tip:
The Create Web Content button displays only when the Content Source field displays Single Content Item and when at least one Content Server repository (11g or higher) has the Site Studio component installed.The Oracle Site Studio Choose Region Content pane opens (Figure 33-29).
Figure 33-29 Adding Site Studio Content: Choose Region Content
Description of ''Figure 33-29 Adding Site Studio Content: Choose Region Content''
-
In the Choose Region Content pane, select a Site Studio region definition on which the content you want to create or edit is based.
Notes:
-
To create or edit Oracle Site Studio content, at least one region definition must have been previously created in the Site Studio application.
-
To create articles for the Articles View and Full Article View templates, select
RD_ARTICLERegion Definition. For more information, see Section 33.7, "Using Responsive Templates."
-
-
Click Next.
The Choose content file pane opens (Figure 33-30).
Figure 33-30 Adding Site Studio Content: Choose Content File

Description of ''Figure 33-30 Adding Site Studio Content: Choose Content File''
-
In the Choose content file pane, select one of the following:
-
New Contributor data file to open the Check-in content pane (Figure 33-31), where you can specify the standard document properties for the new Site Studio contributor data file that you want to check in to Content Server.
Figure 33-31 Adding Site Studio Content: Check-in Content
Description of ''Figure 33-31 Adding Site Studio Content: Check-in Content''
-
Existing file from server to open Content Server (Figure 33-32), showing Site Studio contributor data files that are based on the selected region definition.
Figure 33-32 Content Server: Search Results
Description of ''Figure 33-32 Content Server: Search Results''
-
-
Make note of the file name, then click Next.
The Check-in Confirmation pane opens (Figure 33-33).
Figure 33-33 Adding Site Studio Content: Check-in Confirmation
Description of ''Figure 33-33 Adding Site Studio Content: Check-in Confirmation''
-
In the Check-in Confirmation pane, select one of the following:
-
Edit content item now to open the Site Studio Contributor editor, where you can edit the content item as described in Section 33.11.2, "Editing Site Studio Files In-Context" (beginning with Step 4).
-
Exit without editing to make no changes to the file.
-
-
Click Finish to return to the Content Presenter Configuration dialog.
-
If you access WebCenter Portal through Oracle HTTP Server (OHS) and have configured the
webContextRootparameter, as described in the note at the top of this section, the Site Studio contributor data file you selected is shown auto-selected in the Content Presenter Configuration dialog. -
If OHS and the
webContextRootparameter are not configured, you can now select the Site Studio contributor data file to display in the Content Presenter task flow: on the Content page, browse to the Site Studio file, select it, and click Select.
-
-
In the Content Presenter Configuration dialog, click Save.
33.11 Creating and Editing Files In-Context in a Content Presenter Task Flow
In-context editing refers to editing content directly in WebCenter Portal at runtime, where the editor opens in a separate window.
With appropriate permissions, end users can edit HTML and Site Studio content in-context in a Content Presenter task flow.
Note:
Users must have permissions to view and edit the page containing the Content Presenter instance, as well as being assigned a role with write permissions on Content Server. For more information, see Section 7.7, "Administering Security in a Portal" and the "Managing Oracle WebCenter Portal Security" chapter in Administering Oracle WebCenter Portal.The following sections describe how to perform in-context editing:
-
Section 33.11.1, "Editing Wiki Documents or HTML Files In-Context"
-
Section 33.11.3, "Creating New Site Studio Content In-Context"
33.11.1 Editing Wiki Documents or HTML Files In-Context
With appropriate permissions, end users can edit wiki documents or HTML files in-context in a Content Presenter task flow.
To edit a wiki or HTML file in a Content Presenter task flow:
-
In the Content Presenter task flow, click anywhere in the file content.
-
Press Ctrl+Shift+C to enter the in-context edit mode. The editable areas of the web page are highlighted with a dashed border.
Note:
You can change the key sequence to enter in-context edit mode if you wish. See Section 33.11.4, "Changing the Edit Mode Key Sequence." -
Click the Edit icon in the upper right corner of the document chrome (Figure 33-34) to open the file in the Document Viewer preview pane.
If the file is in workflow, workflow controls also display (Figure 33-35). For more information, see Section 36, "Working with Workflow-Enabled Content."
Figure 33-35 Workflow Controls in In-Context Edit Mode in a Content Presenter Task Flow

Description of ''Figure 33-35 Workflow Controls in In-Context Edit Mode in a Content Presenter Task Flow''
-
In the Document Viewer preview pane, click Edit (Figure 33-36) to automatically check the file out and open it for editing in the Rich Text Editor (RTE).
Figure 33-36 Opening the Rich Text Editor
Description of ''Figure 33-36 Opening the Rich Text Editor''
-
Make required updates, then save and close the file.
The modified file is automatically checked in.
-
In the Content Presenter task flow, press Ctrl+Shift+C again to exit the in-context editing mode.

33.11.2 Editing Site Studio Files In-Context
Content Presenter integrates with Oracle Site Studio to allow you to create, access, edit, and display Site Studio contributor data files in either a custom Content Presenter display template or a Site Studio region template. For more information, see Section 33.1.1, "Understanding Site Studio Integration."
With appropriate permissions, end users can edit Site Studio contributor data files in-context in a Content Presenter task flow.
To edit a Site Studio file in a Content Presenter task flow:
-
In the Content Presenter task flow, click anywhere in the Site Studio file content.
-
Press Ctrl+Shift+C to enter the in-context edit mode. The editable areas of the web page are highlighted with a dashed border.
Note:
You can change the key sequence to enter in-context edit mode if you wish. See Section 33.11.4, "Changing the Edit Mode Key Sequence." -
Click the Edit icon in the upper right corner of the document chrome (Figure 33-37) to open the file in Site Studio Contributor
-
In the Site Studio Contributor Data File editor, click a region to edit, as shown in Figure 33-38.
For information about editing files in Site Studio Contributor, see the Oracle Site Studio documentation.
Figure 33-38 Editing a File in Site Studio Contributor
Description of ''Figure 33-38 Editing a File in Site Studio Contributor''
-
Click Save and Close to exit the Site Studio Contributor editor and return to the portal.
-
In the Content Presenter task flow, press Ctrl+Shift+C again to exit the in-context editing mode.

33.11.3 Creating New Site Studio Content In-Context
Content Presenter integrates with Oracle Site Studio to allow you to create, access, edit, and display Site Studio contributor data files in either a custom Content Presenter display template or a Site Studio region template. For more information, see Section 33.1.1, "Understanding Site Studio Integration."
Tip:
Oracle recommends that you use Content Presenter ADF templates (that use region definitions) to integrate Site Studio and WebCenter Portal rather than use Site Studio region templates. The region templates display the details of the contributor data file rather than the contributed content. For more information, see the "Creating Content Presenter Display Templates" chapter in Developing Portals with Oracle WebCenter Portal and Oracle JDeveloper.With appropriate permissions, end users can create new web content in Site Studio during in-context editing in a Content Presenter task flow.
In-context creation of Site Studio files is slightly different than creating Site Studio files in the Content Presenter Configuration dialog, as described in Section 33.10, "Creating or Editing Site Studio Content in the Content Presenter Configuration Dialog." When creating a new Site Studio file in-context, you are limited to creating content that is of the same region definition, file location, security group, and document type as the content selected in the Content Presenter task flow. Additionally, the region definition must have been previously created in the Site Studio application.
To create a new Site Studio file in a Content Presenter task flow:
-
In the Content Presenter task flow, click anywhere in the currently displayed Site Studio file.
-
Press Ctrl+Shift+C to enter the in-context edit mode. The editable areas of the web page are highlighted with a dashed border.
Note that you can change the key sequence to enter in-context edit mode if you wish. See Section 33.11.4, "Changing the Edit Mode Key Sequence."
-
Click the Create icon in the upper right corner of the document chrome (Figure 33-39).
-
In the Choose Content window, select New Contributor data file, then click Next (Figure 33-40).
Figure 33-40 Choose New Content File Window
Description of ''Figure 33-40 Choose New Content File Window''
-
Fill out the Check-in Content form. This form provides the metadata for the contributor data file and checks the file into Content Server. The file is empty until you (or another contributor) edits it. For more information on filling out this form, see the "Uploading and Checking In Documents" section in Using Oracle WebCenter Content.
-
In the Check-in Confirmation window, select Edit content item now.
-
Click Finish.
The Site Studio Contributor Data File editor opens (Figure 33-41).
Figure 33-41 Site Studio Contributor File Editor
Description of ''Figure 33-41 Site Studio Contributor File Editor''
-
Edit the file, then click Save and Close.

33.11.4 Changing the Edit Mode Key Sequence
To change the edit mode key sequence used to enter in-content editing mode for a Site Studio file in Content Presenter, edit the <key-sequence> entry in the application's adf-config.xml file:
******** Content Contributor Mode adf-config.xml entries ***************

<page-editor-config xmlns="http://xmlns.oracle.com/adf/pageeditor/config">
       <content-contribution>
         <enabled>true</enabled>
         <key-sequence>ctrl shift C</key-sequence>
       </content-contribution>
</page-editor-config>
33.12 Approving and Rejecting Files in Workflow
You can view content items displayed in Content Presenter while they are in a workflow, including Site Studio contributor data files displayed in a Site Studio region template.
Note:
In order for a content item in workflow to display in Content Presenter, it must have had Released status at some point. If the content item has never had Released status, it will not display in Content Presenter.As long as the content item has at some point had Released status in Content Server, if a revision of the content item is pending in workflow, Content Presenter allows approvers for the content item to toggle between the published version and the version in workflow in the page editor (Figure 33-42) or in-context edit (contributor) mode, and also provides links to approve or reject the item in workflow, and view additional details about the item (including workflow name, steps performed, action performed, date of action, and who performed the action).
Figure 33-42 Preview File in Workflow to Approve or Reject in Content Presenter
Description of ''Figure 33-42 Preview File in Workflow to Approve or Reject in Content Presenter''
For more information about working with files in workflow in Content Presenter, see Section 36.3.2, "Viewing Workflow Files in a Content Presenter Task Flow."
33.13 Setting Content Presenter Task Flow Properties
The Content Presenter task flow has associated properties, which users with sufficient privileges can access through the Component Properties dialog in Composer (Figure 33-43).
Figure 33-43 Content Presenter Task Flow Component Properties
Description of ''Figure 33-43 Content Presenter Task Flow Component Properties''
For information about accessing the Component Properties dialog, see Section 14.3.2, "Setting Properties on a Component."
The following sections provide information about properties of the Content Presenter task flow and describe the properties on the Parameters tab:
33.13.1 About the Content Presenter Task Flow Properties
Note:
The Content Presenter properties are intended for use at design time by developers creating a WebCenter Portal Framework application (see the "Adding Content Task Flows and Document Components to a Portal Page" section in Developing Portals with Oracle WebCenter Portal and Oracle JDeveloper), or for advanced users who want to bind a parameter to an EL expression. If you modify a property value in the Component Properties dialog, the new value overrides the value specified in the Content Presenter Configuration dialog, and that value becomes read-only in the Content Presenter Configuration dialog (Figure 33-44).Figure 33-44 Read-Only Property Value in Content Presenter Configuration Dialog
Description of ''Figure 33-44 Read-Only Property Value in Content Presenter Configuration Dialog''
The properties on the Parameters tab of the Component Properties dialog control the default task flow content. For descriptions of the parameters on this tab, see Section 33.13.2, "Content Presenter Task Flow Parameters." For some task flows, parameters on this tab facilitate the wiring of the task flow to page parameters and page definition variables. For more information, see "Chapter 19, "Wiring Pages, Task Flows, Portlets, and ADF Components."
Changes to the properties on the Display Options, Style, and Content Style tabs affect the appearance and behavior of the task flow for all users. These properties are common to all task flows. For more information, see Section 14.3.4, "Working with Component Display Options" and Section 14.3.6, "Working with Style and Content Style Properties."
The contents of the Events tab depend on the events supported by the task flow. For more information, see Section 14.3.7, "Working with Component Contextual Events."
All properties on the Parameters and Display Options tabs provide access to an Expression Language (EL) editor, which you can use to select or specify a variable value instead of a constant value. Click the Edit icon next to a property field to open the editor. If you need EL assistance, an application developer can provide an EL expression; see the "Expression Language Expressions" appendix in Developing Portals with Oracle WebCenter Portal and Oracle JDeveloper.
33.13.2 Content Presenter Task Flow Parameters
Table 33-4 describes the parameters that are unique to the Content Presenter task flow.
Table 33-4 Content Presenter Task Flow Parameters
| Parameter | Description |
|---|---|
|
|
The data source of the content. The value depends on the value of
|
|
|
where:
|
|
|
The data source type of the content. Corresponds to the Content Source value in the Content Presenter Configuration dialog. Valid values are:
|
|
|
The maximum number of results to display when Default: |
|
|
Specifies whether the display template is a Site Studio region definition template. This value is valid only with Content Server 11g or higher:
For information about creating and using Site Studio region templates, see "Understanding Site Studio Integration" and the Oracle WebCenter Content documentation library ( |
|
|
The unique identifier of this task flow instance, used internally to maintain the association of the task flow instance with its customization and personalization settings. Do not edit this value. Note: Using a CMIS query as the |
|
|
The display template category ID to use in rendering results for multiple content items. This ID may reference the default template category for an out-of-the-box display template (Table 33-3) or a custom category created for a display template for multiple content items (see the "Creating Content Presenter Display Templates" chapter in Developing Portals with Oracle WebCenter Portal and Oracle JDeveloper). |
|
|
The display template view ID to use in rendering results for single content items. Enter the view ID of a template that is configured in the Assets or Shared Assets page for a specific content type, or for list-based templates by category ID. This ID may reference one of the out-of-the-box display templates (Table 33-2), a custom display template (see the "Creating Content Presenter Display Templates" chapter in Developing Portals with Oracle WebCenter Portal and Oracle JDeveloper), or set to the contentID of a region template if the content is a region. |