Release 2 (v9.0.2)
Part Number A95949-01
Home |
Solution Area |
Contents |
Index |
| Oracle9i Warehouse Builder User's Guide Release 2 (v9.0.2) Part Number A95949-01 |
|
This chapter describes how to define dimensional objects within a warehouse target module.
This chapter includes the following topics:
A typical dimensional model used as the target schema for a data warehouse contains a fact table and dimensions. This is known as a star schema. It can also contain materialized views and a conventional view.
Figure 4-1 shows a fact table linked to a set of dimensions over foreign key constraints.
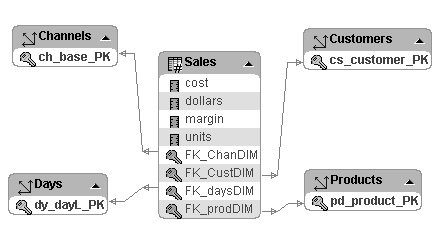
For information on star schemas and dimensional models, see the Oracle8i/9i Data Warehousing Guide.
You should create schema objects in the following order:
Dimensions are created first and objects that reference the dimensions second. You can create the definition for the fact table first by omitting the foreign key reference columns and adding them later after the dimensions have been defined. When a fact table relies on the server to verify foreign key references, this same order must be followed.
Dimension tables contain descriptive details that give meaning to the numbers that populate fact tables.
Query performance can be improved because users often analyze data by drilling down on known hierarchies. Examples of hierarchies are a temporal hierarchy of Year, Quarter, Month, Day and a brand hierarchy of Category, Brand, Product. Oracle8i/9i makes use of defined hierarchies by rewriting queries to retrieve data from summary rather than detail tables. The rewritten queries run much faster.
Typical dimension tables have the following characteristics:
Fact tables contain measures and link to one or more dimension tables. Most fact table measures are additive. Common additive measures include dollars, units, and cost. Fact tables can include non-additive and semi-additive measures such as margins, averages, and balances. Event fact tables do not contain measures.
Fact tables are linked to dimension tables over foreign key constraints. These constraints are critical in a data warehousing environment where data integrity is paramount. The constraints enforce referential integrity during the daily operation of the data warehouse. Referential integrity constraints can cause the data loading to slow down because they require an enormous number of look-up operations.
When dimensions are designed with warehouse keys, the fact table row length is usually reduced because warehouse keys are shorter than their natural counterparts. The result is improved query performance.
A typical fact table contains:
When you create a definition for a fact table, you must define its measures and its foreign key references. To define a foreign key reference, you include the name of the referenced dimension and its primary key column.
Materialized views are summary tables used by the Oracle8i/9i server to rewrite queries so they execute faster. A query that retrieves product totals from a monthly summary table will run much faster than a query that retrieves data from a detail table and then calculates the monthly subtotals. Because the first query retrieves far fewer rows and performs fewer calculations, it executes much faster.
End users do not know whether the materialized views exist or how to rewrite queries. The server automatically does this work. The Oracle8i/9i server can also refresh materialized views as the detail data changes.
When you create materialized views, you can enable query rewrite. To maximize the number of query rewrites, create dimension and fact tables so they include the physical characteristics of dimensions and facts described previously. See the Oracle8i/9i Data Warehousing Guide for more information about query rewrites.
Conventional views simplify and secure data within a data warehouse without requiring additional physical storage space. For example, a view could calculate and return standard deviations for brand summaries rather than a list of details. This simplifies access for users. Another view could restrict access to the sales values of specific products. This type of view simplifies management of the data warehouses for the database administrator.
Although the procedure for creating a definition for a view is similar to creating a materialized view, the objects themselves are different. A materialized view occupies storage space; a view does not. A materialized view speeds queries; a view has a different purpose. Materialized views are designed for the server and users do not know about their existence; views are displayed to users.
This section describes how to create dimensions using the New Dimension Wizard. Use the New Time Dimension Wizard to create a time dimension. This section also describes how to modify the definitions using property sheets.
A dimension definition includes a dimension object definition and a dimension table definition. This section provides information about the dimension object.
Table 4-1 summarizes the rules for dimensions.
Dimension objects consist of a set of levels and a set of hierarchies defined over those levels. The levels represent levels of aggregation. Hierarchies describe parent-child relationships among a set of levels.
For example, a typical calendar dimension could contain five levels. Two hierarchies can be defined on these levels:
The hierarchies are described from parent to child, so that Year is the parent of Quarter, Quarter the parent of Month, and so forth.
When you create a definition for a hierarchy, Warehouse Builder creates an identifier key for each level of the hierarchy and a unique key constraint on the lowest level. Warehouse Builder uses the identifier keys during the generation phase to build a DDL script to create the dimension object.
When you create a foreign key reference constraint on a fact table that points to a dimension, Warehouse Builder shows the unique key constraint and the other identifier keys as candidates for the referenced column. A fact table can reference only the lowest level of a hierarchy because it contains a unique key constraint. If you select any other level, the definition is invalid.
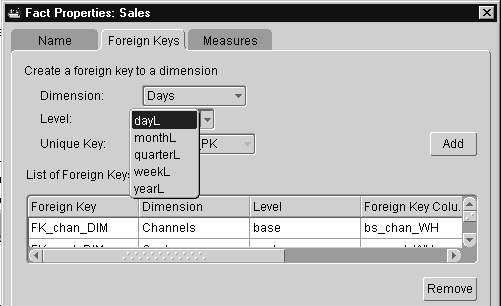
An application can require two hierarchies that start at different levels of aggregation. For example, you can have the following hierarchies:
H1: YearL > QuarterL > MonthL > WeekL > DayL
H2: YearL > WeekL > DayL
H3: YearL > QuarterL > MonthLowL
To model this mixed case using Warehouse Builder:
For this set of hierarchies, Warehouse Builder generates six level identifiers and two unique key constraints. One unique constraint is defined on the Days column and the other on the MonthLow column. Because DayL and MonthLowL are at the bottoms of their respective hierarchies, they can serve as targets of foreign key references.
Warehouse Builder generates a dimension as a single denormalized table with a set of levels and hierarchies defined on that table. Each level can have any number of columns.
To create definitions for a dimension, use the New Dimension Wizard. You name the dimension table and define a primary key constraint on its warehouse key column. When you define each column, Oracle recommends setting the constraint to NOT NULL to prevent inconsistent result sets and to maximize the number of query rewrites.
You also define the dimension hierarchy and its levels of aggregation. Table 4-2 provides an example of a dimension table with each level of aggregation, a prefix for each level, and the attributes defined on each level. The levels occur in parent to child order: class is the parent of family and family is the parent of product.
To create a dimension definition:
Warehouse Builder displays the welcome page for the New Dimension Wizard.
The wizard displays the Name page.
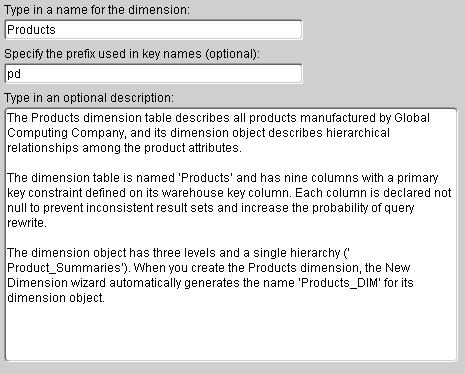
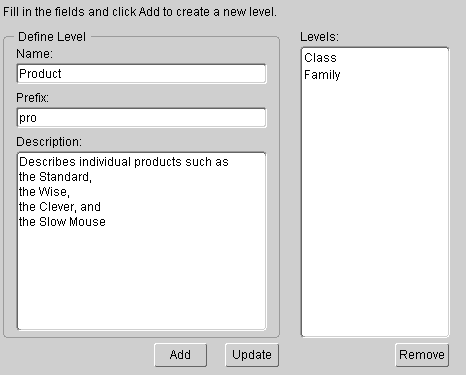
Prefixes are useful because they:
The wizard displays the Level Attributes page. A level can have one or more attributes. The wizard generates an ID attribute for each level.
The ID attribute for a level identifies the level. The attribute is the level's logical key column. This attribute is used in the CREATE DIMENSION statement to define the level, and the defined level is used in the statement's DETERMINES clause to specify other columns within that level (dependent columns). See the Oracle8i/9i SQL Reference and the Oracle8i/9i Data Warehousing Guide for more information.
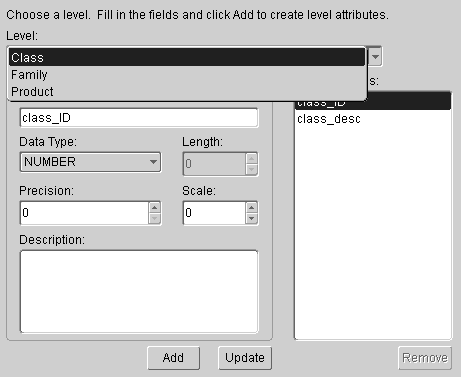
You can define another attribute for the selected level or select another level and define its attributes. Continue this process until you have defined all the attributes for each level.
If you want to rename the ID column, select ID in the Level Attributes text box.
The wizard displays the Hierarchies page.
The wizard displays the Level Relationships page.

The wizard displays the Finish page. Verify the description.
The wizard creates a definition for the dimension.
The wizard generates a unique key (UK) constraint for a dimension table on the ID column that represents the dimension's base level of aggregation. Dimensional designs often call for a primary key (PK) rather than a UK constraint. After you complete a definition for a dimension, you can change the UK to a PK constraint. See "Changing Key Constraints" for information.
You can update the definition for a dimension object with the Dimension Editor or by editing entries in the dimension property sheet.
To display the Dimension Editor, right-click a dimension in the navigation tree and select Edit.
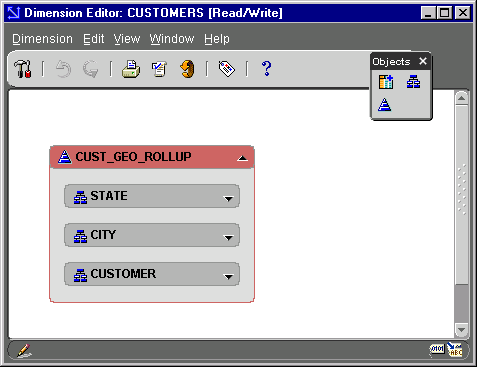
The Dimension Editor displays a toolbox and the dimension object.
To add an element to the dimension object, drop an icon from the toolbox onto a dimension element.
To add an attribute to a level:
Warehouse Builder adds an attribute (attribute1) in the level with the number data type.
The Dimension Editor displays the dimension property sheet.
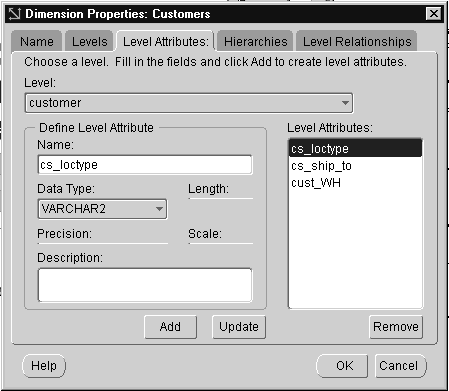
To print the diagram, click the Print icon on the Dimension Editor toolbar.
The dimension object and the dimension table both have property sheets. In the dimension object property sheet, you edit the levels and hierarchies. In the dimension table property sheet, you edit the columns and constraints.
To display the dimension object property sheet:
Warehouse Builder displays the property sheet for the dimension object.
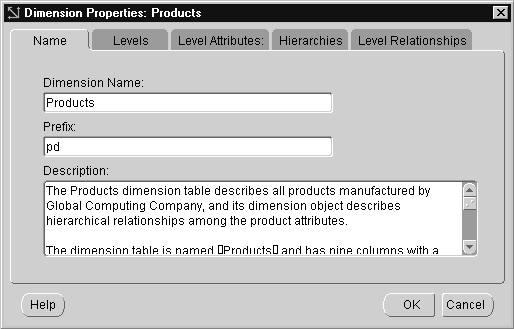
The dimension object property sheet has the following tabs:
To display the dimension table property sheet:
Warehouse Builder displays the dimension table property sheet. For information about the table property sheet, see "Using the Table Property Sheet" .
This section describes how to use the New Time Dimension Wizard. The Time Dimension Wizard generates a SQL insert statement to populate the time dimension. You do not need to extract data from a data source. You must set the start and end dates for the statement that generates the data. See "Guidelines for Configuring Dimensions, Facts, and Tables" for information on configuring the dates.
The Time Dimension Wizard uses predefined names and prefixes for levels, hierarchies, and attributes. The attributes have predefined data types. After you create the definition, you can update the property sheet.
To create a time dimension definition:
Warehouse Builder displays the welcome page for the New Time Dimension Wizard.
The Levels page contains predefined levels of aggregation and a prefix for each level.
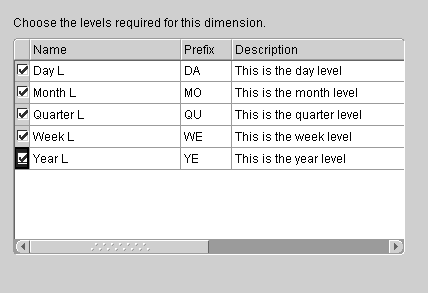
The wizard displays the Level Attributes page. This page contains a set of predefined attributes for each level.

Continue this process to select attribute sets for each level.
The Hierarchies page contains a set of predefined attributes for each level.
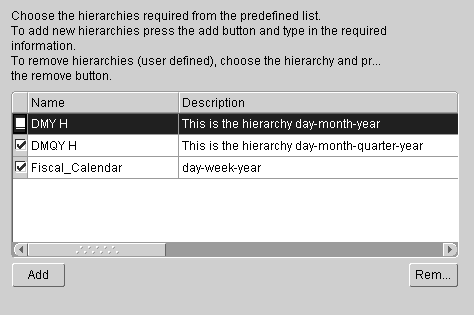
The wizard displays the Level Relationships page.
The wizard displays the Finish page.
The wizard stores the definition in the warehouse module.
The New Time Dimension Wizard generates the attributes you select plus additional attributes and constraints. In addition to the selected attributes, the wizard generates:
You can edit the names of constraints, levels, attributes, and hierarchies in the dimension property sheet. For additional information on editing a dimension object, see "Updating Dimension Definitions".
This section describes how to create and update a definition for a fact table. You create a definition for a fact table using the New Fact Table Wizard, and you update the definition by editing its property sheet. You can also import definitions for tables from another database source or an Oracle Designer Repository.
You use the New Fact Table Wizard to create definitions for a fact table. This information includes details regarding foreign key references, measures, and the data types of all the table's columns.
This section describes how to create a fact table definition.
To create a fact table definition:
Warehouse Builder displays the Welcome page for the New Fact Wizard.
The wizard displays the Name page.
The wizard displays the Define Foreign Keys page.
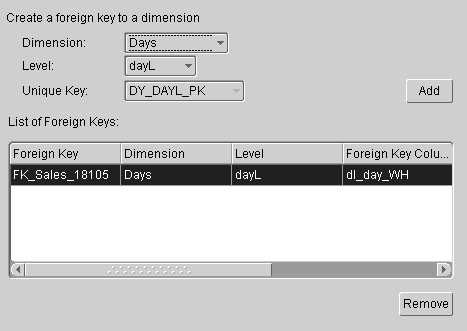
The wizard inserts the foreign key reference constraint in the text box that lists the foreign keys.
You can change the name of the generated foreign key by selecting the name and typing over it. The name must be unique within the project.
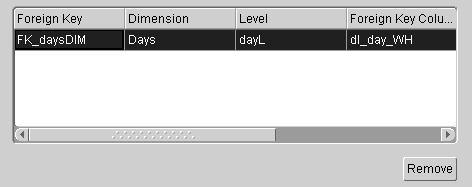
The wizard displays the Define Measures page.
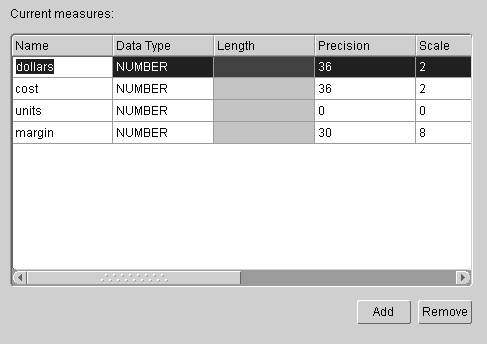
The wizard displays the Finish page. This page summarizes the fact table. Click Back to modify any of the elements.
The wizard creates a definition for a fact table, stores it in the warehouse module, and inserts its name in the warehouse module's navigation tree.
A fact object has two property sheets: one for the fact object and another for the fact table. You can update a fact object's properties by editing the property sheets. In addition, you can add foreign key references or measures to a fact object using the Fact Editor. You can also use the Fact Editor to change fact properties and foreign key relationships with dimensions.
To open the Fact Editor, right-click a fact table in the Warehouse Module Editor and select Edit from the pop-up menu.
Warehouse Builder displays the Fact Editor containing a tool palette and a diagram of the fact table and the related dimensions.
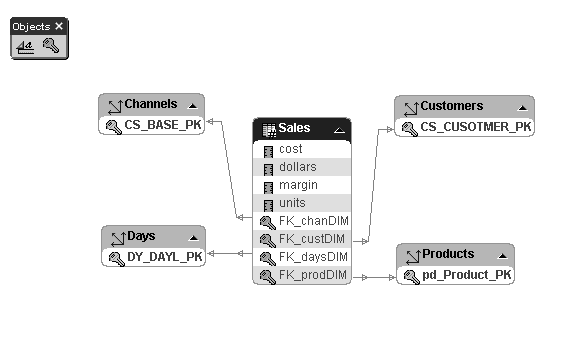
To print the diagram, click the printer icon on the Fact Editor toolbar.
To display the fact object property sheet:
The properties include the object's name and description, foreign key references, measures, and attribute sets.
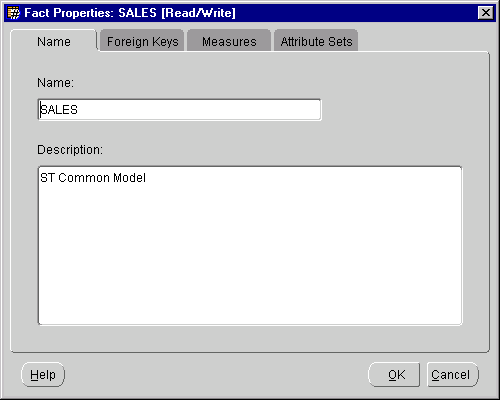
From the Fact Properties sheets, you can:
This Foreign Keys sheet shows all the UK constraints defined on a dimension: the base level of aggregation and each higher level of aggregation. Warehouse Builder generates DDL only for the constraint defined on the base level of aggregation.
Edit the table property sheet if you want to change the physical properties of a fact.
To display the fact table property sheet, right-click the fact and select Table Properties from the pop-up.
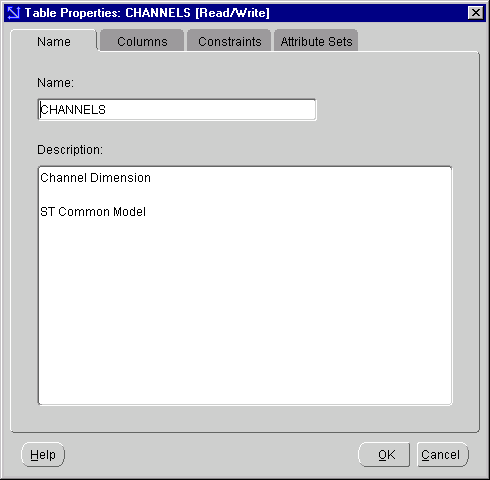
From the Table Properties sheets, you can:
The Oracle8i/9i server can automatically refresh materialized views provided that a materialized view log file is created for the underlying fact table. To build the log file, the fact table must have a PK constraint. You can change the composite UK constraint defined on a fact table to a PK constraint.
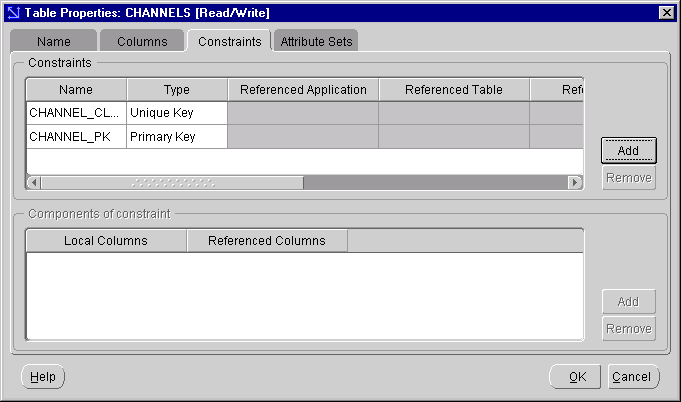
To change key contraints:
You can import definitions for tables, views and sequences using the Import Metadata Wizard. See "Importing Definitions from a Database" for instructions.
Transformations are pre-built PL/SQL functions, procedures, package functions, and package procedures. They take input data, perform operations on it, and produce output data. Custom transformations are used to define an operation outside of the Oracle Library. You create a custom transformation using the New Transformation Wizard.
The following sections describe the transformation libraries and how to create custom transformations.
Warehouse Builder supports the following transformation types:
Most transformations have parameters. The input parameter specifies a source of data, the output specifies a result. More complex transformations often have multiple input, input/output, and output parameters.
Each time you create a warehouse module, Warehouse Builder creates a Transformation Library for that module containing transformation operations. This library contains the standard Oracle Library and an additional library for each warehouse module defined within the repository.
Transformation Libraries consist of the following types:
When you create a custom transformation, add it to the Global Shared Library to share across warehouse modules. If the transformation is specific to one module, add it to the transformation library within that module.
The Global Shared Library stores transformations that are shared across a repository. The default categories are:
The Oracle Library includes a set of standard transformations organized into categories including:
You can access the Transformation Libraries from Expression Builder, the Add Transformation dialog, or the New Transformation Wizard. You can also access Transformation Libraries from the navigation tree in the Warehouse Builder Console.
You can create transformation libraries to organize transformations. The following steps show you how to create transformation libraries within the warehouse module using the New Transformation Library Wizard.
To create a transformation library:
Warehouse Builder displays the New Transformation Library Wizard welcome page.
The wizard displays the Name page.
A library name can have from 2 to 40 alphanumeric characters but no spaces.
The wizard inserts the name of the library in the module's navigation tree.
Custom transformations are used to define an operation outside of the Oracle Library. Definitions for custom transformations are stored in a warehouse module Global Shared Library in the Transformations branch that can be subdivided into categories in the Module Editor.
Create new transformations using the New Transformation Wizard. To create a transformation, enter the SQL or PL/SQL code that the transformation executes.
To define a custom transformation:
Warehouse Builder opens the New Transformation Wizard.
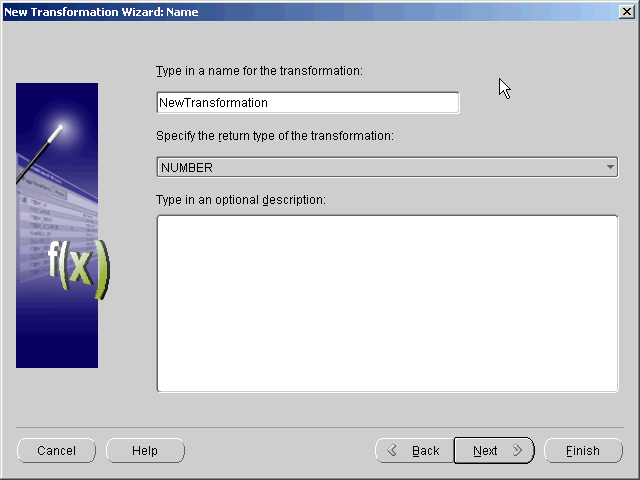
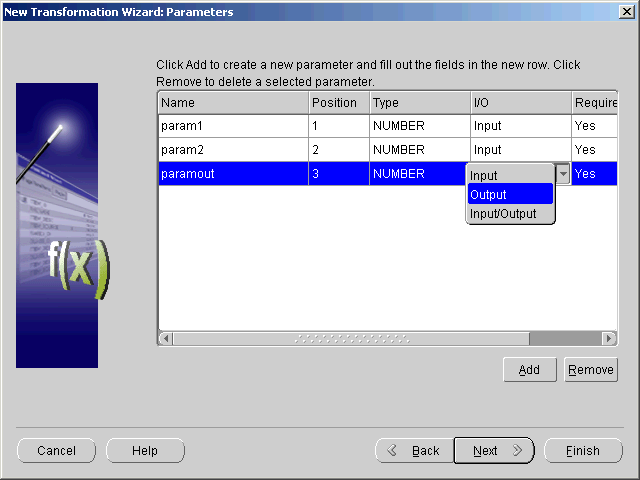
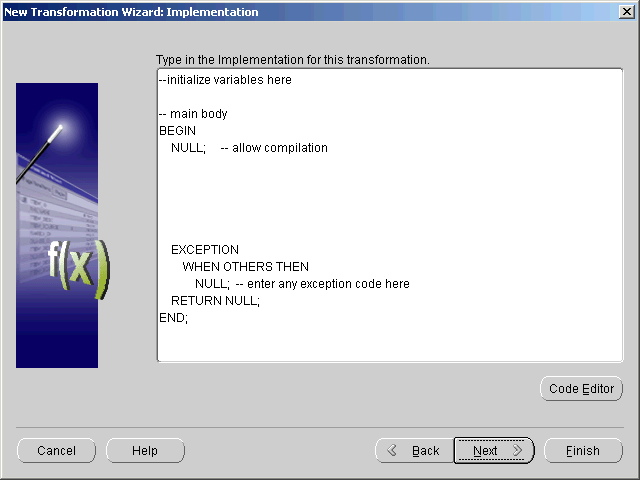
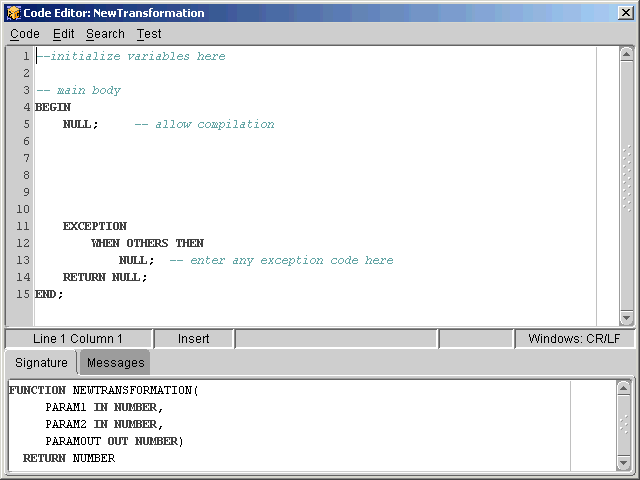
You can edit a transformation on the transformation properties sheet. Make sure you edit properties consistently. For example, if you change the name of a parameter, then you must change the name in the implementation code.
Using the Import Wizard, you can import PL/SQL functions, procedures, and packages into a Warehouse Builder project. When Warehouse Builder generates a script for the extract and load job, it generates the added constraint within the PL/SQL routine that implements the mapping. At runtime, you can accept the default value or supply a different one.
When you submit the script using Oracle Enterprise Manager, you can then modify the runtime parameter value.
The following steps describe how to import PL/SQL packages from other sources into Warehouse Builder.
To import a PL/SQL function, procedure, or package:
Warehouse Builder displays the Import Metadata Wizard Welcome page.
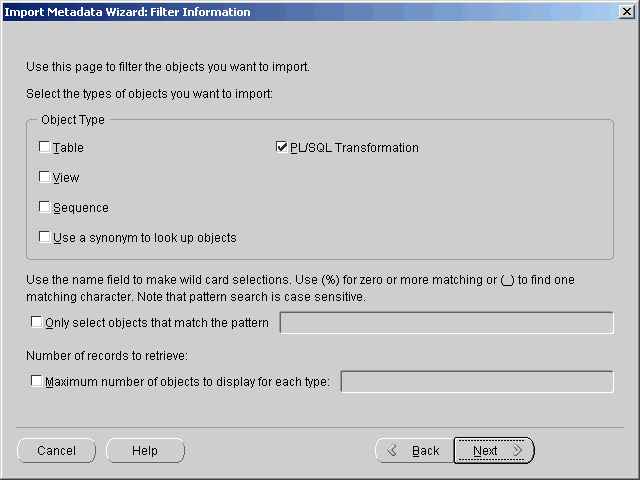
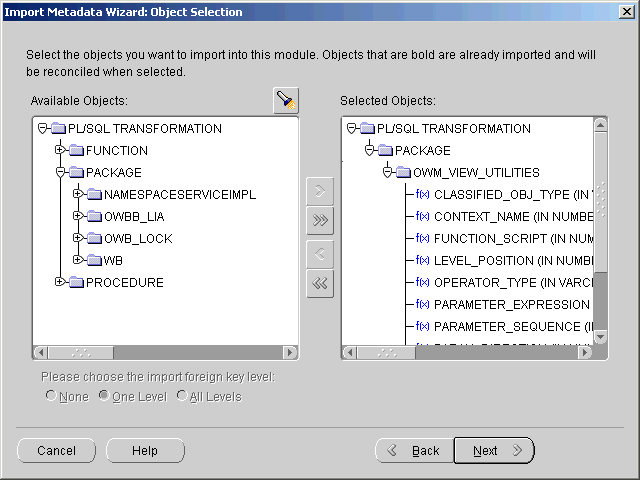
The Import Metadata Wizard displays the Summary and Import page.
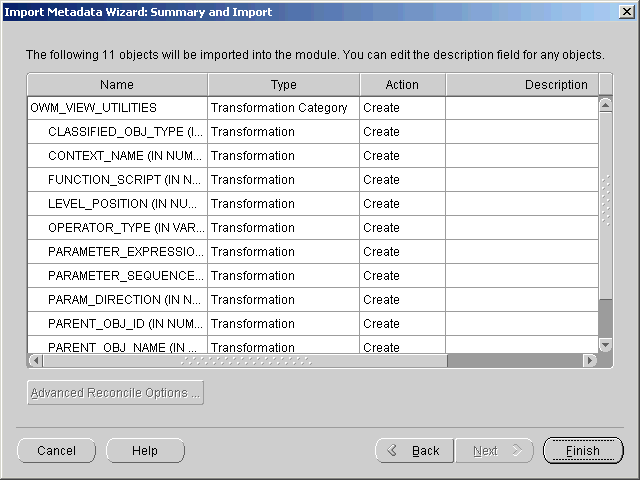
The Import Results dialog displays.
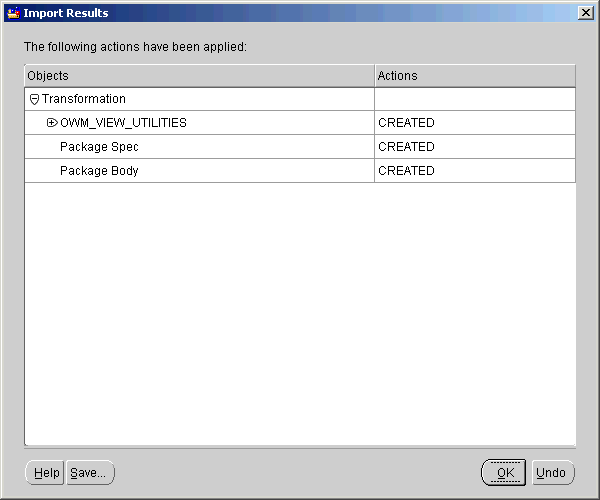
The imported PL/SQL information appears in the Module Editor under Transformation Libraries.
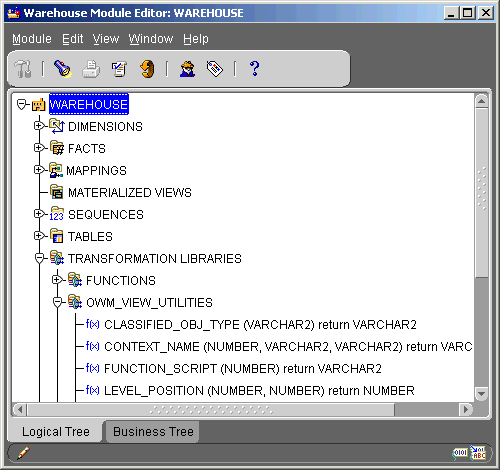
When you use the imported PL/SQL:
A business area is a logical grouping of data within a warehouse module. These areas define links to a subset of the module's objects. You can define multiple business areas within a warehouse module. The business tree displays a warehouse module's business areas.
Business areas are useful when the logical warehouse contains a large number of objects. Define business areas when you need to examine subsets of warehouse objects or export subsets of objects to a decision support tool such as Oracle Discoverer or Oracle Express.
Oracle Discoverer and Oracle Express use business areas to provide their users with access to the data they need for ad hoc queries, decision support, and presentation of results. You can use the Warehouse Builder Transfer Wizard to export business areas from Warehouse Builder to Discoverer and Express.
You can create multiple business areas that share the same links. After you create a business area, you can update its definitions using the standard Warehouse Builder editors, such as the Dimension, Fact, Table, and Mapping editors. You can also update an object definition by editing its property sheet. For additional information on updating definitions, see the previous examples in this chapter.
To create a definition for a subset of warehouse objects in a business area:
Warehouse Builder displays the navigation tree for the business areas.
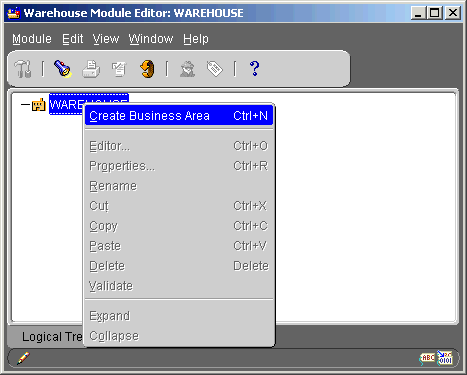
Warehouse Builder displays the Business Area dialog.
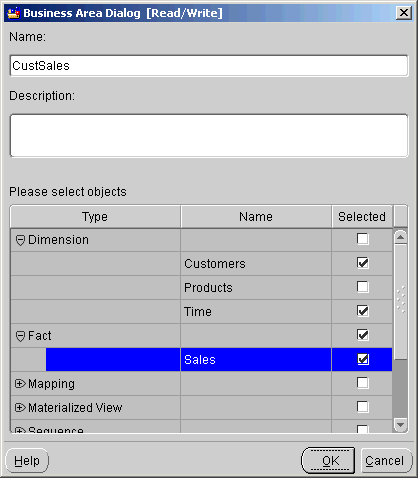
Warehouse Builder creates the business area.
|
|
 Copyright © 1996, 2002 Oracle Corporation. All Rights Reserved. |
|