| Oracle® Distributed Document Capture/Oracle® Document Capture Administrator's Guide Release 10gR3 E13871-01 |
|
 Previous |
 Next |
| Oracle® Distributed Document Capture/Oracle® Document Capture Administrator's Guide Release 10gR3 E13871-01 |
|
 Previous |
 Next |
This guide describes how to administer Oracle Document Capture's suite of production-level document capture applications.
This section covers the following topics:
Oracle Document Capture provides production-level document scanning and indexing. It consists of the following components:
The Scan component allows users to scan and import pages into batches. Users scan images using settings administrators save in scan profiles. See "About Scan".
The Index component allows users to index batches of scanned images, by assigning values to them in index fields. Users index documents using settings administrators save in index profiles. See "About Index".
After indexing batches, users commit them, which creates documents from the images and archives them so they can be accessed in the document management system. Documents are committed using the settings selected in their assigned commit profile. You create and assign commit profiles in Capture administration.
In addition to commit profiles, administrators use the Capture Administration component as a centralized area for managing file cabinets, index fields, users, pick-lists, database lookups in Capture components. See "Capture Administration Overview" for overview information.
The Commit Server, Recognition Server and Import Server components provide expanded functionality for Oracle Document Capture, as described in "About the Servers". For example, organizations that want to perform scheduled batch commit processing on a separate server use the Commit Server component.
Use the Batch Manager component to view all Capture batches on the network.
Oracle Document Capture supports a Visual Basic for Applications (VBA) compatible programming language for writing and debugging macros. You can develop macros to customize the Capture products for your organization. See the Developer's Guide for Oracle Document Capture for information about developing macros.
This section covers the following topics:
Scan comes in two versions: Scan for ISIS (optimized for use with ISIS drivers) and Scan for Adrenaline (optimized for use with Kofax Adrenaline/VRS interfaces). Note that you can run one Scan version at a time. (To switch between them, run the SwitchScan.exe utility located in the Capture installation folder.)
Batch scanning typically uses medium to high-speed scanners with automatic document feeders to scan paper into batches of 50 to 500 images.
A scan profile contains all the scanning settings you want used when users scan particular batches. It identifies how batches will be named, the scanner, scanner settings, and image processing options to be used.
You may have one or many scan profiles. The number of file cabinets and the different document types scanned typically determines the number of scan profiles. (At least one scan profile is required to begin scanning with Scan.)
A profile is configured to work with one type of scanner. If a user connects a different scanner to his or her system, he or she will need to choose a different profile configured for that particular scanner or an administrator will need to edit the scan profile to use the new scanner.
In general, set your scanner settings so they accommodate most of the documents being scanned using the selected scan profile. Keep in mind that users can override a profile's scanner settings without changing the profile, then select the profile again at any time to reload the default profile settings.
This section provide general tips for optimizing scanning using Scan for ISIS or Scan for Adrenaline.
For ease of use, set the scan profile to automatically name batches for users as they create new batches. You supply a prefix for the profile and select the Auto Sequence option. As users create each batch, Scan names them by appending a sequence number to the prefix. For example, enter a prefix of Corr (for Correspondence) and Scan will create batches named Corr00000000001, Corr00000000002, Corr00000000003, and so on.
Use image processing settings to reduce the number of images that need to be re-scanned. Image processing settings automatically clarify images and increase their legibility. See "About Image Processing in Scan for ISIS" or "About Image Processing in Scan for Adrenaline".
For example, if you intend to OCR areas on images after scanning and the scanner produces images with a black border, turn on deskewing, black border removal and cropping. These image processing settings will help ensure that images are consistently aligned for better OCR results.
You may want to set a 90 degree rotation in the scan profile, and instruct users to scan papers in landscape mode. (See "Rotating and Scaling" for details about rotating images.) This increases throughput, since pages are scanned more quickly in landscape mode. Note that users can also rotate images on a page-by-page basis when reviewing batches. Setting the orientation in the scan profile, however, affects all images in the batch while scanning.
You may want to allow users to import images already saved as electronic files. For example, you might do this when converting microfiche or microfilm to TIFF images, or when images were scanned using another scanner not controlled by Scan.
When users begin scanning in the Batch Scanning screen using a scan profile set for importing, a standard file dialog box displays, prompting them to select files to import. After selecting one or more files, they are briefly displayed in the viewer as they are imported.
As an alternative, images and other electronic document files can be imported using Import Server. See "About Import Server".
Endorsing (or imprinting) prints text on each sheet of paper as it is scanned. To use endorsing, you must have an endorsing-capable scanner. Some scanners support automatic endorsing, while others support manual endorsing or both. Check your scanner documentation to determine if endorsing is supported and if it is, where the text is printed on the paper.
Endorsing is helpful in preventing papers from being unintentionally scanned more than once, detecting double-feeds, and in indexing. You can set up endorsing to print such values as the batch name and daily sequence number, and users can read these values and use them in indexing. For example, in the insurance industry, the Julian date and daily sequence number can be used to assign a claim number.
|
Note: Image processing settings apply to black and white images only. |
The Image Processing options in the Manage Scan Profiles screen allow you to select and configure processing filters to apply to images during scanning. For example, you might set up bar code detection, crop images to a smaller size, deskew (straighten) them, and remove noise (clean them up).
Note that filters you select are run in a default order, which you can change. When images are scanned, the selected filters are run in a recommended order. For example, you would not perform line removal before performing bar code recognition.
When selecting image processing settings, it is recommended that you test the profile with documents similar to ones you anticipate processing and fine tune each filter's settings until you find the best values for the documents, while balancing processing speed and image quality.
Scan for ISIS image processing filters include:
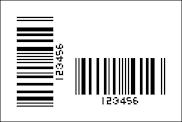
Use the Bar Code Detection options to specify whether bar codes are detected during scanning and how they are decoded. The bar code filter can detect a virtually unlimited number of bar codes on a page.
Use the Blank Page Detection filter to detect and delete blank pages.
Use the Patch Code Detection filter to detect and decode patch codes on scanned images. A patch code is a pattern of horizontal black bars separated by spaces and is typically placed near the leading edge of a paper document. It can be used to separate documents or to stop the scanner. Scan for ISIS can detect Type II, III and T patch codes.

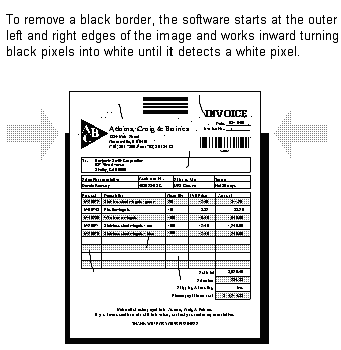
Use the Border Removal filter to remove black edges that sometimes appear around an image after scanning. The filter removes borders around image edges by changing them to white.
Use the Halftone Removal filter to remove a background or graphics object from an image.
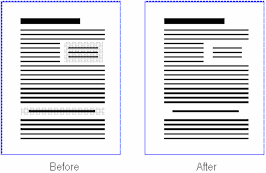
Use the Hole Removal filter to remove punch holes from image edges. The filter looks for objects that resemble punch holes around the edges of the image. It does not remove objects that resemble punch holes from other areas of the image.
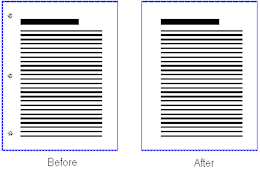
Use the Cropping/Picking Rectangle filter to set image margins and to add or remove white space around image edges.
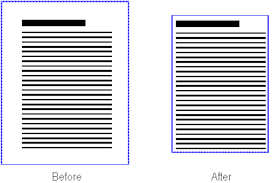
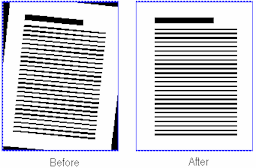
Use the Deskew filter to straighten skewed images. When documents are fed into a scanner, fax machine or copier, they sometimes get skewed. This filter detects the skew angle (measured between the image's edge and the horizontal or vertical axis) and then rotates the image to correct it. Deskewing can improve an image's legibility and OCR results.
You can also use the Deskew filter to rotate images a specified number of degrees (from -44.9 degrees to +44.9 degrees). You might do this after detecting the skew angle yourself or to rotate the image to a certain degree.
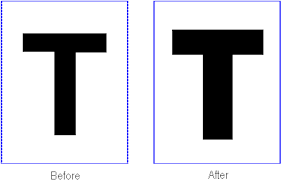
Use the Dilate filter to expand the area of black objects on images. Dilating can improve image quality and text legibility. Note that using this filter increases file size.
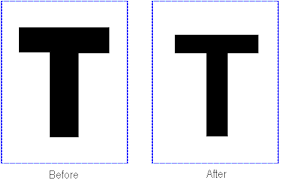
Use the Erode filter to trim the area of black objects. Using this filter reduces file size, but may also reduce image detail.
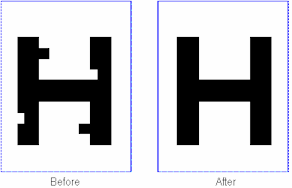
Use the Smoothing filter to delete bumps and spurs from text characters or objects on images. The filter looks for pixels surrounded by five or six connected pixels of the opposite color, and inverts the center pixel, based on the filter mode being used. Smoothing can improve legibility and reduce file size without losing a lot of image detail.
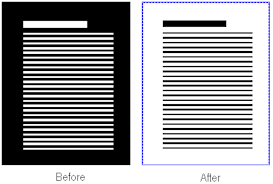
Use the Inverting filter to invert images. The filter changes white pixels to black and black pixels to white.
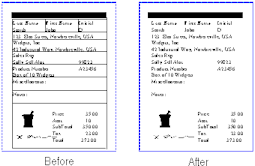
Use the Line Editing filter to remove and optionally redraw straight lines on form-type images. Removing lines can reduce file size and improve OCR results.
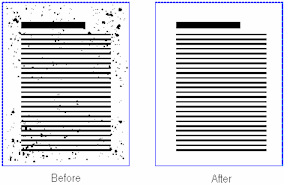
Use the Noise Removal filter to detect and remove noise. You do this by defining the maximum space an object can occupy within a specified area in order to be considered noise.
Scan for Adrenaline provides an Image Processing tab for selecting precise settings to make images easier to read, reduce file sizes, and improve processing. This section describes image processing options you can select for scan profiles.
|
Note: Image processing options require a version of Kofax Adrenaline engine that supports image processing. |
Scan for Adrenaline image processing filters include:
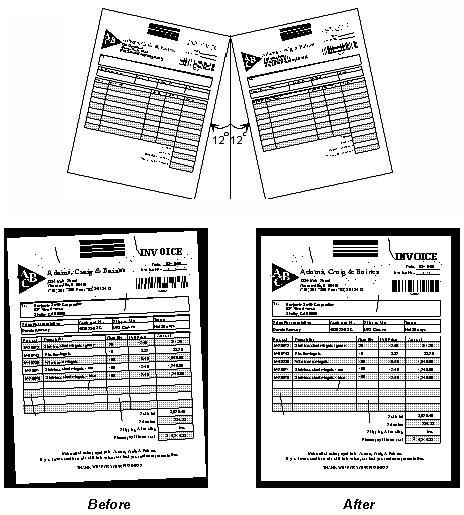
Deskew is the process of straightening a crooked or skewed image. Skewing can happen during the normal process of scanning due to the mechanical feeding action of the scanner. Deskewing is useful for making images more readable and improving post-processing operations. See "Deskew".
The deskew feature can calculate and correct skew angles up to 12 degrees. The deskew value is in increments of 0.1 degrees.
Despeckling removes unwanted dots or speckles on an image. Speckles are groups of black pixels surrounded by white pixels (or white pixels surrounded by black pixels). Removing speckles provides a cleaner image and helps reduce compressed file sizes. See "Despeckle".
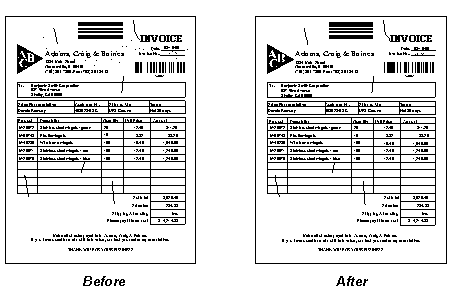
Use Image filters to enhance line edges, smooth characters, and remove background noise on an image. See "Image Filters".
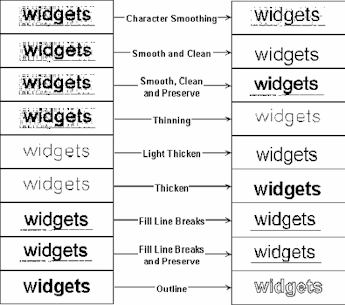
If your images contain horizontal and/or vertical lines (for example, a medical claims form), you can remove them with the line removal feature. This feature can also repair text that intersects the lines that are removed. Removing lines and repairing characters improves the readability of the image for OCR processing. See "Line Removal".
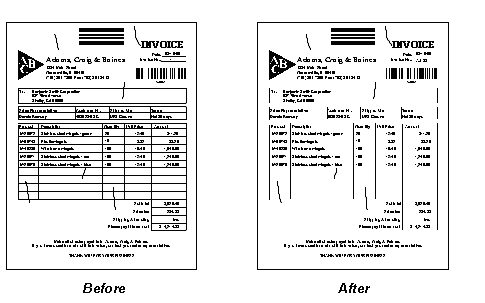
A patch code is a pattern of horizontal black bars separated by spaces and typically placed near the leading edge of a paper document. It can be used to separate documents or to stop the scanner. For more information, see "Patch Code".
Use the deshade options to remove unwanted shaded areas from an image. See "Deshade Properties".
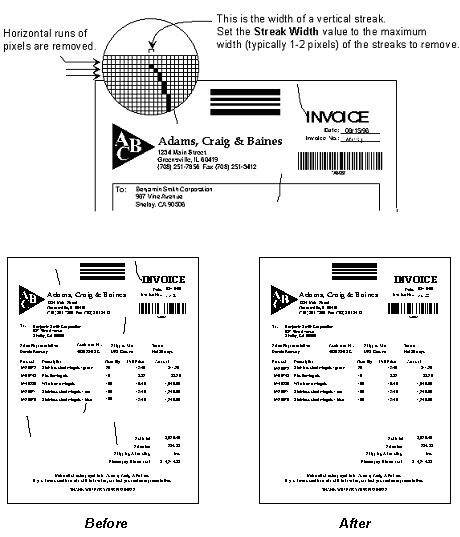
Use the Streak Removal options to remove streaks. Sometimes streaks are inserted on an image during the scan process. They can occur from marks on the original page, dust in the scanner or faulty scanner camera. See "Streak Removal".
Black borders often appear on images as a result of using a scanner with a black belt or drum. See "Black Border".
Use the Bar Code options to detect bar codes on an image and convert them to their ASCII equivalents. See "Bar Codes Properties".
This section covers the following topics:
Users index images by assigning one or more values to them in index fields. During commit, Index takes all images with the same index values and merges them into a document. When it encounters a different value for any of these fields during the commit process, it creates a new document. After images are committed, they are removed from the batch and no longer available.
The following indexing guidelines apply.
A document is created from more than one image when all of the index field values among the images are exactly the same. If one image has three fields filled in and another image has two fields filled in with the same values, two documents are created.
An image is indexed if there is a value in any of its index fields.
Unindexed images (those without any fields filled in) remain in the batch when users commit it.
Required fields must be filled in before their images can be committed. Required fields have an asterisk (*) in front of their name in the indexing screen to users.
An index profile contains all the indexing settings you want used when users index particular batches. Through its settings, you:
identify the file cabinet from which scanned batches are indexed and into which they are stored,
identify fields to be indexed and indexing methods to be used,
can map an external database from which users can look up index values,
can identify how separator sheets are used,
can set up certain fields such as a scan date to be autopopulated,
can set up image highlighting using the Zone Editor.
Unlike scan profiles, index profiles are typically stored in a central location on the network. This allows many indexing users to use the same index profile.
This section provide general tips for optimizing indexing.
When scanning, separate your single and multiple page documents into different batch types and create two index profiles that can be optimized for each document type. You can then use separator sheets in the multiple page documents to index them more quickly.
The Sticky Fields feature is useful in batches where you have a mixture of single page and multiple page documents. When a field is sticky, the index field value a user enters is automatically copied to the same field on the next page when paging through the batch. (Sticky fields also work when paging backwards in a batch.) If you set all fields as sticky, index values are automatically copied onto the new page; if the user determines that the new page does not belong to the same document, he or she simply enters new values and that page becomes a new document. For details about setting sticky fields and specifying when a field is sticky, see "Sticky Index Fields".
The built-in database lookup feature is very powerful as it can eliminate data entry of certain fields and ensure data integrity. For example, in an accounts payable application, you could data enter the purchase order number and perform a database lookup to retrieve the vendor number, vendor name and PO date from your accounting system.
Use pick-lists whenever you want to standardize specific field values. For example, you might create a pick-list of ten document types and require that a document be one of those ten types by locking the field.
Order your indexing fields to coincide with the way the indexing user will read the image. This allows the indexing user to process an image naturally.
When the Scroll Lock key is present and active on users' keyboards, each time they press the Tab key, the index fields shift up and the topmost field is hidden from view. (Pressing Shift-Tab shifts index fields down.)
If you are processing images that are form-based, take advantage of the auto-highlighting feature by defining field zones in the Zone Editor. This forces Index to automatically highlight an area on the image, allowing the user to see and process the field quicker. Use this feature in conjunction with the SCROLL LOCK key to reduce end-user eye movement. Reduction in eye movement can help to minimize indexing user stress and fatigue.
If needed, use the input format feature to ensure that data users enter is formatted consistently. When the user moves to another index field, Capture changes the data if needed to match a selected format.
You can apply special field properties to index fields. For example, applying a pick-list to an index field provides a standard list from which users select. Special field properties include:
A pick-list provides users with two or more values from which to choose when indexing documents. You create pick-lists in Capture Administration, then select them in the index profile.
In a parent/child relationship, a parent field is linked to two or more child pick-lists, one of which is displayed after the user makes a selection in the parent field. For example, a parent pick-list might list departments and its child pick-list document types; if the user chooses Sales from the parent pick-list, the child pick-list might list document types specific to Sales. You create pick-lists and their relationship profiles in Capture Administration, then select the relationship profile and pick-lists in the index profile.
A mask is a filter that controls what users can enter into the index field. For example, a mask might allow users to type numbers but not letters. If the user types a character that does not conform to the mask, Index does not accept it.
The Input Format option provides a way to ensure that data entered by users matches a certain format. When the user moves to another index field, Capture changes the data, if needed, to match the specified input format.
You can configure a scan profile to detect bar codes when images are scanned, and then an index profile to automatically apply the detected value to an index field. If the page contains more than one bar code, Index displays their values in a pick-list to the indexing user.
As an alternative to indexing, images can also be indexed using Recognition Server. This component automates indexing through bar code recognition technology.
Use the Auto Populate tab to set up automatically indexed fields. You can configure Index to automatically fill (populate) selected index fields with certain values. For example, you might want to automatically populate a date field with the batch's scan date instead of having users type it in. Or, you might want to provide a default value for a field that the user could change if needed.
When an index field is sticky, an indexing user specifies a value in an indexing field, moves to the next page and the value is automatically pasted into that indexing field (if blank) on each subsequent page the user displays.
Sticky fields can significantly speed up indexing. In a common scenario, all fields are set as sticky; a user enters values on the document's first page, then quickly views each remaining document page as values are automatically applied.
The sticky field on the destination page must be blank.
Sticky fields are sticky only when users navigate using the Next Page or Previous Page toolbar buttons, and not when using thumbnails or typing page numbers in the Goto Page field.
To provide flexibility, a When option controls when the field is sticky. The choices are ordered from most restrictive to least:
All index fields blank (the default; most restrictive): The field is sticky only when none of the destination page's fields contain values.
Page partially indexed: The field is sticky only when the page is not considered fully indexed. For example, one or more index fields may contain values, but a required field may be missing.
Always (least restrictive): The field is sticky regardless of the page's other index field values.
How Autopopulated Fields Affect Sticky Fields
Because autopopulated fields can affect whether a page is considered indexed and therefore whether a field is sticky, an option titled Allow autopopulate field(s) to index page allows you to control this.
When NOT selected (default), autopopulated fields are considered blank.
When selected, autopopulated fields are considered indexed fields.
Note that, when the user moves to a destination page, sticky field logic is applied BEFORE values are autopopulated. So an autopopulated field affects the sticky field only if the autopopulated field previously had a value.
When All index fields blank is chosen in the Sticky When field, the Allow auto populated... field affects whether all fields are considered blank and consequently, whether the sticky field is sticky. When deselected, all fields are considered blank, so the field is sticky. When selected, the autopopulated field is considered indexed, all index fields are not blank, so the field is NOT sticky.
A database lookup searches an external database for a value the user specifies and populates index fields from a matching database record. For example, users might perform a database lookup after entering an account number, and the remaining index fields would be populated from the matching database record.You create a database lookup in Capture Administration, then select it in the index profile. For more information about database lookups, see "About Database Lookups".
You can use separator sheets to determine where documents begin and end in a batch. Separator sheets speed up indexing: instead of viewing each page to determine if it belongs with the current document or is part of a new document, the user enters index values once for each field, applies those values to all pages in the document, and then quickly jumps to the start of the next document.
To index by separator sheet, batches must have been scanned using patch code or bar code detection in Scan.
When separator sheet indexing is enabled and the user selects the File to Separator command from the Batch menu, Index copies all index values from the current page to all pages between the separator sheets, then advances to the next document (separator sheet).
Index's zone feature allows you to highlight certain areas (zones) of an image with a turquoise-colored box to guide the user when indexing. Highlighting fields to be indexed in this way can increase user efficiency by reducing eyestrain and making fields easier to read. The zone feature is particularly useful when users are indexing forms.
You set up zones for an index profile using Index's Zone Editor. When indexing, users can click the Display Toggle Zone button on their toolbar to turn zones on or off.
To set up zones, you need an image file to use as a template. It is important that the resolution of this image is the same as the resolution that will be used at scan time.
You can configure Index to capture text in a zone and automatically enter it in a selected index field. If OCR is active for an index profile, users can also perform OCR on-the-fly: they right-click and drag an area on the image, and Index will capture its text and insert it in the selected field.
Important points about the OCR feature:
You activate OCR for a zoned field by setting up the field's zone and turning on OCR by selecting the OCR button on the Zone Editor toolbar.
OCR works well in conjunction with a macro that parses the text captured. This allows you to define a zone with padding around the text to capture, and then extract only the characters you want. For example, you might do this when capturing Social Security numbers, capturing a larger area, and then using a macro to filter out all characters except the Social Security number.
If OCR is enabled for any field, users can perform OCR on-the-fly, even if that field is not enabled via a zone, and even if zone display is turned off. Users do this by rubber-banding an area on the image while holding down the right mouse button.
Index performs zonal OCR on an image only if it is not indexed (does not contain values in its index fields). If you want Index to perform OCR on an indexed image (on all fields for which OCR has been defined), choose the OCR Zone(s) command from the Edit menu, or press F5.
It is important that users verify OCR entries, since it can result in inaccurate values.
The server applications provide extended functionality for Oracle Document Capture. Designed to be run unattended, they perform scheduled batch jobs and automate processing in different ways.
The servers consist of:
Commit Server, which performs scheduled batch commit processing on a separate server instead of on indexing users' workstations. See "About Commit Server".
Recognition Server, which automates indexing using bar code recognition technology. Based on bar code recognition results, it indexes and commits batches. See "About Recognition Server".
Import Server, which imports images and other electronic documents directly into Capture from sources such as email, FTP sites, network folders, list files, and fax providers. As images and electronic documents are imported, they are converted into Capture batches where they can be indexed using Index or Recognition Server and then committed. See "About Import Server".
Each server can be run as a Windows service rather than an application. Running as a service allows starting or rebooting the server without logging in. For more information, see "Guidelines For Running Servers as Services".
About Batch Jobs
A batch job identifies the batches you want processed by the server when the job is run according to its schedule. It also contains settings specific to the server.
An event is a schedule for processing a batch job, to be run once or at a certain frequency. For example, if you schedule a batch job to process every minute, the server checks every minute and begins processing if a batch is detected.
Use the Scheduler to create events, delete events, delete old log files and shut down the server.
Server Activities and Statistics
Once processing begins, you can view up-to-the-minute statistics and server log messages in the server main screen. You can also set the server to send an email alert if an error occurs during processing.
In addition, each server audits certain activities and saves the information in the ecAudit table in the Capture batch database.
Using Commit Server frees up indexing users' workstations immediately after they click to commit a batch. It also provides scheduled processing during off-peak hours. For example, scanning and indexing might be done at a remote location during normal business hours, while commit processing is performed overnight and unattended from a central location.
To use Commit Server with a Capture component, the Use Commit Server option in that component must be enabled. (You can use Commit Server in Index, Recognition Server and Import Server.) For example, when an indexing user commits a batch with this option set, Index marks the batch as ready to be committed, and Commit Server commits it based on the batch job's schedule.
In Commit Server, a batch job identifies the batches to process. To process all file cabinets or each file cabinet without special settings, schedule processing without creating a batch job. Create a batch job to process batches in ways not provided by the default jobs. For example, you might create a batch job to group particular file cabinets together in a job, process only batches with a certain prefix or status, or sort batches for processing.
Scheduling allows you to prioritize processing. For example, your organization might have a Human Resources file cabinet that contains resume information (which can be processed any time) and retirement information (which is confidential and should be processed right away). You could might create two jobs: a job called Resume that is scheduled to process only batches with an RES prefix every night at midnight, and a job called Retirement that is scheduled to run every minute and process only batches it finds with an RET prefix.
The most costly and time-consuming task of an ECM (electronic content management) system is document indexing, because it requires a large portion of staff and time resources. Software-based and requiring no expensive hardware, Recognition Server seamlessly files images into your content management system, dramatically reducing indexing time.
Documents are scanned in preparation for processing in one of several batch processing methods by Recognition Server.
Each batch can contain single page documents, one document only or multiple page documents. (See "Batch Processing Methods".)
In Recognition Server, administrators create batch jobs, which determine the batches to process and how to process them.
Recognition Server batch jobs contain all the settings to be used when batches are scanned, indexed, and committed. For example, batch jobs determine how images are separated into documents, how bar codes are read and assigned to index fields, and whether index values are assigned from an external database.
For example, the batch job might direct Recognition Server to look for batches assigned to the Mortgage file cabinet that start with a MORT prefix, scan the first image for a Code 39-type bar code, read an eight character value from the bar code, assign the value to an account number field, and file the image in the Mortgage file cabinet.
|
Note: When setting up the batch job, you can instruct Recognition Server to wait a specified number of minutes before processing a batch to ensure that the scanning user has time to review the batch. |
|
Note: In addition to the extensive batch setting options provided, you can use VBA-compliant macros to customize Recognition Server functions. For example, if a bar code contains three values that are joined, you could use a macro to parse the values and correctly assign them to indexing fields. |
Schedule an event for the batch job.
When Import Server detects a scheduled event that is due, it uses the batch job settings to read bar codes and index images into the proper file cabinets. Recognition Server commits images as soon as it finishes indexing them.
A key step in setting up a batch job is specifying how documents were arranged and scanned in batches, so Recognition Server knows how to process them.
Recognition Server provides three methods of processing batches. (All batches within the job must be arranged the same way.) Each batch can contain:
Single page documents: Each image contains a bar code; Recognition Server uses this bar code to index the single image as a document.
One document only: Typically, the first image contains a bar code used to index the entire batch as a single document. (Bar codes can be read from multiple pages.)
Multiple page documents: Documents in the batch are separated by bar code or patch code, and a bar code on the first page of each document is used to index the document.
Import Server imports images and other electronic documents directly into Capture from a variety of sources. You can apply this server to such applications as:
incoming faxes
microfiche conversion
multi-function copiers
images scanned using third-party software
documents sent as email attachments
documents downloaded from an FTP server
How Import Server Works
In Import Server, administrators create batch jobs of the following types, depending on files to be imported.
Folder: Import Server monitors an import folder and imports all files it finds with a specified file mask.
List File: Import Server monitors an import folder and also reads a list (text) file containing records that identify each image to import, and optionally, index values to be assigned to the image or values to be matched against a database.
Castelle FaxPress Provider: Import Server automatically imports incoming fax images from a FaxPress network appliance into Capture.
Email Provider: Import Server imports files attached to incoming email messages into Capture and optionally converts email messages to images.
|
Note: The Import Server Email Provider does not support multiple servers monitoring the same inbox at the same time. |
Custom Provider: Import Server uses a specified VBA-compatible macro to import images into Capture.
FTP Provider: Import Server connects to an FTP Server and downloads files from a specified folder into Capture.
|
Note: Depending on the providers selected during installation, some of the import providers may not be available. |
Administrators select the batch job's settings.
Under Image Output options, specify if you want image and non-image files converted to a different format when imported.
On the provider-specific tab, select settings related to the selected import provider. For example, for a Folder batch job, specify when to create new batches, and, for a List File batch job, identify fields to be read from the list file.
|
Note: In addition to the extensive batch setting options provided, you can incorporate VBA-compliant macros in a variety of ways to customize Import Server functions. |
Schedule an event for the batch job.
When Import Server detects a scheduled event that is due, it uses the batch job's settings to import images into Capture batches. If you import images using a list file job, Capture can index and commit images into the proper file cabinets.
Import Server automatically names batches when creating them. The batch name consists of three parts:
batch prefix (if specified)
date (using the format mmddyy)
elapsed time since midnight, expressed in hundredths of a second. This number is padded with zeros to make it seven digits. For example, for a file created exactly two seconds after midnight, the time portion of its name would be 0000200
A batch named AP0202080000200 was created in the AP file cabinet on February 2, 2008, exactly 2 seconds after midnight.
Import Server converts non-image documents during import using the Capture virtual print driver. After determining the document's native application based on its file extension, Import Server prints the electronic file using the native application, then intercepts the print output and converts it to an image. For example, if the file is a Microsoft Word document, Import Server launches Microsoft Word, instructs the application to print and converts the print output to images.
Occasionally, the native application generates a conflict in automated printing. For example, Internet Explorer displays a print dialog box that requires a response to continue. A solution is to automatically change the files' extension before conversion. To do this, configure extension renaming. For example, if you change the .HTM extension of Internet Explorer files to .DOC, Microsoft Word prints the files instead.
|
Note: To test if a document file prints correctly with Import Server, right-click the file in Windows Explorer. If the Print option is available, select it to print the document. If the file prints without displaying a Print dialog box requiring user interaction, the document file type can be used with Import Server. If the Print option is not available, there is no print association with the selected document type. |
|
Note: To improve performance, you may want to start the application (for example, Microsoft Word) before running the Import Server. This may prevent the application from loading and unloading between file conversion. Whether or not an application unloads is dependent on the associated application. |