| Oracle® Retail Point-of-Service User Guide Release 14.1 E54472-02 |
|


 Previous |
 Next |
To access the fulfillment functionality, press Fulfillment/F6 on the Main Options screen. You are prompted to log in. See "Logging In and Out" in Chapter 1 for more information. After logging in, the initial screen that appears is dependent on how orders are implemented in Point-of-Service:
If the Fulfillment screen appears, you can work with orders created in the store. See "Processing Orders in the Store".
If the Modify Order Options screen appears, you can work with orders across multiple stores. See "Processing Orders Across Multiple Stores".
|
Note: The till must be open before you can access the Fulfillment functionality. If the till is not open, you are prompted to open the till before you can proceed to the Fulfillment screen. |
You can pick up, complete, or cancel orders, as well as provide order updates to customers in a timely manner using automated e-mail communication. You can also manage orders, items marked for pickup, and items marked for delivery.
Orders are typically placed over the web by customers requesting items that they will pick up from a chosen store location. Processing an order means locating all requested items from store inventory. Once all the items from an order are retrieved, the order is ready to be picked up by the customer.
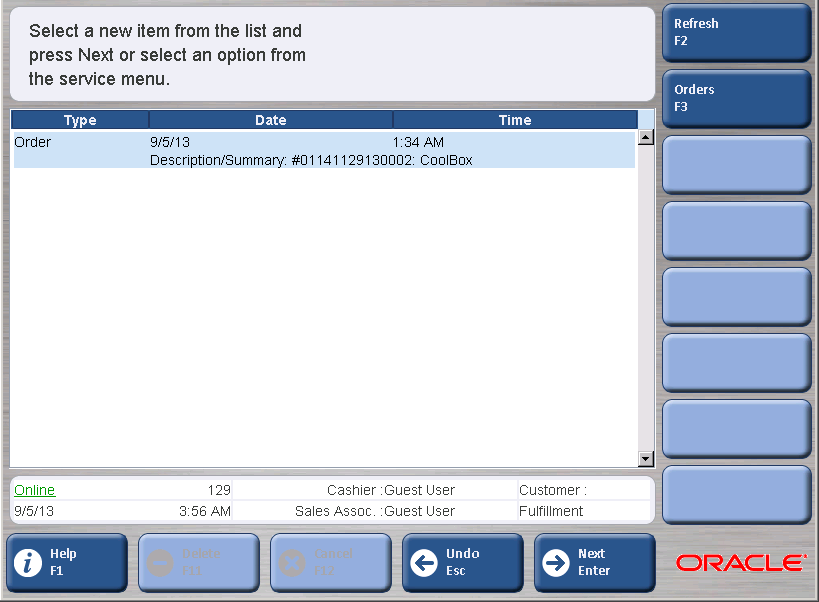
Once logged in, the Fulfillment screen displays new orders.
To refresh the Fulfillment screen after changes are made or to check for any new items, press Refresh/F2.
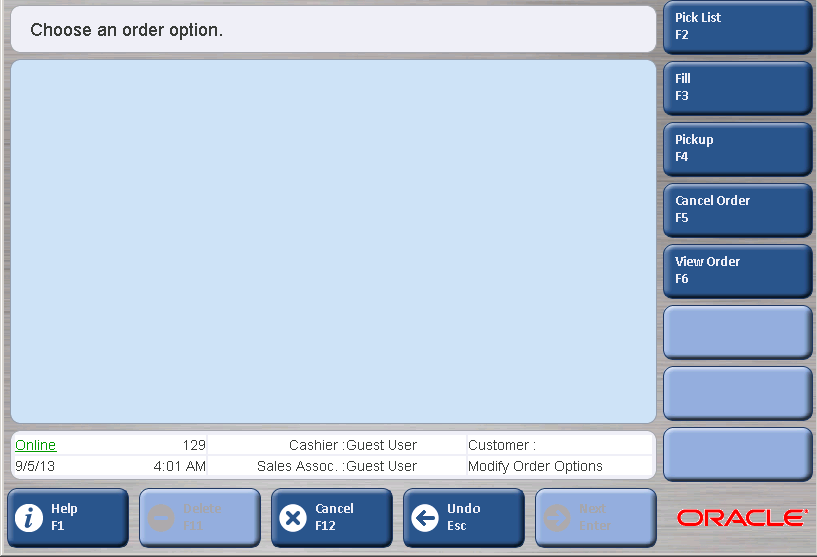
To manage orders, press Orders/F3 on the Fulfillment screen. The Order Options screen appears.
The following functions are available:
The Pick List option enables you to print a pick list. The pick list is a list of items that need to be retrieved from inventory to complete an order.
To print a pick list:
On the Order Options screen, press Pick List/F2. The Order List screen appears with a list of available orders.
Select the order to be printed and press Next/Enter. The Print Order screen appears. The order number to be printed appears.
To print the order, press Print/F2. The order prints. You are returned to the Order List screen. The printed order is automatically removed on the order list.
To return to the Order Options screen, press Undo/Esc.
The Fill Order option is used to fulfill orders. Once all the items specified in the order are located and retrieved from inventory, the order is considered filled and ready to be picked up.
To fill an order:
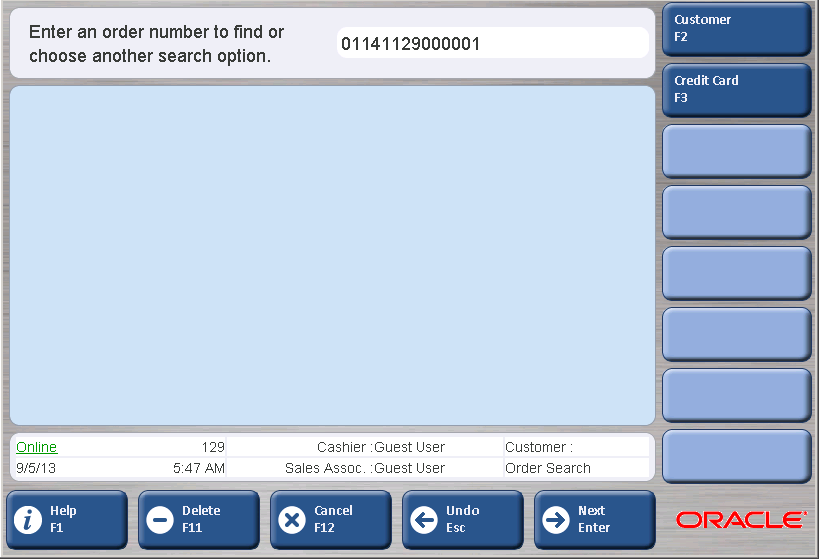
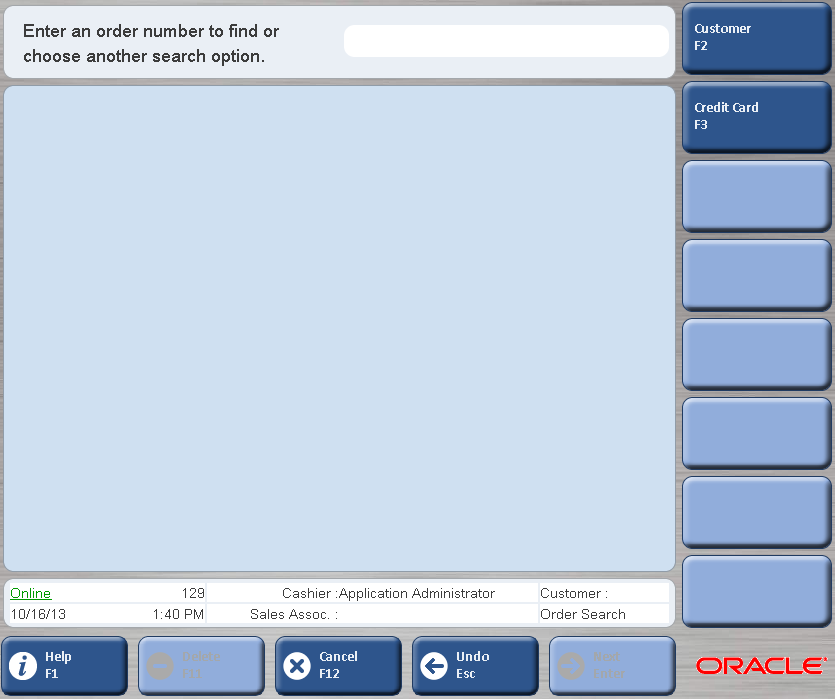
On the Order Options screen, press Fill/F3. The Order Search screen appears.
If you know the order number, enter it into the prompt region and press Next/Enter. To search for an order, press either Customer/F2 or Credit Card/F3.
If you press Customer/F2, the Customer Options screen appears. You can enter the customer ID if you know it. For more search options, press Find/F2. The Cust Search Options screen appears. See "Searching for a Customer" in Chapter 4 for more information.
If you press Credit Card/F3, the Credit/Debit Search screen appears. You can search for any orders by their date range and item number.
The Order List screen appears.
Select the order that needs to be filled and press Next/Enter. The Edit Item Status screen appears.
Select the items you want to fill and then press Filled/F2 to change the status to filled.
|
Note: You can also change the status of items to something other than filled. If all items are filled, the status of the order is automatically changed to filled. If some items are not filled (that is, their status is changed to pending), then the order status is automatically changed to partial. |
Press Next/Enter to continue. The Edit Location screen appears.
From the menu, select the location and press Next/Enter. You are returned to the Fulfillment screen.
Once an order has been physically picked up by a customer, then it is considered completed.
To complete an order:
On the Order Options screen, press Pickup/F4. The Order Search screen appears.
If you know the order number, enter it and press Next/Enter. To search for an order, press either Customer/F2 or Credit Card/F3. For more information, see Step 2 in the section "Filling an Order". The Order List screen appears.
Select the order that contains the items for pickup and press Next/Enter. The Edit Item status screen appears.
Select the items you want to pick up and then press Pickup/F4. You can also change the status to Pending (F3) or Cancelled (F5).
|
Note: If all items are picked up, the status of the order is automatically changed to completed. If some items are not picked up, the status is changed to partial. If there are other items in the order that are pending or filled, you can change those items to cancelled. |
Press Next/Enter to continue. The Edit Location screen appears.
Note the location of the item and press Next/Enter. The Confirm Selection screen appears.
If the customer has additional items to purchase, add those items to the transaction.
To confirm the selection and continue, press Tender/F2. Tender the transaction normally. For more information on tendering, see "Tendering a Transaction" in Chapter 3. You are then returned to the Fulfillment screen.
To cancel an order:
On the Order Options screen, press Cancel Order/F5. The Order Search screen appears.
Enter the order number. To search for the order, press either Customer/F2 or Status/F3. For more information, see Step 2 in "Filling an Order". The Order List screen appears.
Select the order that needs to be cancelled and press Next/Enter. The Cancel Order screen appears with all items on the order changed to Cancelled.
Press Cancel Order/F2. The Cancel confirmation dialog appears.
To confirm the order cancellation, press Yes. To return to the Cancel Order screen, press No.
If you confirmed the order cancellation, the Confirm Selection screen appears.
To tender the transaction, press Tender/F2. Tendering the transaction completes the order. For more information on tendering, see "Tendering a Transaction" in Chapter 3. After tendering is complete, you are returned to the Fulfillment screen.
To view the details for an order:
Press View Order/F6 on the Order Options screen. The Order Search screen appears.
Enter the order number. To search for the order, press either Customer/F2 or Status/F3. For more information, see Step 2 in "Filling an Order". The Order List screen appears.
Press Next/Enter. The Order Details screen appears.
To print the order, press Print/F2. The order prints. You are returned to the Order Details screen.
To view more order information, press Next/Enter. The Order Location screen appears. This screen displays the order details such as order number and location. Press Next/Enter to return to the Order Options screen.
Fulfillment automatically creates e-mail messages for customers when certain conditions are met. Each transaction has a status associated with it. As each step in the order process is completed, the status is automatically updated to reflect these changes.
Whenever the order status changes to Filled, Partial, Completed, or Cancelled, an automatic e-mail message is created. The order information is inserted into an e-mail file and sent to the server. The following table lists the parameter that defines the e-mail message sent for each status:
| Status | Parameter |
|---|---|
| Filled Order | Automatic Email Filled Order |
| Partial Order | Automatic Email For Partial Order |
| Picked Up Order | Automatic Email For Picked Up Order |
| Cancelled Order | Automatic Email For Canceled Order |
|
Note: The created e-mail messages are stored in the database. Point-of-Service does not send the e-mail messages to customers. The retailer is responsible for sending the e-mail messages. For more information, see the Oracle Retail POS Suite Implementation Guide, Volume 1 - Implementation Solutions. |
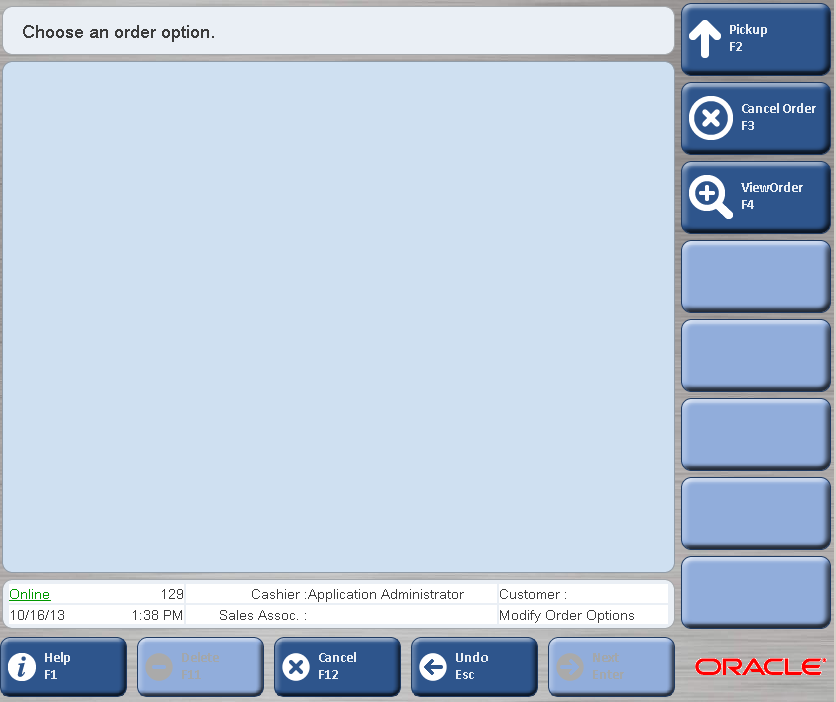
Once logged in, the Modify Order Options screen appears. You can search for orders to be picked up, cancel an order, and view an order.
To search for an order:
Select an option. The Order Search screen appears.
If you know the order number, enter the number and press Next/Enter.
To search for an order:
If you press Customer/F2, the Customer Options screen appears. You can enter the customer ID if you know it. For more search options, press Find/F2. The Cust Search Options screen appears. See "Searching for a Customer" in Chapter 4 for more information.
If you press Credit Card/F3, the Credit/Debit Search screen appears. You can search for any orders by their date range and item number.
After the order is found, the screen for the option that was selected on the Modify Order Options screen appears:
To modify an order, see "Modifying an Order".
To cancel an order, see "Cancelling an Order".
To see details of an oder, see "Viewing an Order".
To modify an order:
Press Pickup/F2. The Order Search screen appears.
Enter the order number or press Customer/F2 to search for the order.
Press Next/Enter. The Edit Item Status screen appears. This screen shows the item, quantity, status, and store for the pickup.
Select an item:
To change the status for the item, press Pickup/F2. The status changes to Pickup.
To cancel pickup of the item, press Cancel/F3. Continue at Step 5 in "Cancelling an Order".
To cancel an order:
Press Cancel Order/F3. The Order Search screen appears.
Enter the order number or press Customer/F2 to search for the order.
Press Next/Enter. The Cancel Order screen appears. This screen shows details of the order.
To cancel the order, press Cancel/F2.
You are prompted to confirm the cancellation. To confirm the cancellation, press Yes.
To complete the cancellation, press Tender/F6. The Refund Options screen appears.
Select a refund option and press Next/Enter. The Issue Refund screen appears.
If eReceipt is enabled, you are prompted to select a receipt option. Otherwise, the receipt prints.
To view an order:
Press View Order/F4. The Order Search screen appears.
Enter the order number or press Customer/F2 to search for the order.
Press Next/Enter. The Order Details screen appears. This screen shows the item, quantity, order status, and store for the pickup:
To print the order information, press Print/F2.
To see details on the order, press Next/Enter. The Order Location screen appears. This screen shows the order number, customer name, order date and location for the pickup in the store, and status.