Advanced Topics Locate
Data Access Control: Principles Locate
This chapter describes the entity access control mechanism, which defines permissions for users and groups to access structures in BEA AquaLogic Service Registry
There are two types of user groups: public and private. Both public and private groups are visible to all users in the registry, meaning that all users are able to see which groups exist. Public and private groups differ in that members of public groups are visible to all users of the registry whereas members of private groups are visible only to the owner of the group.
![[Note]](../images/note.gif) | Note |
|---|---|
There are other permissions in BEA AquaLogic Service Registry used to control access to APIs and their operations. API permissions are relations between the user or group and operation only. Please see Permissions: Principles in the Administration Guide for details. | |
Permission in this chapter is limited to Data Access Permission - ACL permission.
We use the following terms with regard to ACL permissions:
Party A user or group of users
Core Structure One of the major UDDI data structures: businessEntity, businessService, bindingTemplate or tModel
Action An operation: "find", "get", "save", or "delete" on the entity plus special action "create", which means to save sub-entities. (For example, a user with the "create" permission on a businessService can save new bindingTemplates under the businessService, but can not update whole businessService.) Note that the "create" permission makes sense only on businessEntity and businessService, because bindingTemplates and tModels have no sub-entities.
Standard UDDI access control defines that only the owner of a UDDI core structure can update or delete it. Every user can find or get the structure (with the exception that deleted/hidden tModels are visible for get_tModelDetail but not for the find_tModel operation). ACLs (Access Control Lists) added to a UDDI entity can override standard UDDI access control as there are several cases in which standard access control is not sufficient.
Examples:
When a Web service is under construction, its UDDI representation (businessService and bindingTemplate) should be visible only to members of the development team. Arbitrary users should not be able to obtain it in the result set of get_serviceDetail or find_service operations. Moreover, a get_businessDetail or find_business operation result, which includes a superior businessEntity, should not give away the existence of the businessService.
On the other hand when the server (where the service prototype is running) goes down, the administrator should be able to deploy the Web service on another server and repair the service endpoint in the accessPoint within its bindingTemplate, despite not being the owner of the bindingTemplate.
Explicit Permissions Locate
Explicit permission gives (positive permission), or revokes (negative permission), access rights to a party to process an action on a specified entity.
Explicit permissions are saved with the entity as special keyedReferences in the categoryBag. For more information, please see Setting ACLs on UDDI v3 Structures and Setting ACLs on UDDI v1 and v2 Structures below.
Permission Rules Locate
When no explicit permission is set for the find/get action on an entity, everyone can find/get it. When no explicit permission is set for the save/delete action on an entity, only owner of the entity can save/delete it. This is a standard UDDI access control. When an explicit Permission is set for an action, a completely different access control is used which is defined by the following rules:
Owner always has full control The owner can always process an operation over an owned entity, even if the permission is explicitly revoked.
Negative permission for a user overrides positive permission for a user. Example: User U has explicit positive permission on businessEntity BE for the get action. However, if U also has explicit negative permission on BE for action get, then an attempt to process get_businessDetail by user U on the BE will fail.
Negative permission for group overrides positive permission for group. Example: User U has belongs to groups G1 and G2. Group G1, has explicit positive permission on the BE for action get. Group G2, has explicit negative permission on the BE for action get. Because of this negative permission, any attempt to process get_businessDetail by user U on the BE will fail.
Permission for user has more weight than permission for group Example: User U has explicit positive permission on businessEntity BE for action get. Group G, to which U belongs, has explicit negative permission on the BE for action get. User U can process get_businessDetail on the BE, even though U belongs to group G.
The owner of an entity can always process get_XXX on a direct sub-entity Example: User U1 owns businessEntity BE. U1 (as owner) grants "create" permission to user U2. Then U2 saves new businessService BS with bindingTemplate BT under BE. When user U1 executes get_businessDetail, U1 obtains BE with BS but without BT, because BT is not a direct sub-element of the BE.
Motivation: This rule ensures that the owner of an entity will see all direct sub-entities. The number of sub-entities is limited. By default, a user can save only one businessEntity, four businessServices per businessEntity, two bindingTemplates per businessService and 10 tModels. Suppose that user U1 has businessEntity BE. User U2 can save businessServices in BE (permission "create" on BE). If U2 has already saved four businessServices under BE, user U1 cannot, therefore, save a new businessService. Therefore, the owner of an businessEntity should see why the limit is reached.
Delete and Save positive permissions are inherited from parent entities and override negative permissions on sub-entities Example: User U has "delete" permission on businessEntity BE. Then U can execute the delete_business operation, which deletes the BE with all its businessServices and bindingTemplates, even if some of these sub-entities have negative permission for deletion by the user U.
Motivation: Sub-entities can not survive parent entity deletion. This rule ensures that a user who can save/delete an entity can do this despite not having sufficient privileges on sub-entities.
To perform update by save_XXX operation, it is necessary to have both "save" and "get" permissions Example: User U1 has "save" and "get" permissions on businessEntity BE, but he is not the owner. User U2 owns the BE and saves businessService BS1, which has "get" permission for U1, and businessService BS2 without any permissions. Both BS1 and BS2 are created under BE. U1 gets BE with only BS1 and updates BE in this way: U1 can add a category and save BE again without BS1. In fact, when BE is updated, BS1 is deleted but BS2 remains.
Example:
User U1 owns a businessEntity BE. The user U1 defines the explicit get allowed permission to user group G1. Everyone can find the BE, because there is no explicit permission for find and therefore the standard UDDI access control is used. On the other hand, only user U1 (as the owner) and all users from group G1 can get the BE.
Composite Operations Locate
BusinessService BS can be moved from one businessEntity BE1 to other businessEntity BE2. By performing the save_service operation on BS, where BS has updated businessKey to point to the BE2. To perform this action, the party must have permission to save BE1, BE2, and BS, because all these entities are changed.
Similarly bindingTemplate BT can be moved from businessService BS1 to businessService BS2. The party who moves it must have save permission on BS1, BS2 and BT.
BusinessService BS hosted in businessEntity BE1 can be projected into businessEntity BE2. The party who projects BS must have save permission on BE2.
Pre-installed Groups Locate
ACL logic considers some special pre-published abstract groups during permission evaluation. These abstract groups allow a publisher to give a permission to a specific set of BEA AquaLogic Service Registry users.
- system#everyone
Holds all users of BEA AquaLogic Service Registry (both users who have and who do not have a BEA AquaLogic Service Registry account, authenticated and non-authenticated). If this group is used, all users always have the specified permission to the associated data.
- system#registered
Holds all authenticated BEA AquaLogic Service Registry users. Every user who is authenticated (that is, who has an account and has logged into the registry) is a member of this group. If this group is used, all authenticated users always have the specified permission to the associated data.
- system#intranet
Holds users who access BEA AquaLogic Service Registry via a local intranet. (This group is reserved for a future release. There is no implementation behind it as of BEA AquaLogic Service Registry 2.0)
ACL tModels Locate
ACL permissions are represented as tModels as detailed below:
| ACL Permission | v3 tModelKey | v2 tModelKey |
|---|---|---|
| find allowed | uddi:systinet.com:acl:find-allowed | uuid:aacfc8e0-dcf5-11d5-b238-cbbeaea0a8d4 |
| find denied | uddi:systinet.com:acl:find-denied | uuid:ced3c160-dcf5-11d5-b238-cbbeaea0a8d4 |
| get allowed | uddi:systinet.com:acl:get-allowed | uuid:f9977a90-dcf5-11d5-b238-cbbeaea0a8d4 |
| get denied | uddi:systinet.com:acl:get-denied | uuid:09e202d0-dcf6-11d5-b238-cbbeaea0a8d4 |
| save allowed | uddi:systinet.com:acl:save-allowed | uuid:19885bd0-dcf6-11d5-b239-cbbeaea0a8d4 |
| save denied | uddi:systinet.com:acl:save-denied | uuid:2a25e610-dcf6-11d5-b239-cbbeaea0a8d4 |
| delete allowed | uddi:systinet.com:acl:delete-allowed | uuid:37f44ac0-dcf6-11d5-b239-cbbeaea0a8d4 |
| delete denied | uddi:systinet.com:acl:delete-denied | uuid:4e51d8f0-dcf6-11d5-b239-cbbeaea0a8d4 |
| create allowed | uddi:systinet.com:acl:create-allowed | uuid:5bc32980-dcf6-11d5-b239-cbbeaea0a8d4 |
| create denied | uddi:systinet.com:acl:create-denied | uuid:6d0be7e0-dcf6-11d5-b239-cbbeaea0a8d4 |
Setting ACLs on UDDI v3 Structures Locate
In UDDI v3, explicit ACL permission is saved in a special keyedReferenceGroup having the tModelKey uddi:systinet.com:acl. This keyedReferenceGroup can contain only keyedReferences to ACL tModels. Only the terms "user" and "group" are allowed in the included keyName, and the keyValue must contain the name of the user or group (according to keyName value).
For example, user demo_john can save (update) following businessEntity even if he is not the owner:
Example 1. Setting ACLs - v3
<businessEntity xmlns="urn:uddi-org:api_v3">
  ...
  <categoryBag>
    ...
    <keyedReferenceGroup tModelKey="uddi:systinet.com:acl">
      <keyedReference tModelKey="uddi:systinet.com:acl:save-allowed"
      keyName="user" keyValue="demo_john"/>
      ...
    </keyedReferenceGroup>
  </categoryBag>
</businessEntity>
Setting ACLs on UDDI v1/v2 Structures Locate
Under versions 1 and 2 of UDDI, explicit ACL permission is saved as a special keyedReference in the categoryBag. This keyedReference refers to one of the tModels representing ACL permissions. Only the terms "user" and "group" are allowed in the included keyName and the keyValue must contain the name of the user or group (according to the keyName value).
For example, user demo_john can save (update) following businessEntity even if he is not the owner:
<businessEntity ...>
  ...
  <categoryBag>
    <keyedReference tModelKey="uuid:19885bd0-dcf6-11d5-b239-cbbeaea0a8d4"
                                         keyName="user" keyValue="demo_john"/>
    ...
  </categoryBag>
</businessEntity>
| Note |
|---|---|
ACL permissions cannot be set on the bindingTemplate structure because this structure has no categoryBag in UDDI v1/v2. | |
Publisher-Assigned Keys Locate
Under UDDI v1 and v2, keys are generated automatically when a structure is published. Generated keys in these versions are in form (uuid:)8-4-4-4-12 where the numbers indicate a count of hexadecimal values. For example, uuid:327A56F0-3299-4461-BC23-5CD513E95C55. Note that the prefix "uuid:" was only used in tModelKeys.
In UDDI v3 users may assign keys when saving a structure for the first time. These Keys can be 255 characters long and can contain numbers and Latin characters, so that the key itself describes what the UDDI structure means. For example, the key uddi:systinet.com:uddiRegistry:demo:businessService has the following elements:
The prefix uddi: is a schema much like http: or ftp: and must be always present.
systinet.com is an optional host name.
The elements uddiRegistry, demo, and businessService represent a hierarchy of domains. The domain demo is a subdomain of uddiRegistry.
This description is sufficient for our purposes for now. For a more precise description of keys, please see the UDDI v3 Specification.
Generating Keys Locate
The key generator tModel is a tModel with a key in the form domain:keygenerator. This tModel permits its owner to save structures with keys in the form domain:string. For example, the tModel uddi:systinet.com:uddiRegistry:demo:keygenerator allows its owner to publish structures with keys like:
uddi:systinet.com:uddiRegistry:demo:businessService
uddi:systinet.com:uddiRegistry:demo:b52
These are derived keys of the uddi:systinet.com:uddiRegistry:demo domain.
With one exception, the key generator tModel does not allow the user to save keys from subdomains such as uddi:systinet.com:uddiRegistry:demo:businessService:exchangeRate, that is, derived keys of uddi:systinet.com:uddiRegistry:demo:businessService.
The key generator tModel, however, permits the user to save the key generator for each direct subdomain. For example, the user can save uddi:systinet.com:uddiRegistry:demo:businessService:keygenerator. After creating this second key generator, the user is permitted to save structures with keys of the uddi:systinet.com:uddiRegistry:demo:businessService domain, such as uddi:systinet.com:uddiRegistry:demo:businessService:exchangeRate.
![[Important]](../images/important.gif) | Important |
|---|---|
To generate keys for a domain, the user must own the domain's key generator tModel. Only the administrator can save structures with assigned keys without having the key generator tModel. To enable this process for other users, the administrator must save the domain's tModel and then change its ownership to the user via custody transfer. For more information, please see Publish Custody Transfer. | |
Affiliations of Registries Locate
The rules above ensure that two users can not create structures with the same key. A complicated situation arises when one user wants to copy UDDI structures from one registry to another while preserving the keys of those structures. There are two problems:
The key of the copied structure must not exist on the second registry. The key must be unique - this is required by the UDDI specification.
The user must be allowed to save a structure with a specified key on the second registry.
The Affiliated registries mechanism solves both problems. An affiliation is a relationship between two registries. The first registry gives up generation of keys for a certain domain and transfers this privilege to the second registry. This ensures that keys from both registries are unique.
| Note |
|---|---|
In the examples below we name the two registries 'master' and 'slave'. Moreover there are three people:
| |
Affiliation Setup Locate
To set up an affiliation:
The administrator of the slave registry (slave-admin) registers a user account on the master registry (master-user2).
Master-user2 requests a key generator tModel from the administrator of the Master registry.
This administrator, master-admin, creates the key generator tModel and transfers it to the master-user2 account using custody transfer.
Person 2 manually copies the key generator tModel to the slave registry (his slave-admin account has permission to assign any key) and sets up the slave registry to generate all keys based on this key generator. For more information, please see Node in the Administrator's Guide.
All keys generated by the slave registry or its users will be from the domain or some subdomain defined by the key generator.
Copying Structures with Key Preservation Locate
Given key should refer to the same structure no matter which registry the structure is in.
Suppose that slave-admin creates a key generator tModel for slave-user3 and this user uses the key generator to generate a key for a structure in the slave registry. To copy the structure to the master registry, this key generator tModel must exist on both registries.
To copy a structure from the slave to the master registry:
The slave-user3 must ask person 2 (slave-admin) to copy the second key generator, because only the holder of the account master-user2, as owner of the first key generator, can do this on the master registry.
Then master-user2 transfers ownership of the second key generator in the master registry to master-user3. Now master-user3 can copy the structure while preserving the generated keys.
Range Queries Locate
BEA AquaLogic Service Registry's range queries functionality allows you to search UDDI entities with the ability to use comparative operators (>, <) for matching keyValues in keyedReferences. There must be a defined type of keyValues in the taxonomy which defines the ordering. The following ordering types are supported: string, numeric, and custom. KeyedReferences in find_XXX queries are extended by a list of find qualifiers. Do not mix with find qualifiers of the whole query. Find Qualifiers are used for specifying comparison operators.
See Find Business by Categories how to search UDDI data structures using range queries with Registry Console.
| Note |
|---|---|
The BEA AquaLogic Service Registry implementation of range queries goes beyond the current UDDI v3 specification since the specification does not define this functionality. | |
The following findQualifiers are supported:
equal - the default find qualifier. If no one from the group of ( equal, greaterThan, lesserThan qualifiers) is specified. This is done due to the backward compatibility with a standard UDDI. When used, the keyedReference from the request matches to the all keyedReferences from the database with the same tModelKey and the same keyValue.
greaterThan - When used, the keyedReference from the request match to the all keyedReferences from the database with the same tModelKey and a greater keyValue.
lesserThan - When used, the keyedReference from the request match to the all keyedReferences from the database with the same tModelKey and a lesser keyValue.
notExists - This findQualifier has validity for the whole keyedReference (not just for keyValues). An entity matches the find request with notExists findQualifier if and only if the specific keyedReference does not exist in its categoryBag. This findQualifier can be arbitrarily combined with greaterThan, lesserThan and equal findQualifiers. If the notExists findQualifier is used alone, then the equal findQualifier is considered automatically.
Comparators can be combined:
greaterThan and equal find qualifiers can be used together with the keyedReference match to the all keyedReferences with the same tModelKey and a greater or equal keyValue (>=).
lesserThan and equal find qualifiers can be used together with the keyedReference match to the all keyedReferences with the same tModelKey and a lesser or equal keyValue (<=).
lesserThan and greaterThan find qualifiers can be used together with the keyedReference match to the all keyedReferences with the same tModelKey and a not equals keyValue (<>).
Combination of lesserThan, greaterThan and equal is not allowed.
Examples Locate
The following examples demonstrate the usage of range queries. Suppose that the keyedReferences are placed in the category bag of the find_business request.
greaterThan Only business entities that have a keyedReference with tModelKey equal to tmKey, and a keyValue that is greater than kv, in their categoryBags are returned.
<keyedReference tModelKey="tmKey" keyValue="kv" keyName="kn">
   <findQualifiers>
      <findQualifier>greaterThan</findQualifier>
   </findQualifiers>
</keyedReference>
greaterThan and lesserThan Only business entities that have keyedReference with tModelKey that is equal to tmKey, and a keyValue not equal to kv, in their categoryBags are returned.
<keyedReference tModelKey="tmKey" keyValue="kv" keyName="kn">
   <findQualifiers>
      <findQualifier>greaterThan</findQualifier>
      <findQualifier>lesserThan</findQualifier>
   </findQualifiers>
</keyedReference>
notExists Only business entities that do not have a keyedReference with a tModelKey equal to tmKey, and a keyValue equal to kv, in their categoryBags are returned.
<keyedReference tModelKey="tmKey" keyValue="kv" keyName="kn">
   <findQualifiers>
      <findQualifier>notExists</findQualifier>
   </findQualifiers>
</keyedReference>
notExists and greaterThan Only business entities that do not have a keyedReference with a tModelKey equal to tmKey, and a keyValue greater than kv, in their categoryBags are returned.
<keyedReference tModelKey="tmKey" keyValue="kv" keyName="kn">
   <findQualifiers>
      <findQualifier>notExists</findQualifier>
      <findQualifier>greaterThan</findQualifier>
   </findQualifiers>
</keyedReference>
notExists, greaterThan, equal Only business entities that do not have a keyedReference with a tModelKey equal to tmKey, and a keyValue greater than or equal to kv, in their categoryBags are returned.
<keyedReference tModelKey="tmKey" keyValue="kv" keyName="kn">
   <findQualifiers>
      <findQualifier>notExists</findQualifier>
      <findQualifier>greaterThan</findQualifier>
      <findQualifier>equal</findQualifier>
   </findQualifiers>
</keyedReference>
See also Demos, Advanced Inquiry - Range Queries.
Taxonomy: Principles, Creation and Validation Locate
The UDDI Version 3 Specification provides tools for setting the context on all four major UDDI structures: businessEntities, businessServices, bindingTemplates and tModels. This document covers basic principles and management of this feature - the taxonomies.
What Is a Taxonomy? Locate
A taxonomy, or value set in the terminology of the UDDI specifications, is a tModel which can be used in categoryBags, identifier bags, or Publisher Assertions. This tModel must be in a specific form, so that BEA AquaLogic Service Registry can recognize it as a taxonomy. The tModel must be categorized with the type of taxonomy and, optionally, with information concerning whether and how to validate the values in keyedReferences.
Taxonomy Types Locate
The UDDI specification distinguishes four types of taxonomies: categorizations, categorizationGroups, identifiers, and relationships.
- Categorizations
Categorizations can be used in all four main UDDI structures. They are used to tag them with additional information, such as identity, location, and what the taxonomy describes.
- CategorizationGroups
New in UDDI version 3, CategorizationGroups group several categorizations into one logical categorization. For example, a geographical location comprised of two categorizations: longitude and latitude.
- Identifiers
Used in businessEntities and tModels, Identifiers reference published information.
- Relationships
Used only in Publisher Assertions, Relationships define the relation between two businessEntities.
Validation of Values Locate
The publisher of a taxonomy can decide whether the values in keyedReferences within the taxonomy will be checked or not.
Unchecked Taxonomies Locate
BEA AquaLogic Service Registry does not perform any checks on values used in keyedReferences associated with unchecked taxonomies. Unchecked taxonomies are those that are marked as such, or those that are not marked as checked. These two states are equivalent.
Checked Taxonomies Locate
If a taxonomy is checked, BEA AquaLogic Service Registry executes its validation service for every keyedReference in which the checked taxonomy is used. The validation service may check the expected syntax of values, such as the format of a credit card or ISBN number. Taxonomies like the ISO 3166 Geographic taxonomy, which permits only existing countries, check the existence of the value against a list. A validation service may even permit or deny values depending on the context in which they are used.
BEA AquaLogic Service Registry Requirements Locate
BEA AquaLogic Service Registry conforms to the technical note Providing A Value Set For Use In UDDI Version 3. To create a checked taxonomy, you must:
Prepare and deploy a validation service which implements the Valueset_validation API.
Publish the tModel categorized as a checked taxonomy and mark it as unvalidatable.
Publish the bindingTemplate that implements the Valueset_validation API and the taxonomy's tModel.
Republish the tModel, without the unvalidatable categorization, and with the categorization uddi-org:validatedBy pointing to the bindingTemplate.
BEA AquaLogic Service Registry requires that the bindingTemplate be published in the businessService of the Operational Business Entity. If this businessService is not part of the Operational Business Entity, the checked taxonomy will not be validatable and thus it may not be used in keyedReferences. This implies that only the BEA AquaLogic Service Registry administrator may publish checked taxonomies.
The bindingTemplate must contain an accessPoint with its useType attribute set to "endPoint".
If the accessPoint starts with the prefix class:, then the remaining part is assumed to contain the fully qualified name of the class that implements interface org.systinet.uddi.client.valueset.validation.v3.UDDI_ValueSetValidation_PortType and is accessible by the BEA AquaLogic Service Registry classloader.
If the accessPoint does not start with the prefix class:, it is assumed to be the URL of the Web service implementing the Valueset_validation API and a stub is created for this Web service.
Internal Validation Service Locate
BEA AquaLogic Service Registry contains a special validation service called the Internal Validation Service. This service is used by checked taxonomies that declare a list of available values published using the Taxonomy API.
Types of keyValues Locate
The creator of the taxonomy must specify types of keyValues by assigning the appropriate comparator reference (comparator tModel) of the systinet-com:isOrderedBy taxonomy to the categorization taxonomy you want to use to categorize a UDDI entity. The following types of key values types are supported:
string - keyValues are treated as string values. If keyValues type is unknown then keyValues are treated as strings. The maximum length is 255 characters.
numeric - keyValues are treated as decimal numbers. The value can have maximum 19 digits before the decimal point and maximum 6 digits after the decimal point.
custom - keyValues must be transformed to string or numeric values using a transformation service. Please see Custom Ordinal Types for more information.
For example, the tModel of the categorization taxonomy with numeric key values must have the following keyedReference in its category bag:
<keyedReference tModelKey="uddi:systinet.com:isOrderedBy"
   keyValue="uddi:systinet.com:comparator:numeric"/>
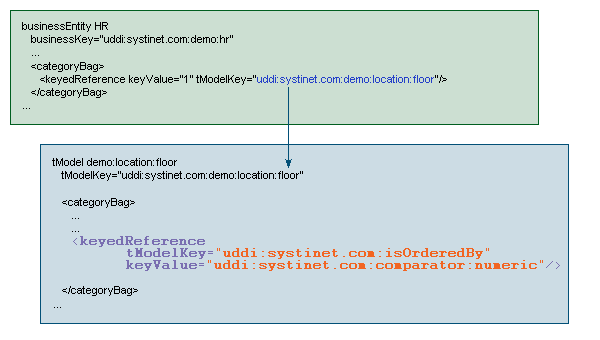
Figure 42 shows how the demo:location:floor taxonomy from Demo data can be assigned numeric key values.
| Important |
|---|---|
If you change type of keyValues of the taxonomy and there are entities in the BEA AquaLogic Service Registry that were already categorized with the taxonomy, the BEA AquaLogic Service Registry administrator must execute the task Transform keyed references. The button for executing this task is located in the Registry Console under the Manage tab, Registry Management link. See Administrator's Guide, Access Registry Management | |
To learn how to make this assignment using the Registry Console , see User's Guide, Adding a Category.
See User's Guide, Searching how to search UDDI data structures using range queries with Registry Console.
See Administrator's Guide , Editing Taxonomies how to edit taxonomy type.
Custom Ordinal Types Locate
You can define your custom ordinal types. To demonstrate possible extensions, BEA AquaLogic Service Registry contains two demo comparators:
systinet-com:comparator:date
systinet-com:comparator:stringToLowerCase
Let's assume you want to create a taxonomy with date values in keyValues. You must mark the taxonomy tModel (that is, add the following keyedReference into its categoryBag) by <keyedReference tModelKey="uddi:systinet.com:isOrderedBy" keyValue="uddi:systinet.com:comparator:date"/>. It is quite easy because there is a demo comparator for date in the registry. Imagine the date comparator is not present. Take the following steps to create it in the registry:
Create a transformer service that transforms the date value into a string or numeric value. The transformer service must implement TransformerKeyedReferenceApi and add this class to the BEA AquaLogic Service Registry class path.
Create a new comparator tModel for date. The tModel must be categorized as a comparator using the systinet-com:comparator taxonomy. The comparator must refer to the transformer service. This reference is specified by the taxonomy IsTransformedBy (where "uddi:cba104c0-fb5c-11d8-8761-eb2505508761" is the key of the bindingTemplate with the specification of the transformer service.
| Important |
|---|---|
If you change implementation of the of the transformer service of the taxonomy and there are entities in the BEA AquaLogic Service Registry that were already categorized with the taxonomy, the BEA AquaLogic Service Registry administrator must execute the task Transform keyed references. The button for executing this task is located in the Registry Console under the Manage tab, Registry Management link. See Administrator's Guide, Access Registry Management | |
Figure 43 shows the tModel references for date categorization ordering. It describes a purchase order document that has been mapped to BEA AquaLogic Service Registry via XML-to-UDDI functionality, and then categorized by the acceptancedate taxonomy. The categorization taxonomy must refer to the comparator tModel uddi:systinet.com:comparator:date that references a bindingTemplate with the location of the date transformation service.

The transformer service is called whenever the appropriate keyedReference is processed. If any entity contains the keyedReference with a taxonomy tModel whose type is custom then the transformer service is called to discover the correct (that is, transformed) keyValue of the keyedReference. Such transformed values are stored into the database. If you want to find entities by this keyedReference (the keyedReference with the same taxonomy tModel), the service is called again to get the transformed value. Transformed values are used for the saving and searching of keyedReferences.
See Administrator's Guide , Editing Taxonomies how to edit taxonomy type.
Taxonomy API Locate
This section demonstrates the basics of taxonomy API and taxonomy persistence format. A comprehensive description of the Taxonomy API can be found in the Developer's Guide, Taxonomy.
| Note |
|---|---|
For clarity, we use an XML representation, but you can achieve the same results with Java objects. | |
<taxonomy xmlns="http://systinet.com/uddi/taxonomy/v3/5.0"
        xmlns:uddi="urn:uddi-org:api_v3"
         check="false">
    <tModel tModelKey="uddi:systinet.com:demo:myTaxonomy">
        <uddi:name>My taxonomy</uddi:name>
        <uddi:description>Category system</uddi:description>
    </tModel>
    <compatibilityBag>
        <compatibility>businessEntity</compatibility>
    </compatibilityBag>
    <categorizationBag>
        <categorization>categorization</categorization>
    </categorizationBag>
</taxonomy>
Each taxonomy, in order to be saved, requires a valid tModel. While it must contain a tModelKey and a name, you do not need to set the content of the categoryBag.
The Taxonomy attribute check determines whether the taxonomy will be checked or not.
The compatibilityBag is an interface to Systinet's uddi:systinet.com:taxonomy:categorization taxonomy, which is used to limit usage of the selected taxonomy within the four main UDDI structure types. In this way you can enforce that your taxonomy can be used only within the UDDI structures of your choice and not in others.
The categorizationBag is used to declare the type of the taxonomy, for example, whether it is a categorization, categorizationGroup, identifier or relationship taxonomy.
Note that values may be combined.
Let's enhance the previous example and convert the taxonomy from unchecked to checked. Checked taxonomies must contain Validation. In this example, the taxonomy is checked by the Custom Validation Web service located at http://www.foo.com/MyValidationService.wsdl.
<taxonomy xmlns="http://systinet.com/uddi/taxonomy/v3/5.0"
        xmlns:uddi="urn:uddi-org:api_v3"
         check="true">
    <tModel tModelKey="uddi:foo.com:demo:myTaxonomy">
        <uddi:name>My taxonomy</uddi:name>
        <uddi:description>Category system</uddi:description>
    </tModel>
    <compatibilityBag>
        <compatibility>businessEntity</compatibility>
    </compatibilityBag>
    <categorizationBag>
        <categorization>categorization</categorization>
    </categorizationBag>
    <validation>
        <bindingTemplate bindingKey="" serviceKey="" xmlns="urn:uddi-org:api_v3">
            <accessPoint useType="endPoint">
               http://www.foo.com/MyValidationService.wsdl
            </accessPoint>
            <tModelInstanceDetails>
                <tModelInstanceInfo
                        tModelKey="uddi:uddi.org:v3_valueSetValidation"/>
                <tModelInstanceInfo
                        tModelKey="uddi:systinet.com:demo:myTaxonomy"/>
            </tModelInstanceDetails>
        </bindingTemplate>
    </validation>
</taxonomy>
The validation element must hold the bindingTemplate identifying the validation Web service or categories structures. In this example we chose bindingTemplate. It must contain complete accessPoint and tModelInstanceDetails must hold the Valueset_validation API and tModelKey of the saved taxonomy. If the serviceKey is specified and if the businessService already exists, it must be part of the Operational Business Entity.
| Important |
|---|---|
Be aware that the service will be replaced during the save_taxonomy process. | |
If you can provide a list of allowed values, you do not need to implement your own validation Web service. Just provide the allowed values inside the categories structure (as shown below) and the Internal Validation Service will be responsible for validation of the keyedReferences.
<taxonomy xmlns="http://systinet.com/uddi/taxonomy/v3/5.0"
        xmlns:uddi="urn:uddi-org:api_v3"
         check="true">
    <tModel tModelKey="uddi:foo.com:demo:myTaxonomy">
        <uddi:name>My taxonomy</uddi:name>
        <uddi:description>Category system</uddi:description>
    </tModel>
    <compatibilityBag>
        <compatibility>businessEntity</compatibility>
    </compatibilityBag>
    <categorizationBag>
        <categorization>categorization</categorization>
    </categorizationBag>
    <validation>
        <categories>
            <category keyName="Value A" keyValue="A"/>
            <category keyName="Value B" keyValue="B">
                <category keyName="Value B1" keyValue="B1"/>
                <category keyName="Value B3" keyValue="B3" disabled="true" />
            </category>
            <category keyName="Value C" keyValue="C"/>
        </categories>
    </validation>
</taxonomy>
As you can see, you can arrange your values hierarchically. This is useful for the Registry Console that implements the drill-down pattern. If you really need, you can even specify bindingTemplate along with the categories structure, but its accessPoint must point to the Internal Validation Service.
Predeployed Taxonomies Locate
BEA AquaLogic Service Registry comes with the following predeployed taxonomies:
uddi-org:types is a UDDI Type Category System.
v3 UDDI key uddi:uddi.org:categorization:types v2 UUID key uuid:c1acf26d-9672-4404-9d70-39b756e62ab4 Categorization categorization Compatibility tModel Checked yes, Internal Validation Service uddi-org:general_keywords is a category system consisting of namespace identifiers and the keywords associated with namespaces.
v3 UDDI key uddi:uddi.org:categorization:general_keywords v2 UUID key uuid:A035A07C-F362-44dd-8F95-E2B134BF43B4 Categorization categorization Compatibility tModel, businessEntity, businessService, bindingTemplate Checked yes uddi-org:entityKeyValues is a category system used to declare that a value set uses entity keys as valid values.
v3 UDDI key uddi:uddi.org:categorization:entitykeyvalues v2 UUID key uuid:916b87bf-0756-3919-8eae-97dfa325e5a4 Categorization categorization Compatibility tModel Checked yes, Internal Validation Service uddi-org:isreplacedby is the identifier system used to point to the UDDI entity, using UDDI keys, that is the logical replacement for the one in which isReplacedBy is used.
v3 UDDI key uddi:uddi.org:identifier:isReplacedBy v2 UUID key uuid:e59ae320-77a5-11d5-b898-0004ac49cc1e Categorization identifier Compatibility tModel, businessEntity Checked yes uddi-org:nodes is a category system for identifying the nodes of a registry.
v3 UDDI key uddi:uddi.org:categorization:nodes v2 UUID key uuid:327A56F0-3299-4461-BC23-5CD513E95C55 Categorization categorization Compatibility businessEntity Checked yes uddi-org:owningBusiness_v3 is a category system used to point to the businessEntity associated with the publisher of the tModel.
v3 UDDI key uddi:uddi.org:categorization:owningbusiness v2 UUID key uuid:4064c064-6d14-4f35-8953-9652106476a9 Categorization categorization Compatibility tModel Checked yes uddi-org:validatedBy is a category system used to point a value set or category group system tModel to associated value set Web service implementations.
v3 UDDI key uddi:uddi.org:categorization:validatedby v2 UUID key uuid:25b22e3e-3dfa-3024-b02a-3438b9050b59 Categorization categorization Compatibility tModel Checked yes uddi-org:wsdl:types is a WSDL Type Category System.
v3 UDDI key uddi:uddi.org:wsdl:types v2 UUID key uuid:6e090afa-33e5-36eb-81b7-1ca18373f457 Categorization categorization Compatibility tModel, businessEntity, businessService, bindingTemplate Checked yes, Internal Validation Service uddi-org:wsdl:categorization:protocol
v3 UDDI key uddi:uddi.org:wsdl:categorization:protocol v2 UUID key uuid:4dc74177-7806-34d9-aecd-33c57dc3a865 Categorization categorization Compatibility tModel Checked yes uddi-org:wsdl:categorization:transport
v3 UDDI key uddi:uddi.org:wsdl:categorization:transport v2 UUID key uuid:e5c43936-86e4-37bf-8196-1d04b35c0099 Categorization categorization Compatibility tModel Checked yes uddi-org:wsdl:portTypeReference is a category system tModel that can be used to identify a relationship to a portType tModel.
v3 UDDI key uddi:uddi.org:wsdl:portTypeReference v2 UUID key uuid:082b0851-25d8-303c-b332-f24a6d53e38e Categorization categorization Compatibility tModel Checked yes systinet-com:taxonomy:compatibility enhances a taxonomy tModel with additional information, in which structures the taxonomy can be used.
v3 UDDI key uddi:systinet.com:taxonomy:compatibility v2 UUID key uuid:cf68c700-f93d-11d6-8cfc-b8a03c50a862 Categorization categorization Compatibility tModel Checked yes, Internal Validation Service systinet-com:dependency creates link between two structures (may be different types). Both keyName and keyValue must be specified. KeyName must be one of businessEntity, businessService, bindingTemplate and tModel. KeyValue must be existing UDDI key of specified structure.
v3 UDDI key uddi:systinet.com:dependency v2 UUID key uuid:179e5540-f27b-11d6-9738-b8a03c50a862 Categorization categorization Compatibility tModel, businessEntity, businessService, bindingTemplate Checked yes dnb-com:D-U-N-S - Thomas Registry Suppliers
v3 UDDI key uddi:uddi.org:ubr:identifier:dnb.com:d-u-n-s v2 UUID key uuid:8609c81e-ee1f-4d5a-b202-3eb13ad01823 Categorization identifier Compatibility tModel, businessEntity, businessService, bindingTemplate Checked no microsoft-com:geoweb:2000 - Geographic Taxonomy: GeoWeb (2000 Release)
v3 UDDI key uddi:297aaa47-2de3-4454-a04a-cf38e889d0c4 v2 UUID key uuid:297aaa47-2de3-4454-a04a-cf38e889d0c4 Categorization categorization Compatibility tModel, businessEntity, businessService, bindingTemplate Checked no ntis-gov:naics:1997 - Business Taxonomy: NAICS (1997 Release)
v3 UDDI key uddi:uddi.org:ubr:categorization:naics:1997 v2 UUID key uuid:c0b9fe13-179f-413d-8a5b-5004db8e5bb2 Categorization categorization Compatibility tModel, businessEntity, businessService, bindingTemplate Checked yes, Internal Validation Service ntis-gov:sic:1997 - Business Taxonomy: SIC (1997 Release)
v3 UDDI key uddi:70a80f61-77bc-4821-a5e2-2a406acc35dd v2 UUID key uuid:70a80f61-77bc-4821-a5e2-2a406acc35dd Categorization categorization Compatibility tModel, businessEntity, businessService, bindingTemplate Checked yes, Internal Validation Service ntis-gov:naics:2002 - Business Taxonomy: Business Taxonomy: NAICS (2002 Release
v3 UDDI key uddi:uddi.org:ubr:categorization:naics:2002 v2 UUID key uuid:1ff729f2-1948-46cf-b660-31ec107f1663 Categorization categorization Compatibility tModel businessEntity businessService bindingTemplate Checked yes, Internal Validation Service unspsc-org:unspsc:3-1 - Product Taxonomy: UNSPSC (Version 3.1)
v3 UDDI key uddi:db77450d-9fa8-45d4-a7bc-04411d14e384 v2 UUID key uuid:db77450d-9fa8-45d4-a7bc-04411d14e384 Categorization categorization Compatibility tModel, businessEntity, businessService, bindingTemplate Checked no unspsc-org:unspsc - Product Taxonomy: UNSPSC (Version 7.3)
v3 UDDI key uddi:unspsc-org:unspsc v2 UUID key uuid:cd153257-086a-4237-b336-6bdcbdcc6634 Categorization categorization Compatibility tModel, businessEntity, businessService, bindingTemplate Checked yes, Internal Validation Service unspsc-org:unspsc:v6.0501 - Product and Service Category System: United Nations Standard Products and Services Code (UNSPSC)
v3 UDDI key uddi:uddi.org:ubr:categorization:unspsc v2 UUID key uuid:4614C240-B483-11D7-8BE8-000629DC0A53 Categorization categorization Compatibility tModel businessEntity businessService bindingTemplate Checked yes, Internal Validation Service ws-i-org:conformsTo:2002_12 is a category system used for UDDI entities to point to the WS-I concept to which they conform.
v3 UDDI key uddi:65719168-72c6-3f29-8c20-62defb0961c0 v2 UUID key uuid:65719168-72c6-3f29-8c20-62defb0961c0 Categorization categorization Compatibility tModel Checked no
WSM Taxonomies Locate
The following taxonomies are used for integration with a web service management system:
systinet-com:management:metrics:avg-byte Locate
Average sum of incoming and outgoing message length
| v3 UDDI key | uddi:systinet.com:management:metrics:avg-byte |
| v2 UUID key | uuid:3c13a2e2-dfd0-30a2-bd58-c5de8c2ae3bb |
| Categorization | categorization |
| Compatibility | tModel |
| Checked | no |
systinet-com:management:metrics:avg-byte-input Locate
Average input message length per hour
| v3 UDDI key | uddi:systinet.com:management:metrics:avg-byte-input |
| v2 UUID key | uuid:f18a50ad-ddb2-392a-b97c-1181c67b2817 |
| Categorization | categorization |
| Compatibility | tModel |
| Checked | no |
systinet-com:management:metrics:avg-byte-output Locate
Average output message length
| v3 UDDI key | uddi:systinet.com:management:metrics:avg-byte-output |
| v2 UUID key | uuid:7664723d-896a-3ed2-b7e9-46c9f38e7681 |
| Categorization | categorization |
| Compatibility | tModel |
| Checked | no |
systinet-com:management:metrics:avg-hits Locate
Average message hits per hour
| v3 UDDI key | uddi:systinet.com:management:metrics:avg-hits |
| v2 UUID key | uuid:bf010bf9-cafa-3f68-bf51-3cde3bd0f483 |
| Categorization | categorization |
| Compatibility | tModel |
| Checked | no |
systinet-com:management:metrics:avg-response-time Locate
Average response time in milliseconds
| v3 UDDI key | uddi:systinet.com:management:metrics:avg-response-time |
| v2 UUID key | uuid:099d67a9-eae6-3c30-8be9-48b44c5d9728 |
| Categorization | categorization |
| Compatibility | tModel |
| Checked | no |
systinet-com:management:metrics:errors Locate
Count of application failures in the last hour
| v3 UDDI key | uddi:systinet.com:management:metrics:errors |
| v2 UUID key | uuid:b074de10-e781-383a-bd00-248a1c42f0fa |
| Categorization | categorization |
| Compatibility | tModel |
| Checked | no |
systinet-com:management:metrics:hits Locate
Count of hits in the last hour
| v3 UDDI key | uddi:systinet.com:management:metrics:hits |
| v2 UUID key | uuid:720689a4-dce4-398c-adba-e5c0f50d1eb2 |
| Categorization | categorization |
| Compatibility | tModel |
| Checked | no |
systinet-com:management:metrics:median-byte Locate
Median sum of incoming and outgoing message lengths
| v3 UDDI key | uddi:systinet.com:management:metrics:median-byte |
| v2 UUID key | uuid:0adefd4c-7624-3973-91a5-ea4971d6b0ef |
| Categorization | categorization |
| Compatibility | tModel |
| Checked | no |
systinet-com:management:metrics:median-byte-input Locate
Median value of incoming message lengths
| v3 UDDI key | uddi:systinet.com:management:metrics:median-byte-input |
| v2 UUID key | uuid:c9c2fd87-f806-3ca0-819e-3f788cc8fd95 |
| Categorization | categorization |
| Compatibility | tModel |
| Checked | no |
systinet-com:management:metrics:median-byte-output Locate
Median output message length
| v3 UDDI key | uddi:systinet.com:management:metrics:median-byte-output |
| v2 UUID key | uuid:bdb4e8f8-1aba-3558-b1f5-cf89b5455529 |
| Categorization | categorization |
| Compatibility | tModel |
| Checked | no |
systinet-com:management:metrics:median-response-time Locate
Median response time in milliseconds
| v3 UDDI key | uddi:systinet.com:management:metrics:median-response-time |
| v2 UUID key | uuid:62f08146-1d3f-30e3-8c6a-1f2062c332d4 |
| Categorization | categorization |
| Compatibility | tModel |
| Checked | no |
systinet-com:management:metrics:policy-violations Locate
Count of policy violations in the last hour
| v3 UDDI key | uddi:systinet.com:management:metrics:policy-violations |
| v2 UUID key | uuid:be42511a-3c68-34d2-b137-d00e56bb4de4 |
| Categorization | categorization |
| Compatibility | tModel |
| Checked | no |
systinet-com:management:metrics:reference Locate
Reference to a tModel containing all metrics about the service. The keyValues in keyedReferences that refer to this tModel must be a tModelKey of the metric tModel.
| v3 UDDI key | uddi:systinet.com:management:metrics:reference |
| v2 UUID key | uuid:0d709256-b9f3-30a3-9aa1-51a1adb11324 |
| Categorization | categorization |
| Compatibility | bindingTemplate |
| Checked | yes |
systinet-com:management:proxy-reference Locate
WSM Proxy Reference Taxonomy
| v3 UDDI key | uddi:systinet.com:management:proxy-reference |
| v2 UUID key | uuid:79bf6f6d-b0b7-3f08-b45e-9893b525de9b |
| Categorization | categorization |
| Compatibility | bindingTemplate |
| Checked | yes |
systinet-com:management:server-reference Locate
WSM Server Reference Taxonomy.
| v3 UDDI key | uddi:systinet.com:management:server-reference |
| v2 UUID key | uuid:1583604a-57a2-3887-9b1d-2549e270390c |
| Categorization | categorization |
| Compatibility | bindingTemplate |
| Checked | yes |
systinet-com:management:state Locate
WSM State Taxonomy
| v3 UDDI key | uddi:systinet.com:management:state |
| v2 UUID key | uuid:73c7ef28-6150-36a0-ba82-414424ede582 |
| Categorization | categorization |
| Compatibility | bindingTemplate |
| Checked | yes |
systinet-com:management:state-change-request-type Locate
WSM State Change Request Taxonomy
| v3 UDDI key | uddi:systinet.com:management:state-change-request-type |
| v2 UUID key | uuid:64473cda-4a78-3ddb-b0c6-801533ce1943 |
| Categorization | categorization |
| Compatibility | bindingTemplate |
| Checked | yes |
systinet-com:management:system Locate
WS Management System Taxonomy
| v3 UDDI key | uddi:systinet.com:management:system |
| v2 UUID key | uuid:e148d85e-cc08-32f6-8f00-db85e258e511 |
| Categorization | categorization |
| Compatibility | bindingTemplate |
| Checked | no |
systinet-com:management:type Locate
WSM Type Taxonomy
| v3 UDDI key | uddi:systinet.com:management:type |
| v2 UUID key | uuid:5d14645d-66ea-39ac-8122-49d06b09b492 |
| Categorization | categorization |
| Compatibility | bindingTemplate |
| Checked | yes |
systinet-com:management:url Locate
Endpoint URL Taxonomy
| v3 UDDI key | uddi:systinet.com:management:url |
| v2 UUID key | uuid:4897f99b-bd23-3889-af37-b80351cf8b52 |
| Categorization | categorization |
| Compatibility | bindingTemplate |
| Checked | no |
Registry Console Reference Locate
Register/Create Account Locate
Register Locate
Before you can publish data to the registry, you must have a BEA AquaLogic Service Registry account. You can create an account via the web interface.

Follow these steps to register a user account:
Click the Register link on the main Registry Console page. This returns the Create account page.
Fill in all fields. Those labeled with an asterisk (*) are required. Your email address may be used later for enabling your account.
Click the Create account button.

The new account is now enabled.
| Note |
|---|---|
BEA AquaLogic Service Registry may be configured to require email confirmation in order to enable the user account. In this case, the registry sends an email confirmation. Follow the instructions in this email to enable your account. | |
Login Locate
To log on, click the Login link on the upper part of the Registry Console, and enter your username and password.

Once logged into the registry, you are able to publish, delete, and update the various UDDI structures. Users have access to their own account information. Administrators also have account administration access; that is, the ability to delete and edit accounts and produce account audit reports.
Registry Console Overview Locate
Registry Console is comprised of the following objects:
A: Main Menu Tabs
- Browse
This tab allows you to browse UDDI entities using taxonomies.
- Search
This tab allows you to search the registry. You can perform inquiry on UDDI entities, you can find business entity, service, bindings, tModels, and related businesses. The menu option also allows you to browse taxonomies and directly get information from BEA AquaLogic Service Registry when you know a key of UDDI data types (business, service, binding, and tModel)
- Publish
This tab allows you to publish UDDI structures (businessEntities, businessServices, bindingTemplates, and tModels). On this tab, you can also assert relationships between business entities, subscribe interest in receiving information about changes made to a registry, transfer ownership of selected UDDI structures (Custody Transfer), and publish WSDLs to the registry.
- Profile
Here you can manage your user account properties, account groups and favorite taxonomies.
- Manage
This tab is used by the BEA AquaLogic Service Registry administrator to perform management tasks. See Administrators Guide for more information.
B: Menu Bar Sub menu options are located here.
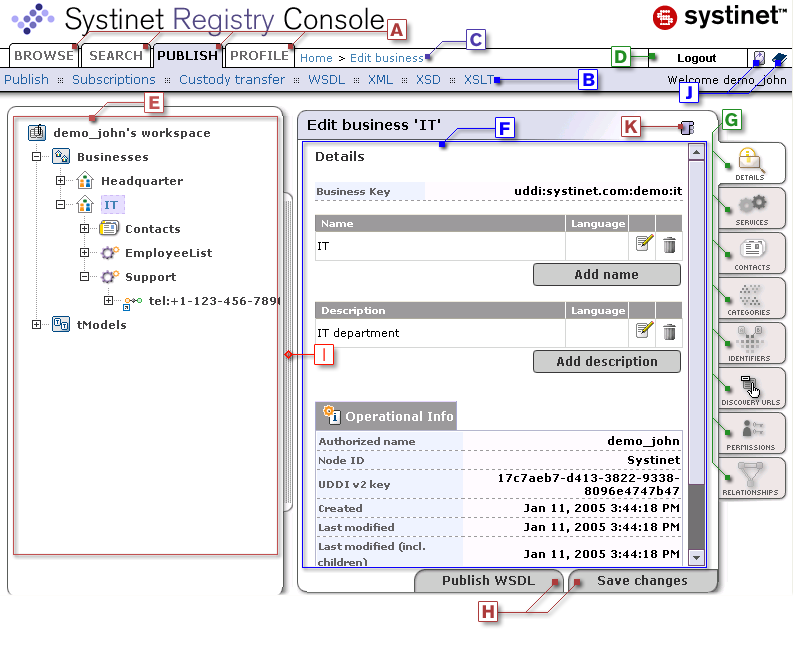
C: History path (breadcrumbs) This area displays the log of your recent actions. You can return to any of these previous actions by clicking on the hyperlinks.
D: User Actions This area contains several control elements that enable a user to:
Create an account
Log On
Log Out
E: Tree Display Area A tree of available objects displays whenever applicable. It is displayed when viewing a business entity and its child objects and when the user may want a hierarchical overview of the UDDI workspace (such as when publishing).
F: Main Display Area Information chosen from the tabs and the tree display is made available in the Main Display Area.
G: Display Tabs These tabs allow the user to control the main area's display based on information type. A plain listing of all business properties would be very long and very difficult to read. Dividing the properties into tabs reduces the amount of information and improves page readability. The displayed information changes with the context.
H: Action Buttons The action buttons allow you to perform operations on the contents of the main display.
I: Resizing Bar This feature includes several enhancements to common web-based GUIs. If the content is too wide, you can drag and resize the tree window to fit all contents. The scrolling logic also applies to the main display area and makes it possible to keep all control elements of the interface on screen in any situation.
J: Action Icons There are two icons in this area. The first one allows you to refresh the page content, second one will open the product documentation page.
K: Action Icons Icons from this area allow you to switch on/off display tabs and open the current page in the printer friendly mode.
L: Context Menu The context menu displayed in Figure 48 is available by right mouse click on a node's icon in the tree display area.
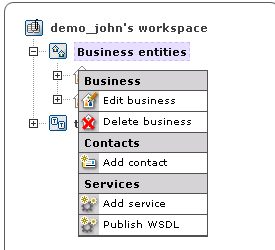
For more information, please see Figure 47.
User Profile Locate
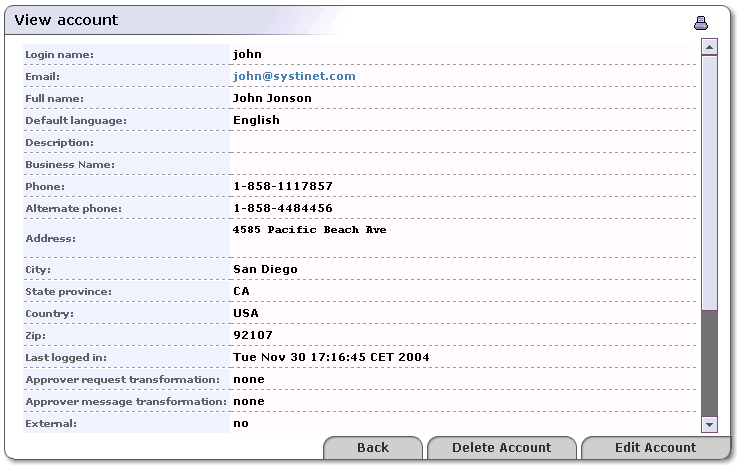
You can manage your user account, user groups, and favorite taxonomies under the Profile menu tab.

To update your account properties, select My account and click the Edit Account button
Field descriptions (self-explanatory fields are omitted):
- Default Language Code
Set the default language code. Used when publishing, it is the language code associated with a particular field when the language is not specified.
- Use the following profile
Profile preference - Select your preferred predefined user profile from this drop down list
To maintain user groups, click the Groups link. From the Groups screen, you can:
Create and manage your own groups
Manage group membership
Create and Manage Groups Locate
To create a new group:
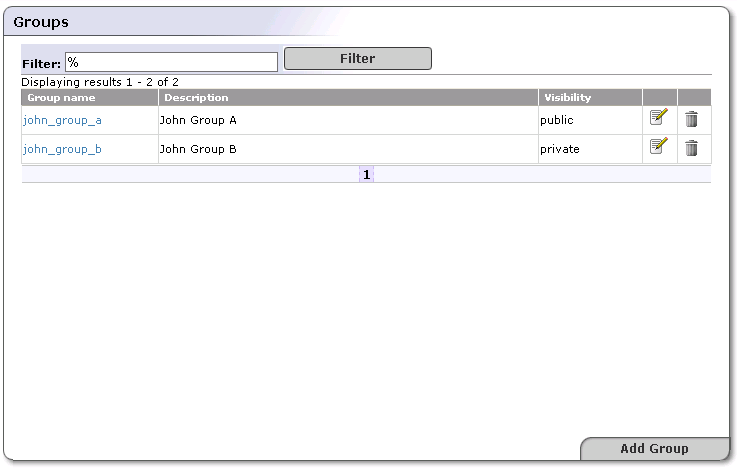
Click on the Profile menu tab, and select the Groups link. This returns the Group list shown in Figure 51.
Click the Add Group button.
In the edit box labeled Group name, type the name of your group.
Use the radio buttons labeled public and private to establish whether this group should be visible to all members (public) or visible only to the group owner (private).
Click Filter to display a list of the registry's users.
Check the boxes for all members you wish to include, then click the right-pointing arrow to move them to the Group members table.
Once users are added, click Save Group to update BEA AquaLogic Service Registry

Manage Group Membership Locate
To add or remove members from a group:
favorite Taxonomies Locate
You can manage your favorite taxonomies under the Profile tab. You can define which taxonomies will be present in the list of your favorite taxonomies. Favorite taxonomies help you to search and categorize UDDI entities.
To manage your list of favorite taxonomies:
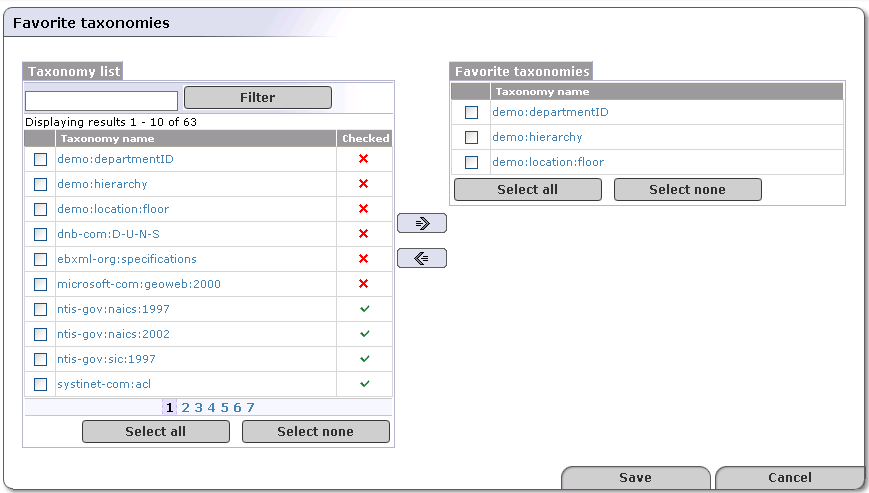
Click on the Profile menu tab. Click on the favorite taxonomies link. This returns the list of your favorite taxonomies shown in Figure 53.
Click Filter to search taxonomies by name.
Check the boxes for all taxonomies you wish to include, and click the right-pointing arrow to copy them to the favorite taxonomies table.
Once taxonomies are added, click the Save button to update the registry.
Browsing Locate
In this section, we will show you how to browse taxonomy structures to discover UDDI entities categorized or identified by taxonomies. You can also define a taxonomy filter and put your search criteria to a query. We present a demo data set that is installed with BEA AquaLogic Service Registry. This demonstration set is designed to help familiarize you with the registry.
To browse taxonomies and UDDI entities:
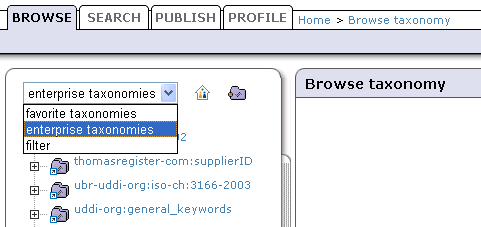
Click on the Taxonomies link under the Browse main menu tab.
The page shown in Figure 54 will appear.
On this page, you can use the drop down list to switch the taxonomy list to favorite taxonomies, enterprise taxonomies, and a defined filter.
| Note |
|---|---|
The favorite taxonomies option appears in the drop down list only if your list of favorite taxonomies is not empty. To add a taxonomy to your favorites, follow the direction in favorite Taxonomies. The list of enterprise taxonomies is defined by an administrator. For more information, see Taxonomy Management in the Administrator's guide. | |
Initially, the filter contains all taxonomies except system taxonomies. Icons next to the drop down list serve to show/hide categorized entities, and show all/suppress empty categories.
Drill down through the taxonomy tree to see all taxonomy categories. Those with sub-categories can be expanded and collapsed.
When you browse internally checked taxonomies you can see their value set to see UDDI entities categorized by these key values. For unchecked or externally checked taxonomies, you can search UDDI entities by key values. We will show you how to browse an unchecked taxonomy from the demo data.
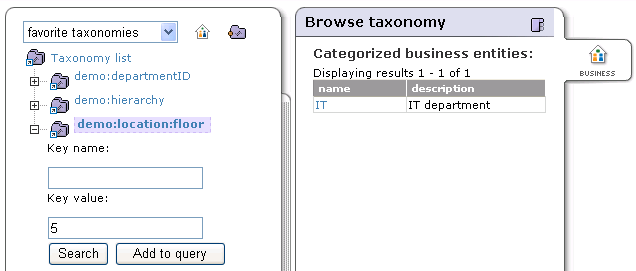
To browse the demo data using demo:location:floor taxonomy:
Switch the drop down list shown in Figure 54 to the filter option.
Click on the demo:location:floor taxonomy. Expand the taxonomy by clicking on the plus sign in front of the taxonomy name. The key name and key value field pair appears.
Enter key value as 5, then click Search button.
You will get a list of UDDI entities categorized by this taxonomy with matching key value (IT in this case) as shown in Figure 55.
You can also add this search criterion to a query.
Define Filter Locate
You can reduce the number of taxonomies in the taxonomy list by defining a taxonomy filter. To switch from taxonomy browsing to filter definition, click on the filter link in the lower left corner. The page shown in Figure 56 will appear.
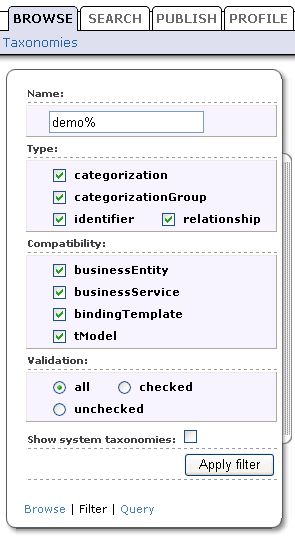
You can filter taxonomies by name using the wild card characters % and _. You can specify taxonomy type, compatibility, and a validation type. Once you define the filter criteria, click Apply filter. This will return you to the browse taxonomy page.
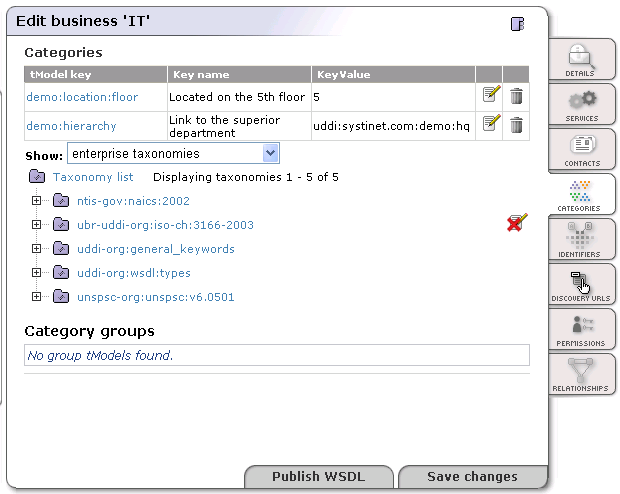
Define Query Locate
You can also combine search criteria in a query. To add a search criterion to a query, use the button Add to query shown in Figure 55. Then, you can expand another taxonomy and specify a new criterion. The page shown at Figure 57 presents the query displaying business entities located on the 5th floor (demo:location:floor taxonomy) having Headquarter department as the superior department (demo:hierarchy taxonomy).
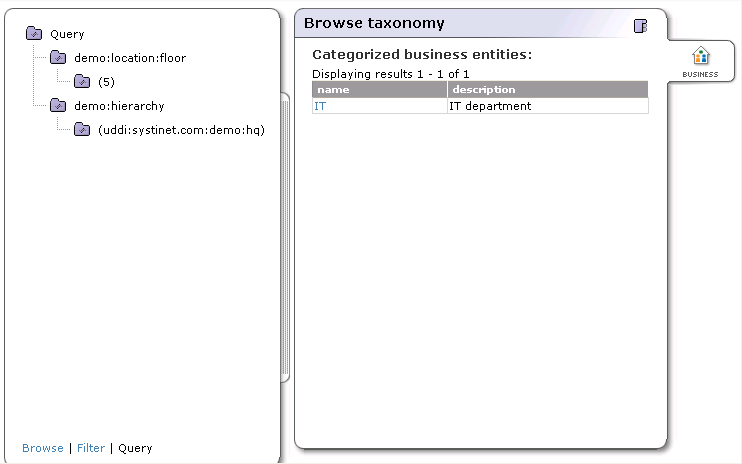
To remove a category from the query, right-click on the query and select remove from query from the context menu.
| Note |
|---|---|
The query definition is not persistent. Once you leave the Browse menu tab, the query will disappear. | |
Searching Locate
BEA AquaLogic Service Registry search function allows you to perform the following searches:
- Find UDDI data structures
You can search for business entities, services, bindings, and tModels using names and categories in combination with find qualifiers including range queries.
- Direct Get
You can retrieve data from BEA AquaLogic Service Registry when you know the key of the UDDI entity you want to retrieve.
- Find Resources
You can search for resources:
In the Search section, we present a demonstration data set that is installed with BEA AquaLogic Service Registry. This demonstration set is designed to help familiarize you with the registry.
| Note |
|---|---|
BEA AquaLogic Service Registry supports the use of wildcard characters. You can use both % and _. Use % in place of any number of characters and spaces. For example, if you wish to find all business beginning with A, type A%. Use the underscore wildcard (_) in place of any single character. For example, to find Dan or Dane, type Dan_. | |
See Find Business by Categories how to use range queries functionality.
Find Business Locate
In this section, we cover locating business entities using a number of different methods. You can locate business entities by:
Name
Categories
Identifiers
Discovery URL
tModel
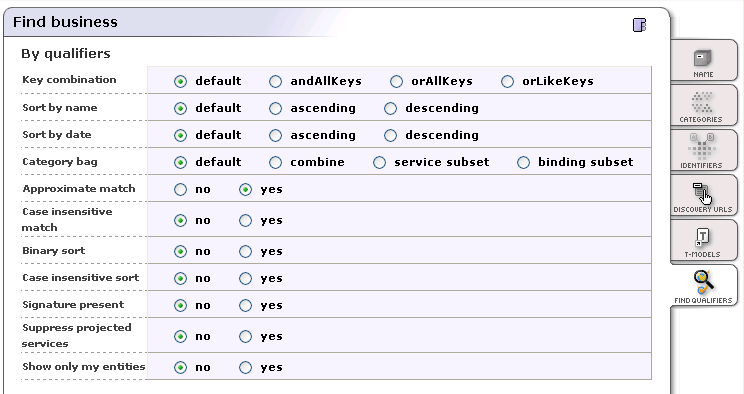
For each find method, you can specify qualifiers located on the Find Qualifiers tab of the Search panel.
Find Business by Name Locate
To find a business by name:
Under the main Search tab, click the Businesses link.
Click the Add Name button in the Search panel.
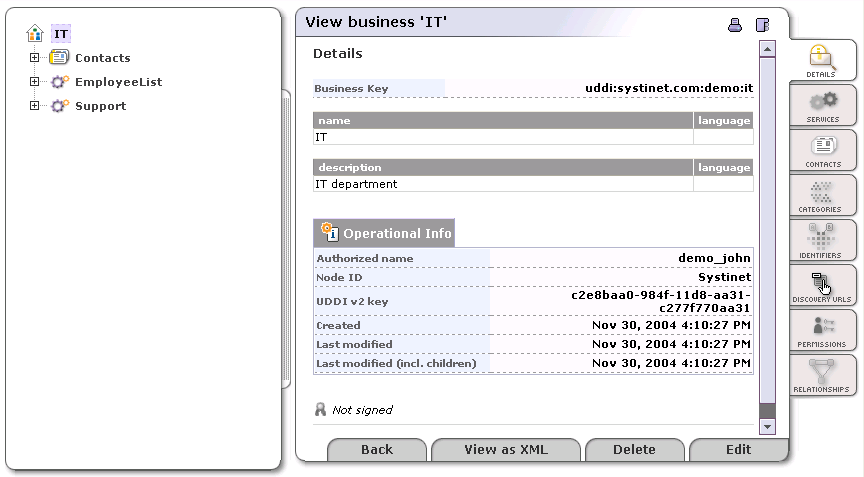
Type in the business name, such as IT from the pre-installed demo data. Then click the Find tab at the bottom right corner.
To see all businesses, type the wildcard % and click Find.
The search result will appear on the Results panel. Click on the link with the business name, this opens the page shown at Figure 59.
Find Business by Categories Locate
In this section we will show you how to search for business entities by categories. We will use demo data to demonstrate how to find all departments located on specific floors. Also, an example how to use range queries will be shown.
To find a business by category:
Under the main Search tab, click the Businesses link
Click the Categories tab, then click the Add category button. This returns a list of available taxonomies.
You can switch the Show drop down list from favorite taxonomies to see all taxonomies. To manage favorite taxonomies see User Profile.
Click on the desired taxonomy.
The taxonomy is shown as a tree; its sub-branches include categories.
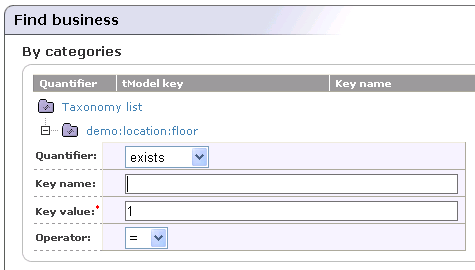
Select demo:location:floor from our demo data.
Now you can enter Key name and Key value.
Type 1 in the box labeled Key value and then click the Add category icon.
Once a category is added as your search criteria, click Find.
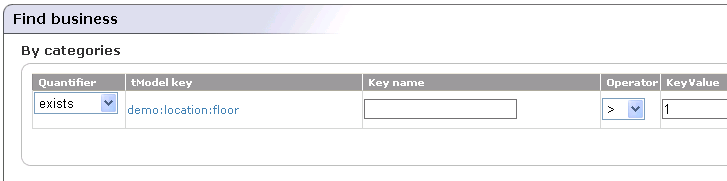
You will get the department with that is located on the first floor. If you want search for all departments located on higher floors you must use range queries functionality. We will continue with the previous search.
Click the tab Search to return to the Find business by categories page.
Click the Edit category icon. The page shown in Figure 61 is returned.
From the Operator drop down list, select the > operator, and click the Update icon.
Click Find. You will get all departments located higher than the first floor.
Find Business by Identifier Locate
In this section we will show you how to find a business entity by identifier. We will use demo data to demonstrate how to find departments by their department number identifiers.
To find a business by identifier:
Under the main Search tab, click the Businesses link
Click the Identifiers tab. Then click the Add identifier button. This returns a list of available taxonomies.
Click on the desired taxonomy
The taxonomy is shown as a tree with its sub-branches including categories.
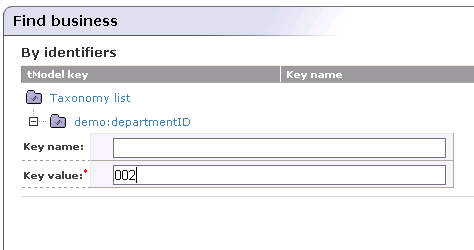
Select demo:departmentID from the demo data.
Now you can enter Key name and Key value.
Type 002 in the box labeled Key value, and click Add identifier.
Once the Identifier is added as your search criteria, click Find.
Find Business by Discovery URL Locate
To find a business entity by discovery URL:
Under the main Search tab, click the Businesses link.
Select the Discovery URLs tab.
Type in the discovery URL and click Find.
Find Services Locate
You can find services using a number of different methods including by:
Name
Category
tModel
Search principles for finding services are the similar to those used for finding business entities.
Find Binding Locate
You can find bindings using a number of different methods including by:
Parent service
Category
tModel
The search principles for finding bindings are similar to those used for finding business entities.
Find tModel Locate
You can find tModels using a number of different methods including by:
Name
Category
Identifiers
The search principles for finding tModels are similar to those used for finding business entities.
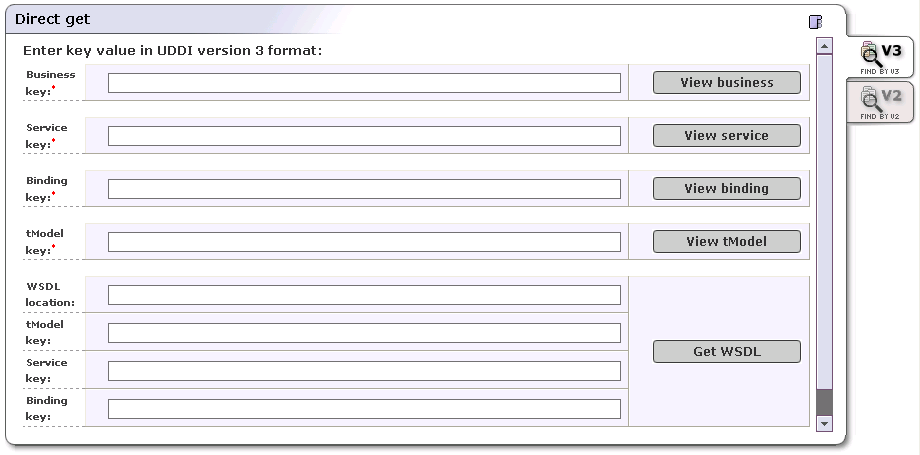
Direct Get Locate
You can also use Direct get from the Search menu tab to retrieve data from BEA AquaLogic Service Registry when you know the key of the UDDI structure you want to retrieve. BEA AquaLogic Service Registry allows you to specify keys for both UDDI version 2 and UDDI version 3. Click the Find by v2 tab if you want to search using UDDI v2 keys.
Direct Get of XML Structures Locate
You can also acquire the XML form of businesses, services, bindings, and tModels for use in automated processing by entering the key of the structure into a URI.
The form of the URI is:
http://<hostname>:<port>/uddi/web/directGetXml?<structureKey>=<key>
URI Examples Note that UDDI v3 is assumed by default.
http://localhost:8080/uddi/web/directGetXml?businessKey=uddi:systinet.com:uddinodebusinessKey
http://localhost:8080/uddi/web/directGetXml?serviceKey=..
http://localhost:8080/uddi/web/directGetXml?bindingKey=..
http://localhost:8080/uddi/web/directGetXml?tModelKey=..
Example with Login This URI includes username and password.
https://localhost:8080/uddi/web/directGetXml?businessKey=uddi:systinet.com:uddinodebusinessKey&userName=admin&password=changeit
Example with UDDI Version Specification Use this format when getting information associated with v1 and v2 structures.
http://localhost:8080/uddi/web/directGetXml?businessKey=8f3033d0-c22f-11d5-b84b-cc663ab09294&version=2
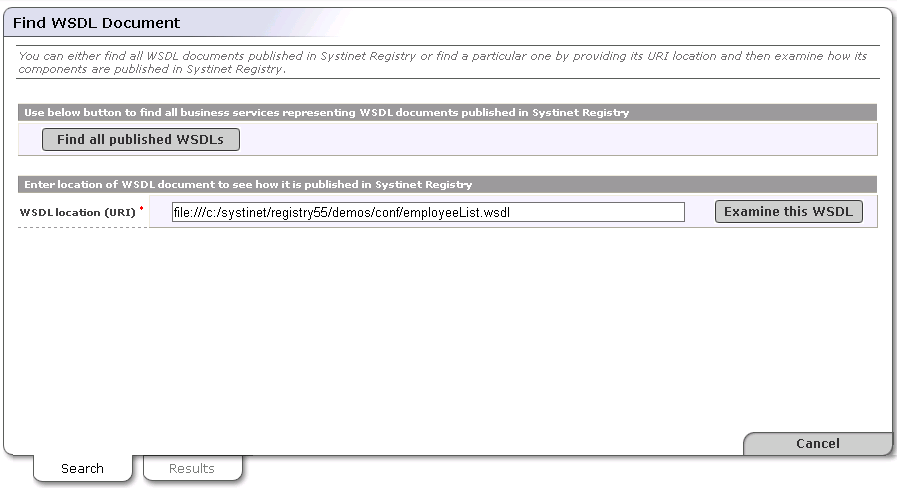
Find WSDL Locate
You can find all WSDL documents published in BEA AquaLogic Service Registry. When you supply the WSDL location URI, you can review how artifacts of the WSDL document are published in BEA AquaLogic Service Registry. The following criteria: a WSDL document location, a tModel key, a business service key, and a binding template key can be used. To search for a WSDL document in BEA AquaLogic Service Registry:
Select the Search menu tab and click the WSDL link. The page shown in Figure 64 will appear.
Click the Find all published WSDLs button, or
Enter WSDL location URI , then click Examine this WSDL button.
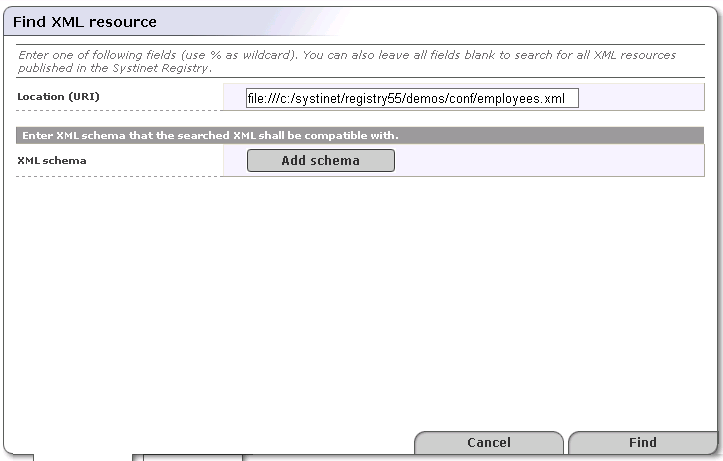
Find XML Locate
You can search for an XML document in BEA AquaLogic Service Registry according to location URI of the XML document.
To search an XML document:
Select the Search menu tab and click the XML link. The page shown in Figure 65 will appear.
Enter a location and click Find.
Find XSD Locate
You can search for an XML Schema in BEA AquaLogic Service Registry according to location URI of the XML document.
To search an XML document:
Select the Search menu tab and click the XSD link. The page shown in Figure 66 will appear.
You can search by the location of the XML Schema document, namespaces, and by xsd:elements and xsd:types defined in the XML Schema document. Once you specify the search criteria, click Find.

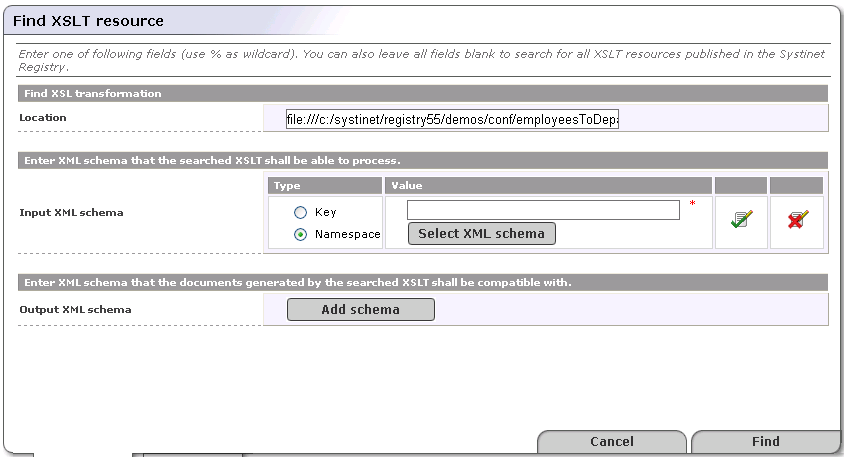
Find XSLT Locate
To search an XSL transformation:
Select the Publish menu tab and click the XML link. The page shown in Figure 67 will appear.
You can enter the location of the XSLT. You can also search according to input and output XML schemas Search criteria for an XML schemas can be specified by tModel key or namespace. If you click on Select XML Schema you can specify additional criteria for the XML Schema, then select an XML Schema from the XML Schema list.
Before you click Find, click the Update icon if you specified to be search according to an XML Schema.
Publishing Locate
Publishing in BEA AquaLogic Service Registry has several components:
Publish UDDI core structures:
Publishing Assertions - Asserting relationships between business entities.
Publishing Subscriptions - Subscribing interest in receiving alerts regarding changes made to a registry.
Publish Custody Transfer - Transferring ownership of selected UDDI structures.
Publish Resources
Publishing WSDL Documents - Publishing Web Services Description Language documents (WSDL) to BEA AquaLogic Service Registry.
Publish XML - Publishing XML Documents.
Publish XSD - Publishing XML Schema Definition (XSD) Documents.
Publish XSLT - Publishing Extensible Stylesheet Language Transformation (XSLT) Documents.
| Note |
|---|---|
You must be logged into BEA AquaLogic Service Registry to publish to it. There is a limitation of how many UDDI structures a user can store. See Administrator's Guide, Account Limits | |
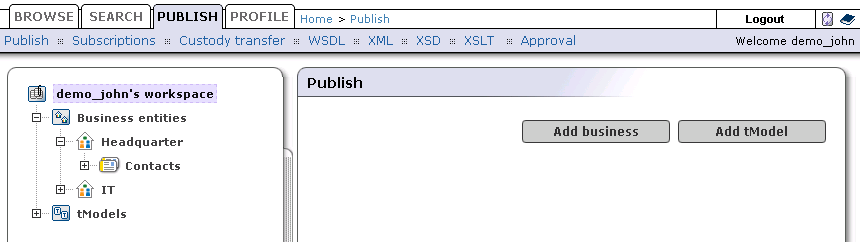
The main Publish page is divided into two panels. The left panel displays UDDI data structures that belong to the logged-in user or to which this user has access permissions. The panel on the right displays details about the data structure selected in the left panel. As you can see, if no structures are selected, buttons for adding businesses and tModels are displayed.

Publishing a Business Locate
This section explains how to publish a businessEntity and edit businessEntity-related structures:
Add business name and description
Add Contact
Add a Discovery URL
Add a Category
Add an Identifier
Add Business Services
Add Projected Services
Assert Business Relationships
To publish a business:
Click the Add Business button in the right-hand panel of the publish page, or select Add Business from the context menu that appears when you right-click the Business Entities node.
Enter the business name and a description, then click Add Business.
The business will appear in the left tree panel under the Business entities node
To edit a business entity:
Select the Publish menu tab.
Click the Publish link.
In the left tree panel, click on the business entity node you wish to edit.
After you modified the business entity, click the Save changes button.

Adding a Contact Locate
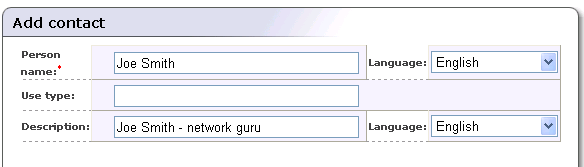
The contact structure provides you with a space where you can list the people associated with the business entity. It is comprised of six properties: name, phone, email, address, description, and use type.
It is recommended that you use the description field to give a brief explanation of how the contact should be used.
Use types can be used to indicate the expected way in which the contact should be used. For example, "New Franchises", "Sales contact", "Technical Questions".
To add a contact:
On the Contacts tab of the Edit business or View business page, click the Add contact button. This displays the Add contact page where you can specify the contact's name and use type, as shown in Figure 71:
Click Add contact.
Build your lists of information for descriptions, phone numbers, and addresses. Each collection page, with the exception of Address collection, functions in the same manner. Click the Add button for the element you want to add. You will see two or more edit fields to be completed.
Important Once the fields have been edited, you must click the Update icon on the right.
For addresses, click the Addresses tab. On this tab, add, edit, or delete existing address structures by clicking through the appropriate buttons.
When you add or edit an address, fill in the desired fields, add the data to your list, and click Update when finished.
Once you have updated all of the contact's information, click Save changes at the bottom of the Edit contact page. You will see the name and use type of your new contact entry in the contacts list.
Adding a Discovery URL Locate
To add a Discovery URL:
On the Edit business page click on the Add discovery URL button at the bottom of the Discovery URLs tab.
Complete the Discovery URL and Use Type edit fields with the relevant data.
When the fields are complete, click Update on the right to add this information to the list.
Click Save changes
Adding a Category Locate
With categories you can make your business more visible to searches by associating it with a number of accepted taxonomies. These taxonomic categories identify a business and its services by location, product or service line, and industry.
BEA AquaLogic Service Registry comes with keys for three basic checked taxonomies by default: These are the ISO 3166 geographical classification system and the NAICS and SIC industry and product classifications.
A key is also provided for Microsoft GeoWeb 2000, but as this is an unchecked taxonomy, key names and key values must be entered by hand.
To add a category to your list:
On the Categories tab of the Edit business page, click the Edit button. If there are already categories associated with this business entity, a list of them will be returned along with the Add category button. Otherwise, only the button will be displayed.
Click the Add category button beneath the Categories tab. This returns a list of available taxonomies from which you can choose categories to add to the list.
Click on an available taxonomy. Checked taxonomies will expand to a tree of categories valid for that model. You can type a known key name in the search box for faster retrieval. Note that larger branches are limited to ten items per page.
You can also search for the name of the taxonomy through the search box at the top of the taxonomy form. Use the starts with, contains, and exact match radio buttons as necessary. Like standard wild cards, these buttons search for the entered string as specified. For example, The pattern Cana, when used with the starts with button and a geographic taxonomy, returns the set {"Canada" "Canarias"}. The result set is limited to a maximum of 250 items.
Note If you provide too broad a search pattern, the resulting list will be truncated to 100 items.
With unchecked taxonomies (for example, Microsoft's GeoWeb taxonomy), it is possible to supply the key name and value through edit fields.
To add multiple categories, for example Albania and Armenia from the uddi-org:iso-ch:3166:1999 taxonomy, check the boxes to the right of those key names, and click Add category. If you would like to add categories from different pages, you must click Add category on the first page before continuing to the next page containing your selections. For example, to choose Albania and Kazakhstan:
Select Albania and click Add category.
Click Add category on the Find service page.
Click the link for page 8 on the expanded Find service page.
Check the box next to Kazakhstan and click Add category.
When you find the taxonomic classification you want, click the Add category button for checked taxonomies. For unchecked taxonomies, click Add category once the edit fields have been completed.
Adding an Identifier Locate
You can also make your organization more visible by supplying any of your public or private identifiers, such as D-U-N-S, Tax, or Geographical Locator numbers to the registry. UDDI identifier structures are composed of the following elements:
- tModel Key
Identifies a namespace or service in which the key name and key value have significance
- keyName
The name or description of the key being used
- keyValue
The value of the key
To add an identifier to your list:
On the Edit business page, switch to the Identifiers tab.
Click the Add identifier button at the bottom of the Identifiers list.
Choose the identifier type from the displayed list of available taxonomical tmodels. This returns a field in which you enter key names and key values.
When you have filled in the fields, click the Add identifier button to the right to add the new identifier to the list.
| Important |
|---|---|
If you use a tModel for a checked identifier, the key value must be of a recognizable form and value. For example, if you want to use a uddi-org:isReplacedBy key, you must supply the valid business entity UUID key in the keyValue field. Failure to do so will generate an error when you attempt to submit your business data to the database. | |
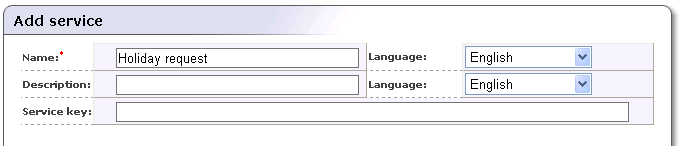
Publishing a Service Locate
To publish a service:
Select the Publish menu tab and click the Publish link
In the left panel, click on the business to which you want to add a service. The right display area will show business details.
Select the Services tab, and click the Add Service button.
Alternately, right-click on the business node to which you want to add a service, and select Add Service from the context menu.
Enter the service name and description and click Add service.
The service is added to the left panel tree.
Publishing a Binding Template Locate
Once you have declared and defined a business service, you must establish how current and potential business partners can access that service, a technical description of the service including where it can be found. This is accomplished through bindingTemplates.
A bindingTemplate represents a Web service instance where you obtain (among other things) the access point of an instance of the parent business service. Every bindingTemplate has a unique bindingKey for identification. (An access point contains contact information such as a URL, email address, or telephone number used to locate the service.)
The AccessPoint in a bindingTemplate structure can contain a URL of the endpoint of the web service. If there is more than one businessEntity that provides the same business service we recommend you reuse this information in a bindingTemplate. Create a bindingTemplate on the businessService that holds technical information. Other businessServices should contain bindingTemplates with accessPoints containing the key of the first technical bindingTemplate. These accessPoints should also contain useTypes with the value hostingRedirector.
| Note |
|---|---|
Alternatively, reference to another bindingTemplate can be stored in a hostingRedirector structure instead of in an accessPoint. However the hostingRedirector structure (not the hostingRedirector value of useType) is a relic of UDDI v2 and is deprecated in UDDI v3. | |
To add a bindingTemplate:
Select the Publish menu tab and click the Publish link
In the left panel, click on the service to which you want to add a binding. The right display area will show service details. Select the Bindings tab and click the Add Binding button.
Alternatively, right-click the service node to which you want to add a binding, and select Add Binding from the context menu.
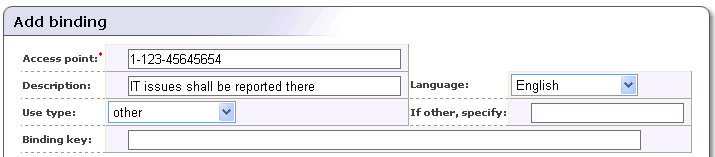
Publishing a tModel Locate
The tModel is a structure that takes the form of keyed metadata (data about data). In a general sense, the purpose of a tModel within BEA AquaLogic Service Registry is to provide a reference system based on abstraction. Among the roles that a tModel plays in UDDI is the ability to provide and to describe compliance with a specification or concept, to a taxonomy, for example.
To publish a tModel:
Select the Publish tab, and click the Publish link.
On the right Publish panel, click the Add tModel button.
Alternatively, right-click on the tModels node in the left panel and select Add tModel from the context menu.
Enter tModel name and description, and click the Add tModel button.
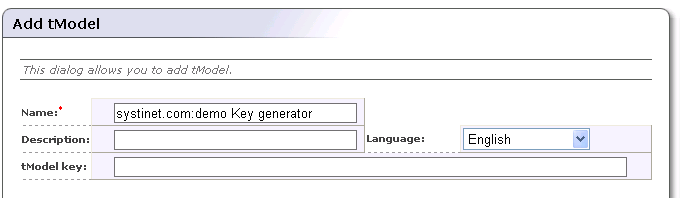
| Note |
|---|---|
If you delete an unused tModel, the tModel will be deleted from the database. The BEA AquaLogic Service Registry Administrator can change this behavior that tModels will be only marked as deleted. See Administrator's Guide, Node. | |
Adding a Category Locate
In this section we will show you how to assign demo:location:floor taxonomy to the numeric ordering as show at Figure 42.
Log on as demo_john user. ( password is the same as the username).
Click the Publish tab in the main menu. Click on the tModel demo:location:floor item in the tree in the left part of the page. Edit tModel 'demo:location:floor' page will appear.
Click Add category button. A taxonomy list will appear.
Select the taxonomy systinet-com:isOrderedBy, enter Key value uddi:systinet.com:comparator:numeric.
Click the button Add category , then Save changes button.
Publishing Assertions Locate
You can assert relationships that businesses under your BEA AquaLogic Service Registry custody have with others under your custody or with those under the custody of another user registered at the same operator node. The success of the latter assertion depends upon the approval of the user to whom the assertion is made.
When making an assertion you must supply:
The identity of the business from which the assertion is being made
The identity of the business to which it is making a claim. BEA AquaLogic Service Registry specifies these business identities through their UUID keys.
A reference explaining the nature of the relationship. References about the nature of the asserted relationship are derived from your own tModels or from the uddi-org:relationships tModel.
Adding an Assertion Locate
To add a new assertion:
On the Edit business panel, switch to the Relationships tab. This displays the Relationship assertions page. If you have already set assertions you will see a list of those previously published. If not, you will see the message "No assertions found."
Click the Add new assertion button to display the Add assertion page shown in Figure 76.
If the business for which you are making an assertion will assume the "To" role, click the Change Direction button.
Find the business with which you want to assert a relationship in the same way you would on the inquiry side of UDDI. The difference is that, along with the business name, you will see the business descriptions in the retrieved record set and a Select business key icon next to each record.
When you locate the target business among the records, click its Select business key icon. This returns you to the Add assertion page with the UUID key of the selected business as the previously missing role.
Important A Keyed Reference will be required for the assertion to be valid. Click the Set button on the right of the Keyed Reference line. The Set keyed reference page displays.
Locate a tModel for your reference in the same way you would on the inquiry side of UDDI. The difference is that there are edit fields for Key Names and Key Values next to the tModel names and a Set button at the end of each row. Pertinent tModels include uddi-orgs:relationship and those you have published yourself.
Enter the key value and the key name or description. For uddi-orgs:relationship, the key value may be parent-child, peer-peer, or identity.
Click the Set value. This returns you to the Add assertion page. The tModel, key name, and key value added to the Keyed Reference record are displayed there.
Click the Add assertion button.
If the assertion is made to a business of which you have custody, the assertion will be completed automatically. If it is made to a business in the custody of another user, that user will need to review the assertion and complete it through his or her own account. This process is described below.
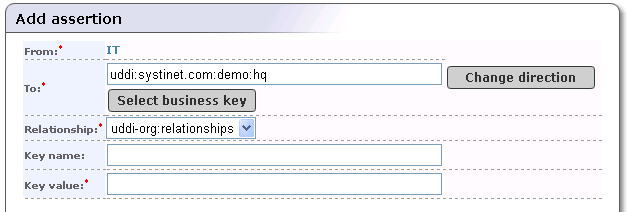
Accepting an Assertion Locate
Assume that you have been notified by a parent company, a subsidiary, a peer, or a cooperative member that they have asserted a relationship with your company. Now you must review that assertion and, if you are in agreement, complete it.
To accept the assertion:
On the Edit business page, switch to the Relationships tab.
View the incomplete assertions made toward your business in the Requested assertions list. Each assertion will have a Complete assertion button next to its status message.
Click the Complete assertion button to accept the assertion.
If you wish to refuse, leave the assertion incomplete by omitting step 3. Return to the Publisher assertions page by clicking the link at the top of the page. Contact the business making the assertion to resolve the details of your relationship. Incomplete assertions will not appear when users query for related businesses.
Publishing Subscriptions Locate
Subscriptions give you the ability to register interest in receiving information about changes made to BEA AquaLogic Service Registry. It allows the monitoring of new, changed, and deleted UDDI structures. Each subscription has a filter that limits the subscription scope to a subset of registry entities.
You can establish a subscription based on a specific query or set of entities in which you are interested. Query-based subscriptions notify the user if the result set changes within a given time span; entity-based subscriptions notify the user if the contents of the specified entities change.
Subscriptions enable:
notification of the registration of new businesses or services
monitoring of existing businesses or services
acquiring registry information for use in a private registry
acquiring data for use in a marketplace or portal registry
This filter should be one of the following ordinary UDDI inquiry calls:
find_business
find_relatedBusinesses
find_service
find_binding
find_tModel
get_businessDetail
get_serviceDetail
get_bindingDetail
get_tModelDetail
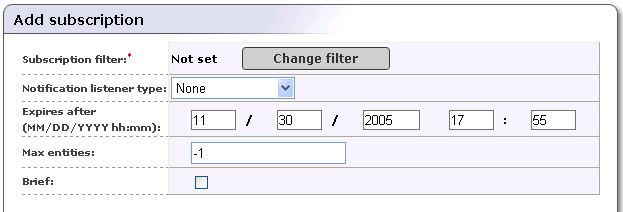
Adding Subscriptions Locate
To add new subscription:
Click on the Subscriptions link under the Publish menu tab to display the Subscriptions page.
Click the Add subscription button to display the Add subscriptions page shown in Figure 77.
Click Change filter to specify a filter for your subscriptions. This returns the Subscription filter type page.
Select the filter type from the drop down list labeled Subscription filter type.
Click Select filter.
Set the filter properties in the same way you would for ordinary search calls.
Click the Preview results button to check filter results.
Click Save filter to return to the page with the filter settings shown in Figure 77.
Fill in the other subscription fields if needed. These are described below.
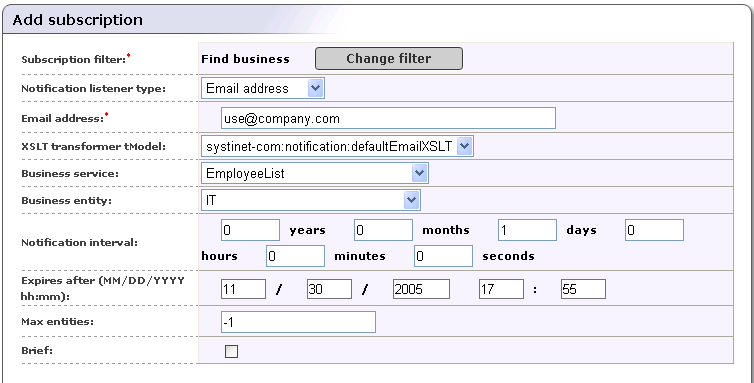
Subscription filter - Specifies on which UDDI structure change the notification will occur.
Notification listener type - Select notification listener type
Email address
Service endpoint
Binding template
Email address - Email address to which notifications will be sent
XSLT transformer tModel - tModel that references XSLT
Business service and Business entity - Business service and business entity to which the bindingTemplate representing the notification listener service will be saved. These drop down lists lists only business entities and business services under which you have the permission to create the binding template.
Notification interval - Specifies how often change notifications are to be provided to a subscriber. Required only for asynchronous notifications.
Expires after - Specifies the period of time for which the administrator would like the subscription to exist.
Max entities - Contains the maximum number of entities in a notification returned to a subscription listener.
Brief - Controls the level of detail returned to a subscription listener.
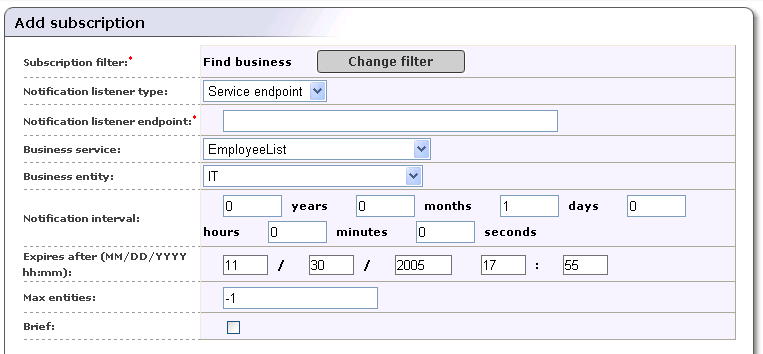
Subscription filter - Specifies on which UDDI structure change the notification will occur.
Notification listener type - Select notification listener type here.
Email address
Service endpoint
Binding template
Notification listener endpoint - URL to which the notification will be sent
Business service and Business entity - business service and business entity to which the bindingTemplate representing the notification listener service will be saved. These drop down lists lists only business entities and business services under which you have the permission to create the binding template.
Notification interval - Specifies how often change notifications are to be provided to a subscriber. Required only for asynchronous notifications.
Expires after - Specifies the period of time for which the administrator would like the subscription to exist.
Max entities - Contains the maximum number of entities in a notification returned to a subscription listener.
Brief - Controls the level of detail returned to a subscription listener.
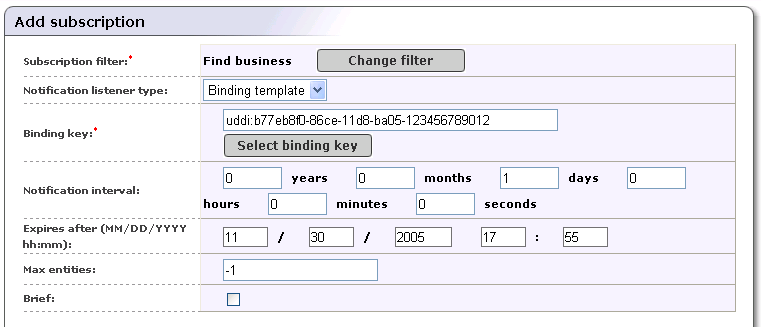
Subscription filter - Specifies on which UDDI structure change the notification will occur.
Notification listener type - Select notification listener type here.
Email address
Service endpoint
Binding template
Binding Template - The bindingTemplate representing the notification listener service.
Notification interval - Specifies how often change notifications are to be provided to a subscriber. Required only for asynchronous notifications.
Expires after - Specifies the period of time for which the administrator would like the subscription to exist.
Max entities - Contains the maximum number of entities in a notification returned to a subscription listener.
Brief - Controls the level of detail returned to a subscription listener.
Editing Subscriptions Locate
To edit an existing subscription:
Click on the Subscriptions link under Publish menu tab to display the Subscriptions page.
Click the Edit button beside the subscription you want to edit. This returns the Edit subscription page. Here you can edit all subscription arguments except Subscription filter.
Deleting Subscriptions Locate
To delete subscription:
Click on the Subscriptions link under Publish menu tab to display the Subscriptions page.
Check the boxes beside subscriptions you want to delete.
Click the Delete selected button. This returns a confirmation page.
The confirmation page contains a list of subscriptions marked for deletion. If it is correct, press the Yes button to delete subscriptions permanently.
Publish Custody Transfer Locate
Custody transfer is a service used to transfer ownership of a selected structure (business entity, business service, binding template or tModel) from one user to another. It consists of two steps: selecting structure(s) to transfer and generating a custody transfer token. When the potential new owner receives the transfer token (by a secure transport such as encrypted email), that user may accept or reject the custody transfer.
| Important |
|---|---|
This token must be kept secret, as it is sufficient information to transfer custody of the structure to any user! | |
If you decide to cancel the request (for example the transfer token has been compromised), use the Discard transfer token button.
Requesting Custody Transfer Locate
To request custody transfer:
Click on the Custody link under Publish menu tab to display the Custody transfer page.
Click the Request transfer token link. This returns a list of UDDI data structures you own.
Check the box next to the UDDI structure(s) you wish to transfer, and click Request transfer token.
The next page will generate the transfer token. Copy the text of the transfer token to a file and send this file to the user who shall become the new owner of selected structures. Keep the token secret, as anyone who knows it can use it to transfer custody of that structure. Unencrypted email, for example, is not good data transfer choice.
Accepting Custody Transfer Locate
To accept custody transfer:
Click on the Custody link under Publish menu tab to display the Custody transfer page.
Click on the Transfer custody link.
Open the file with the transfer token, copy its contents to clipboard and paste it to the edit area on the Transfer structures page.
Click Transfer button.
Publishing WSDL Documents Locate
BEA AquaLogic Service Registry WSDL to UDDI (WSDL2UDDI) mapping is compliant with OASIS's technical note Using WSDL in a UDDI registry Version 2.0. It enables the automatic publishing of WSDL documents into UDDI, enables precise and flexible UDDI queries based on specific WSDL artifacts and metadata, and provides a consistent mapping for UDDI v2.
Publish WSDL Locate
To publish a WSDL document:
Click on the WSDL link under the Publish main menu tab.
The page shown at Figure 81 will appear.
Enter the Business key of the business where services from WSDL document will be published. You can find a business key when you click on the Find business key button.
Enter a WSDL location. You can try the WSDL document from BEA AquaLogic Service Registry demos from REGISTRY_HOME/demos/conf/employeeList.wsdl.
Leave the Advanced mode check box unchecked, then click Publish button.
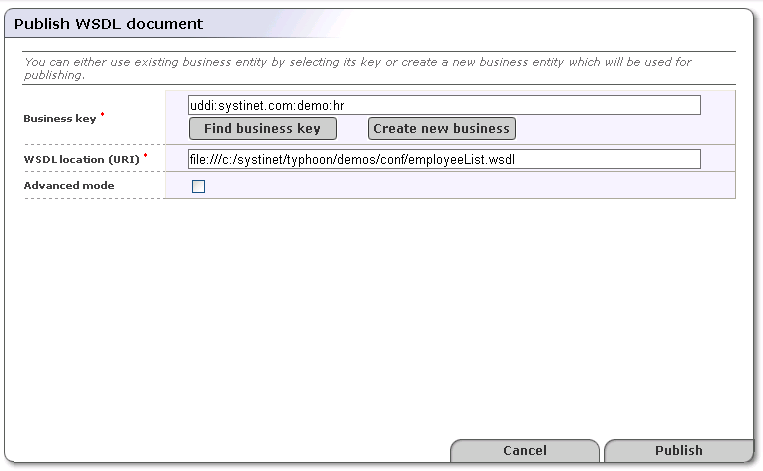
The WSDL document will be published to BEA AquaLogic Service Registry. You can review how WSDL artifacts of the document have been mapped to BEA AquaLogic Service Registry at Figure 82.
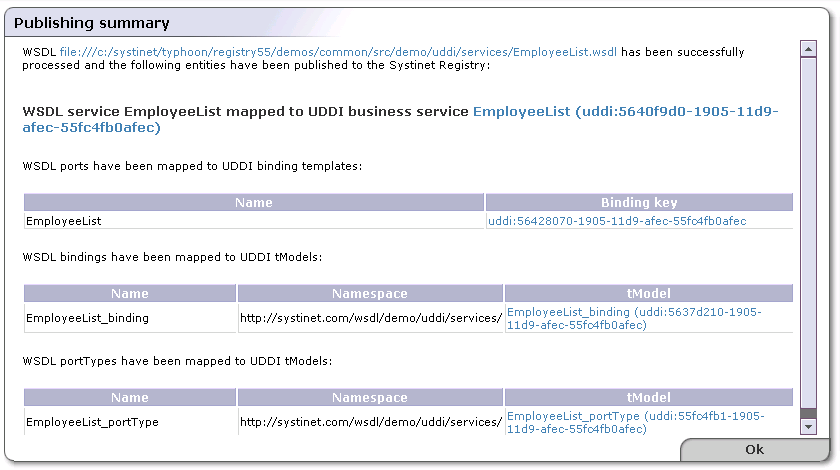
Publishing WSDL Documents (Advanced Mode) Locate
The advanced publishing mode allows you to specify certain details of how the WSDL document will be mapped to the UDDI registry. To publish in this mode, follow the steps from the previous section, and toggle the Advanced mode check box on. Once you click on the button Publish the Advanced Mode Publish page shown in Figure 83 will appear.
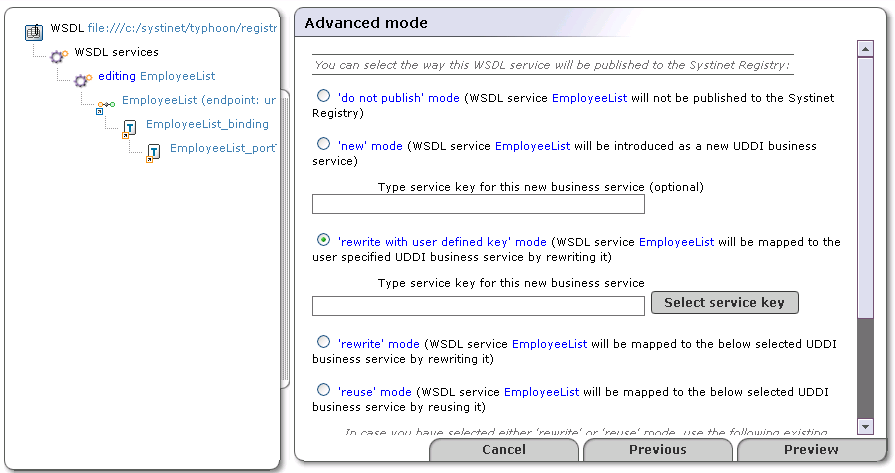
In the left tree panel, you can see how artifacts of the WSDL document will be published. Click on a tree branch to edit how WSDL artifacts will be mapped to BEA AquaLogic Service Registry. Explanatory instructions in the right panel describe the mapping options. Click Preview to see how each part of the WSDL document will be mapped to the registry. From the Preview page, you can go back to adjust the WSDL mapping.
The wizard shown in Figure 83 defaults mapping according to the following rules:
If a possible mapping of a WSDL artifact already exists in the registry, and the user owns this UDDI structure, the wizard will suggest rewriting that mapping in the registry.
If a possible mapping of a WSDL artifact already exists in the registry, and the user does not own this UDDI structure, the wizard will suggest reusing that UDDI entity.
If no mapping of the WSDL artifact exists in the registry, the wizard will suggest creating a new UDDI entity to represent the mapping.
BEA AquaLogic Service Registry applies these rules automatically when you publish a WSDL document without the Advanced mode option.
| Note |
|---|---|
Publishing of WSDL operations and WSDL messages is not implemented in this BEA AquaLogic Service Registry release. | |
Unpublish WSDL Locate
To unpublish a WSDL definition:
Search for the WSDL document in the registry.
In the result view, click on a business service.
The page with business service details will appear, click the Unpublish button at the page.
The Unpublish WSDL document wizard will appear.
Publish XML Locate
BEA AquaLogic Service Registry XML to UDDI (XML2UDDI) mapping enables the automatic publishing of XML documents into UDDI, enabling precise and flexible UDDI queries based on specific XML artifacts and metadata
If you want to unpublish an XML document, use the Find XML button, then click the Unpublish button in the search result page.
Publishing an XML Document Locate
To publish an XML document:
Click on the XML link under the Publish main menu tab.
The page shown in Figure 84 will appear.
Enter an XML location. To demonstrate, choose the file REGISTRY_HOME/demos/conf/employees.xml from the BEA AquaLogic Service Registry demos.
Leave the Advanced mode check box unchecked, and click Publish.
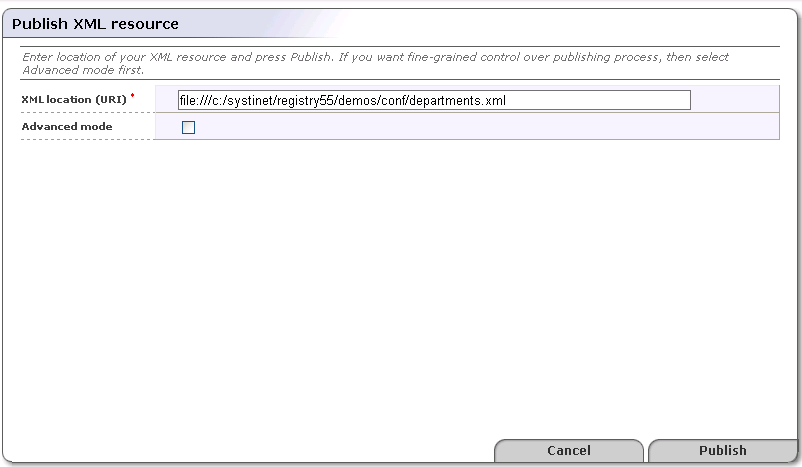
The XML document will be published to BEA AquaLogic Service Registry You can review how the XML document has been mapped to BEA AquaLogic Service Registry at Figure 85.
| Note |
|---|---|
The content of the XML document is not copied into the registry | |
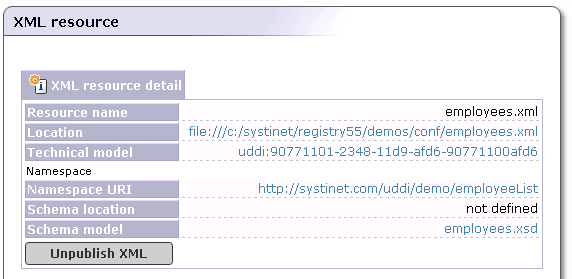
Publishing an XML Document - Advanced Mode Locate
The advanced publishing mode allows you to specify certain details of how the XML document will be mapped to the UDDI registry. To publish in this mode, follow the steps from the previous section, check the box labeled Advanced mode, and click Publish. This returns the Advanced Mode Publish page shown in Figure 86 will appear.
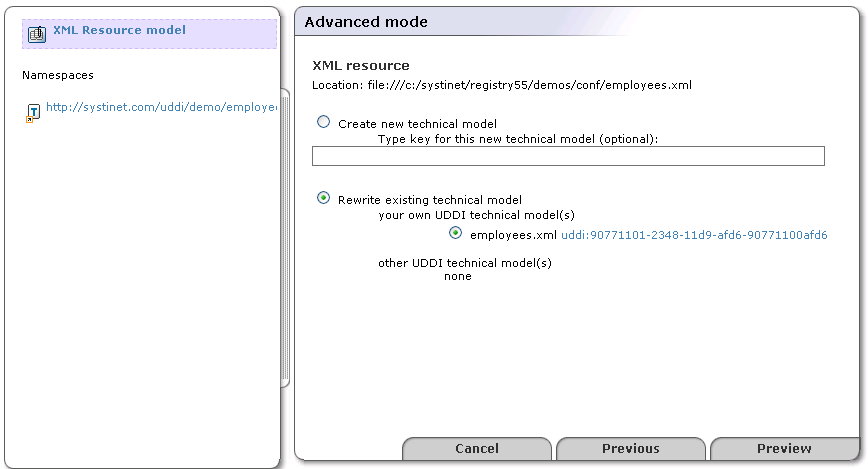
In the left tree panel, you can see how Namespaces of the XML document will be published. Click on a Namespace to edit how the Namespace will be mapped to BEA AquaLogic Service Registry. Explanatory instructions in the right panel describe the mapping options. Click Preview to see how the XML document and its Namespaces will be mapped to BEA AquaLogic Service Registry. From the Preview page, you can go back to edit the XML mapping.
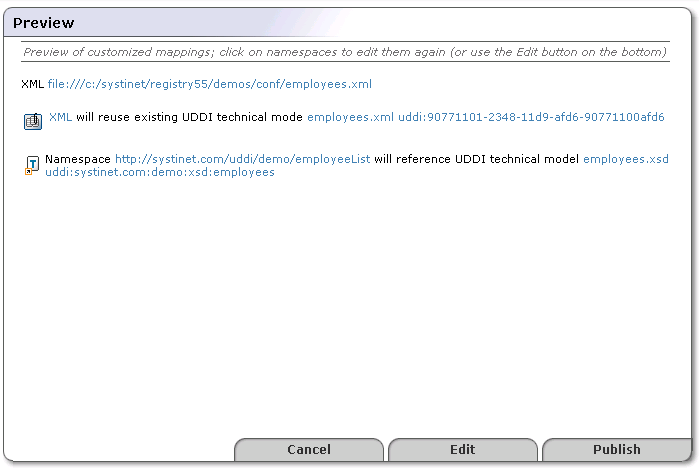
Unpublish an XML Document Locate
The Unpublish XML operation allows you to delete an XML mapping from BEA AquaLogic Service Registry To unpublish an XML document, you must search for the XML document first.
Publish XSD Locate
BEA AquaLogic Service Registry XSD to UDDI (XSD2UDDI) mapping enables the automatic publishing of XML schema documents into UDDI, enabling precise and flexible UDDI queries based on specific XML schema artifacts and metadata.
If you want to unpublish an XML schema document, use the Find XSD button and click the Unpublish button in the search result page.
Publishing an XML Schema Locate
To publish an XML Schema document:
Click on the XSD link under the Publish main menu tab.
The page shown in Figure 88 will appear.
Enter an XML Schema location. To demonstrate, use the file REGISTRY_HOME/demos/conf/employees.xsd from the BEA AquaLogic Service Registry demos.
Leave the Advanced mode check box unchecked, then click Publish.
The XML Schema document will be published to the registry. You can review mappings of the XML Schema document itself and its elements at Figure 89.
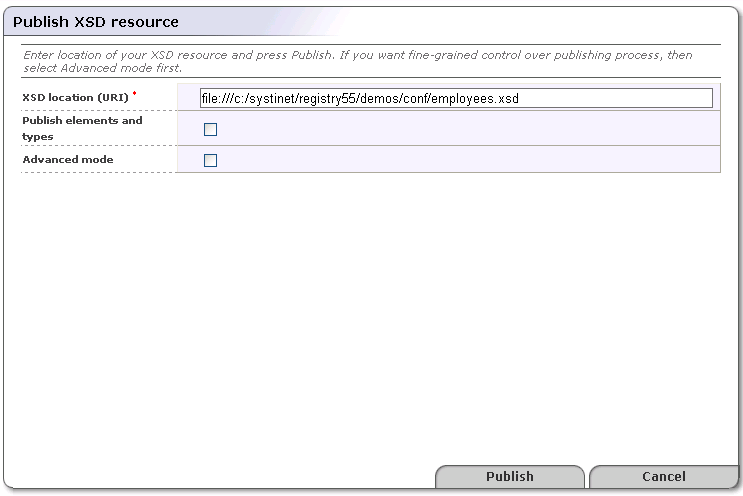
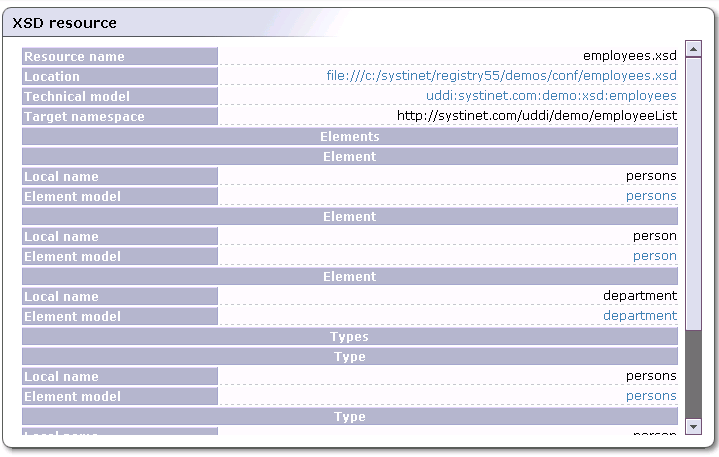
Publishing an XML Schema (Advanced Mode) Locate
The advanced publishing mode allows you to specify certain details of how the XML Schema document will be mapped to the UDDI registry. To publish in this mode:
Follow the steps from the previous section, but check the Advanced mode box
Click Publish. This returns the Advanced Mode Publish page shown in Figure 90.
In the left tree panel, you can see how the XML Schema and its possible XML Schema imports will be published. Click on an XML Schema model node to edit how the parts of the XML Schema will be mapped to the BEA AquaLogic Service Registry. The explanatory instructions in the right panel describe the mapping options.
Click the Preview to see how the XML Schema document will be mapped to BEA AquaLogic Service Registry. From the Preview page, you can go back to edit the XML Schema mapping.
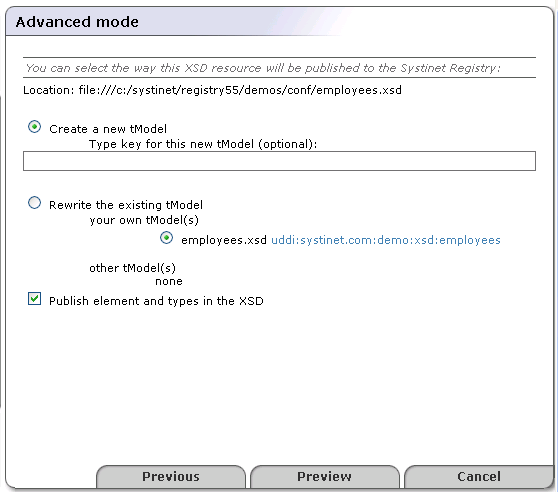
Unpublish an XML Schema Locate
The Unpublish XML operation allows you to delete the XML Schema mapping from BEA AquaLogic Service Registry. To unpublish an XML Schema document, you must search for the XML Schema document first.
Publish XSLT Locate
BEA AquaLogic Service Registry XSLT to UDDI (XSLT2UDDI) mapping enables the automatic publishing of XSL Transformations into UDDI, enabling precise and flexible UDDI queries based on specific XSLT artifacts and metadata.
If you want to unpublish an XSL transformation, click the Find XSLT button, then click the Unpublish button in the search result page.
Publishing an XSL Transformation Locate
To publish an XSL transformation:
Click on the XSLT link under the Publish main menu tab.
The page shown in Figure 91 will appear.
Enter an XSLT location. To demonstrate, use the REGISTRY_HOME/demos/conf/employeesToDepartments.xsl file from the BEA AquaLogic Service Registry demos.
Leave the Advanced mode check box unchecked, then click Publish.
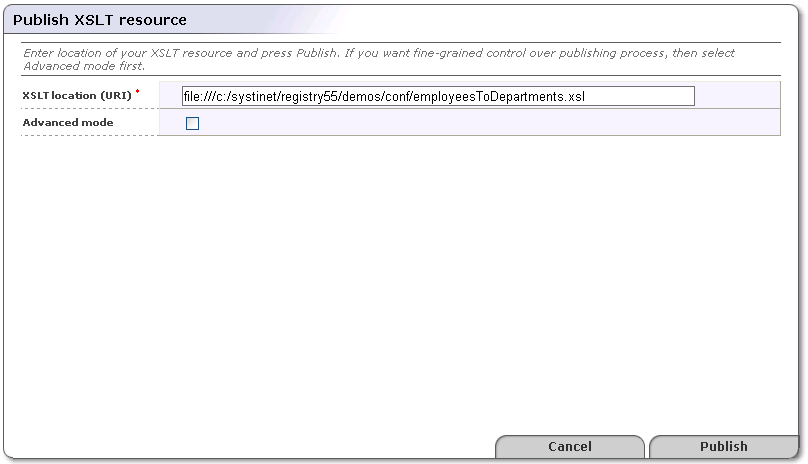
The XSL transformation will be published to BEA AquaLogic Service Registry. You can review how XSLT artifacts have been mapped to BEA AquaLogic Service Registry at Figure 92
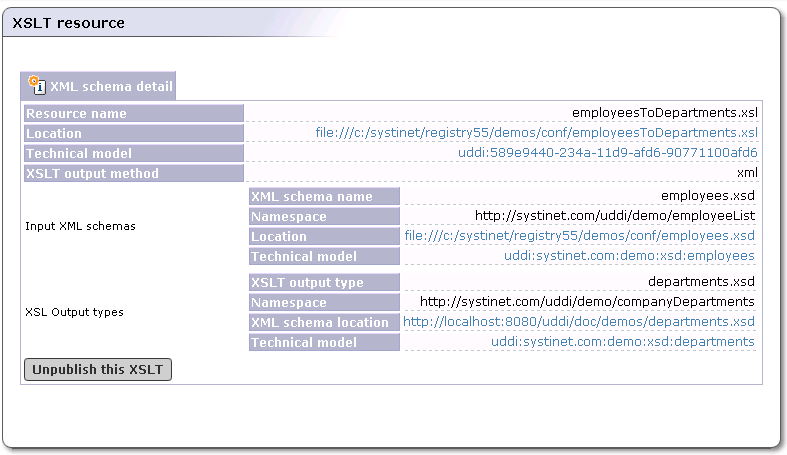
Publishing an XSL Transformation (Advanced Mode) Locate
The advanced publishing mode allows you to specify certain details of how the XSL transformation will be mapped to the UDDI registry. To publish in this mode:
Follow the steps from the previous section, but check the Advanced mode box.
Click Publish. This returns the Advanced Mode Publish page shown in Figure 86.
In the left tree panel, you can see how XSLT and its input and output schemas will be published.
Click on an XSLT node itself, its input XML Schemas, and types of XSLT output to edit how these artifacts will be mapped to BEA AquaLogic Service Registry. Explanatory instructions in the right panel describe the mapping options.
Click Preview to see how the XSLT will be mapped to BEA AquaLogic Service Registry. From the Preview page, you can go back to edit the mapping.
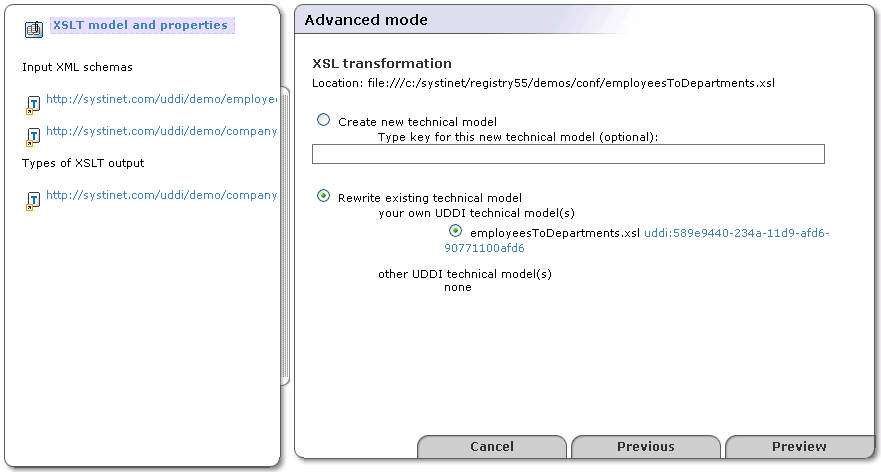
Signer Tool Locate
One of the most important advantages of UDDI version 3 is its support for digital signatures. Without signatures you cannot verify whether the publisher of a business entity is really who that publisher claims to be. But if the publisher has signed the UDDI structure, anyone can verify that the information is unmodified by any means (including by UDDI registry operators) and to confirm the publisher's identity.
The BEA AquaLogic Service Registry Signer tool simplifies signature manipulation. You can find this tool's script in the bin directory of your BEA AquaLogic Service Registry installation. The Signer is a graphical application that can be used to add, remove, and verify the signatures of UDDI structures you have published.
| Note |
|---|---|
If you are using IBM Java, you must install Bouncy Castle security provider. See Installation Guide, System Requirements | |
Starting the Signer Locate
To start the Signer tool, first ensure that BEA AquaLogic Service Registry is running, then execute the following script from the bin subdirectory of your BEA AquaLogic Service Registry installation:
Windows: signer.bat UNIX: ./signer.sh When the tool starts, you must first authenticate yourself against the selected UDDI version 3 registry. Simply provide your user name and password. If your registry is not running on a local machine, you must configure its endpoints. This can be accomplished via the Configure UDDI button.
On the returned screen, set the endpoints of the Security, Inquiry, and Publishing Web services. For help, ask the administrator of your registry.
Once you have entered your user name and password, click the Login button. The Signer tool will attempt to authorize you at the selected registry. If authorization fails, you can correct your login information. Once it succeeds, the Login dialog disappears and the Signer tool asks BEA AquaLogic Service Registry for your registered information (businessEntities and tModels that you have published).
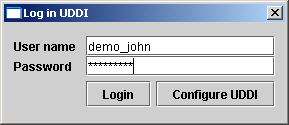
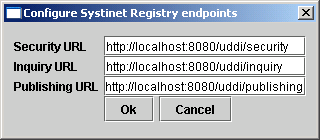
Main Screen Locate
In the Signer tool's interface, the left part of the main screen consists of a tree containing all your businessEntities and tModels. If you wish to add or remove a digital signature, select the structure to sign from this tree. The Signer will fetch it from the registry. When the structure is fetched, its XML representation is displayed in the right panel. The Sign button is unblocked. If the structure has been already signed, the Remove signatures button is unblocked as well.

The status bar at the bottom of the application informs the user of current action progress and results.
Sign Locate
To sign a UDDI structure, you must set up the Java keystore. Use JDK tool keytool to generate the keystore. Please, see your JDK documentation for more information how to use keytool. The Signer tool has been tested with keystores in JKS and PKCS12 formats.
| Note |
|---|---|
To generate the certificate issue the following command keytool -genkey -keyalg RSA -storetype JKS -alias demo_john -keystore test_certificate.jks Example of the dialog:
 Enter keystore password:  changeit
What is your first and last name?
  [Unknown]:  John Johnson
What is the name of your organizational unit?
  [Unknown]:  UDDI
What is the name of your organization?
  [Unknown]:  Myorg
What is the name of your City or Locality?
  [Unknown]:  San Diego
What is the name of your State or Province?
  [Unknown]:  California
What is the two-letter country code for this unit?
  [Unknown]:  CA
Is CN=John Johnson, OU=UDDI, O=Myorg, L=San Diego, ST=California, C=CA correct?
  [no]:  yes
Enter key password for <demo_john>
        (RETURN if same as keystore password):
| |
To sign a UDDI structure, you must set the Java keystore file, alias, and password as follows:
Click on the Sign button. This returns the Select identity dialog.
In the box labeled Select identity, type the path to the file with your Java keystore.
In the box labeled Alias, type the alias located in the identity.
In the box labeled Password, type the password used to encrypt the private key.
Important If you enter the wrong value for the alias or the password, the tool will not be able to open the identity.
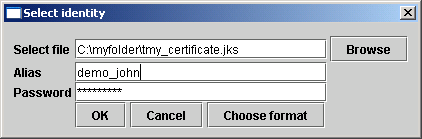
If the keystore is in the Sun JKS format, you do not have to click on Choose format button. You can leave default values there. If the keystore is not in the Sun JKS format, you can specify the format by clicking the Choose format button. In the returned dialog window, set the keystore format and its provider. For example, to use the PKCS12 format, set the format to PKCS12 and the provider to SunJSSE.
When the signing operation succeeds, the selected UDDI structure will have a digital signature and its XML representation will be updated. For security reasons, the signing process takes place on your computer so as not to risk compromise to your private key.
Finally the Publish changes and Remove signatures buttons are enabled.
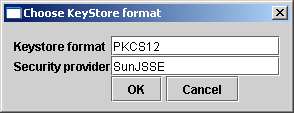
Validation Locate
The Validate button is used to perform validity check of UDDI structures that contain XML digital signatures. The result of this operation is displayed in the status bar.
Remove Signatures Locate
The Remove signatures button is used to remove all digital signatures from the selected UDDI structure. When this operation is complete, the XML representation of the UDDI structure is updated. If the Publish changes button had been disabled, it is enabled.
Publish Changes Locate
If you have signed the selected UDDI structure or removed digital signatures from it, you can select the Publish changes button to publish the changes to the registry. Its invocation uses standard UDDI publishing methods (save_tModel, etc.) to update this UDDI structure on the registry. The private key is not used during this operation.
Signer Configuration Locate
The Signer tool automatically remembers the actual configuration such as registry endpoints or keystore location and format. The config file is saved in the user's home directory with the name signer.conf. You can change the location (and filename) by using the signer script's -c option. If you do not want this feature, use -n. The list of valid options can be obtained with -h option.