


|

|
|
|
|
Installing WebLogic Java Adapter for Mainframe
After you have reviewed the Preparing to Install BEA WebLogic Java Adapter for Mainframe section, you are ready to begin installing WebLogic JAM. Instructions for installing WebLogic JAM are provided in the following sections:
Locating the Installation Files
Locate the installation files:
If you purchased WebLogic JAM, select the file that corresponds to your system. If you downloaded WebLogic JAM from the Web for evaluation, only the file you requested will be downloaded.
Installing the WebLogic JAM Gateway
Determine the platform on which you will install the WebLogic JAM Gateway. The Gateway can be installed in the following ways:
Graphical-mode installation is the graphics-based method of executing the BEA installation program. It can be run on Microsoft Windows and Unix systems.
To run Graphical-mode installation, the console attached to the machine on which you are installing the software must support a Java-based GUI. All consoles for Microsoft Windows systems support Java-based GUIs, but not all consoles for Unix systems do.
Console-mode installation is the text-based method of executing the BEA installation program. It can be run only on Unix systems and is intended for Unix systems with non-graphic consoles.
Installing the WebLogic JAM Gateway Using Graphical-Mode Installation
Graphical-mode installation of WebLogic JAM may be used on Microsoft Windows or Unix systems. This installation will install the WebLogic JAM Gateway and the files for the installation of the CRM.
Prepare to Install the WebLogic JAM Gateway
To prepare to install the WebLogic JAM Gateway using the graphical mode, complete the steps in the following section that correspond to your platform.
On Microsoft Windows Platforms
Prepare to install the WebLogic JAM Gateway on Microsoft Windows platforms by completing the following steps:
java -version
The java version will display. For example:
java version "1.3.1"
If the version displayed is lower than the required version, you will need to configure your PATH environment variable to use the required JDK that is installed with WebLogic Server.
If it does not, click Run from the Start menu. The Run window displays.
The InstallAnywhere screen displays. Continue with the installation of the WebLogic JAM Gateway by completing the steps in the Install WebLogic JAM Gateway section.
On Unix Platforms
Prepare to install the WebLogic JAM Gateway on Unix in graphical mode by completing the following steps:
> ls -1 /dev/cdrom
total 0
brw-rw-rw- 1 root sys 22, 0 April 14 10:55 c1b0t010
2. Set the JAVA_HOME and PATH environment variables. For example, if your BEA Home directory is /usr/bea and you are using the JDK installed in the BEA Home directory, then the environment variables should be set in the following way:
export JAVA_HOME=/usr/bea/jdk131
export PATH=/usr/bea/jdk131/bin:$PATH
3. If you are installing remotely (from a machine other than the one upon which you are installing WebLogic JAM), define the DISPLAY environment variable as follows:
export DISPLAY=xx.xx.xx.xx:0.0
xx.xx.xx.xx is the IP address of the machine from which you are installing.
Note: If you are installing remotely from Microsoft Windows, you must use an X-Windows terminal emulator.
4. Execute the installation program.
sh wljam50_Unix.bin
The InstallAnywhere screen displays. Continue with the installation of the WebLogic JAM Gateway by completing the steps in the Install WebLogic JAM Gateway section.
Install WebLogic JAM Gateway
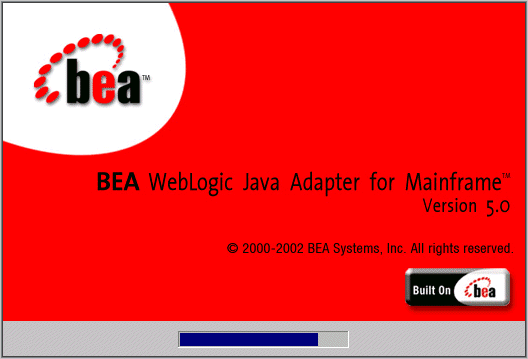
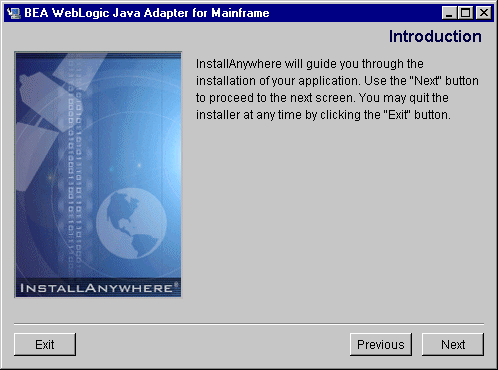
After the InstallAnywhere screen displays, the BEA WebLogic Java Adapter for Mainframe splash screen displays, followed by the Introduction screen.
Note: To stop the installation process and exit the program, click Exit on any screen.
The License Agreement screen displays.
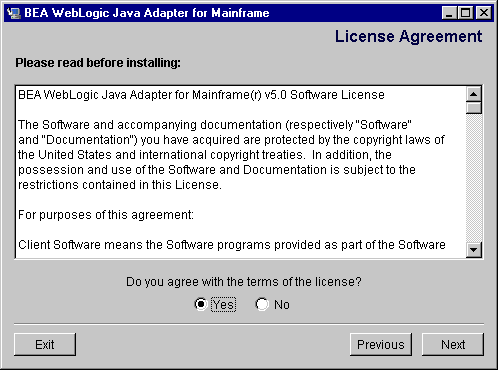
2. After reading the license agreement, select Yes to accept the license agreement. Click Next to proceed with the installation.
Note: If you do not accept the license agreement, you will not be able to continue with the installation. You must either exit the installation or go back to the previous screen.
The Choose Install Set screen displays.
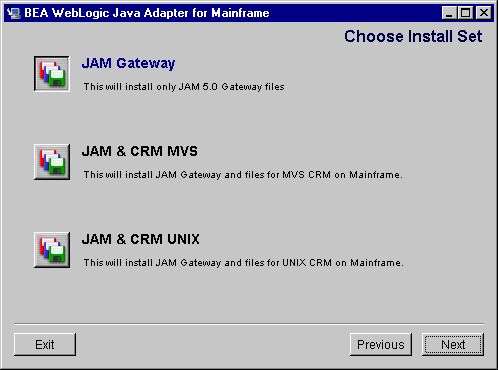
3. Select the Install Set that corresponds to your system from the following list. Click Next.
Installs only the WebLogic JAM Gateway.
Installs the WebLogic JAM Gateway and copies the CRM install files for the z/OS and OS/390 MVS platform.
Installs the WebLogic JAM Gateway and copies the CRM install file for z/OS and OS/390 Unix.
The Choose BEA Home Directory screen displays.
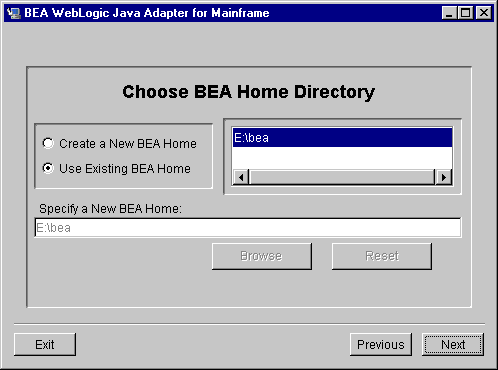
4. Select one of the following options, then click Next.
You can have several BEA Home directories, but products that are dependent on each other must be installed in the same BEA Home directory. For example, any BEA Home directory containing WebLogic JAM must also contain WebLogic Server.
If you already have WebLogic JAM installed in the BEA Home directory you have selected, the installation program will notify you. You can choose to continue installing WebLogic JAM into the same directory, but the new installation will overwrite existing patches and configuration files.
Note: If WebLogic Server is not installed, you will receive the following warning. If you click Next, installation continues. However, WebLogic JAM will not function fully unless WebLogic Server is installed. If WebLogic Server is not installed first, many automated configuration tasks must be completed manually.

The Choose Product Directory screen displays.
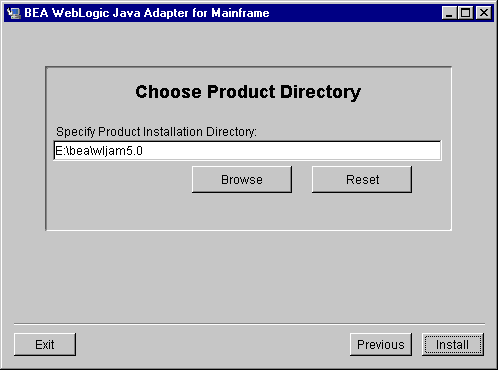
5. Click Install to accept the default product directory and continue with the installation. WebLogic JAM will create a wljam5.0 folder in the BEA Home directory. If you want to select a different product directory, click Browse. If you want to return to the default directory, click Reset.
The Install Complete screen displays.
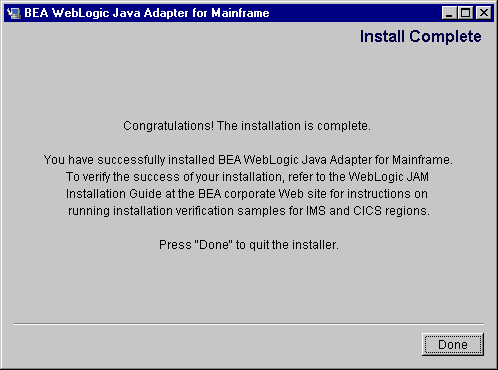
6. Click Done to exit the installation program.
On a Microsoft Windows platform, WebLogic JAM will create or update a Microsoft Windows program group named BEA WebLogic E-Business Platform. The WebLogic JAM folder will be "WebLogic Java Adapter for Mainframe 5.0." Groups of shortcuts are listed within the program group folder.
7. Install the CRM as described in the Installing the CRM section. After installing the CRM, see the Verifying Your Installation section to verify the files and run the installation verification sample. Complete post-installation tasks located in the Performing Post-Installation Tasks section.
Installing the WebLogic JAM Gateway on Unix Systems Using Console-Mode Installation
To install the WebLogic JAM Gateway and the files for the installation of the CRM on Unix systems using the console-mode installation, run the BEA standard installation shell script for the platform on which you want to install WebLogic JAM. Select the following script:
wljam50_Unix.bin
To install WebLogic JAM on a Unix system using console mode, perform the following steps:
> ls -1 /dev/cdrom
total 0
brw-rw-rw- 1 root sys 22, 0 April 14 10:55 c1b0t010
2. Set the JAVA_HOME and PATH environment variables. For example, if your BEA Home directory is /usr/bea and you are using the JDK installed in the BEA Home directory, then the environment variables should be set in the following way:
export JAVA_HOME=/usr/bea/jdk131
export PATH=/usr/bea/jdk131/bin:$PATH
3. Execute the appropriate installation program for your non-mainframe Unix system in character-based mode. For example, to execute the HP/UX installation program, enter the following:
sh wljam50_Unix.bin -i console
4. The installation program runs and prompts you for responses.
Listing 3-1 Console-Mode Installation Example
Preparing to install...
Preparing CONSOLE Mode Installation...
================================================================
BEA WebLogic Java Adapter for Mainframe(created with InstallAnywhere by Zero G)
----------------------------------------------------------------
================================================================
Introduction
------------
This installer will guide you through the installation of 'WebLogic Java Adapter for Mainframe'. On each step, answer the questions provided. Type "quit" at any time to exit the installer.
PRESS <ENTER> TO CONTINUE: <ENTER>
================================================================
License Agreement
-----------------
Please read before installing:
BEA WebLogic Java Adapter for Mainframe(r) 5.0 Software License
The Software and accompanying documentation (respectively "Software"and "Documentation") you have acquired are protected by the copyright laws of the United States and international copyright treaties. In addition, the possession and use of the Software and Documentation is subject to the restrictions contained in this License.
   . . . .
DO YOU AGREE WITH THE TERMS OF THE LICENSE? (Y/N): y
================================================================
Choose Install Set
------------------
Please Choose the Install Set to be installed by this installer.
->1- JAM Gateway
2- JAM & CRM MVS
3- JAM & CRM UNIX
ENTER THE NUMBER FOR THE INSTALL SET, OR <ENTER> TO ACCEPT THE DEFAULT: 1
================================================================
Choose BEA Home Directory
-------------------------
1- Create a New BEA Home
2- Use Existing BEA Home
Enter a number: 2
1- /bea/loads
2- /cmhome/wls61sp2
Existing BEA Home: 1
-----------------------------------------------
A previous installation of WebLogic Java Adapter for Mainframe 5.0 has been detected at /bea/loads/wljam5.0. The following options are available:

    1- Continue to install over /bea/loads/wljam5.0
2- Cancel to select another BEA Home Directory
3- Exit the installation
Choose a number: 1
================================================================
Installing...
-------------
 [===============|===============|===============|==============]
[---------------|---------------|--------------|--------------]
================================================================
Install Complete
----------------
Congratulations!
You have successfully installed BEA WebLogic Java Adapter for Mainframe.To verify the success of your installation, refer to the WebLogic JAM Installation Guide at the BEA corporate Web site for instructions on running installation verification samples for IMS and CICS regions.
PRESS <ENTER> TO EXIT THE INSTALLER: PRESS <ENTER> TO EXIT THE INSTALLER: <ENTER>
Note: The single-dash bar just beneath the double-dash bar in Listing3-1 is a progress indicator. When the single-dash bar becomes the same length as the double-dash bar, installation is complete.
5. Install the CRM as described in the Installing the CRM section. After installing the CRM, see the Verifying Your Installation section to verify the files and run the installation verification sample. Complete post-installation tasks located in the Performing Post-Installation Tasks section.
Installing the CRM
Installation files for the CRM are placed in the <BEA_HOME>/<JAM_INSTALL_DIR>/Mainframe directory during the installation process based on your selection of the install set. To install the CRM, use FTP to send the CRM files to the mainframe and run the specific install procedure for that platform. The following sections provide installation instruction for supported platforms.
Note: The mainframe, CICS, and IMS do not need to be restarted for a WebLogic JAM installation.
Installing the CRM on z/OS and OS/390 Unix
If you selected the JAM & CRM Unix install set during the installation of the WebLogic JAM Gateway, complete the following steps to install the CRM on the mainframe in a z/OS and OS/390 Unix environment.
Note: This procedure assumes the installer is familiar with File Transfer Protocol (FTP) functions.
tar xvf os390.tar
Executing the tar command extracts the install.sh script and subdirectories containing the software to be installed from the tar file.
sh install.sh
The installation script prompts you for responses. Listing3-2 is a sample installation that shows the installation of the CRM on the mainframe in an OS/390 Unix environment. User responses are in bold.
Listing 3-2 Sample Script for CRM Installation on an OS/390 Unix Platform
>sh install.sh

01) os390/os390r8
Install which platform's files? [01- 1 , q to quit, l for list]: 1
** You have chosen to install from os390/os390r8 **
Communications Resource Manager Release 5.0
This directory contains the Communications Resource Manager 5.0
for IBM OS/390 Unix R8 on IBM OS/390.
Is this correct? [y,n,q]: y
To terminate the installation at any time press the interrupt key, typically <del>, <break>, or <ctrl+c>.
The following packages are available:
  1     crm             Communications Resource Manager
Select the package(s) you wish to install [?,??,q]: 1
Communications Resource Manager
OS390) Release 5.0
Copyright (c) 2000 BEA Systems, Inc.
All Rights Reserved.
Distributed under license by BEA Systems, Inc.
Directory where Communications Resource Manager files are to be installed
(Enter your directory path) [?,q]:
Using /work/user/jam as the Communications Resource Manager base directory
The following CRM stack support options are available:
1 vtm28 OpenEdition MVS 390
Select an option [?,??,q]: 1
Determining if sufficient space is available ...
24152 blocks are required
8476704 blocks are available to /work/user/jam
Unloading /bea/loads/dist/juniper-9/os390/os390r8/crm/CRMSA.Z ...
2415 blocks
x bin/CRM
x bin/CRMLOGS
x bin/crmdown
x bin/crmlkoff
x bin/crmlkon
x bin/unix.env
x lib/csxappc.dll
x lib/csxcrm.dll
x lib/csxgpw.dll
x lib/csxscrm.dll
x lib/csxxfm.dll
x lib/ctxdebugs_12.dll
x lib/ctxos_12.dll
x lib/ctxplat_12.dll
x lib/ctxprim_12.dll
x lib/libgp40.dll
x lib/libgpnet.dll
... finished
Unloading /bea/loads/dist/juniper-9/os390/os390r8/crm/STKSA.Z ...
226 blocks
x lib/csxvtm28.dll
... finished
Changing file permissions...
... finished
Installation of Communications Resource Manager was successful
Please don't forget to fill out and send in your registration card
Installing the CRM on z/OS and OS/390 MVS
If you selected the JAM & CRM MVS install set during the installation of the WebLogic JAM Gateway, complete the following steps to install the CRM on the mainframe in a z/OS and OS/390 Unix environment.
The installation for this environment is semi-automated. Two JCL files are provided to facilitate prerequisites for allocating data sets in the MVS environment and to unload WebLogic JAM product software into the allocated data sets.
The following files relating to this installation procedure are downloaded during the installation of the WebLogic JAM Gateway:
Installation Procedure for CRM on z/OS and OS/390 MVS
Perform the following steps to install the CRM component on a z/OS and OS/390 MVS platform.
Note: The installation process assumes the installer is familiar with Job Control Language (JCL) job operations and File Transfer Protocol (FTP) functions.
You may transfer the files with IND$FILE protocol, if you prefer, provided the text files are transferred in text mode, and the LOAD, DATA, and SAMPLE files are in binary mode. See your Terminal Emulation Software for instructions.
Step 1: Upload the Install JCL Files to the MVS Environment
createds.jcl
uncmprss.jcl
Note: Use conventional MVS naming standards for the destination member name. For example
ftp>put createds.jcl CREATEDS
Step 2: Allocate the initial data sets
Use the SET statements in the CREATEDS job to set the high-level qualifiers of the receiving data sets according to the following syntax:
SET HLQPDSE=[QUALIFIER]
In this statement, [QUALIFIER] is the high-level qualifier for the CRM load library. The load library containing the JAM50.LOAD program objects must be a partitioned data set with extended attributes (PDSE).
SET SCLASS=[CLASS NAME]
In this statement, [CLASS NAME] is the storage class name of the PDSE. This parameter is required for OS/390 v2.8, but can be left blank for most systems. The PDSE minimally must have storage class SMS declaration for OS/390 v2.8. See the BEA WebLogic Java Adapter for Mainframe Release Notes
for detailed information about platform support.SET HLQPDS=[QUALIFIER]
In this statement, [QUALIFIER] is the high-level qualifier for the sample and data sets.
SET TMPHLQ=[QUALIFIER]
In this statement, [QUALIFIER] is the high-level qualifier for the temporary data sets. These temporary data sets will be used to receive the distribution files from the FTP.
The CREATEDS job has the following steps:
DELETE
Deletes any existing data sets previously created so you can run this JCL multiple times, if necessary.
CREATE
Allocates the data sets needed to receive and install the product software files.
Step 3: FTP the Files to the Allocated Data Sets
Using FTP, put the following product files into their corresponding data sets. The data sets were created in the previous step and have the high-level qualifier identified by TMPHLQ.
Transfer the data sets using the PUT command.
Note the following example of a PUT command:
put JAM50.LOAD 'BEA.JAM50.TEMP.LOAD'
Step 4: Unload the Data in Data Sets.
Use the SET statement in the UNCMPRSS job to set the high-level qualifiers of the temporary data sets using the same value that was used in CREATEDS:
SET TMPHLQ = <TMPHLQ>
In this statement, TMPHLQ identifies the high-level qualifier used for the temporary data sets created in step 1.
Modify the following variables in the SYSIN JCL to the high-level qualifiers used in step 1:
The value from the SET HLQPDSE in CREATEDS
The value from the SET HLQPDS in CREATEDS
The UNCMPRSS job has the following steps:
UNLOAD
Performs a TSO RECEIVE to uncompress and unload the data in your installation data sets created with the CREATEDS job. This step will delete the temporary data sets created by CREATEDS.
Note: Instead of running the UNCMPRSS job, you may choose to manually perform the TSO RECEIVE command. This command unloads the data in your temporary installation data sets. Run TSO RECEIVE in the following way:
TSO RECEIVE INDS(`xxx')
When prompted, enter:
DA("yyy")In these statements, the following definitions apply:
What Do I Do Next?
After you have installed WebLogic JAM components, BEA recommends that you verify your installation as described in the Verifying Your Installation section. After you have verified your installation, see the Performing Post-Installation Tasks section for additional tasks that must be performed before you begin to use WebLogic JAM.
If you choose not to use the installaton verification sample, see the BEA WebLogic Java Adapterfor Mainframe Configuration Guide for information about starting and administering the CRM.

|

|

|
|
|
|
Copyright © 2002 BEA Systems, Inc. All rights reserved.
|