BEA Logo BEA WebLogic Java Adapter for Mainframe 5.0

  BEA Home  |  Events  |  Solutions  |  Partners  |  Products  |  Services  |  Download  |  Developer Center  |  WebSUPPORT


   WebLogic Java Adapter for Mainframe Documentation   |   Workflow Processing Guide   |   Previous Topic   |   Next Topic   |   Contents   |   Index

Running the WebLogic Integration Examples


The BEA WebLogic Java Adapter for Mainframe (WebLogic JAM) Plug-in software includes sample workflows designed to illustrate the way WebLogic JAM works with BEA WebLogic Integration. This section describes these workflow templates and gives you step-by-step instructions for running the example. This section contains information on the following subjects:


What is Included in the Sample

Table 4-1 describes the files used in the examples. These example workflow templates initiate mainframe requests to read and write from a mainframe database. The examples are located in the following directory:

<BEA_HOME>/<JAM_INSTALL_DIR>/samples/examples/wlintegration

Table 4-1 List of WebLogic Integration/WebLogic JAM Sample Files


Directory

File

Description

wlintegration

create.xml

Workflow that creates an employee record.

wlintegration

read.xml

Workflow that reads an employee record.

wlintegration

readString.xml

Workflow that reads as employee record using string data type.

wlintegration

emprec.cpy

Copybook for the employee record.


These examples use mainframe components from the Employee Record CICS outbound sample. Mainframe components for the Employee Record sample are located in the following directory:

<BEA_HOME>/<JAM_INSTALL_DIR>/samples/examples/CICS/outbound/
mainframe/source

A sample WebLogic JAM configuration file can be found in the following directory:

<BEA_HOME>/<JAM_INSTALL_DIR>/config/examples/jamconfig_CICS.xml

For information on setting up the Employee Record sample, refer to the BEA WebLogic Java Adapter for Mainframe Samples Guide.


Running the BEA WebLogic Integration/WebLogic JAM Example

This example simulates storage and retrieval of employee records in a mainframe database initiated by workflow processing. The data is entered from a worklist form and translated to XML. The data is then translated to COBOL copybook format and stored in the data base. The employee record can then be retrieved from the database into the workflow.

Follow the steps below to run the BEA WebLogic Integration/JAM example. For specific instructions on performing the tasks in WebLogic Integration and WebLogic Server, please refer to the documentation that accompanies those applications.

Step 1: Set up the Mainframe

Set up the mainframe programs dpldemor.cbl, dpldemou.cbl, and dpldemod.cbl. Refer to the BEA WebLogic Java Adapter for Mainframe Samples Guide for more information.

Step 2: Configure and Run WebLogic Integration using WebLogic Server

  1. Move the jamconfig_CICS.xml file from the config/examples directory to: <BEA_HOME>/<WLI_HOME>/config/<domain.name>

    where <domain.name> is your WebLogic Integration domain.

  2. Start the CRM (refer to the BEA WebLogic Java Adapter for Mainframe Configuration and Administration Guide).

  3. Start the WebLogic Integration Server.

  4. Using the WebLogic Administration Console, update the WebLogic JAM configuration to communicate with the CRM (refer to the BEA WebLogic Java Adapter for Mainframe Configuration and Administration Guide).

  5. Import the emprec.cpy copybook using WebLogic Integration and store it in the repository as described in Using Mainframe Applications with Workflows.

Step 3: Create the Templates and Import the Template Definitions

This example provides three workflow templates for you to work with. The templates are listed and described in Table 4-2.

Table 4-2 Provided Workflow Templates

Workflow Template

File Name

Description

JAM create

create.xml

Creates an employee record

JAM read

read.xml

Reads an employee record

JAM readString

readString.xml

Reads and employee record using string data type


To create the template and import the template definition for JAM create:

  1. Create a new template called JAM create.

  2. Select the template from the tree view in the left pane and click the right mouse button.

  3. Choose Import Template Definition.

  4. Select the corresponding definition file: create.xml.

  5. Click OK to close the message box.

  6. Repeat steps 1 through 5 for:

Step 4: Open and Activate the Template

To enable each workflow template, open and activate the template using the following steps:

  1. Select the JAM create template definition imported in the previous step from the tree view and click the right mouse button.

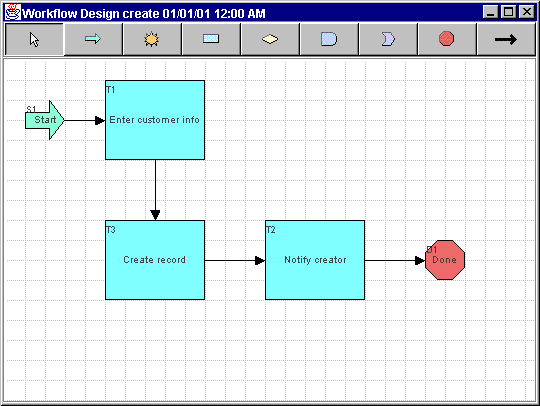
  2. Choose Open. The workflow created for this sample application displays, as shown in Figure4-1.

    Figure 4-1 Workflow for JAM create


  3. Select the JAM create template definition again from the tree view and click the right mouse button.

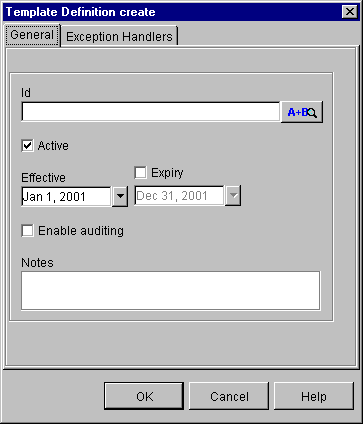
  4. Choose Properties. The Template Definition properties dialog box displays, as shown in Figure4-2.

    Figure 4-2 Template Definition create


  5. Click Active to activate the template and click OK.

  6. Select the JAM create template definition a third time from the tree view and click the right mouse button again.

  7. Choose Save to save the template definition with the changes you made.

  8. Repeat Steps 1 through 7 for JAM read and JAM readString.

Step 5: Execute the Workflow

This section provides step-by-step instructions for executing workflows to create an employee record and to read an employee record.

Execute the JAM create Workflow

The JAM create workflow creates an employee record. To start the workflow from the WebLogic Integration Worklist, complete the following steps:

  1. Start WebLogic Integration Worklist and choose Workflow—>Start a Workflow.

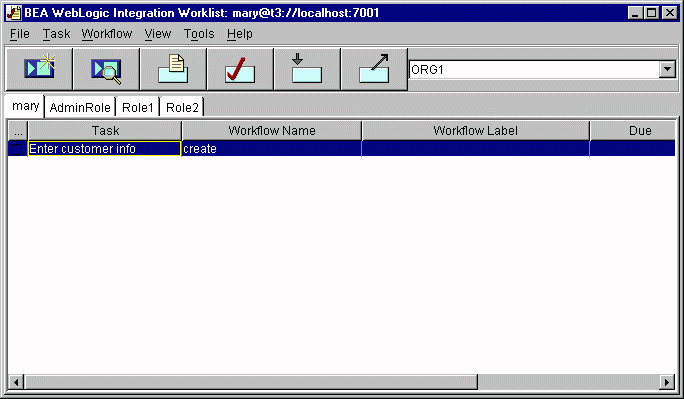
  2. Select JAM create. The template opens and the first task is displayed, as shown in Figure4-3.

    Figure 4-3 JAM create Worklist


  3. Select the Enter Customer Info task and click the right mouse button.

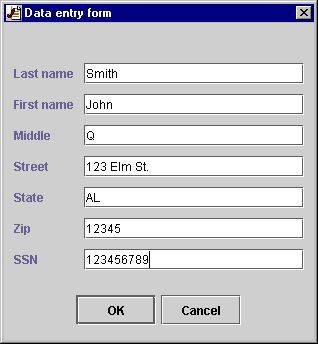
  4. Select Execute. The Enter Customer Info dialog displays, as shown in Figure4-4.

    Figure 4-4 Data Entry Form


  5. Enter the employee information and click OK. The task is started and the workflow runs.

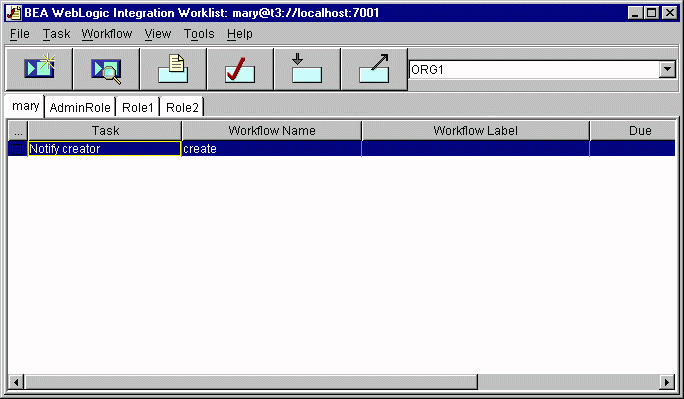
  6. A new task, Notify Creator will appear on the worklist, as shown in Figure4-5. Select the Notify Creator task.

    Figure 4-5 Notify Creator Task


  7. Select Execute. When the Information dialog appears, as shown in Figure4-6, click OK to close the dialog box. The workflow is now complete.

    Figure 4-6 Information Dialog window


Execute the JAM read and JAM readString Workflow

The JAM read and JAM readString workflows read and display an employee record for the mainframe database. The JAM readString workflow is functionally the same as the JAM read workflow. The difference is that the JAM readString workflow uses String variables internally to contain the XML used for data translation.

To execute these workflows from the WebLogic Integration Worklist, complete the following steps:

  1. Start WebLogic Integration Worklist and choose Workflow—>Start a Workflow.

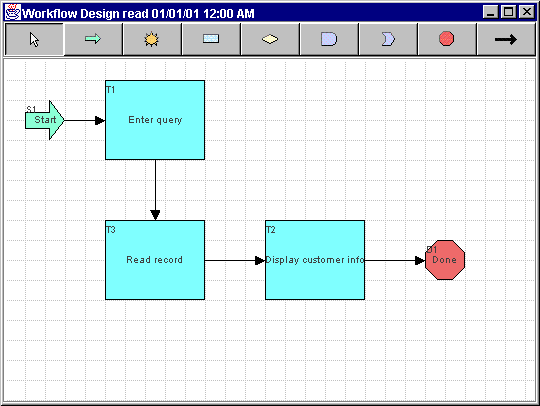
  2. Select JAM read or JAM readString. The template opens, as shown in Figure4-7 and the first task is displayed.

    Figure 4-7 JAM read or JAM readString Workflow


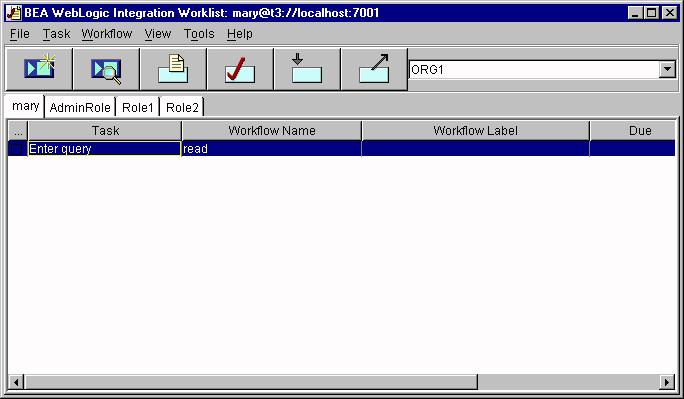
  3. Select the Enter Query task, as shown in Figure4-8, and click the right mouse button.

    Figure 4-8 JAM read or JAM readString Worklist


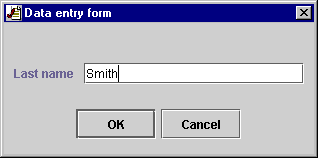
  4. Select Execute. The Data entry form dialog box displays, as shown in Figure4-9.

    Figure 4-9 Data entry form


  5. Enter the last name of the employee to be read. For example, the last name entered when you created an employee record was Smith. Click OK.

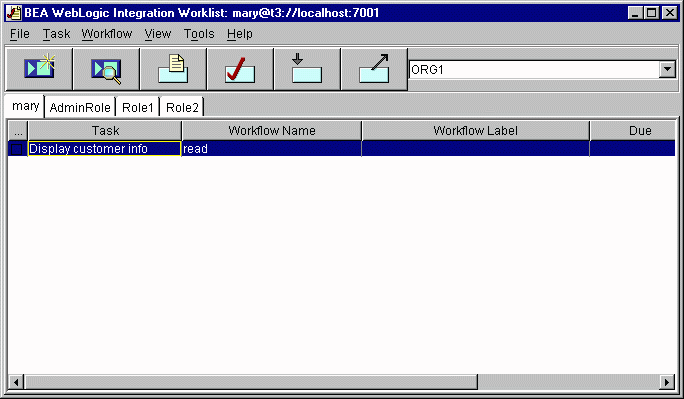
  6. A new task, Display Customer Information, will appear on the worklist. Select the Display Customer Information task, as shown in Figure4-10.

    Figure 4-10 Display Customer Information Task


  7. Select Execute. When the Information dialog box appears, as shown in Figure4-11, click OK to close the dialog box. The workflow is now complete.

    Figure 4-11 Information Dialog window


back to top previous page