| Download Docs | Site Map | Glossary | |
|
|
|||
| bea.com | products | dev2dev | support | askBEA |
|
|
|
||||||||
| e-docs > WebLogic Platform > WebLogic Integration > DI Topics > Translating Data > Building Format Definitions |
|
Translating Data
|
Building Format Definitions
Format definitions are the metadata used to parse or create binary data. WebLogic Integration helps you build format definitions for binary data that is to be translated to or from XML.
This section provides information about building format definitions using the Format Builder, WebLogic Integration's design-time component for integrating data. It includes the following topics:
Understanding Data Formats
To understand how to use the Format Builder, it helps to understand the following format and document types:
Binary (NonXML) Data
Because computers are based on the binary numbering system, a binary format is often used in applications to represent data. A file stored in binary format can be read by a computer, but not necessarily by a human. Binary formats are used for executable programs and numeric data; text formats are used for pure text. Many files contain a combination of binary and text formats. Such files are usually considered to be binary files even though they contain some text.
Unlike XML data, binary data is not self-describing. In other words, binary data does not include a description of how the data is grouped, divided into fields, or otherwise arranged. Binary data is a sequence of bytes that can be interpreted as an integer, a string, or a picture, depending on the intent of the application that generates that sequence.
For example, consider the following binary data string:
2231987
You can interpreted it in many different ways. For example:
Without a clear understanding of the purpose of this data string, the application cannot interpret the string appropriately.
In order for binary data to be understood by an application, the layout of the data must be embedded in the application itself. The character set used to encode the character data included in a binary file may also vary. For example, character data on an IBM mainframe is usually encoded using the EBCDIC character set, while data from a desktop computer is either ASCII or unicode.
You can use Format Builder to create a Message Format Language (MFL) file that describes the layout of your binary data. MFL is an XML language that includes elements for describing each field of data, as well as groupings of fields (groups), repetition, and aggregation. The hierarchy of a binary record, the layout of fields, and the grouping of fields and groups are expressed in an MFL document. This MFL document is used at run time to translate data to and from an XML document.
Listing 3-1 Example of Binary Data
1234;88844321;SUP:21Sprockley's Sprockets01/15/2000123 Main St.;
Austin;TX;75222;555 State St.;Austin;TX;75222;PO12345678;666123;150;
Red Sprocket;
XML Documents
The eXtensible Markup Language (XML) is fast becoming the universal format for structured documents and data on the Web. Unlike binary data, XML is self-describing; it makes use of tags (words bracketed by '<' and '>') that signal the start and end of each block of data. These tags define the hierarchy of related data components which constitute the elements in a structured document.
The properties of XML make it suitable for representing and structuring data in a platform-neutral manner. By making the structure explicit, XML can simplify the task of exchanging data between applications. Because the data is presented in a standard form, applications on disparate systems can interpret it using XML parsing tools, instead of having to interpret data in proprietary binary formats.
Listing 3-2 shows an example of an XML document.
Listing 3-2 Example of XML Document
<?xml version="1.0"?>
<PurchaseRequest>
<PR_Number>1234</PR_Number>
<Supplier_ID>88844321</Supplier_ID>
<Supplier_Name>Sprockley's Sprockets</Supplier_Name>
<Requested_Delivery_Date>2000-01-15T00:00:00:000</Requested_Delivery_Date>
<Shipping_Address>
<Address>
<Street>123 Main St.</Street>
<City>Austin</City>
<State>TX</State>
<Zip>75222</Zip>
</Address>
</Shipping_Address>
</PurchaseRequest>
DTDs and XML Schemas
The original XML recommendation only defined one way to describe the elements, attributes, and data types allowed in an XML document instance: the XML Document Type Definition (DTD). Subsequently, it became apparent that a more flexible and powerful way to describe the content model was required, and work began on the XML Schema definition language, which became available as a final recommendation in May of 2001.
An XML document is said to be valid if it conforms to the content model described in its associated DTD or XML Schema. Although the metadata required by an XML parser to validate an XML document can be conveyed in either a DTD or XML Schema, an XML Schema definition is more specific than a DTD; it provides much finer grained control over the content than a DTD.
Listing 3-3 shows an example of a Document Type Definition, or DTD.
Listing 3-3 Example DTD
<!ELEMENT PurchaseRequest
    (PR_Number,Supplier_ID,Supplier_Name?,
    Requested_Delivery_Date,Shipping_Address,
    Billing_Address,Payment_Terms,Purchase_Items)>
<!ELEMENT PR_Number (#PCDATA) >
<!ATTLIST PR_Number type CDATA #FIXED "nonNegativeInteger">
<!ELEMENT Supplier_ID (#PCDATA) >
<!ATTLIST Supplier_ID type CDATA #FIXED "nonNegativeInteger">
<!ELEMENT Supplier_Name (#PCDATA) >
<!ATTLIST Supplier_Name type CDATA #FIXED "string">
<!ELEMENT Requested_Delivery_Date (#PCDATA) >
<!ATTLIST Requested_Delivery_Date type CDATA #FIXED "timeInstant">
<!ELEMENT Shipping_Address (Address)>
<!ELEMENT Address (Street,City,State,Zip)>
<!ELEMENT Street (#PCDATA) >
<!ATTLIST Street type CDATA #FIXED "string">
<!ELEMENT City (#PCDATA) >
<!ATTLIST City type CDATA #FIXED "string">
<!ELEMENT State (#PCDATA) >
<!ATTLIST State type CDATA #FIXED "string">
<!ELEMENT Zip (#PCDATA) >
<!ATTLIST Zip type CDATA #FIXED "nonNegativeInteger">
Listing 3-4 shows an example of an XML Schema definition.
Listing 3-4 Example XML Schema
<?xml version="1.0" encoding="UTF-8"?>
<xsd:schema xmlns:xsd="http://www.w3.org/1999/XMLSchema">
<xsd:annotation>
	<xsd:documentation>
		This schema created for MFL MessageFormat PurchaseRequest.
	</xsd:documentation>
</xsd:annotation>
<xsd:element name="PurchaseRequest">
<xsd:complexType content="elementOnly">
<xsd:sequence>
	<xsd:element ref="PR_Number" minOccurs="1" maxOccurs="1"/>
	<xsd:element ref="Supplier_ID" minOccurs="1" maxOccurs="1"/>
	<xsd:element ref="Supplier_Name" minOccurs="0" maxOccurs="1"/>
	<xsd:element ref="Requested_Delivery_Date" minOccurs="1" maxOccurs="1"/>
	<xsd:element ref="Shipping_Address" minOccurs="1" maxOccurs="1"/>
</xsd:sequence>
</xsd:complexType>
</xsd:element>
<xsd:element name="PR_Number" type="xsd:nonNegativeInteger"/>
<xsd:element name="Supplier_ID" type="xsd:nonNegativeInteger"/>
<xsd:element name="Supplier_Name" type="xsd:string"/>
<xsd:element name="Requested_Delivery_Date" type="xsd:timeInstant"/>
<xsd:element name="Shipping_Address">
<xsd:complexType content="elementOnly">
<xsd:sequence>
	<xsd:element ref="Address" minOccurs="1" maxOccurs="1"/>
</xsd:sequence>
</xsd:complexType>
</xsd:element>
</xsd:schema>
MFL Documents
A Message Format Language (MFL) document (also known simply as a message format document) is a specialized XML document used to describe the layout of binary data. An MFL document conforms to the mfl.dtd, which includes elements and attributed used to describe each field of data, as well as groupings of fields (groups), repetition, and aggregation. When you use Format Builder to define the hierarchy of a binary record, the layout of fields, and the grouping of fields and groups, the information is saved as an MFL document that can then be used to perform run-time translations. The information captured in the MFL document can also be used to generate DTDs or XML Schemas that describe the content model for the output generated by the MFL document.
The top-level element of a message format document is the MessageFormat element, which defines the message format name and version. For example, the following is the root element of the sample po.mfl document installed with WebLogic Integration:
<MessageFormat name='PurchaseRequest' version='2.01'>
WebLogic Integration now supports Message Format Language Version 2.02. This version supports new features related to padding, truncation, and trimming. Message Format Language Version 2.01 is still supported.
The name assigned to the message format document becomes the root element in the XML instances that are generated based on the MFL document. For example, The following is the root element of any XML document generated based on the sample po.mfl document:
<PurchaseRequest>
The other elements and attributes available in an MFL document are used to define the following:
Analyzing the Data to Be Translated
Before a message format can be created, the layout of the binary data must be understood. Sample data for a legacy purchase order, with corresponding MFL and XML documents for a purchase order record, are installed with ProductName. The sample purchase order illustrates how WebLogic Integration translates data from one format to another. For more information about this sample data, see Running the Purchase Order Sample.
The key to translating binary data to and from XML is to create an accurate description of it. For binary data (data that is not self-describing), you must identify the following elements:
Use Format Builder to incorporate these elements into the format definitions used for data translations.
Using the Format Builder
Format Builder helps you create format descriptions for binary data and store them in MFL documents. Your description should include hierarchical and structural information derived from a detailed analysis of your data. These format descriptions are stored in an MFL document. You can also use Format Builder to test your format descriptions before applying them to your data.
Starting Format Builder
To start Format Builder, choose Start
Using the Format Builder Window
The Format Builder window is split into two vertical panes. The left pane contains the navigation tree which shows the structural relationship of the groups and fields defined in the active MFL document. The right pane displays the properties that define the item.
Information about the file you are editing is displayed in the title bar of the Format Builder window.
Figure 3-1 Format Builder Window
The structure of the binary data is defined in the navigation tree through a combination of fields and groups that match the target data. The following topics explain how to use the various tools provided in the Format Builder window to navigate and execute commands: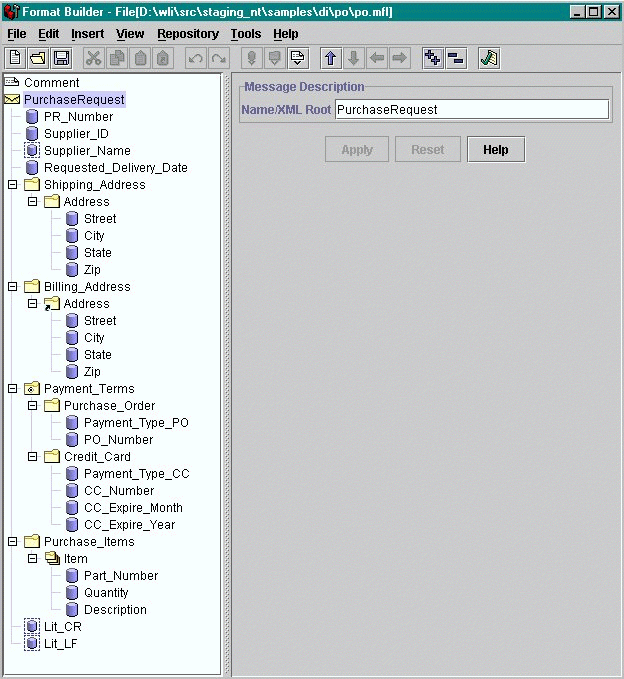
Using the Navigation Tree
The navigation tree represents the structure of the binary data in a hierarchical layout. The root node of the navigation tree, the Message node, corresponds to the MFL document being created or edited. Child nodes are labeled with the names of groups or fields. Fields are represented by leaf nodes in the navigation tree. Groups contain fields or other groups and are represented by nonleaf nodes in the navigation tree.
The icon for each node encapsulates the following information about the node: whether the node represents a message, a group, a field, a comment, or a reference; whether a group or field is repeating; whether a group is a Choice of Children; and whether a group or field is optional or mandatory.
You can add, delete, move, copy, or rename nodes in the navigation tree though menus or the toolbar. (For details, see Using the Format Builder Menu Bar and Using the Toolbar.)
The following table describes the icons displayed in the navigation tree.
Using the Format Builder Menu Bar The menu bar provides quick access to Format Builder functions. Figure 3-2 Format Builder Menu Bar
The items available in a menu depend on the actions you have taken and the node currently selected in the navigation tree. If a menu item is not available, it is shown in gray in the menu. You can display a menu in either of two ways: 
To execute a command, select it from the menu. Some commands can also be executed via the keyboard shortcut indicated on the menu (For example, a Ctrl + key sequence.) The commands available on each menu are described in Format Builder Menus.
Using the Toolbar
The toolbar is a menu of icons that provide alternative ways to access frequently used commands.
Figure 3-3 Format Builder Toolbar
To execute a command, click the appropriate icon in the toolbar. If a command is unavailable, the icon for it appears grayed-out. The following table describes the icons in the Format Builder tool bar.
Using the Shortcut Menus When you right-click an item in the navigation tree, a menu of the most frequently used commands for that item is displayed. The following table describes the commands that are available from the shortcut menus. Note: The availability of a command depends on the item you select and the previous actions you have taken.
Using Drag and Drop You can drag and drop to copy and paste, or move items in the navigation tree. Note: The node being copied or moved is always inserted as a sibling of the selected node during the drag-and-drop process. If you drag and drop the node onto the Message Format node, it is inserted as the last child. To move an item:
To copy and paste an item:
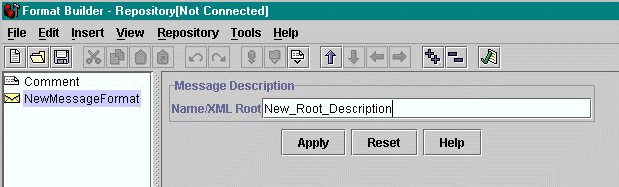
Creating Message Formats
The first step in creating a message format definition file is to create a message format (the root node of a message format file).
To create a message format:
Figure 3-4 Message Format Detail Window
XML Element Naming Conventions
The names you assign to the root node, fields, groups, and references in a message format document are translated to XML element names in the XML instances generated based on the message format document. Therefore, the names must comply with the following XML naming rules:
The following strings are examples of valid names:
The following strings are examples of invalid names:
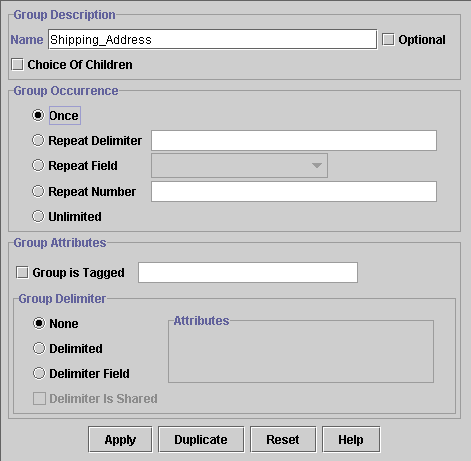
Creating Groups
A group is a collection of fields, comments, references, and other groups that are related in some way. For example, the fields PAYDATE, HOURS, and RATE might all belong to the PAYINFO group. You can create a group as a child of the message format item, as a child of another group, or as a sibling of a group or field.
To create a group:
Specifying Delimiters
You can specify delimiters in Format Builder by entering the correct syntax. For example, if you want to specify a tab character as a delimiter (`\u009'), you must enter the construct \t to match it.
The following tables maps characters you can use as delimiters to the constructs you must use to designate these characters as delimiters.
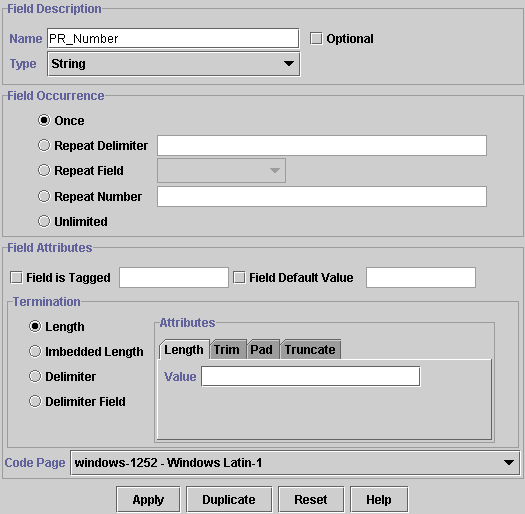
For more information, visit the following URL: http://java.sun.com/j2se/1.4/docs/api/java/util/regex/Pattern.html Creating Fields A field is a sequence of bytes that is meaningful to an application. (For example, the field EMPNAME contains an employee name.) You can create a field as a child of the message format node, as a child of a group, or as a sibling of a group or another field. Field names are used as element names in the XML output; they must comply with the conventions described in XML Element Naming Conventions. To create a field:
Padding Mandatory Fields
In previous releases of WebLogic Integration, no padding was performed on mandatory fields when data for the field did not exist at run time. In WebLogic Integration 7.0, during an XML-to-binary translation, a mandatory field that does not contain data is padded with the default value, if a default value has been specified. If no default value is specified and a field does not contain data at translation time, an error occurs.
Note: Padding of mandatory fields is not supported for binary-to-XML translations.
This feature is useful when a group is specified multiple times, but data is provided for only one occurrence. When padding of mandatory fields is invoked, all occurrences of a group for which data are not provided are padded with default values, if specified.
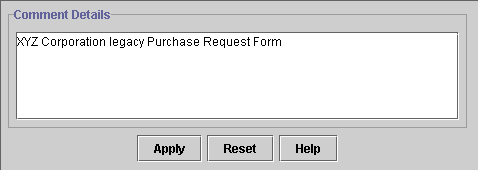
Creating Comments
Comments are notes about the message format or the data translated by the message format. Comments are included in the message format definition for documentation and informational purposes only; they are unnumbered and are not transformed to XML or binary data. You can create a comment as a child or sibling of any message format, group, or field.
Note: Conventionally, a comment precedes the node it annotates.
To create a comment:
Figure 3-7 Comment Detail Window
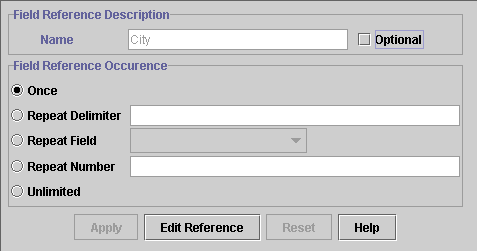
Creating References
References allow you to reuse an existing field or group format in a new context. When you create a reference to an existing field or group, the same format is used, but you can modify the optional and occurrence properties for the reference field or group.
For example, if your data includes a bill to address and a ship to address and the same format is used for both addresses, you can create the address format once, and then reference it. That is, you can create the an address definition for the bill to address and reference it for the ship to address.
Note: A reference item is given exactly the same name as the original item, therefore, you should use a generic name, such as address, when you create a field or group that is be referenced. For instance, in the previous example, you can create an address group as a child of the bill_to group and then reference the address group from within the ship_to group.
To create a reference:
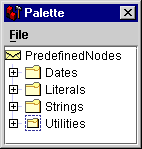
Working with the Palette
The Format Builder palette allows you to store commonly used message format components so they are available whenever you need to insert them into your message format definitions.
The default palette, palette.xml, is an MFL document which is stored in the WebLogic Integration installation directory. The default palette contains common date formats, literals, and strings. You can use these items in the message formats you create, as well as add your own items to the default palette. You can also create your own MFL documents for use in the palette, or open and use items from any existing MFL document.
The following topics provide the information you need to use the palette:
Opening the Palette
To open the palette:
You can copy items from the navigation tree to the palette, and vice versa. You can use drag and drop, or the commands available on the shortcut menu, to organize items in the palette. The contents of the palette are automatically saved when you exit Format Builder.
Note: Only copying items, whether from the navigation tree to the palette or vice versa, is allowed. You cannot move items between the windows.
Using the Palette File Menu
The commands described in the following table are available from the Palette File menu.
Using the Palette Shortcut Menu A shortcut menu is displayed when you right-click an item or folder in the palette. The following table describes the commands available from the shortcut menu. Note: Some commands may be unavailable, depending on the item you select.
Copying Items From the Active Message Format to the Palette To copy an item from the document currently open in Format Builder to the palette:
Notes: You cannot add an item that depends on the existence of another item to the palette. For example, you cannot add a field or group reference, and you cannot add an item for which a Repeat Field is specified.
Adding comments is possible, but not recommended because comments do not have unique names and therefore are indistinguishable on the palette.
Deleting Items From the Palette
To delete an item from the palette:
Copying Palette Items from the Palette to the Active Message Format
To copy an item from the palette to a message format document currently open in Format Builder:
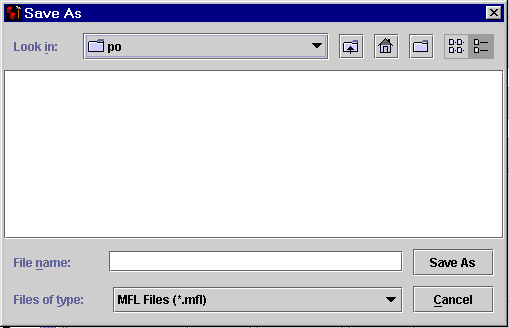
Saving or Storing a Message Format
You can save a message format document to your file system as described in the this section, or you can store the document in the repository, as described in Storing MFL Documents in the Repository.
To save a message format file for the first time:
Figure 3-10 Save As Dialog Box
To save changes to an existing file, choose File
To save an existing file to a new name, choose File
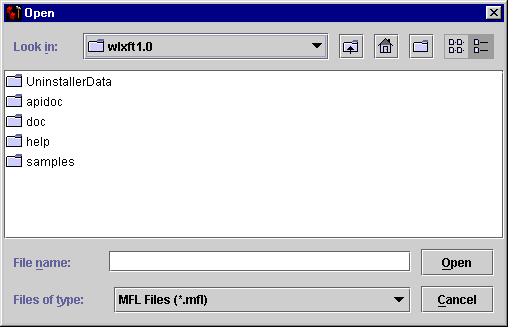
Opening or Retrieving an Existing Message Format File
You can open a message format document on your file system as described in the this section, or you can retrieve the document from the repository, as described in Retrieving MFL Documents from the Repository.
To open an existing message format file:
Figure 3-11 Open Dialog Box
Using Internationalization Features
You can use the internationalization features in Format Builder by changing the options for an individual message file or by setting the default Format Builder options to include internationalization. For details, see:
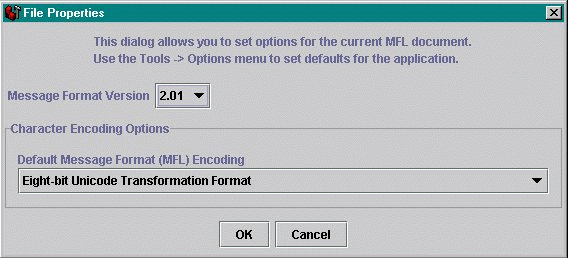
Changing Options for a Message Format
To change options for a message format file:
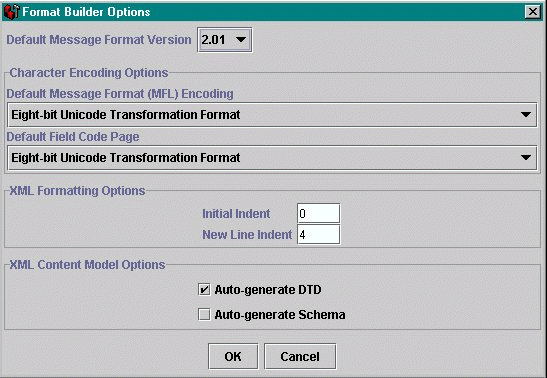
Setting Format Builder Options
You can set several options to control the overall operation of Format Builder.
To set Format Builder options:
Format Builder Menus
The following menus are available in Format Builder: File, Edit, Insert, View, Repository, Tools, and Help.
The commands available on each menu are described in the following sections.
Note: Some commands may be unavailable, depending on which actions you have taken and what is selected in the navigation tree.
File Menu
The following commands are available from the File menu.
Edit Menu The following commands are available from the Edit menu.
Insert Menu The following commands are available from the Insert menu.
View Menu The following commands are available from the View menu.
Repository Menu The following commands are available from the Repository menu. Note: For details about using the repository, see Retrieving and Storing Repository Documents.
Tools Menu The following commands are available from the Tools menu.
Help Menu The following commands are available from the Help menu.

|

|

|