|
|
|
|
|
|
Installing BEA WebLogic Process Integrator
This section provides procedures for all the steps you must follow before you can run WebLogic Process Integrator. The required steps are:
Installing WebLogic Process Integrator Components
You can install WebLogic Process Integrator from the CD-ROM included in the product package, or you can download the software from the BEA Web site as described in Downloading the Software.
If you are installing WebLogic Process Integrator on a graphics (windowing) terminal or workstation, you should use the installation program. Follow the procedures given in the next section, Installing on UNIX or Windows Platforms in Graphics Mode.
If you want to install WebLogic Process Integrator on a UNIX system in text mode, see Installing on UNIX Platforms in Console Mode.
Note: If you are upgrading from a previous version of WebLogic Process Integrator, do not uninstall the older version until you have WebLogic Process Integrator 2.0 up and running. You will need files from your previous installation for database migration. For more information, see Migrating an Existing WebLogic Process Integrator Database.
Installing on UNIX or Windows Platforms in Graphics Mode
To run the BEA WebLogic Process Integrator installation program:
cd unix
The InstallAnywhere splash screen appears, followed by the BEA WebLogic Integration splash page, and the BEA WebLogic Process Integrator 2.0 Introduction page.
Figure 2-1 License Agreement Window
Figure 2-2 Choose Install Set Dialog Box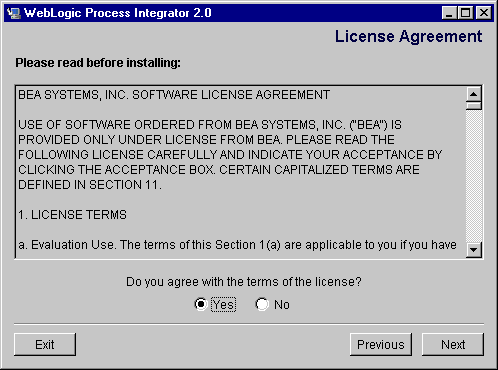
By default, the WebLogic Process Integrator installation program installs the following components: 
It is not necessary, however, to install all components on the same system. Although the WebLogic Process Integrator server must be installed on a system hosting WebLogic Server, the WebLogic Process Integrator client applications, Studio and Worklist, can be installed on the same system or on another system that can connect to the WebLogic Process Integrator server over the network.
If you are installing WebLogic Process Integrator in a clustered environment, you will most likely need to install only the server on each of the clustered machines.
Figure 2-3 Customize Install Dialog Box
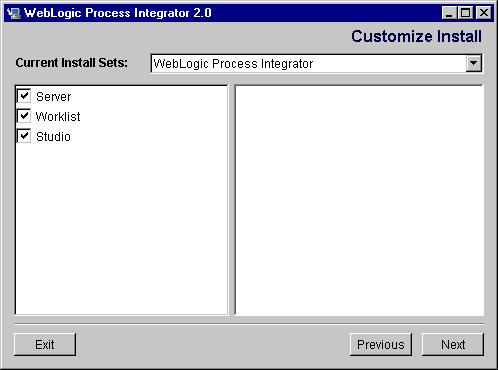
Figure 2-4 Choose BEA Home Directory Dialog Box
We recommend that you use the existing BEA Home directory. For a detailed description of how the BEA Home directory is used in WebLogic Server 6.0, see "BEA Home Directory" at the following URL: http://download.oracle.com/docs/cd/E13222_01/wls/docs60/install/instpre.html Note: You must select a drive or directory in which WebLogic Server 6.0 is installed. 
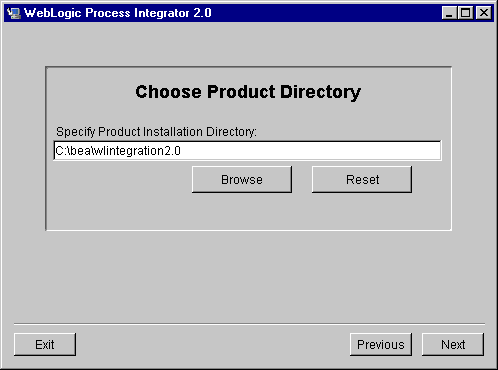
Figure 2-5 Choose Product Directory Dialog Box
When the installation is complete, WebLogic Process Integrator creates a home directory called processintegrator.
Figure 2-6 Database Selection Dialog Box
As part of WebLogic Integration 2.0, the WebLogic Process Integrator 2.0 server installation creates two domains: The WebLogic Process Integrator installation automatically provides a preconfigured Cloudscape database for your Samples domain. The database also includes tables for the XML repository, in which XML entities are stored for common access by all WebLogic Integration 2.0 products. The database is called db and is located in the WebLogic Integration 2.0 repository/cloudscape directory. You can run WebLogic Process Integrator in the Samples domain without any additional set-up. Note: You need to have selected a full installation of WebLogic Server 6.0 Service Pack 2 (Server with Examples) if you want to use the default Samples database. This is the domain you should use for development and production. To use this domain, you must set up WebLogic Process Integrator and repository tables on your database server before you can run the WebLogic Process Integrator server. You must select the same database for all WebLogic Integration products you are installing. If you choose Cloudscape for Mydomain, this domain will point to the same database that is automatically configured in the Samples domain. You do not need to perform any additional setup, unless you want to create an alternate Cloudscape development domain. Procedures for doing so are provided in Setting Up an Alternate Cloudscape Database.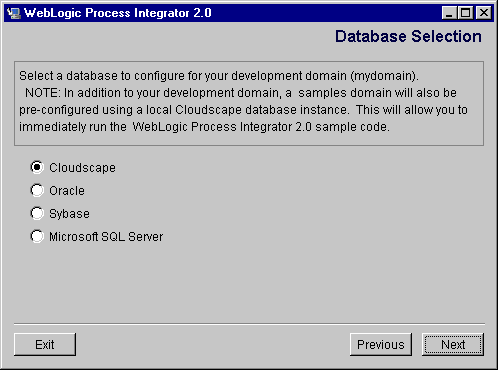
Figure 2-7 Database Configuration Dialog Box
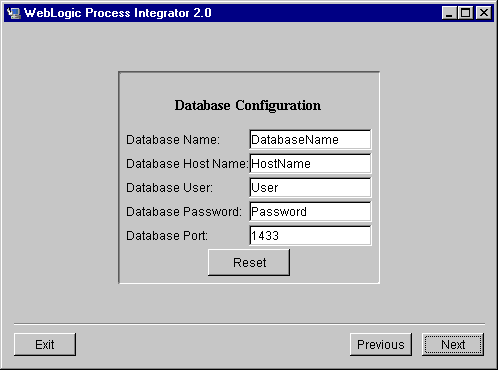
Figure 2-8 MailSession Configuration Dialog Box
The settings you specify in this screen enable WebLogic Process Integrator to send e-mail from workflow instances. If you do not have mail session information available, you can configure these settings after installation. For information, see Customizing Mail Session Settings. Note: Depending on your e-mail server, you can also configure other mail session options after installation. For more information, see Customizing Mail Session Settings. When installation is complete, the Installation Complete window is displayed. 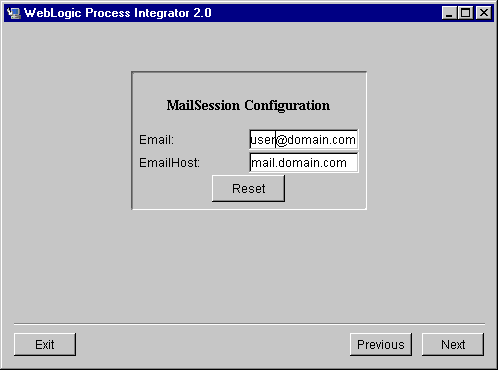
Installing on UNIX Platforms in Console Mode
This section provides the information you need to install WebLogic Process Integrator on a UNIX system in console mode. The text-based console-mode program mimics the graphical installation program.
To install WebLogic Process Integrator on a UNIX system in console mode:
Note: If the daemon /usr/sbin/vold is running, the CD should be mounted in the /cdrom directory. If vold is not running, see the instructions for mounting a CD in your UNIX administration documentation.
sh install.bin -i console
Introductory information is displayed.
You are prompted to choose a BEA Home directory.
You are prompted to choose a directory in which to install WebLogic Process Integrator.
You are prompted to select a database.
If you selected Oracle or Cloudscape, do the following:
The installation program copies the necessary files and updates the configuration as required. A message indicating that the installation is complete is displayed when the process is complete.
Installing Your Software License
The components of WebLogic Integration cannot be used without a valid software license. A 30-day license file is automatically installed when you install the first WebLogic Integration component. When you purchase the software, a permanent WebLogic Integration license file will be provided to you by BEA. Follow the directions below to update your license file on the target system.
To install your software license:
Setting Up the WebLogic Process Integrator Tables
Before you can run WebLogic Process Integrator from Mydomain, you must set up the database tables for WebLogic Process Integrator.
Note: If you choose Cloudscape for your development domain during the installation process, the domain uses the same tables that are automatically created in the Samples domain, and you do not need to configure them. If you want to set up an alternate Cloudscape database, see Setting Up an Alternate Cloudscape Database. If for any reason you need to recreate the default Samples database, you can run the createCloudscape.cmd (on Windows) or createCloudscape.sh (on UNIX) script, found in the bin directory of the WebLogic Process Integrator installation.
If you are installing WebLogic Process Integrator for the first time, go to the next section, Creating a New WebLogic Process Integrator Database.
If you are upgrading from a previous version of WebLogic Process Integrator, you need to migrate your database tables. Proceed to Migrating an Existing WebLogic Process Integrator Database.
If you have not yet set up the repository tables during another WebLogic Integration 2.0 installation, you also need to set these up. See the procedure in Setting Up the WebLogic Integration XML Repository Tables.
Note: Your WebLogic Process Integrator and repository tables must be in the same database.
Creating a New WebLogic Process Integrator Database
Before you can run BEA WebLogic Process Integrator, you must first create the required database tables on your database server.
The ddl subdirectory of the WebLogic Process Integrator product directory contains SQL Data Definition Language (DDL) files that are used to create the required tables.
For information on creating an alternate Cloudscape development domain database, see Setting Up an Alternate Cloudscape Database.
To create the WebLogic Process Integrator database tables:
Migrating an Existing WebLogic Process Integrator Database
WebLogic Process Integrator 2.0 uses a new database schema and security model. If you are using a previous version of WebLogic Process Integrator, you must migrate your existing database and security realm for compatibility with WebLogic Process Integrator 2.0.
Warning: It is strongly recommended that you migrate your WebLogic Process Integrator database before configuring any WebLogic Process Integrator 2.0 settings.
The migrate/ddl subdirectory of the WebLogic Process Integrator product directory contains SQL Data Definition Language (DDL) files that are used to migrate your WebLogic Process Integrator tables.
Migrating your database involves three steps:
Note: Once you have migrated your database and security realm, you will also need to assign permissions to previously existing users and roles. This task is done in the Studio application. For basic information on default permission groups and their member users, see Configuring Security Realms for WebLogic Process Integrator of this document. For more detailed information and procedures on assigning permissions to users and roles, see Administering Data in Using the BEA WebLogic Process Integrator Studio.
Migrating the Database Schema
To migrate your database schema:
Migrating the Security Realm
WebLogic Process Integrator 2.0 uses a new security model which you need to adopt in order to access Studio and Worklist functions. (For more information, see "Understanding Security" in Using the BEA WebLogic Process Integrator Studio.)
The migrate/bin directory of your WebLogic Process Integrator installation includes a utility you can use to upgrade your security realm, and an additional utility that allows you run the tutorial example without any additional setup. (For more information, see Learning to Use BEA WebLogic Process Integrator.)
To use the realm migration utilities, first specify appropriate settings for your environment in two scripts and one Java properties file (all of which are provided in the migrate/bin directory) as described in the following procedure. Then follow the procedures for running the utility according to the version and security realm from which you are migrating.
To configure the realm migration utility scripts:
Note: If you need to assign all permissions to any existing users of your system, you can add them to the WLPI_SUPER_USERS variable in the Migration.properties file, or assign permissions in the Studio client application after migration. For information on the default users and passwords provided in a new WebLogic Process Integrator 2.0 installation, see WebLogic Process Integrator Default Users and Passwords. For information on permission groups, see Configuring Security Realms for WebLogic Process Integrator.
Note: The following procedures assume knowledge of WebLogic Server 6.0 Service Pack 2 and the WebLogic Server Administration Console. For more information, see your WebLogic Server documentation.
Migrating from WebLogic.Properties Realm (WebLogic Process Integrator 1.2 Only)
To migrate from WebLogic.Properties Realm:
sh migrate_realm.sh
sh enable_tutorial.sh
Migrating from RDBMS Realm (WebLogic Process Integrator 1.2 or 1.2.1)
To migrate from RDBMS Realm:
%WLPI_HOME%\lib\oldrdbmsrealm.jar;
sh migrate_realm.sh
sh enable_tutorial.sh
Migrating from File Realm (WebLogic Process Integrator 1.2.1 Only)
To migrate from File Realm:
sh migrate_realm.sh
sh enable_tutorial.sh
Setting Up the WebLogic Integration XML Repository Tables
If WebLogic Process Integrator is the first WebLogic Integration 2.0 product you are installing, you also need to create the tables for the common XML repository for your development domain, regardless of whether you have created a new WebLogic Process Integrator database or migrated from an existing one.
If you have already configured the XML repository tables during a previous WebLogic Integration installation, you do not need to perform this step.
Note: If you chose Cloudscape as the database for your development domain, this step has already been done for you automatically by the installation program.
Your WebLogic Integration 2.0 installation includes scripts you can run to create the repository tables automatically.
To create the XML repository database tables:
sh createDB.sh
When the script has finished running, the tables are created.
You are now ready to start running the WebLogic Process Integrator components. For information on starting and logging on to the WebLogic Process Integrator server and client applications, go to the next section, Starting and Stopping BEA WebLogic Process Integrator Components.

|

|

|
|
|
|
Copyright © 2001 BEA Systems, Inc. All rights reserved.
|