

|

|
|
|
|
Trading Partner Lightweight Client Sample
The Trading Partner Lightweight Client sample demonstrates two communication methods used when one or more trading partner hosts no BEA software: browsers and file sharing. The sample is based on business practice functions and business processes for a requestor and replier communicating via either a browser or a file-sharing client.
This section includes the following topics:
Overview of the Lightweight Client Sample
Most B2B integration conversations involve two trading partners that have both installed BEA WebLogic Integration. Browser and file-sharing clients provide a way to communicate with trading partners who have not installed BEA software. The Lightweight Client sample demonstrates communication between a requestor trading partner using a browser client, and a replier trading partner using a file-sharing client.
Purpose of the Sample
The Lightweight Client sample demonstrates how business communication can take place between a requestor and one or more repliers that do not have WebLogic Integration installations. This communication is accomplished using two types of lightweight clients that are configured in a remote or host B2B integration installation:
In this sample, a business operation called by the replier's private workflow gets a request from a preconfigured directory, creates a reply based on the request, and puts the reply into a preconfigured output directory. An actual FTP server is not used; the sample uses the business operation to simulate an FTP server.
Lightweight Client Sample Scenario and Diagrams
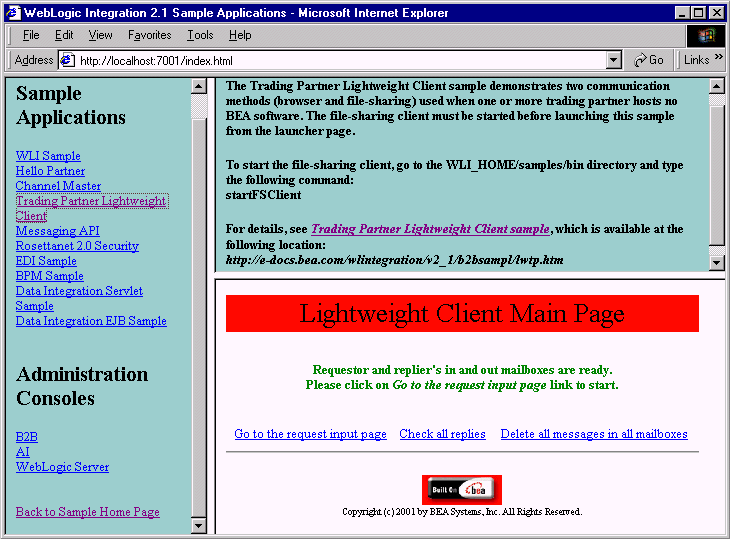
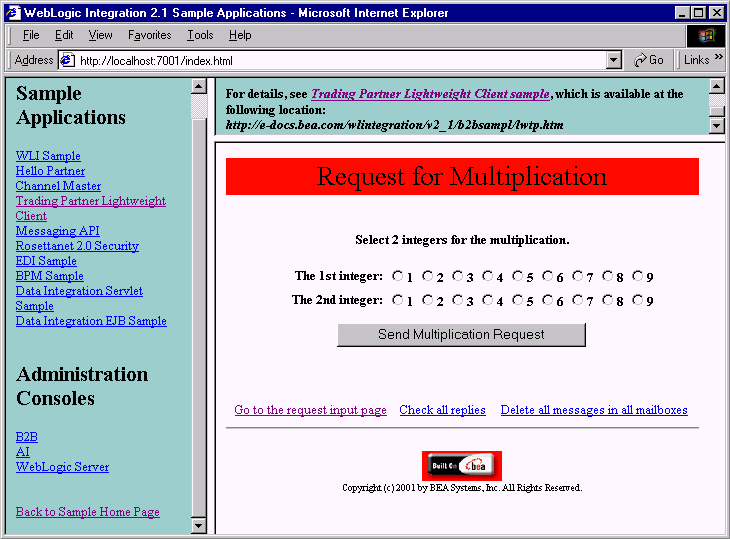
The Lightweight Client sample scenario involves two trading partners (one requestor and one replier) who communicate via a remote WebLogic Integration installation that is preconfigured to handle lightweight clients. The requestor sends a request for multiplication of two integer numbers. The replier performs the multiplication and returns the product to the requestor.
Use the browser of your choice on any machine other than the one on which you are running the samples instance of WebLogic Integration. As a result, the requestor does not have a local WebLogic Integration installation. Instead, it uses a browser to access the JSPs that reside on a remote installation of WebLogic Integration.
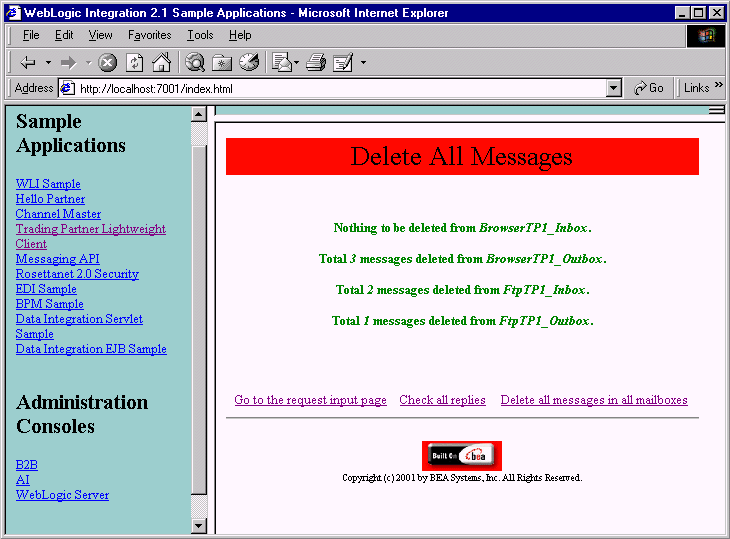
The JSPs create mailboxes and send XML requests using the JSP tag libraries provided by WebLogic Integration. The same JSPs are also used to check messages in the requestor's mailbox, and to delete messages from the requestor's and replier's mailboxes.
Note: The default configuration of the Lightweight Client sample specifies that the samples instance of WebLogic Integration, the browser client, and the FTP Client run on the same machine. In a production deployment of the Lightweight Client sample, however, WebLogic Integration, the browser client, and the FTP client run on different machines.
The replier also has no WebLogic Integration installation. It uses a third-party FTP server application to communicate with some trading partners. It may also use a proprietary mechanism for handling messages. The replier communicates with the requestor via a file-sharing client.
The Lightweight Client sample demonstrates the following events:
In the Lightweight Client sample, four preconfigured mailboxes are used. Each trading partner uses one inbox and one outbox, as follows:
Figure 5-1 Lightweight Client Deployment
Before Running the Lightweight Client Sample
Before running the Lightweight Client sample, complete the following steps:
Running the Lightweight Client Sample
To run the Lightweight Client sample, complete the following steps:
Choose Start
a) Make sure your PATH environment variable includes the directory in which the Netscape executable (netscape) resides.
b) Go to the WebLogic Integration home directory (the directory in which you installed WebLogic Integration). For example:
cd /home/me/bea/wlintegration2.1
c) Run the setenv script to set the top-level WebLogic Integration environment variables:
. setenv.sh
d) Run the RunSamples script:
cd samples/bin
RunSamples
Warning: For UNIX systems, the directory in which the netscape executable resides must be included in your PATH environment variable. If it is not included, the samples launcher page cannot be displayed.
The WebLogic Integration repository has already been
created and populated, possibly from a previous run
of this RunSamples script. Do you want to destroy all the
current data in the repository and create and populate the
WebLogic Integration repository, again? Y for Yes, N for No
If you answer N to this question, the RunSamples script skips the steps for creating and populating the repository and runs only the step for booting the sample instance of WebLogic Server.
If you answer Y to this question, the RunSamples script recreates and repopulates the repository, and then it boots the sample instance of WebLogic Server. When you answer Y, the RunSamples script destroys all the data currently in the repository and loads an unaltered version of the sample data into the repository. Answer Y only when the current sample data has been altered or removed and you want a fresh or unaltered version of the sample data in the repository.
Now the RunSamples script starts an instance of WebLogic Server as a background process and the samples launcher page is displayed.

cd %WLI_HOME%\samples\bin
startFSClient.cmd
cd $WLI_HOME/samples/bin
startFSClient
Note: If you start the file-sharing client before the first JSP is loaded, you get a repeated Mailbox not found exception. These exceptions can be ignored because mailboxes are created when the main JSP is loaded for the first time. Once the mailboxes are created, these exceptions no longer appear.

Note: As a side effect of this step, SendmsgTag and the wrapper Mailbox API are tested.
Note: When the list of replies is checked, CheckallmsgTag is checked, too.

Note: As a side effect of this procedure you also test DeleteallmsgTag.
Note: As a side effect of this procedure, you also test DeletemsgTag.
If you do not want to run more B2B samples at this time, exit from your browser and shut down the WebLogic Server by completing the procedure appropriate for your platform:
Choose Start
cd $WLI_HOME/config/samples
stopWebLogic
Creating and Using Lightweight Clients
This section provides the following information about creating and configuring lightweight clients:
Lightweight Client Source Files
WebLogic Integration delivers all the source files you need to create your own lightweight clients. The Lightweight Client sample shares B2B integration information with the Hello Partner sample.
The following table lists all the files delivered specifically for the Lightweight Client sample.
Using the JSP Tag Library
The JSP tag library uses a wrapper to address the WebLogic Integration Messaging API. The JSP tag library is used with predefined workflows to interact with a mailbox, as shown in Figure 5-2.
Figure 5-2 Mailbox Scenario Using the JSP Tag Library
The mailbox shown here supplements the repository. The tag library accesses the mailbox as needed. The repository may also store mailbox messages. Error handling is based on standard Java exception and error handling via the Mailbox API classes and JSP delivered to the browser client. For a complete listing of the JSP tags, see JSP Tag Reference. Configuring a Lightweight Client This section is provided only for users who want to move the browser client or the file-sharing client to a machine other than the one on which the samples instance of WebLogic Integration is running. If you move a client in this way, follow the appropriate procedure in this section to configure your remote lightweight client. If you are running the Lightweight Client sample and the samples instance of WebLogic Integration on the same machine, skip this section. This section provides procedures for the following tasks:
Configuring a File-Sharing Client
A lightweight client is a process that WebLogic Integration runs in a dedicated Java Virtual Machine. As such, it needs no security mechanisms. WebLogic Integration can serve any number of lightweight clients that are defined in the LwcFileSync.xml configuration file. For additional information, see Edit the File-Sharing Configuration File later in this section.
Edit the WebLogic Integration Configuration File
Add the lightweight trading partner configuration information listed in Listing 5-1 to the configuration file for B2B integration: config.xml.
Listing 5-1 File-Sharing Client Configuration
<StartupClass
      ClassName="com.bea.lwclient.Startup"
      Name="LwcStartup"
      Targets="myserver"
/>
You can edit the configuration file in any of the following domains.
Edit the File-Sharing Configuration File
To configure a lightweight client, define it in LwcFileSync.xml. The file-sharing client configuration in LwcFileSync.xml must conform to LwcFileSync.dtd.
Note: LwcFileSync.dtd must reside in the directory from which the file-sharing client is started.
Listing 5-2 provides a sample DTD file. Replace the values shown in bold with values that are appropriate for your lightweight client installation.
Listing 5-2 Sample LwcFileSync.dtd
<!-- This DTD describes file sharing client configuration file -->
<!ELEMENT wlcfilesyncconfig (wlcfilesync*) >

<!--  maxThreads The upper limit for number of threads permissible -->
<!--  in thread pool at a given point in time  -->
<!ATTLIST wlcfilesyncconfig  maxThreads CDATA #REQUIRED>

<!--  minThreads The lower limit for number of threads permissible -->
<!-- in thread pool at a given point in time -->
<!ATTLIST wlcfilesyncconfig  minThreads CDATA #REQUIRED>

<!--  maxIdleTime The maximum time interval thread could be idle -->
<!-- else removed from the pool -->
<!ATTLIST wlcfilesyncconfig  maxIdleTime CDATA #REQUIRED>

<!--  pollInterval Time interval defining wait interval before polling -->
<!ATTLIST wlcfilesyncconfig  pollInterval CDATA #REQUIRED>

<!--  url Weblogic URL used for JNDI lookup  -->
<!ATTLIST wlcfilesyncconfig  url CDATA #REQUIRED>

<!--  debug flag used to turn debugging on/off  -->
<!ATTLIST wlcfilesyncconfig  debug (TRUE | FALSE) "FALSE">

<!--  The following element is used to configure details of  LWTP -->
<!ELEMENT wlcfilesync EMPTY>

<!--  LWTP name -->
<!ATTLIST wlcfilesync name CDATA #REQUIRED>

<!--  path of the incoming directory on local file system -->
<!ATTLIST wlcfilesync directoryin CDATA #REQUIRED>

<!--  path of the outgoing directory on local file system -->
<!ATTLIST wlcfilesync directoryout CDATA #REQUIRED>
Listing 5-3 provides a sample XML file in which file-sharing clients are defined as lightweight trading partners. Replace the strings shown in bold with values appropriate for your lightweight client installation.
Listing 5-3 Sample LwcFileSync.xml
<?xml version="1.0"?>
<!DOCTYPE wlcfilesyncconfig SYSTEM "LwcFileSync.dtd">
<wlcfilesyncconfig maxThreads="9"
            minThreads="3"
            maxIdleTime="5000"
            pollInterval="2000"
            url="t3://localhost:7001"
            debug="FALSE">
<wlcfilesync name="FtpTP1"
            directoryin="<WLI_HOME>/ftpDir/FtpTP1_indir"
            directoryout="<WLI_HOME>/ftpDir/FtpTP1_outdir"/>
</wlcfilesyncconfig>
Configuring a Browser Client
WebLogic Integration supports two methods of configuring a browser client, depending on the security paradigm to be used: HTTP and HTTPS, or SSL. The following sections provide instructions for these methods:
Configuring an HTTP Browser Client
To configure an HTTP lightweight client, you must edit the web.xml file. To turn on security for a browser client, complete the following procedure:
The workflow template developers can also turn security on and off by invoking the wlcsamples.lightweightClient.LwcBizOp.putMessage() method. This method also accepts a string as its last argument for SECURITY. To turn security on or off, the developer passes one of the following arguments: ON or OFF.
For example, to provide a new user with the security privileges required to use the Web application lwcWebApp.war, add the following code:
  <security-constraint>
    <web-resource-collection>
      <web-resource-name>lwcWebApp</web-resource-name>
      <url-pattern>/*</url-pattern>
    </web-resource-collection>
   <auth-constraint>
     <role-name>newpartner</role-name>
   </auth-constraint>
  </security-constraint>
  <login-config>
   <auth-method>BASIC</auth-method>
  </login-config>
  <security-role>
    <role-name>newpartner</role-name>
  </security-role>
For details, see Administering B2B Integration.
Configuring an HTTPS (SSL) Browser Client
To configure a lightweight HTTPS (SSL) client, perform the following steps:
How to Recompile the Sample
If you have made any changes to the sample you must recompile it before you can run it. To recompile your modified sample, complete the following procedure:
cd %WLIHOME%\bin
setenv
cd $WLI_HOME/bin
./setenv.sh
cd samples\lightweightClient\project
ant all

|

|

|
|
|
|
Copyright © 2001 BEA Systems, Inc. All rights reserved.
|