

|

|
|
|
|
RosettaNet 2.0 Security Sample
The RosettaNet 2.0 Security sample shows how WebLogic Integration can be used to implement RosettaNet 2.0 PIP 3A2 and PIP 0A1 using workflows. Specifically, it shows two trading partners exchanging business messages that conform to the RosettaNet 2.0 PIP 3A2 standard.
This section includes the following topics:
Introduction to the RosettaNet 2.0 Security Sample
RosettaNet is a non-profit consortium of companies that creates, implements, and promotes open e-business process standards. A RosettaNet Partner Interface Process (PIP) defines business processes between trading partners. PIP 3A2 provides an automated process that can be used by trading partners to request and provide product price and availability information.
The RosettaNet 2.0 Security sample demonstrates the implementation of PIP 3A2. It also implements PIP 0A1, which provides a mechanism for sending failure notifications. Finally, the sample demonstrates the WebLogic Integration security features required for RosettaNet 2.0 support: two-way SSL authentication, digital signatures, data encryption, and nonrepudiation.
For more information about implementing RosettaNet with WebLogic Integration, see Implementing RosettaNet for B2B Integration. For more information about using security with the B2B integration functionality of WebLogic Integration, see Implementing Security with B2B Integration.
RosettaNet publishes several documents that are helpful in understanding the RosettaNet 2.0 PIPs used in this sample. The following documents and zip files are available in the Standards section at the RosettaNet Web site (http://www.rosettanet.org):
RosettaNet 2.0 Security Sample Overview
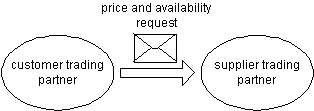
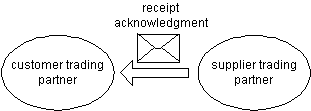
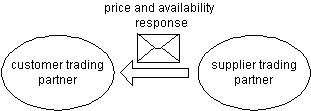
The following sequence provides a high-level overview of the communications between PIP 3A2 trading partners in this sample:


Before Running the RosettaNet 2.0 Security Sample
Before running the RosettaNet 2.0 Security sample, complete the following steps:
Running the RosettaNet 2.0 Security Sample
Unlike the other B2B samples provided with WebLogic Integration, the RosettaNet 2.0 Security sample does not run in the samples domain and is not started from the samples launcher page.
To run the RosettaNet 2.0 Security sample, complete the following steps:
cd bea\wlintegration2.1
cd /home/me/bea/wlintegration2.1
setenv
./setenv.sh
cd samples\RN2Security\bin
cd samples/RN2Seurity/bin
The database specified on the command line must match the database that you entered using the installer for the samples domain.
For example, if oracle was specified for the samples domain, enter:
RunRN2Security oracle
Wait until both instances of the WebLogic Server finish booting before starting the next step. (The RunRN2Security script starts two instances of WebLogic Server as background processes.) When the servers finish booting, the following log message is displayed in your WebLogic Server console window:
RunRN2Security execution successful
Warning: Unlike the other B2B samples, the RosettaNet 2.0 Security sample does not support the use of the WebLogic Integration Database Configuration Wizard to switch the database to be used with the samples domain.
Note: The Cloudscape database is not supported on UNIX systems.
http://localhost:7501/QPASubmit.jsp
The following information about the status of the submission and responses to it are displayed in the browser.
If you do not want to complete the steps described in A Peek at the Workflows at this time, exit your browser and shut down both instances of the WebLogic Server by completing the following procedure:
StopRN2Security
Workflows Behind the RosettaNet 2.0 Security Sample
The RosettaNet 2.0 Security sample shows how WebLogic Integration can be used to implement RosettaNet 2.0 PIP 3A2 and PIP 0A1 using workflows. A public process is part of a formal contract between trading partners that specifies the content and semantics of the messages they exchange. The public process between the two public workflows (PIP3A2_Customer_RN2 and PIP3A2_Supplier_ RN2) is the WebLogic Integration implementation of the PIP 3A2 standard. A private process is specific to a particular business organization and is not visible outside that organization. The public workflows that implement PIP 3A2 are represented by the shaded rectangles in Figure 4-1. The private process is represented by the unshaded rectangles in Figure 4-1.
The following figure shows different interactions between various RosettaNet security sample workflows.
Figure 4-1 Interactions Among RosettaNet 2.0 Security Workflows
Note: The flow of logic shown in the figure illustrates only the sequence of workflows that is executed if no errors occur. This sequence does not contain any error-handling logic. For example, PIP 0A1, the workflow for issuing failure notifications, is not shown. Before the flow of execution can start, two instances of the WebLogic Server must be booted. (One instance for the customer and the other for the supplier.) The flow of execution for this sample starts at the Browser square in the upper left corner of Figure 4-1. The following steps trace a portion of the flow of execution:
To trace the remainder of the execution flow, see Figure 4-1.
A Peek at the Workflows
To peruse the sample private and public workflows, complete the following steps:
cd bea\wlintegration2.1
cd /home/me/bea/wlintegration2.1
setenv
./setenv.sh
cd %WLI_HOME%\samples\RN2Security\bin
RunRN2Security oracle
cd $WLI_HOME/samples/RN2Security/bin
RunRN2Secuirty oracle
Wait until both instances of the WebLogic Server finishes booting before starting the next step. When the servers finish booting, the following log message is displayed in your WebLogic Server console window.
RunRN2Security execution successful
Choose Start
cd $WLINT_HOME/bin
studio
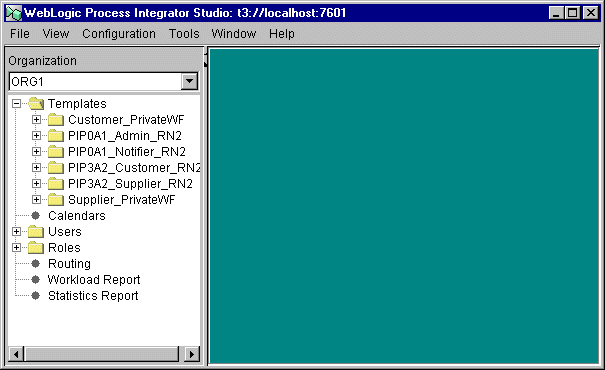
The main WebLogic Integration Studio window is displayed.


The start, task, decision, and event nodes that make up the Customer_PrivateWF workflow are displayed.
The actions that make up the Start the Public Workflow task are displayed.
In this sample, the private Customer_PrivateWF workflow sets the contents of the PIPInput workflow variable and calls the PIP3A2_Customer_RN2 workflow. The PIP3A2_Customer_RN2 workflow uses the contents of the PIPInput variable to construct an XML business message. This message is sent to the PIP3A2_Supplier_RN2 workflow when the Send Business Message Action is invoked. For a complete list of RosettaNet Template variables, see "RosettaNet Template Variables" in Using Workflows with RosettaNet in Implementing RosettaNet for B2B Integration.
The values of two important nodes are set in the right pane:
Note: This procedure is just one way of populating the PIPInput variable. The PIPInput variable can also be populated by reading in values from a file or by passing in the entire contents of an XML document.
The Start Public Workflow window is displayed.
In this window, parameters are defined for the Start the Public Workflow action as follows:
In addition, two TP (trading partner) Names, RNBuyer and RNSeller, are specified in the Parties field. WebLogic Integration uses the conversation name, conversation version, conversation role, and the trading partners specified as parties to locate the appropriate collaboration agreement to use for an action.
For the preceding action, WebLogic Integration searches the active collaboration agreements in the repository for a collaboration agreement between two trading partners named RNBuyer and RNSeller that specifies a conversation named 3A2, a conversation version of 1.3, with the role of customer. The following excerpt from the rn2_peer1_sec.xml file defines the collaboration agreement that fits the criteria for the preceding Start Public Workflow action.
Listing 4-1 Collaboration Agreement in the Import Repository Data File
<collaboration-agreement
	name="RN2|9.9|RosettaNet2|100"
	global-identifier="RN2|9.9|RosettaNet2|RNBuyer|RNSeller|102"
	version="1.0"
	status="ENABLED"
	conversation-definition-name="3A2"
	conversation-definition-version="1.3">
	<party
		trading-partner-name="RNBuyer"
		party-identifier-name="RNBuyerPID"
		delivery-channel-name="RNBuyerChannel"
		role-name="Customer"/>
	<party
		trading-partner-name="RNSeller"
		party-identifier-name="RNSellerPID"
		delivery-channel-name="RNSellerChannel"
		role-name="Product Supplier"/>
</collaboration-agreement>
The collaboration agreement defines the name and version of the conversation definition to be used between the specified parties. The collaboration agreement in Listing 4-1 specifies use of the conversation definition name of 3A2 and the conversation definition version of 1.3 between the RNBuyer trading partner in the role of Customer and the RNSeller trading partner in the role of Product Supplier.
Using the name and version of the conversation definition, as well as the assigned roles, WebLogic Integration can determine which workflow template to start. The conversation definition in Listing 4-2 specifies that for conversations named 3A2, with a version number of 1.3, and with a trading partner in the customer role, an instance of the PIP3A2_Customer_RN2 workflow template will be started.
Listing 4-2 Conversation Definition in the Import Repository Data File
    <conversation-definition
        name="3A2"
        version="1.3"
        business-protocol-name="RosettaNet"
        protocol-version="2.0">
        <role
            name="Customer"
            wlpi-template="PIP3A2_Customer_RN2">
            <process-implementation wlpi-org="ORG1"/>
        </role>
        <role
            name="Product Supplier"
            wlpi-template="PIP3A2_Supplier_RN2">
            <process-implementation wlpi-org="ORG1"/>
        </role>
    </conversation-definition>
Thus the Start Public Workflow action triggers the PIP3A2_Customer_RN2 workflow, in this sample.
The conversation name and version number defined in the Start Public Workflow are the PIP name and version defined by RosettaNet for PIP 3A2. These parameters, along with values specified for the roles and trading partners, correspond to the conversation name, conversation version, role, and trading partners that are registered in the repository.
The template variables to be passed to and received from the public PIP workflow are defined on the Workflow tab:
In this sample, the template variable fromDUNS is set by the Customer_PrivateWF in the Start Public Workflow action. It is passed to the PIP3A2_Customer_RN2 workflow when the PIP3A2_Customer_RN2 is invoked by the Customer_PrivateWF workflow. Some template variables for RosettaNet 2.0 are mandatory; others are optional.
The fromDUNS variable, which defines the DUNS number of the sender, is mandatory. (A DUNS number is a unique nine-digit identifier assigned to a business entity by Dun & Bradstreet.) The DUNS number specified in the fromDUNS variable must match the business ID defined in the repository for that trading partner. For a complete list of RosettaNet template variables, see "RosettaNet Template Variables" in Using Workflows with RosettaNet in Implementing RosettaNet for B2B Integration.
PIPOutput is a mandatory template variable that contains the service content of the received message. It is set by the PIP3A2_Customer_RN2 workflow and is passed to the Customer_PrivateWF workflow when the PIP3A2_Customer_RN2 workflow returns control back to the workflow that called it: Customer_PrivateWF.

The Conversation tab (nested on the B2B Integration tab) is displayed.
The data entered on this tab specifies that the PIP3A2_Customer_RN2 workflow should be started if a Start Public Workflow action is invoked with the specified conversation and role.
The conversation name, version, and role defined in this window:
The start, task, decision, and event nodes that make up the PIP3A2_Customer_RN2 workflow are displayed.
The Start node is the first task that is executed in this workflow.
The actions that make up the Send Message task are listed on the Activated tab.
Note: This step corresponds to step 1 in RosettaNet 2.0 Security Sample Overview.

|

|

|
|
|
|
Copyright © 2001 BEA Systems, Inc. All rights reserved.
|