

|
|
|
|
|
|
Installing BEA WebLogic Process Integrator
This section provides the information you need to run the WebLogic Process Integrator installation program on a Windows or UNIX system. It includes the following topics:
About the WebLogic Process Integrator Installation Program
The WebLogic Process Integrator installation program guides you through the process of installing either WebLogic Process Integrator 1.2.1 for WebLogic Server 5.1 or WebLogic Process Integrator 1.2.1 for WebLogic Server 6.0.
Note: If you intend to upgrade to WebLogic Server 6.0 in the near future, we recommend that you do so before installing WebLogic Process Integrator.
The installation detects whether WebLogic Server 6.0 is installed and prompts you to specify an installation location and other information required to perform basic WebLogic Process Integrator configuration. It then unpacks and installs the appropriate version of the software. The installation program requires a graphics (windowing) terminal or workstation. To install WebLogic Process Integrator on a UNIX system that does not support a graphics terminal or workstation, see BEA WebLogic Process Integrator Console-Mode Installation.
After you verify that the Installation Prerequisites have been met, complete the following steps, which make up the installation procedure:
Step 1. Starting the Installation Program
Step 2. Reviewing the License Agreement
Step 4. Selecting the Version of WebLogic Process Integrator
Step 5. Specifying the BEA Home and Installation Location
Step 6. Configuring the JDBC Connection Pool
Step 7. Completing the Installation
Step 8. Installing Your Software License
Step 9. Creating the WebLogic Process Integrator Tables
Step 10. Verifying the WebLogic Process Integrator Installation
Detailed instructions for each step are provided in the following sections.
Step 1. Starting the Installation Program
You can install WebLogic Process Integrator from the CD-ROM included in the product package, or you can download the software from the BEA Web site as described in Downloading the Software.
The following section provides instructions for Windows platforms. If you are installing WebLogic Process Integrator on a UNIX system, skip the following section and go to Starting the Installation Program on a UNIX System.
Starting the Installation Program on a Windows System
To start the BEA WebLogic Process Integrator installation program on a Windows system:
The BEA WebLogic Process Integrator splash screen is displayed briefly followed by the Introduction dialog box.
The License Agreement dialog box is displayed.
Starting the Installation Program on a UNIX System
To start the BEA WebLogic Process Integrator installation program on a UNIX system:
Note: If the daemon /usr/sbin/vold is running, the CD should be mounted in the /cdrom directory. If vold is not running, see the instructions for mounting a CD in your UNIX administration documentation.
cd unix
The BEA WebLogic Process Integrator Splash screen is displayed briefly followed by the Introduction dialog box.
The License Agreement dialog box is displayed.
Step 2. Reviewing the License Agreement
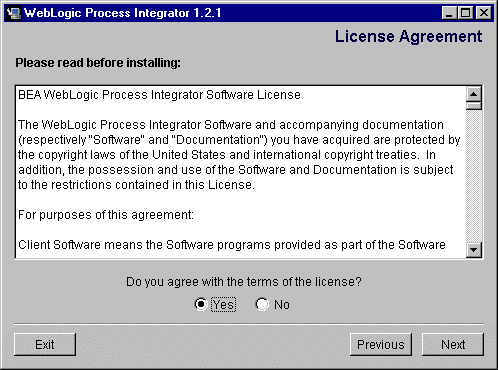
After you have clicked Next in the Introduction dialog box, the License Agreement is displayed as shown in the following figure.
Figure 2-1 License Agreement Dialog Box
Complete the following procedure:
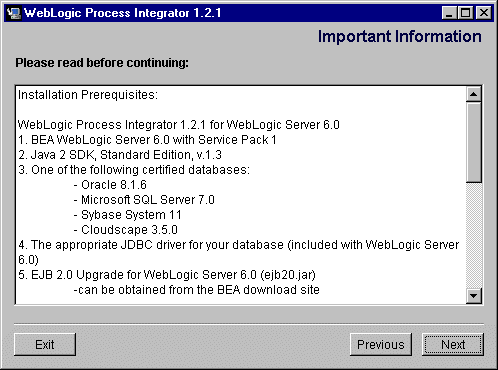
The Important Information dialog box is displayed as shown in the following figure.
Figure 2-2 Important Information Dialog Box
Note: You must scroll down to view the installation prerequisites for WebLogic Process Integrator 1.2.1 for WebLogic Server 5.1. The Choose Install Set dialog box is displayed.
Step 3. Selecting Components
By default, BEA WebLogic Process Integrator installation program installs the following components:
It is not necessary, however, to install all components on the same system. Although the WebLogic Process Integrator Server must be installed on a system hosting WebLogic Server, the other WebLogic Process Integrator components, Studio and Worklist, can be installed on the same system or on another system that can connect to the WebLogic Process Integrator Server over the network.
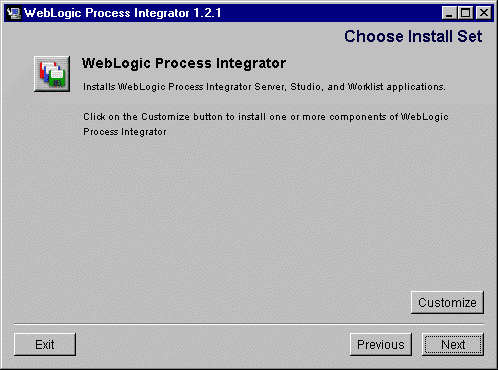
The components to be installed are selected in the Choose Install Set dialog box as shown in the following figure.
Figure 2-3 Choose Install Set Dialog Box
To install all components on the same system:
The Select the Version of the WebLogic Process Integrator dialog box is displayed.
To customize the installation:
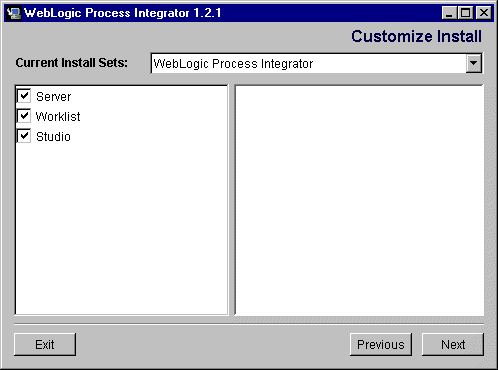
The Custom Install dialog box is displayed as shown in the following figure.
Figure 2-4 Customize Install Dialog Box
The Select the Version of WebLogic Process Integrator dialog box is displayed.
Step 4. Selecting the Version of WebLogic Process Integrator
After you have selected the components, the Select the Version of WebLogic Process Integrator dialog box is displayed as shown in the following figure.
Figure 2-5 Select the Version of WebLogic Process Integrator Dialog Box
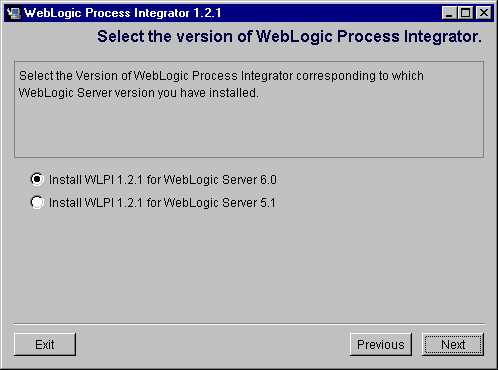
If WebLogic Server 6.0 is detected, the Install WLPI 1.2.1 for WebLogic Server 6.0 option is selected. If WebLogic Server 6.0 is not detected, the Install WLPI 1.2.1 for WebLogic Server 5.1 option is selected.
The Choose BEA Home Directory dialog box is displayed.
Note: If the WebLogic Server 6.0 Not Installed warning is displayed, go to WebLogic Server 6.0 Not Detected.
Step 5. Specifying the BEA Home and Installation Location
After you have selected the version of WebLogic Process Integrator, the Choose BEA Home Directory dialog box is displayed as shown in the following figure.
Figure 2-6 Choose BEA Home Directory Dialog Box
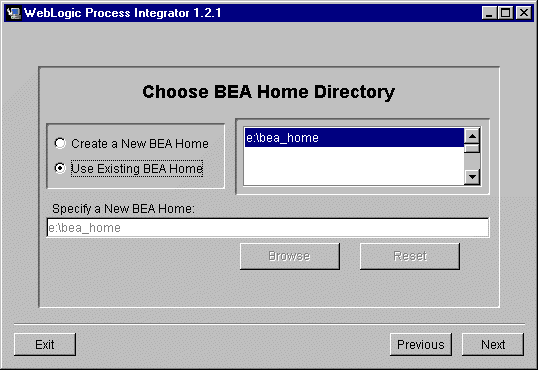
Before responding to the dialog box:
To specify the BEA Home directory and installation location:
If you are installing WebLogic Process Integrator 1.2.1 for WebLogic Server 6.0, one of the following is displayed:
If you are installing WebLogic Process Integrator 1.2.1 for WebLogic Server 5.1, the Choose Product Directory dialog box is displayed as shown in the following figure.
Figure 2-7 Choose Product Directory Dialog Box
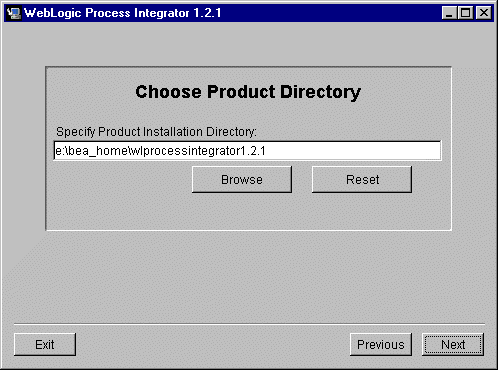
Note: If you are installing WebLogic Process Integrator 1.2.1 for WebLogic Server 5.1, it is possible to overwrite an existing installation of WebLogic Process Integrator without warning.
Step 6. Configuring the JDBC Connection Pool
As noted in Installation Prerequisites, you must have access to a supported database server and the JDBC driver required for that server must be installed before you can install WebLogic Process Integrator.
To enable WebLogic Process Integrator to communicate with your database server you must define a JDBC connection pool. As part of the installation process, you are prompted for information required to establish access to your database server. Other JDBC pool parameters, such as pool name and maximum connections, are set to default values. If necessary, after completing the installation, you can customize your configuration as described in Starting, Stopping, and Customizing BEA WebLogic Process Integrator.
SQL database definition language files are provided during installation. As described in Step 9. Creating the WebLogic Process Integrator Tables, these files are used by your database administrator to create tables required by WebLogic Process Integrator on your database server. The user name, password, and other identifiers used to access these tables must be chosen by you and your database administrator together, and they must reflect the JDBC connection pool information you provide in this step.
The information required to configure the JDBC connection pool depends on whether you are installing WebLogic Process Integrator 1.2.1 for WebLogic Server 5.1 or for 6.0. The following section provides instructions for WebLogic Process Integrator 1.2.1 for WebLogic Server 6.0. If you are installing WebLogic Process Integrator 1.2.1 for WebLogic Server 5.1, skip the following section and go to Configuring JDBC: WebLogic Process Integrator 1.2.1 for WebLogic Server 5.1.
Configuring JDBC: WebLogic Process Integrator 1.2.1 for WebLogic Server 6.0
After you have selected the Product Directory, the JDBC Connection Pool dialog is displayed as shown in the following figure.
Figure 2-8 JDBC Connection Pool Dialog Box
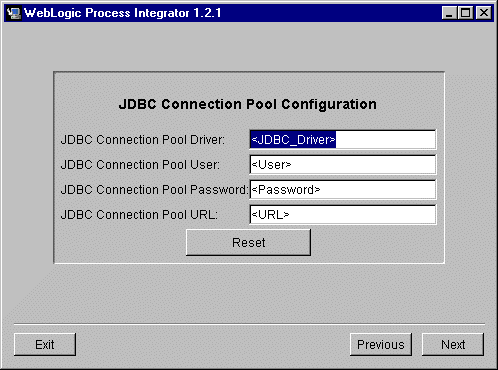
To configure the JDBC connection pool:
The required information is summarized in JDBC Connection Pool Parameters at the end of this procedure.
The Mail Session Configuration dialog box is displayed.
JDBC Connection Pool Parameters
The following table summarizes the information required to configure the JDBC connection pool.
Table 2-1 JDBC Connection Pool Parameters
JDBC Connection Pool URL Format The JDBC connection pool URL includes specification of the following:
The following provide sample URLs for each supported database.
jdbc:oracle:thin:@host:port:database
For example: jdbc:oracle:thin:@rdbmshost:1521:wlpi
jdbc:sybase:Tds:host:port/database
For example: jdbc:sybase:Tds:rdbmshost:5000/wlpi
jdbc:cloudscape:database
For example: jdbc:cloudscape:wlpi
jdbc:weblogic:mssqlserver4:database@host:port?sql7=true
For example: jdbc:weblogic:mssqlserver4:wlpi@rdbmshost:1433?sql7=true
Configuring JDBC: WebLogic Process Integrator 1.2.1 for WebLogic Server 5.1
After you have selected the Product Directory, the Database Selection dialog is displayed as shown in the following figure.
Figure 2-9 Database Selection Dialog Box
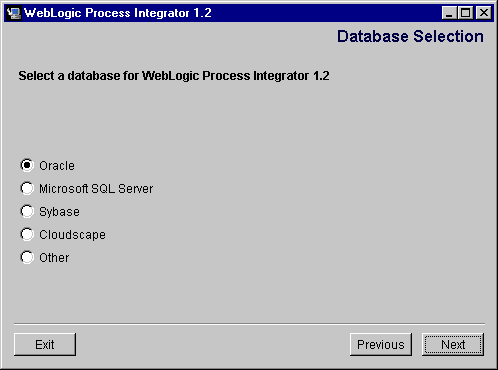
To configure the JDBC connection pool:
Oracle, Microsoft SQL Server, Sybase, and Cloudscape are the only database platforms that are currently certified with BEA WebLogic Process Integrator release 1.2.1. If you select Other, you must configure the Driver and JDBC connection pool manually. For information about how these files might be modified, see the configuration files listed in BEA WebLogic Process Integrator Sample Configuration Files.
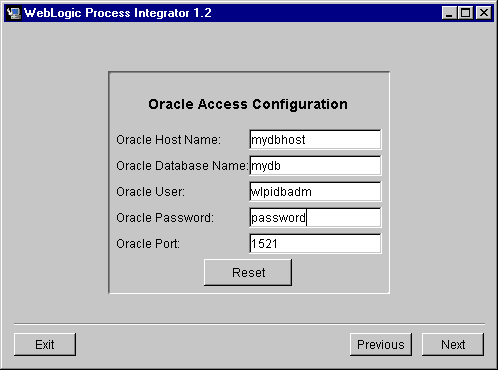
The database configuration dialog box is displayed.
For example, the following figure shows the database configuration dialog box displayed when you select Oracle.
Figure 2-10 Oracle Configuration Dialog Box
The Confirm Selection of Base WebLogic Server Version dialog box is displayed.
Step 7. Completing the Installation
After you have provided the information required to configure the JDBC connection pool, the dialog box displayed depends on the version of WebLogic Process Integrator you are installing:
Note: Mail session properties are not set as part of the installation of WebLogic Server 1.2.1 for WebLogic Server 5.1. For instructions for setting the mail session properties after installation, see Setting the Mail Session Properties.
These dialog boxes are shown in the following figures.
Figure 2-11 Mail Session Configuration Dialog Box
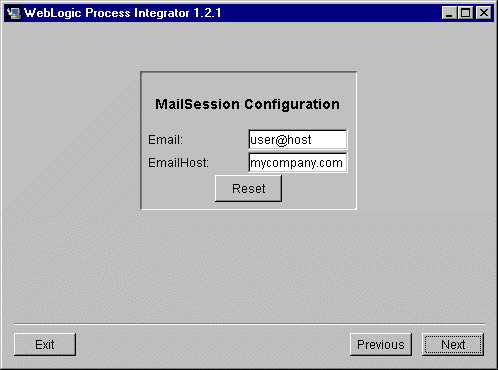
Figure 2-12 Confirm Selection of Base WebLogic Server Version Dialog Box
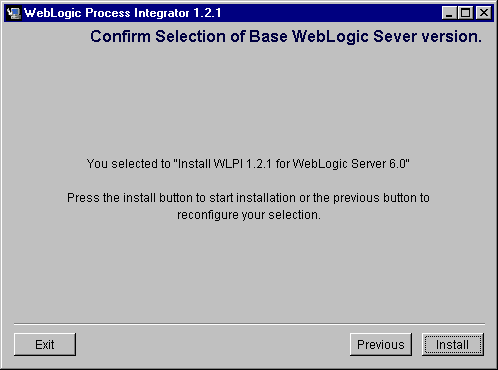
The Confirm Selection of Base WebLogic Server Version dialog box is displayed.
The Installation Status dialog box is displayed as shown in the following figure.
Figure 2-13 Installation Status Dialog Box
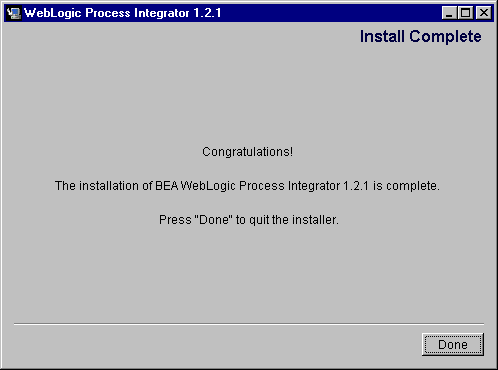
When installation is complete, the Installation Complete dialog box is displayed as shown in the following figure. Figure 2-14 Install Complete Dialog Box
Step 8. Installing Your Software License
BEA WebLogic Process Integrator cannot be used without a valid software license. If you purchased the software on CD-ROM, the license is provided on a diskette in the product box. If you purchased a license for a product downloaded from the BEA Web site, you receive the license as an e-mail attachment.
The method used to install the software license depends on which version of the product you have installed: Release 1.2.1 for WebLogic Server 6.0 or Release 1.2.1 for WebLogic Server 5.1. This section provides procedures for installing a license for both versions.
Installing the License: WebLogic Process Integrator 1.2.1 for WebLogic Server 6.0
To install your software license:
Warning: Do not overwrite the existing license.bea file.
set PATH=.\jdk130\bin:%PATH%
set PATH=./jdk130/bin:$PATH
UpdateLicense license_update_file
sh UpdateLicense.sh license_update_file
Although no one else can use your license file, you should save this information in a place protected from either malicious or innocent tampering by others.
Installing the License: WebLogic Process Integrator 1.2.1 for WebLogic Server 5.1
To install the software license, copy the license.bea file from the diskette or e-mail attachment to the directory you designated as the BEA Home directory during installation.
Step 9. Creating the WebLogic Process Integrator Tables
Before you can run BEA WebLogic Process Integrator, you must first create the required database tables on the database server. The ddl subdirectory of the WebLogic Process Integrator product directory (for example, c:\bea\wlprocessintegrator1.2.1\ddl) contains SQL Data Definition Language (DDL) files that are used to create the required tables. Use the database administrator tool to execute the appropriate DDL file.
The procedure for using the DDL file to create the tables in Cloudscape are provided in the following section. For other supported databases, consult your database administrator for the procedure.
Note: If you have installed WebLogic Process Integrator 1.2.1 for WebLogic Server 6.0 and you are using a Cloudscape database, in addition using the DDL file to create the required tables, you must update the server.cmd file as described in the following section. Creating Tables and Updating Settings for Cloudscape This section describes how to create the database tables and update configuration settings for a Cloudscape database. To create the tables for Cloudscape
java -classpath C:\bea_home\weblogic_server_dir\samples\eval\cloudscape\lib\
tools.jar;C:\bea\wlserver6.0\samples\eval\cloudscape\lib\
cloudscape.jar COM.cloudscape.tools.cview
If you have installed WebLogic Process Integrator 1.2.1 for WebLogic Server 6.0, you must modify the server.cmd (Windows) or server.sh (UNIX) file for Cloudscape. The required settings are shown in server.cmd/server.sh in Appendix A.
If you entered the appropriate settings for Cloudscape in the Step 6. Configuring the JDBC Connection Pool, settings in the config.xml (WebLogic Process Integrator 1.2.1 for WebLogic Server 6.0) or weblogic.properties (WebLogic Process Integrator 1.2.1 for WebLogic Server 5.1) file have been updated as required.
If you are configuring a Cloudscape database after installation, refer to the sections appropriate to your installation.
Step 10. Verifying the WebLogic Process Integrator Installation
To verify the installation, start each application as described in Starting and Stopping BEA WebLogic Process Integrator Components.
Uninstalling BEA WebLogic Process Integrator
This section provides platform-specific procedures for uninstalling WebLogic Process Integrator. See the section appropriate for your platform:
Uninstalling WebLogic Process Integrator on a Windows system
To uninstall BEA WebLogic Process Integrator on Windows:
The WebLogic Process Integrator Uninstall dialog box is displayed as shown in the following figure.
Figure 2-15 BEA WebLogic Process Integrator Uninstall Start Screen
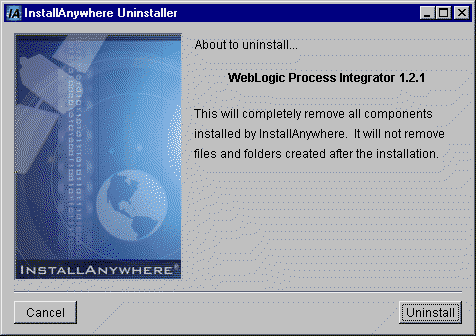
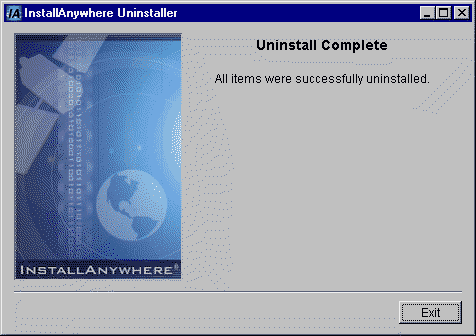
Figure 2-16 Uninstall Complete Dialog Box
Uninstalling WebLogic Process Integrator on a UNIX System
To uninstall BEA WebLogic Process Integrator on a UNIX system:
If you are uninstalling WebLogic Process Integrator 1.2.1 for WebLogic Server 6.0, go to the uninstaller directory. (The default pathname for the directory is /bea/wlprocessintegrator1.2.1/uninstaller.).
If you are uninstalling WebLogic Process Integrator 1.2.1 for WebLogic Server 6.0, go to the UninstallerData directory. (The default pathname for the directory is /bea/wlprocessintegrator1.2.1/UninstallerData.)
When the uninstallation process is complete, the message Uninstall Complete is displayed.
Troubleshooting the Installation
This section describes the problems that may occur during installation, and the symptoms, possible causes, and solutions for those problems: The following problems are described:
Previous Installation Found
Symptom
You have selected a BEA Home directory in the Choose BEA Home Directory Dialog Box and clicked Next. The Previous Installation Found warning is displayed as shown in the following figure.
Figure 2-17 Previous Installation Found Warning
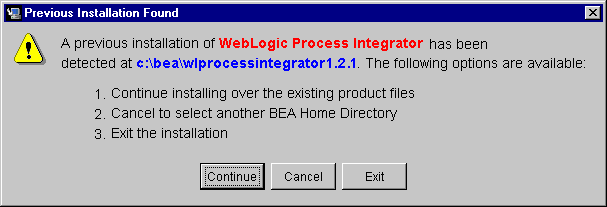
Note: This warning is only displayed if you are installing WebLogic Server Process Integrator 1.2.1 for WebLogic Server 6.0. If you are installing WebLogic Process Integrator 1.2.1 for WebLogic Server 5.1, it is possible to overwrite a previous installation without warning.
Solution The warning dialog presents three options: Continue, Cancel and Exit:
WebLogic Server 6.0 Not Detected Symptom You have installed WebLogic Server 6.0 but one of the following occurs:
Figure 2-18 WebLogic Server 6.0 Missing

Possible Cause 1
Your WebLogic Server 6.0 installation has an evaluation license.
Solution 1
You must purchase WebLogic Server and update the license. Information about purchasing licenses for BEA software can be found at http://www.beasys.com/buy.
Possible Cause 2
You have more than one BEA Home directory configured and the selected directory does not correspond to a valid installation.
Solution 2
Click Cancel to dismiss the dialog box, then click Previous in the Select the Version of WebLogic Process Integrator dialog box to return to the Choose BEA Home Directory dialog box. Select a valid BEA Home directory. For information about the BEA Home directory, see "BEA Home Directory" at http://download.oracle.com/docs/cd/E13222_01/wls/docs60/install/instpre.html#1026378.
Possible Cause 3
You have not installed WebLogic Server 6.0.
Solution 3
Click Exit to dismiss the dialog box and exit the installation. Install WebLogic Server 6.0 before installing WebLogic Process Integrator 1.2.1 for WebLogic Server 6.0

|

|

|
|
|
|
Copyright © 2001 BEA Systems, Inc. All rights reserved.
|