4.6 How to Install a CD-ROM or Tape Drive
4.6.1 Before You Begin
Know the configuration guidelines for installing removable media devices. For detailed information, see your Sun Enterprise 220R Server Owner's Guide.
Complete these tasks:
4.6.2 What to Do
-
If necessary, remove the plastic filler panel from the removable media assembly plastic cover.
On the back side of the RMA cover, push the filler panel retainer tabs inward to disengage the filler panel.
-
If you are replacing a defective drive, make sure that the jumper settings on the new drive match the settings on the old drive.
-
Slide the CD-ROM or tape drive into its drive bay.
Align the two screw holes on each side of the drive with the corresponding holes in each side of the drive bay.

-
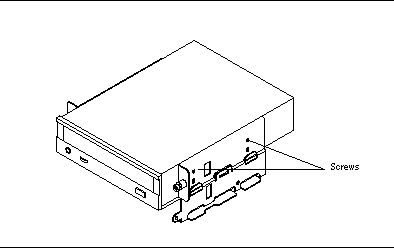
Insert and tighten the four flat-head Phillips screws that secure the drive in its bay.
There are two screws on each side that secure the drive in the RMA.
4.6.3 What Next
To reassemble the system, complete these tasks:
When you are ready to restart the system, be sure to run OpenBoot Diagnostics (OBDiag) tests to verify that the system functions correctly with the new parts you have just installed. For additional information, see:
You must also perform a reconfiguration boot so that your system is able to recognize any new device(s). For additional information, see:
- © 2010, Oracle Corporation and/or its affiliates
