| Skip Navigation Links | |
| Exit Print View | |

|
Sun Storage 6 Gb SAS PCIe RAID HBA, Internal Installation Guide For HBA Models SGX-SAS6-R-INT-Z and SG-SAS6-R-INT-Z |
| Skip Navigation Links | |
| Exit Print View | |

|
Sun Storage 6 Gb SAS PCIe RAID HBA, Internal Installation Guide For HBA Models SGX-SAS6-R-INT-Z and SG-SAS6-R-INT-Z |
Chapter 2 Hardware Installation and Removal
Chapter 3 Creating a Bootable Drive in a Preboot Environment
Overview of Creating a Bootable Drive in a Preboot Environment
Methods For Creating a Bootable Drive
Creating a Bootable Drive (SPARC)
To Create a Bootable Drive (SPARC)
Using the pcli Utility to Create a Bootable Drive (SPARC)
To Prepare to Use the pcli Utility
To Create a Logical Drive With the pcli Utility
Importing an Existing Logical Drive Configuration (SPARC)
To Import an Existing Logical Drive Configuration From a Different Controller (SPARC)
Creating an Alias for a Bootable Drive (SPARC)
To Create an Alias for a Bootable Drive (SPARC)
Creating a Bootable Drive (x86)
To Create a Bootable Drive (x86)
Using the Configuration Options Menu to Create a Bootable Logical Drive (x86)
To Verify the Drives and Their Slots (x86)
To Create a Logical Drive (x86)
To Confirm the Logical Drive Creation (x86)
Using the pcli Utility to Create a Bootable Drive (x86)
To Create a Logical Drive With the pcli Utility (x86)
Importing an Existing Logical Drive Configuration (x86)
To Import an Existing Logical Drive Configuration Using the Configuration Options Menu (x86)
To Import an Existing Logical Drive Configuration in Legacy Booting Mode (x86)
Validating the Label of the HBA Logical Drive
To Verify That the Label of a Logical Drive Is Valid
Installing the Oracle Solaris OS
To Prepare to Install the Oracle Solaris OS
To Install the Oracle Solaris OS
After you have created or imported a logical drive, assuming your system BIOS is set to boot in legacy mode, you can use the drive to boot through the HBA. Only one logical drive can be set as the boot drive for this HBA at any time.
This section describes how to boot through the HBA using the WebBIOS utility on an x86 system.
A message is displayed that gives you the option to press CTRL+H to access the WebBIOS configuration utility.
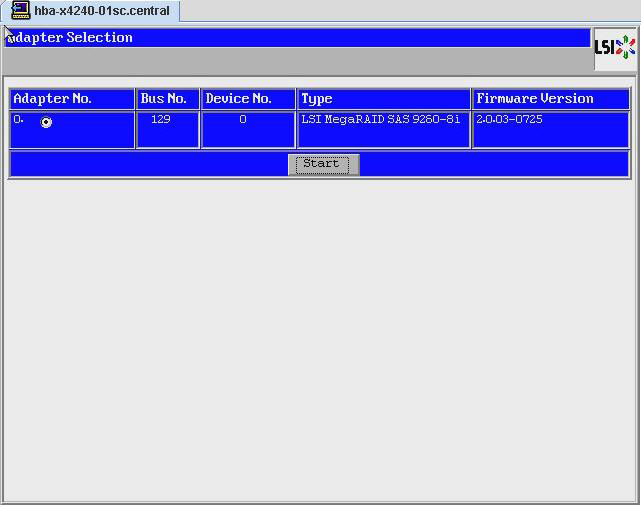
The Adapter Selection screen is displayed.
Figure 3-11 Adapter Selection Screen

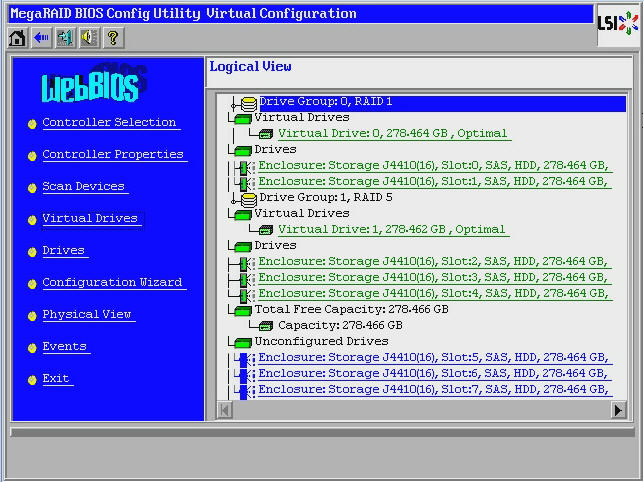
The MegaRAID BIOS Config Utility Virtual Configuration screen is displayed.
Figure 3-12 MegaRAID BIOS Config Utility Virtual Configuration Screen

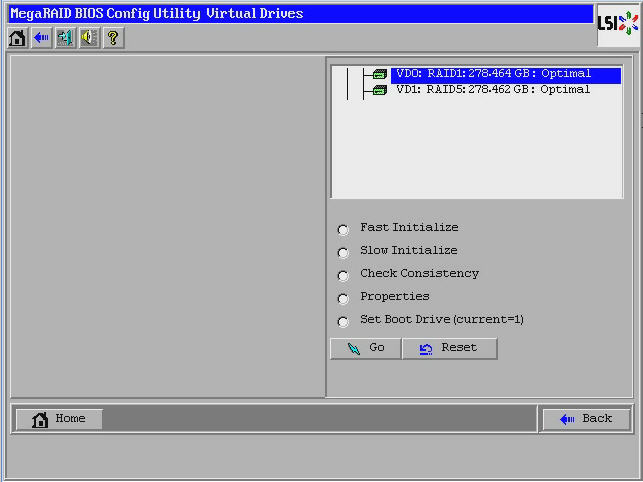
The MegaRAID BIOS Config Utility Virtual Drives screen is displayed.
Figure 3-13 MegaRAID BIOS Config Utility Virtual Drives Screen

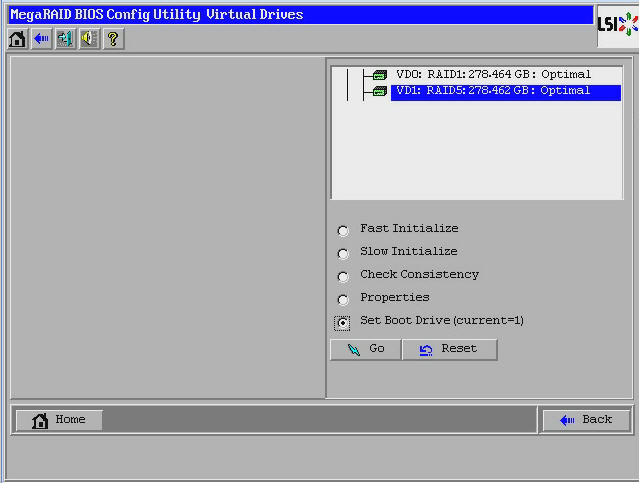
Figure 3-14 Designating a Virtual Drive to Be the Boot Drive for the HBA

The selected drive is now the boot drive for the HBA.