| Skip Navigation Links | |
| Exit Print View | |

|
Sun Blade Storage Module M2 Administration Guide |
About This Documentation (PDF and HTML)
SAS Device Access to the Chassis SAS-2 Domain
Host Access to Storage Module Resources Using the Sun Blade Zone Manager
How to Assign Storage to Hosts Using the CMM ILOM CLI
Overview of Storage Module Management
Management Options Using the CMM ILOM
Management Options Using the Sun Storage 6Gb SAS REM RAID HBA (SGX-SAS6-R-REM-Z)
Management Options Using the Sun Storage 6Gb SAS REM HBA (SGX-SAS6-REM-Z)
Performing Maintenance and Hot Plug Actions
Preparing for Hot Plug Actions
Recovering Zoning Configurations
Upgrading Storage Module Firmware
Importing Existing Virtual Drives to a Replacement REM
Replacing a REM on a SPARC System
Replacing a REM on an x86 System
Storage Module Sensors and Indicators
Displaying Sensor and Indicator Information Using the CMM ILOM Web Interface
Displaying Sensor and Indicator Information Using the CMM ILOM CLI
Before You Begin
The chassis must be powered on and all SAS-2 devices (hosts, NEMs, and storage modules) must be running in order to assign storage resources to hosts.
Note - You might have to wait as much as five minutes after all SAS-2 devices are powered-on before they are recognized by the CMM. Then you can assign storage module resources. This time allows the CMM zmgtd daemon to discover the new devices and bring them into the SAS-2 fabric.
These instructions assume a network connection to the CMM ILOM.
These instructions describe how to initially set up, or add, host-to-storage assignments using the Sun Blade Zone Manager. For complete information on using the Sun Blade Zone Manager feature of the CMM ILOM, refer to the Oracle Integrated Lights Out Manager (ILOM) CMM Administration Guide for Sun Blade 6000 and 6048 Modular Systems.
http://chassis_sp_ipaddress/
Where chassis_sp_ipaddress is the IP address of your chassis service processor.
The ILOM login page will appear.
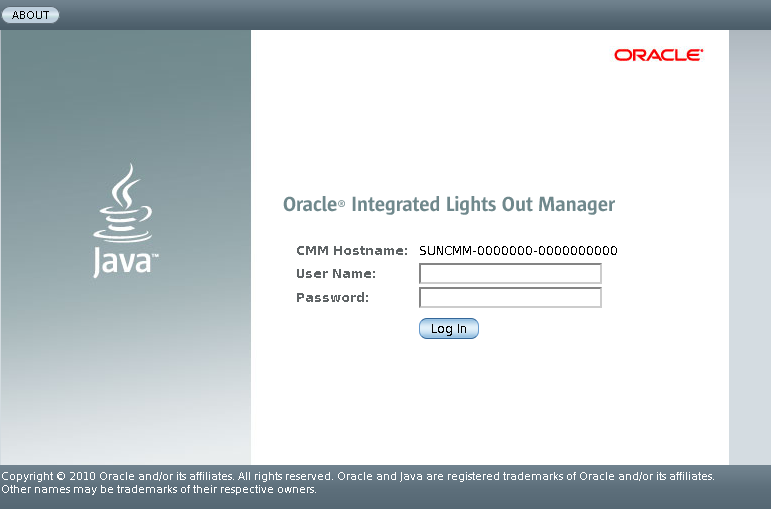
You must login using an account with administrator privileges.
The Chassis View page appears.
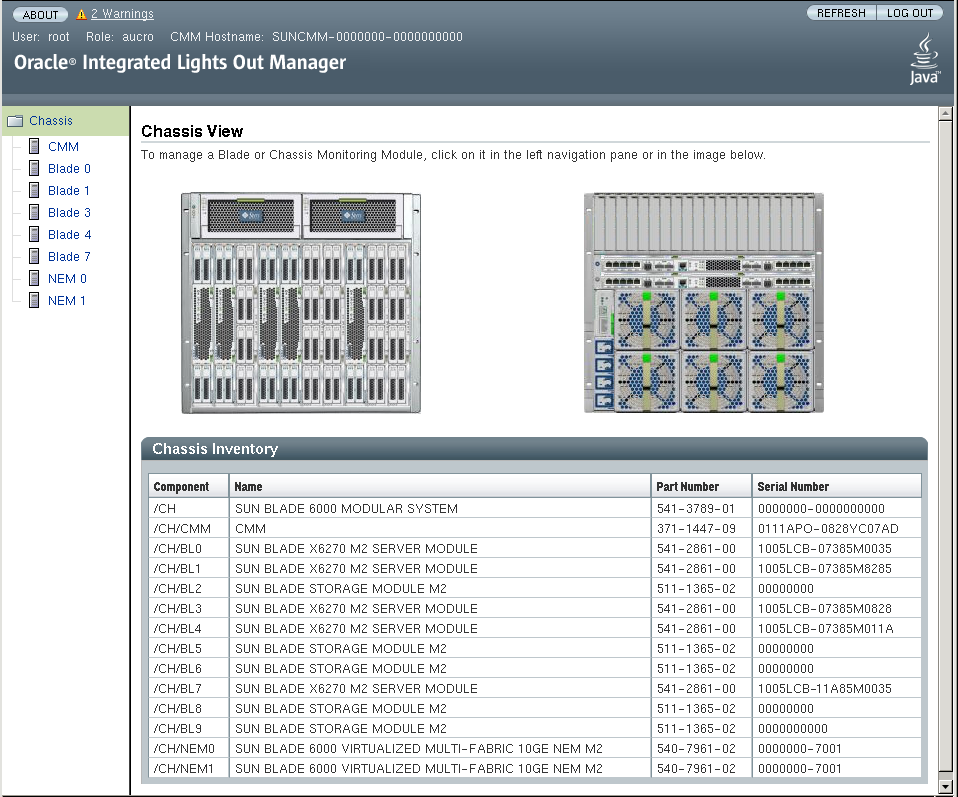
Note - In the left pane, installed server blades are listed, but not installed storage modules. This is because the CMM ILOM controls storage module Integrated Lights Out Management functions.
Refer to the System Requirements. If you do not have the minimum version required, update the CMM ILOM firmware before continuing.
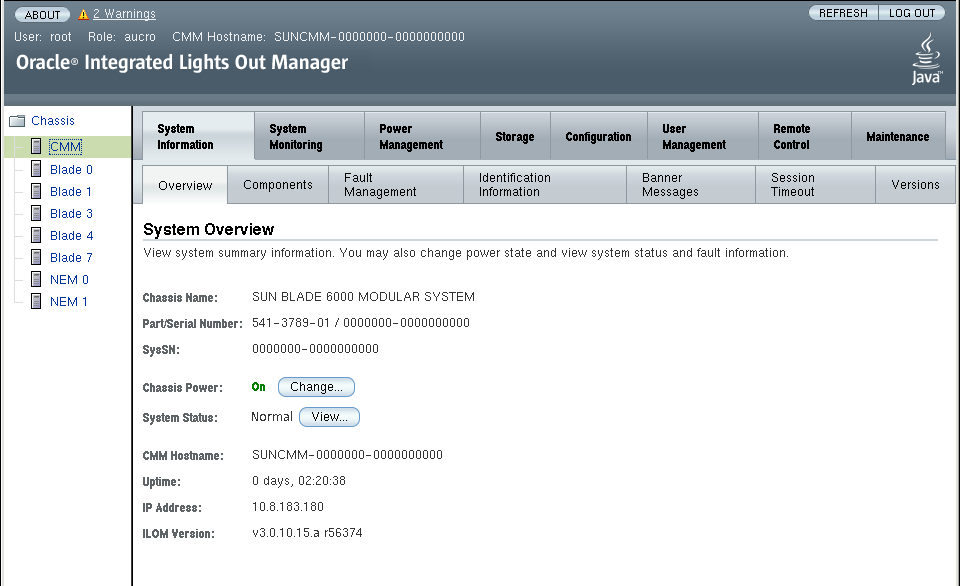
The SAS Zoning sub-page is displayed.
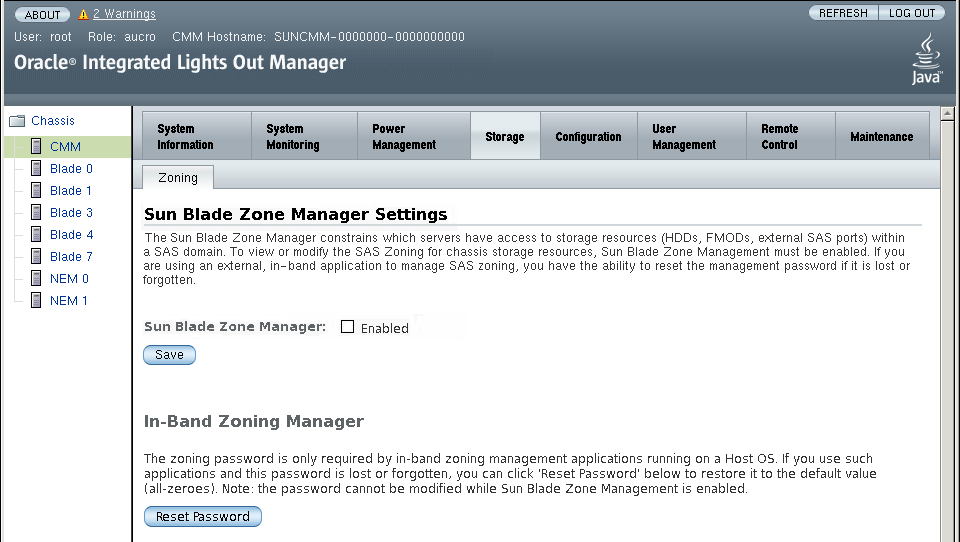
The options for zoning appear. You can now create, view and manage zone settings using the Sun Blade Zone Manager.
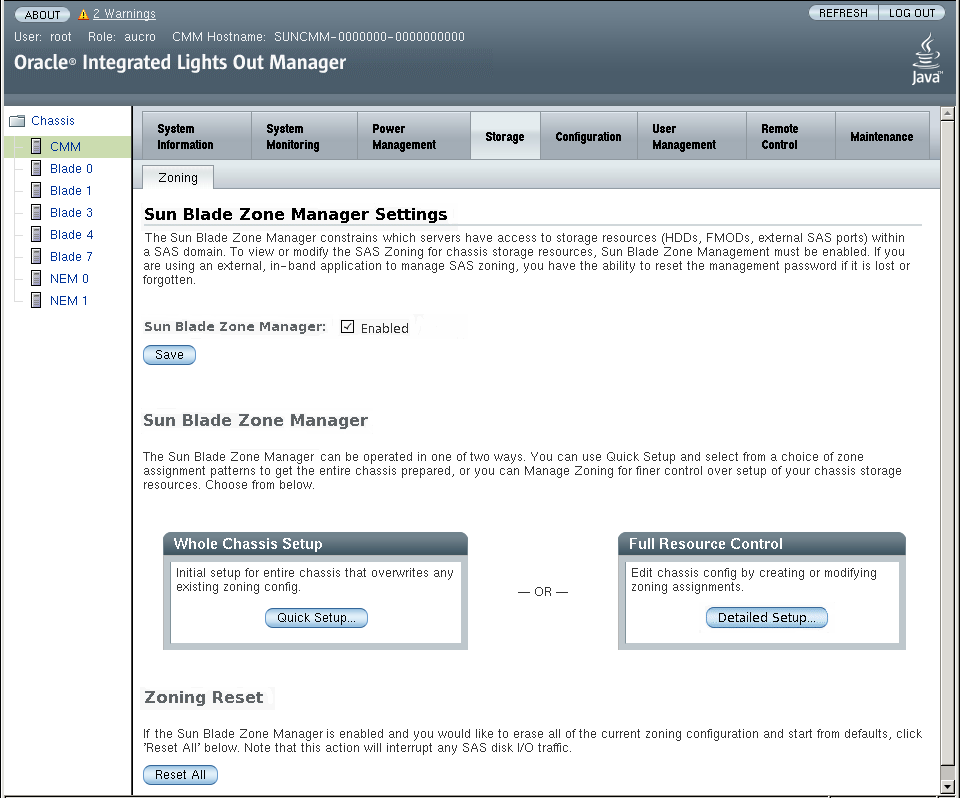
Use this method if there are no existing host-to-storage assignments in the chassis, or if you want to erase all existing assignments and start fresh. Quick Setup allows you to use optimized automated templates to configure assignments. Proceed to Step 7.
Use this method if you want more control in customizing your host-to-storage assignments, or if you have existing assignments in the chassis that you want to add storage to or modify. Proceed to Step 8.
Quick Setup provides easy-to–use automated templates that optimize your host–to–storage assignments based on your need. If you are assigning storage resources in the chassis for the first time (no other assignments have been set), you should use Quick Setup.
 | Caution - Using the Quick Setup templates will overwrite any existing assignments. Quick Setup is best for initial host-to-storage access configuration, or if you want to erase all assignments and start over. |
Note - After creating your initial host-to-storage assignments using Quick Setup, you can later modify assignments using Full Resource Control. Complete instructions for using the CMM Sun Blade Zone Manager can be found in the Oracle Integrated Lights Out Manager (ILOM) CMM Administration Guide for Sun Blade 6000 and 6048 Modular Systems.
A diagram of the chassis components is displayed.
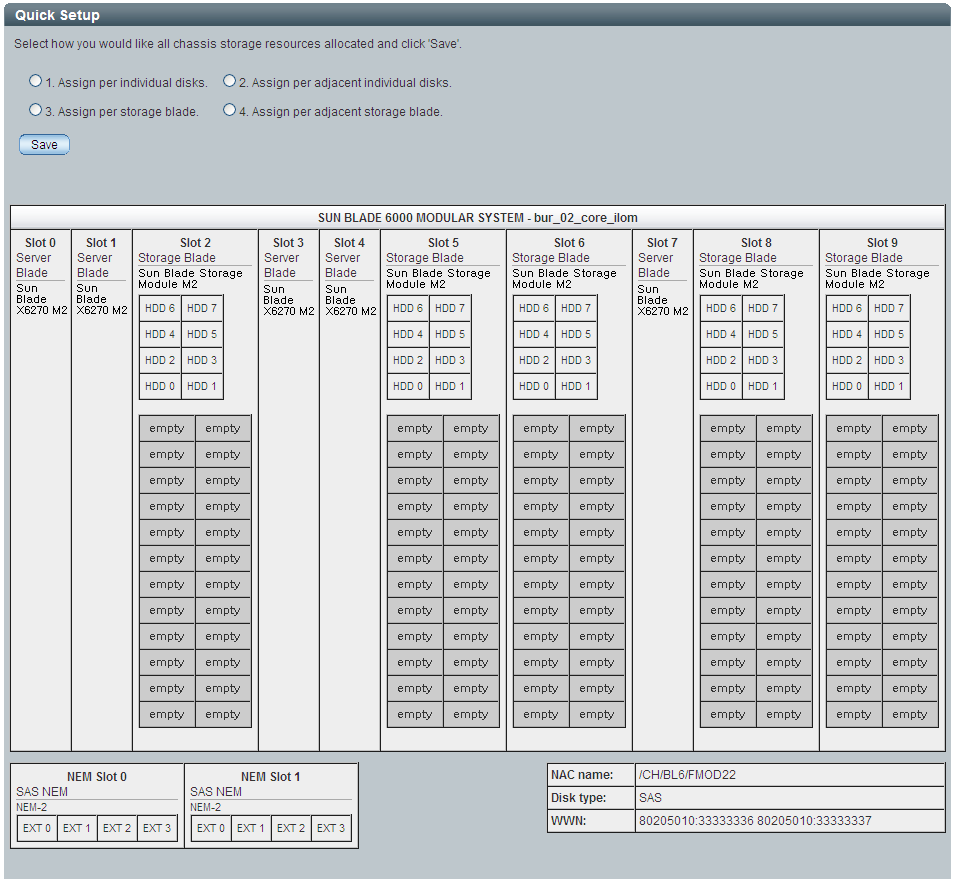
Note - The term HDD in the CMM ILOM web interface refers to an HDD physical slot, regardless of whether a hard disk drive or solid-state drive is present in the slot.
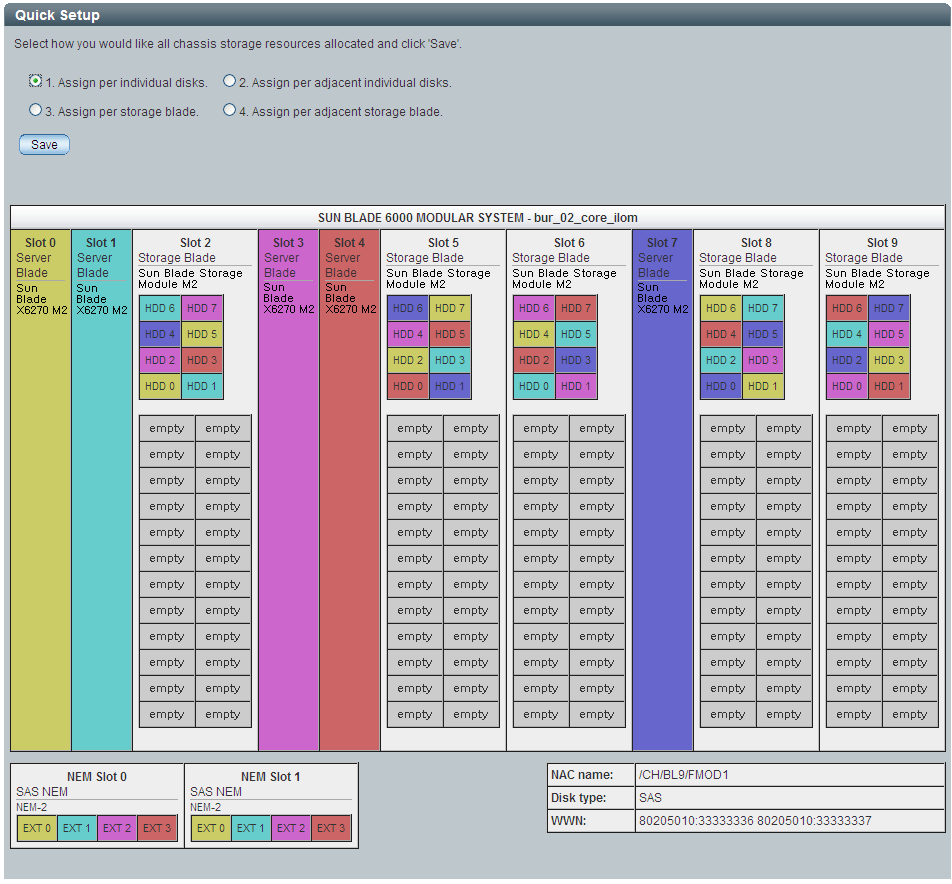
Option 1: Assign per individual disks. This option uses a round-robin algorithm to assign disks to hosts. Ownership of disks is spread evenly across available storage modules. This option is best for fault tolerance where the failure or removal of a single storage module will not bring down a RAID volume.
Option 2: Assign per adjacent individual disks. This option looks for servers (starting at slot 0) and assigns an equal number of disks from the closest storage module. All servers will be assigned as close to an equal number of adjacent disks as possible.
Option 3: Assign per storage blade. This option looks for servers (starting at slot 0) and assigns the closest available storage module. If there are seven servers and three storage modules, only the first three servers will be assigned a storage module.
Option 4: Assign per adjacent storage blade. This option looks for servers with storage modules in adjacent slots and assigns one per server. If a server does not have a storage module in an adjacent slot, it is not assigned any storage.
Note - You can try each template option to see if the template suits your needs. Configurations are not saved until you click the Save button.
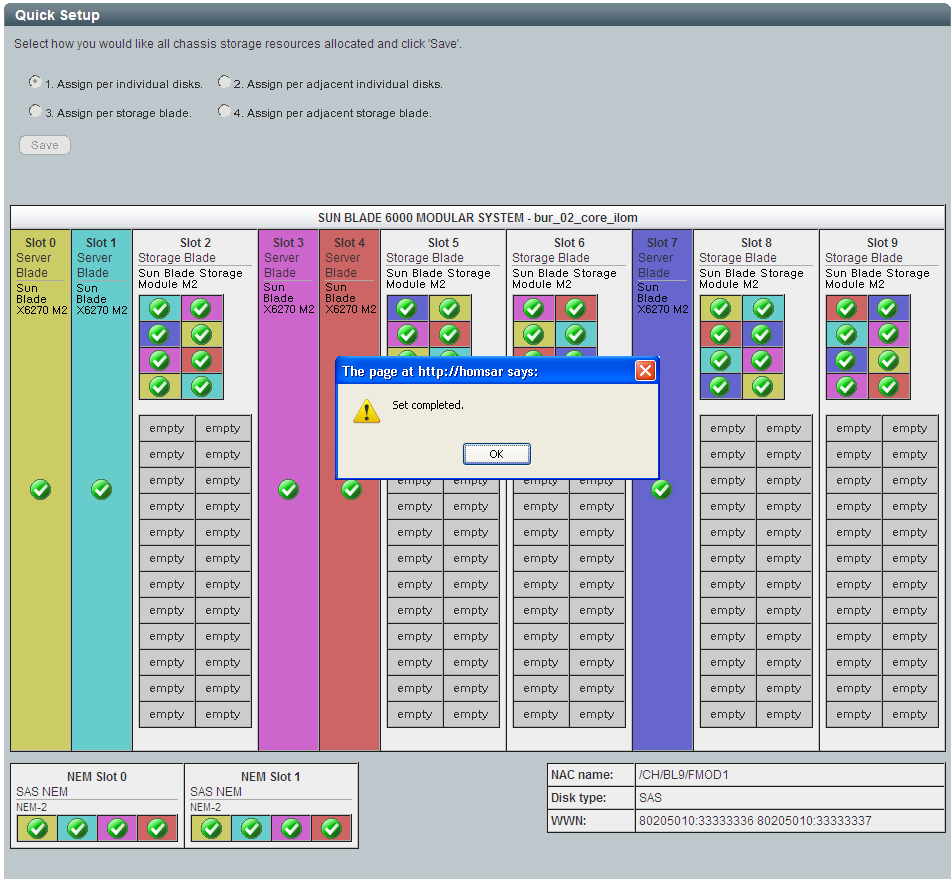
The following is an example of option 1:
The host–to–storage assignments will be saved. Progress is displayed with green check marks as resources are successfully assigned. You can also view details by scrolling to the bottom of the window to view the Pending Assignments table. Do not close the Quick Setup window until the process is complete. Depending on the number of storage devices and servers, this can take up to 15 minutes.
 | Caution - It is important that you do not hot plug or power off any components that have been designated as part of the zoning configuration during the save operation. |
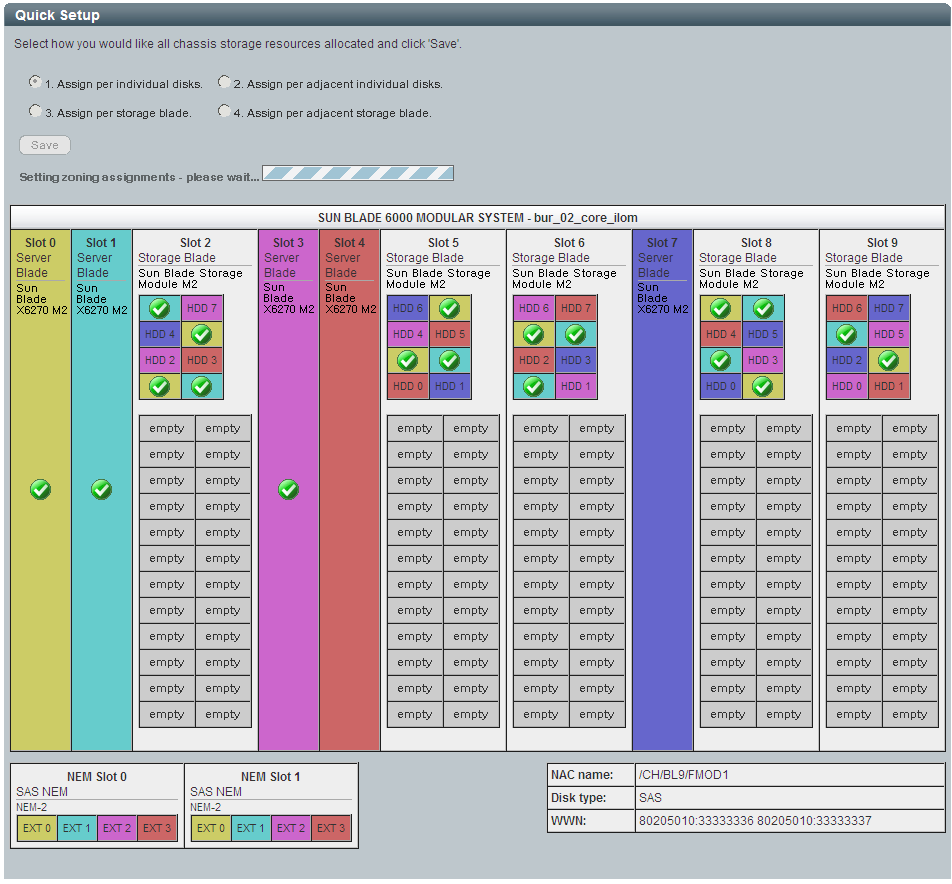
Note - If the Quick Setup window is closed before all of the assignments have been completely saved, only the assignments for devices with a green check mark will be saved. You will then need to return to the Zoning page and click Detailed Setup under Full Resource Control and finish assigning devices that have not been assigned to a host.
This saves your new host–to–storage assignments in the CMM and the SAS domain expanders.
After assignments have been saved, you must next create a backup copy of your CMM ILOM configurations to ensure that if assignments are ever lost, you can recover them by restoring your saved CMM ILOM configurations.
Proceed to Step 9.
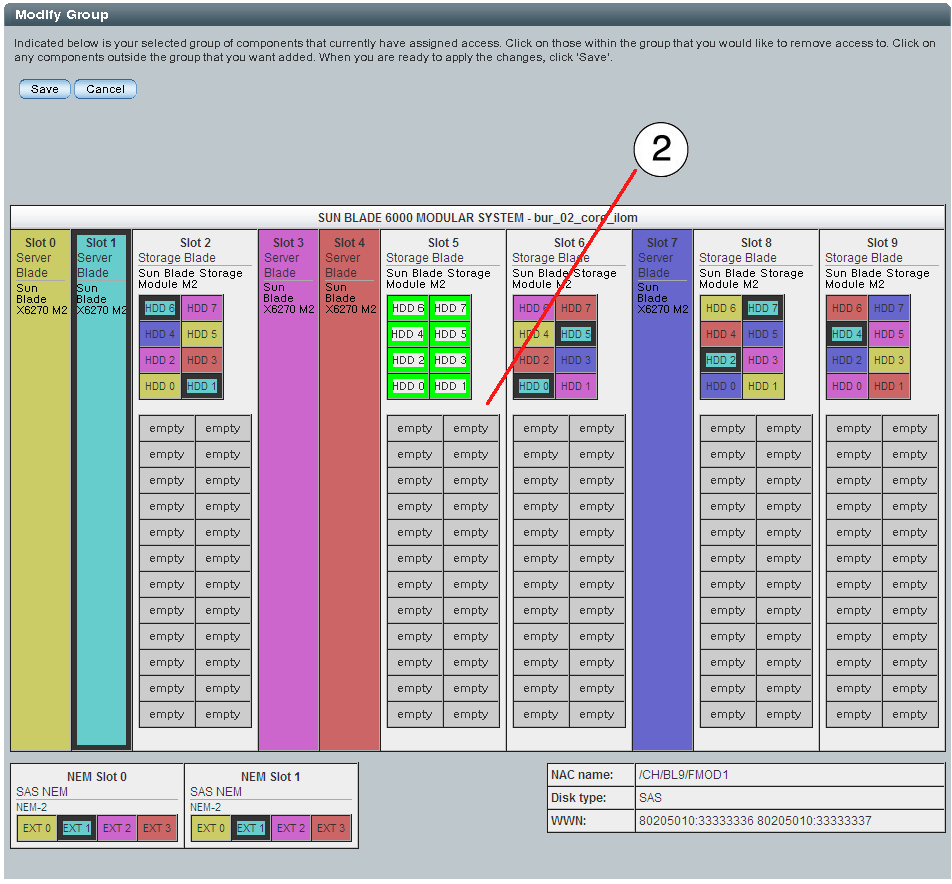
A diagram of the chassis components is displayed. In this example, a storage module has been added to the chassis. In order for it to be seen by a host, it must be either added to an existing zone group, or made part of a new host-to-storage group.
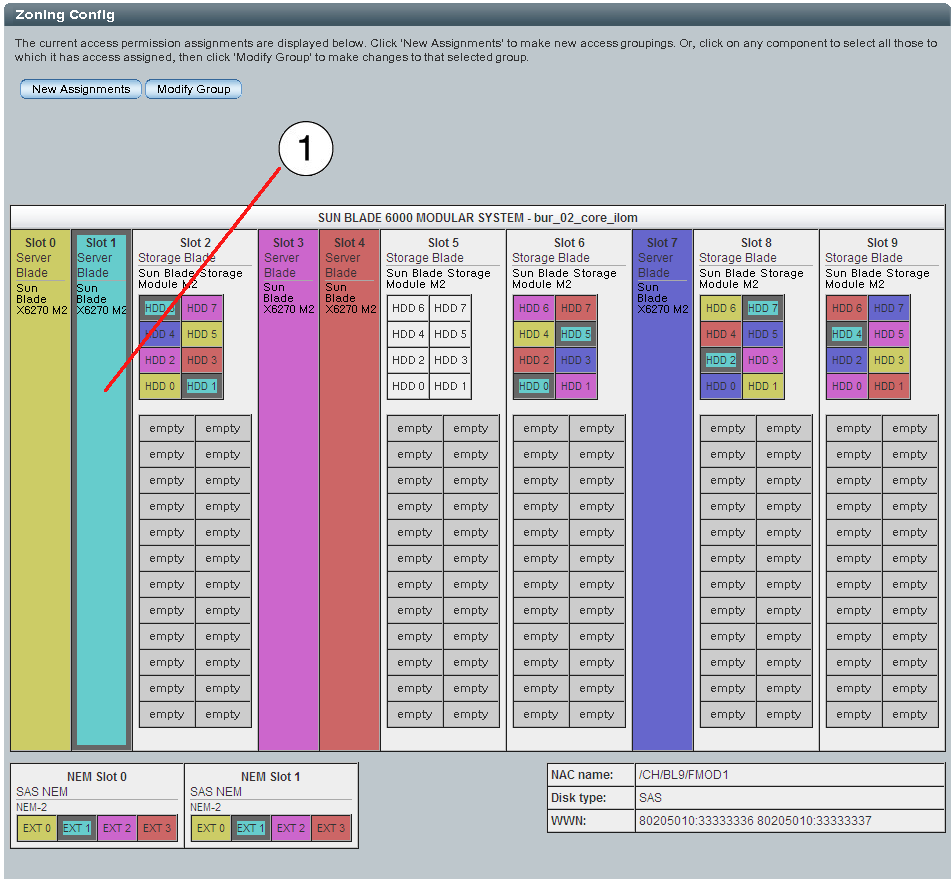
In this example, the new unassigned storage [2] will be added to an existing host [1] zone group.
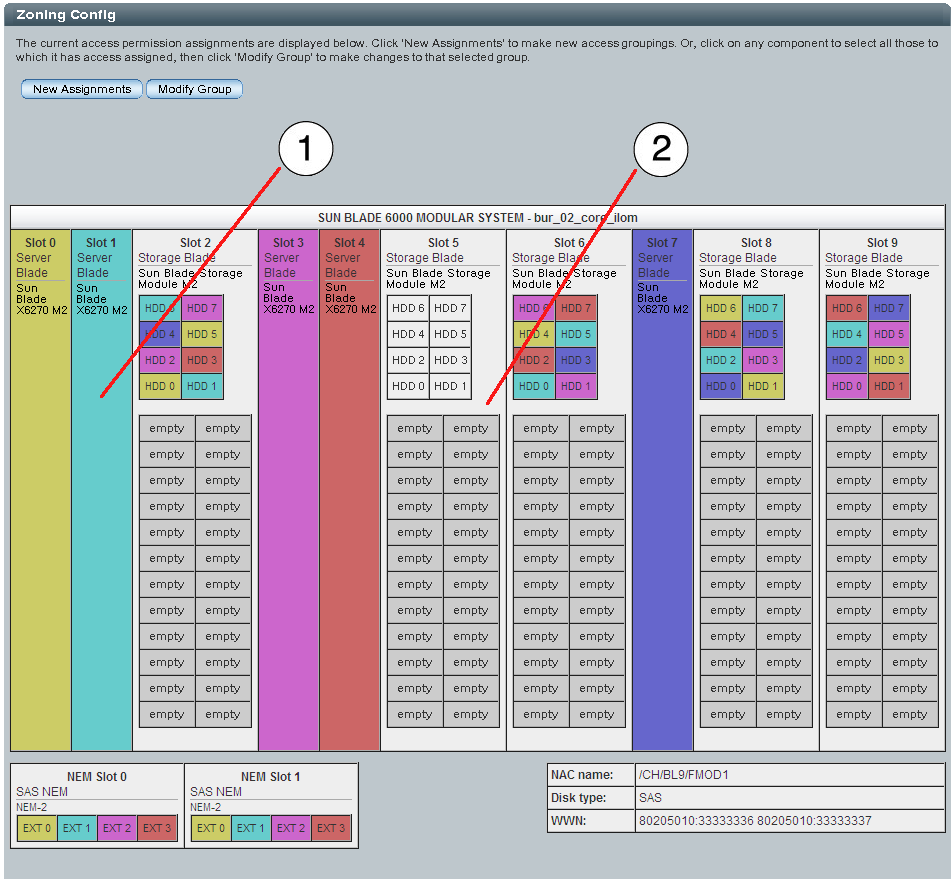
The selected host [1] and all storage currently assigned to it have their outlines highlighted in light gray.
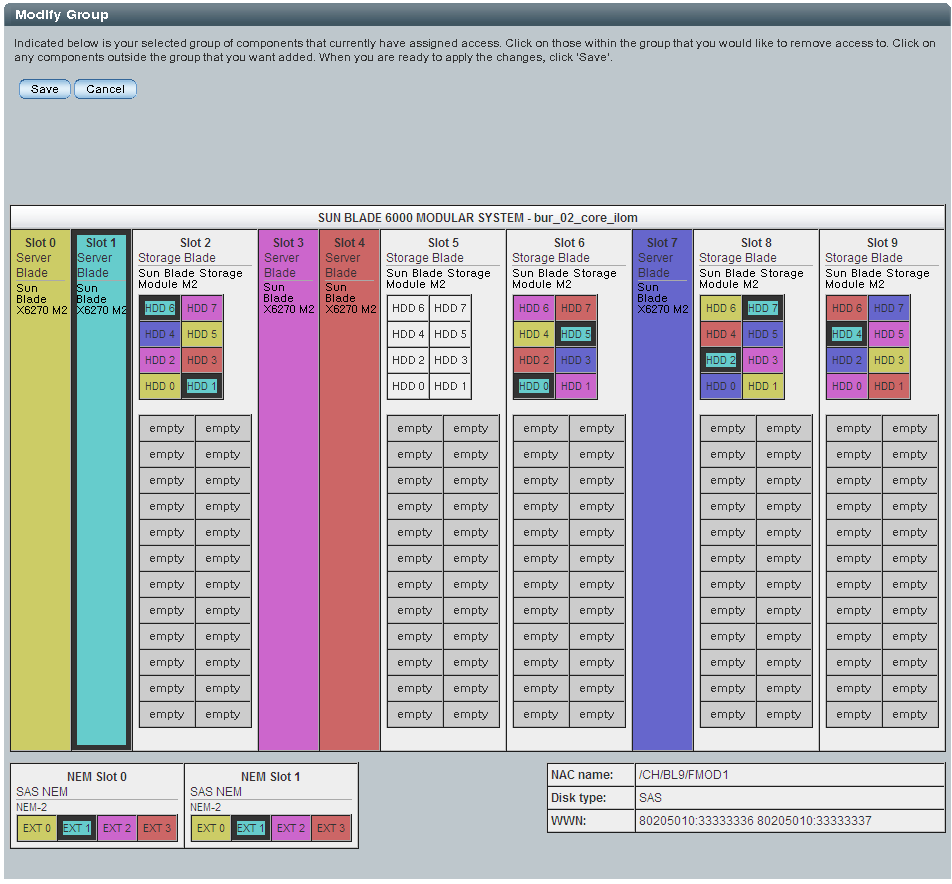
In modify mode, the selected host and all storage currently assigned to it have their outlines highlighted in dark gray.
Each selected storage device [2] that will be assigned to the current zone group has its outline highlighted in light green.
The selected storage will be added to the current zone group. Progress is displayed with green check marks.
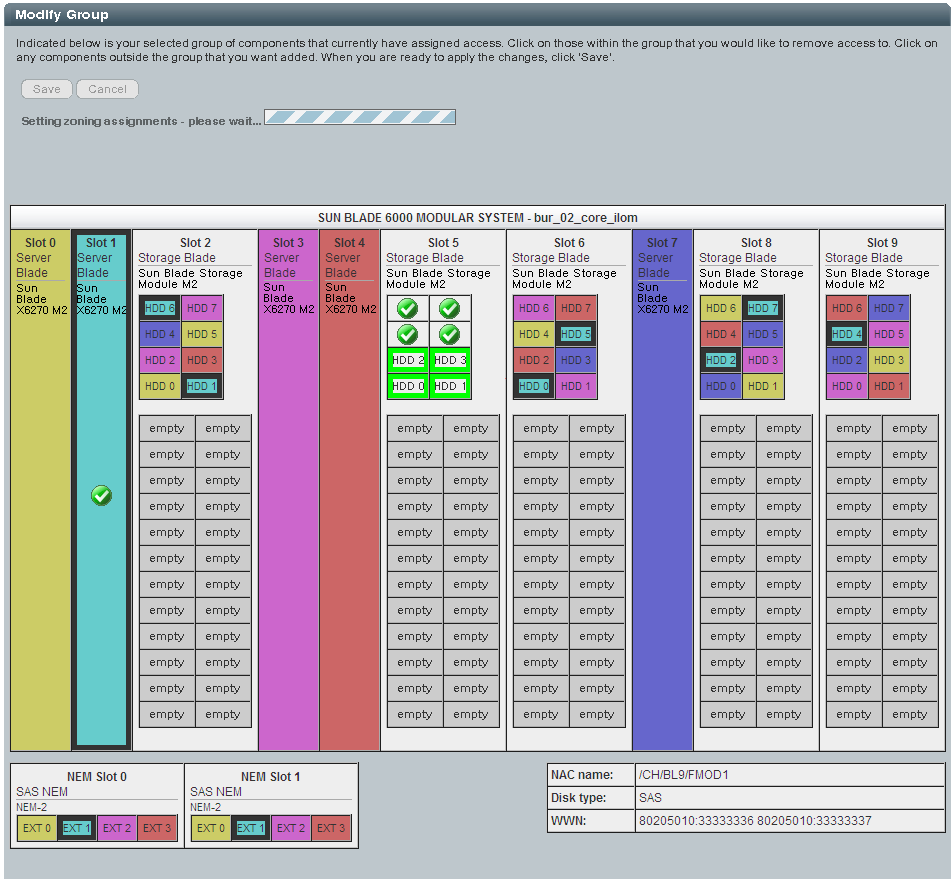
Note - Do not close the zone manager window during the save operation. If the zoning window is closed before the zoning configuration has been completely saved, only the configuration assignments for devices with a green check mark will be saved. You will then need to return to the SAS Zoning Settings page and click Manage Zoning under Full Resource Control and finish configuring devices that have not been assigned to a host.
This saves your new zoning configurations in the CMM and the storage module SAS expanders.
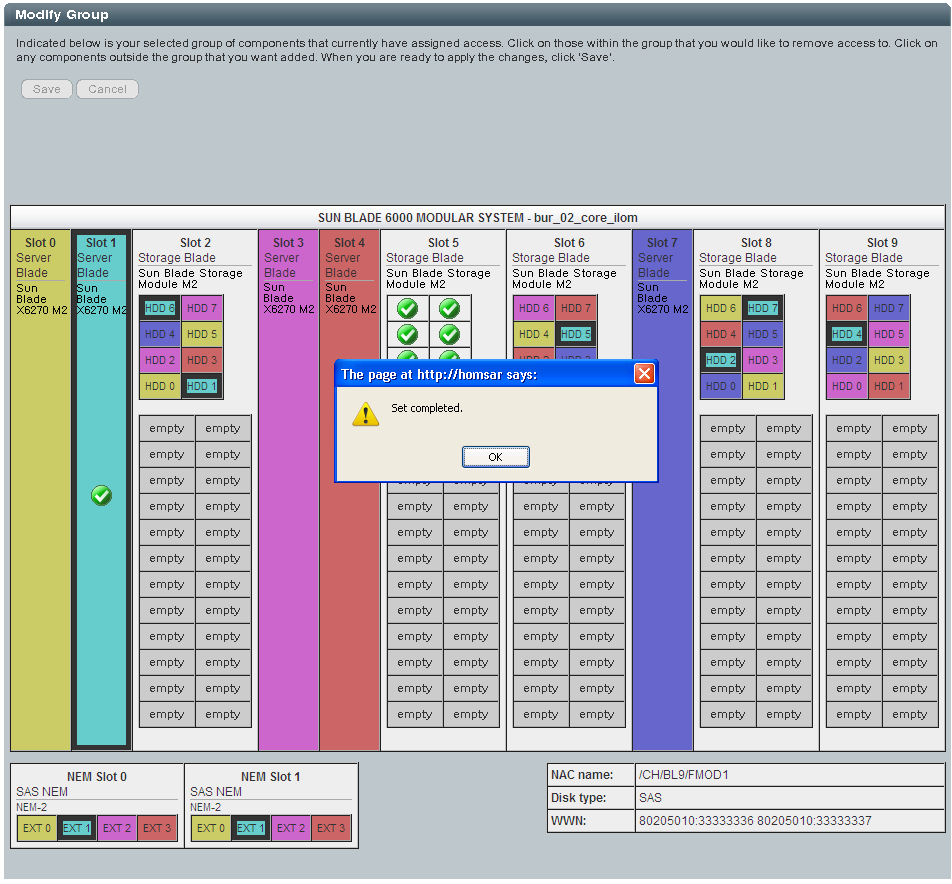
After zoning configurations have been saved, you should create a backup to ensure you can recover the current zoning configurations in the event they are lost.
The CMM maintenance sub-tabs are displayed.
The Backup/Restore page is displayed.
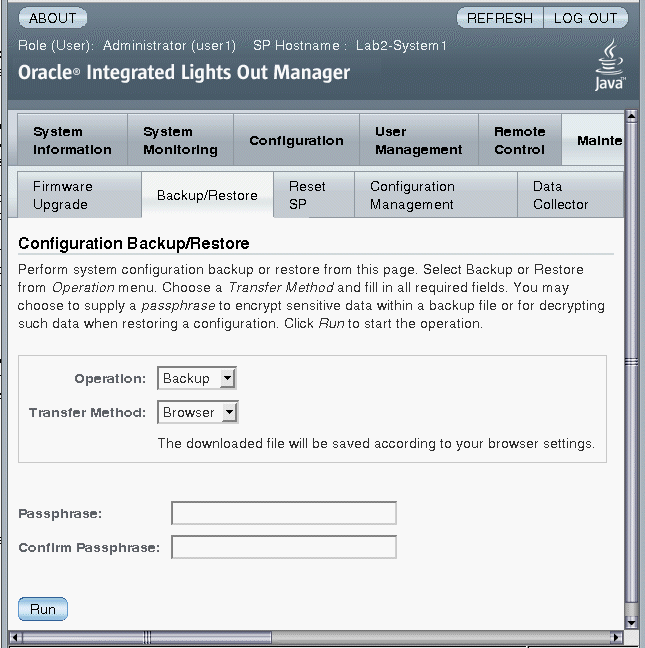
Fill out the information on the page to create your backup file. For complete instructions on using ILOM Backup/Restore, refer to your Oracle Integrated Lights Out Manager (ILOM) 3.0 Web Interface Procedures Guide.
Once you have backed-up your CMM ILOM configurations, proceed to your host(s) to format and create volumes for host-assigned disks.
See Also