Drag and Drop
The OpenWindows drag and drop feature enables you to use your applications together. To send a file from one application to another, you drag a file (in icon form) from the first application and drop it on the second application icon or its drag and drop target--a small rectangle in the application window. (In most applications, the drag and drop target is in the upper right corner.)
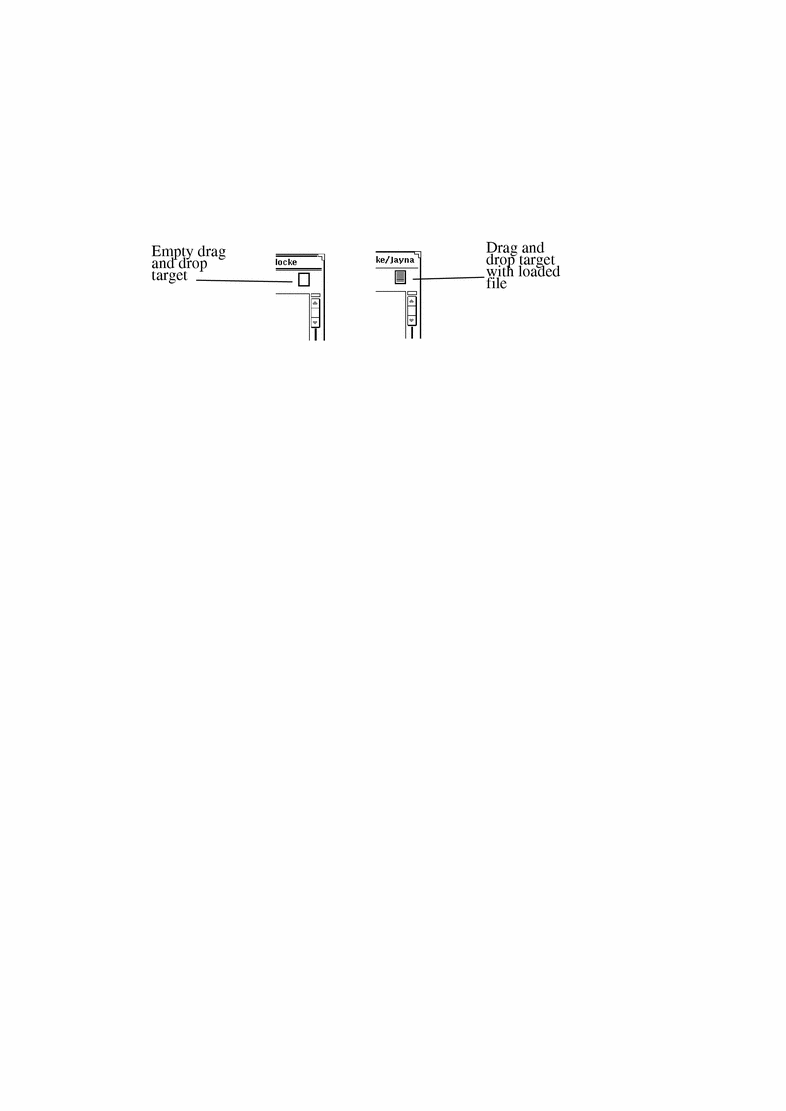
An application's drag and drop target is an empty rectangle if the application does not currently contain a file. When a file is opened from the application or dropped onto the drag and drop target, the target changes in appearance. Figure 1-16 shows an empty drag and drop target and one that contains a file.
Figure 1-16 Drag and Drop Targets
Follow the steps below for any drag and drop operations:
-
Select an object or objects to be dragged.
For example, you might want to select a set of files in the File Manager by pointing at the first file and clicking SELECT, and then clicking ADJUST on the additional files. Or you might want to select a section of text from the Text Editor by pressing SELECT at the start of the desired text, dragging through the text to be moved, and releasing SELECT.
If you want to drag just one file or the contents of a drag and drop target, you can skip this first step.
-
Initiate a move by pointing at a file glyph, the shaded area in a drag and drop target, or a selected object. Then press SELECT and drag the pointer.
If you want to copy the object instead of move it, you can do so by pressing the Control key on the keyboard before pressing SELECT. Keep the Control key held down until after the drag is initiated.
-
When the hot spot of the pointer (the tip of the pointer arrow) is at an appropriate place, drop the selection by releasing SELECT.
The selection is "dropped" at the new location. Depending on the object being dragged, the location can be an icon, a drag and drop target, the window of an application, the workspace background, or a text pane.
In many cases you do not need to worry about whether you need to move an object or copy it. Whenever you use drag and drop to move an object, the DeskSet applications attempt to do the right thing based on the operation. For example, if you move a file from the File Manager into the Wastebasket, it is actually moved to the Wastebasket. (That is, the file is removed from the original location.) On the other hand, if you move a file from the File Manager onto the Print Tool, the file is only copied. The original file remains in its original location.
If it is not obvious whether an object should be moved or copied, it is moved unless the Control key is held down while the drag is initiated.
The following paragraphs list some typical drag and drop operations between the DeskSet applications. See the chapter for each application for more information about how the application supports drag and drop operations.
File Manager glyphs can be dropped onto the following DeskSet applications:
-
Mail Tool
-
Wastebasket
-
Print Tool
-
Tape Tool
-
Text Editor
-
Icon Editor (if it is an icon file)
-
Snapshot (if it is a raster or GIF file)
-
Audio Tool (if it is an audio file)
Mail messages from the Mail Tool Header window can be dropped onto the following DeskSet applications:
-
Text Editor
-
Print Tool
-
File Manager
-
Wastebasket
-
Calendar Manager (with specific format restrictions)
Mail Tool Attachments can be dropped onto these DeskSet applications:
-
File Manager
-
Wastebasket
-
Print Tool
-
Text Editor
-
Image Tool
-
Icon Editor (if it is an icon file)
-
Snapshot (if it is a raster file)
-
Audio Tool (if it is an audio file)
Text selections from Text Editor files can be dropped onto these applications:
-
Mail Tool
-
Text Editor
-
Print Tool
-
Calendar Manager (with specific format restrictions)
-
Icon Editor (if it is an icon file)
-
File Manager
-
Wastebasket
-
Command Tool
Text files from the Text Editor drag and drop target can be dropped onto these applications:
-
File Manager
-
Wastebasket
-
Print Tool
-
Mail Tool
-
Calendar Manager (with specific format restrictions)
-
Command Tool
If an error occurs during a drag and drop sequence, refer to Appendix A, Solaris Troubleshooting.
Drag and Drop Examples
Sometimes an application has a drag and drop target, typically located in the top right of an application's control area. The drag and drop target is shown in Figure 1-17. Note that on a color workstation the drag and drop target will appear lightly shaded.
Figure 1-17 Drag and Drop Target
When you drop an object onto a drag and drop target, the object is loaded into the application, replacing whatever was currently loaded. For example, if you drop a file or text selection onto the Text Editor's drag and drop target, the entire contents of the Text Editor are replaced by the dropped file or text.
Some drag and drop targets contain lines to indicate that the entire contents of the current application can be dragged out of the drop target. For example, when you drag the lined area from the Text Editor drag and drop target, the entire contents of the Text Editor are dragged.
Figure 1-18 Drag and Drop Target Containing a Draggable Object
You can sometimes drop an object directly into a pane that contains data in order to add the object instead of loading it. For example, you might want to drop text somewhere within a text pane to insert the dropped text into the existing text of the pane (instead of replacing the existing text, which would happen if you dropped the text on the drag and drop target). Another common example is to drop a file onto a folder in the File Manager to add that file to the folder.
There are many ways to drag and drop files among DeskSet Applications. The following are several examples.
-
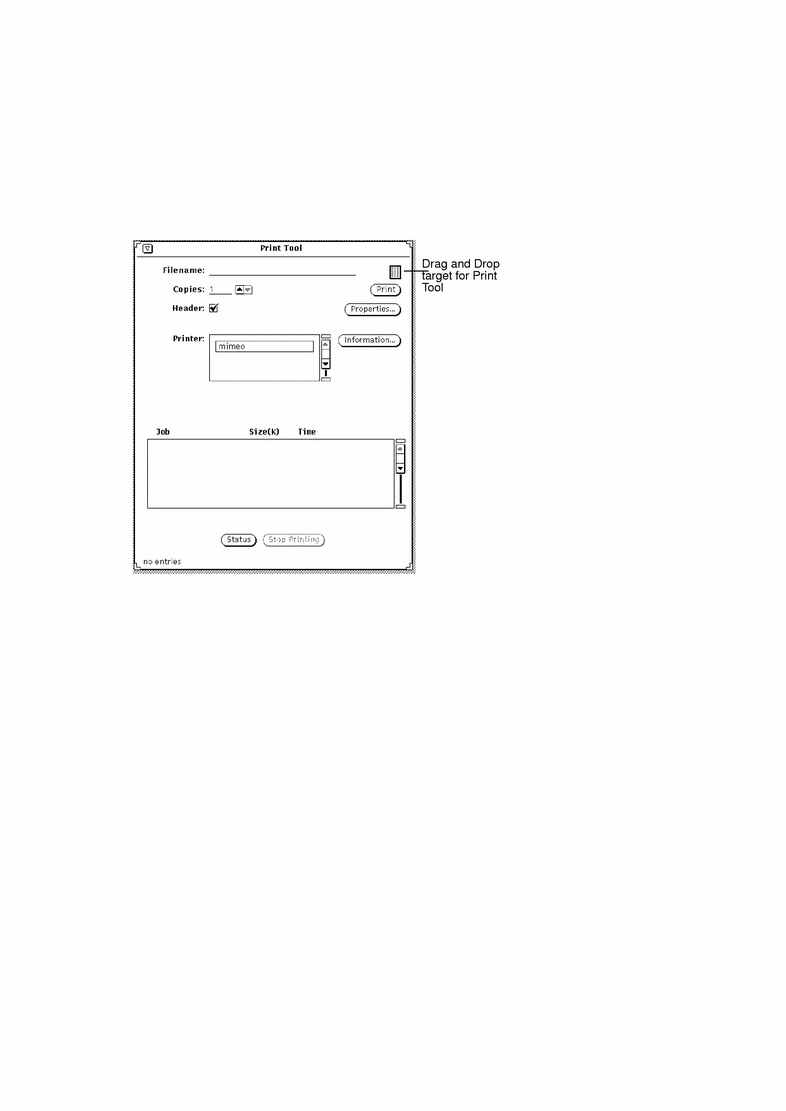
You can print a file by dragging it and dropping it onto the Print Tool icon or its drag and drop target. Figure 1-19 shows Print Tool's drag and drop target. Chapter 10, Print Tool, discusses Print Tool in detail.
Figure 1-19 Print Tool's Drag and Drop Target
-
You can delete a file you no longer need by pressing SELECT on the file icon in File Manager or in the Attachments window of a Multimedia Mail Tool message, dragging it to the wastebasket icon, and releasing the mouse button.
-
You can drag a text file, folder or other icons from File Manager and drop them on the Workspace to view it.
-
You can drag files attached to a Multimedia Mail Tool message window and drop them onto the Workspace: the application with which the file was created (such as File Manager, Text Editor, Audio Tool, or Icon Editor) is invoked and the file is opened in the application window. Refer to Chapter 2, File Manager, or Chapter 4, Multimedia Mail Tool for more information about dragging and dropping with these tools.
Positioning Windows and Pinned Menus
You can position your windows and pinned menus anywhere on the Workspace, and can move a window or menu in front of other windows. To move a window to a new location on the Workspace:
-
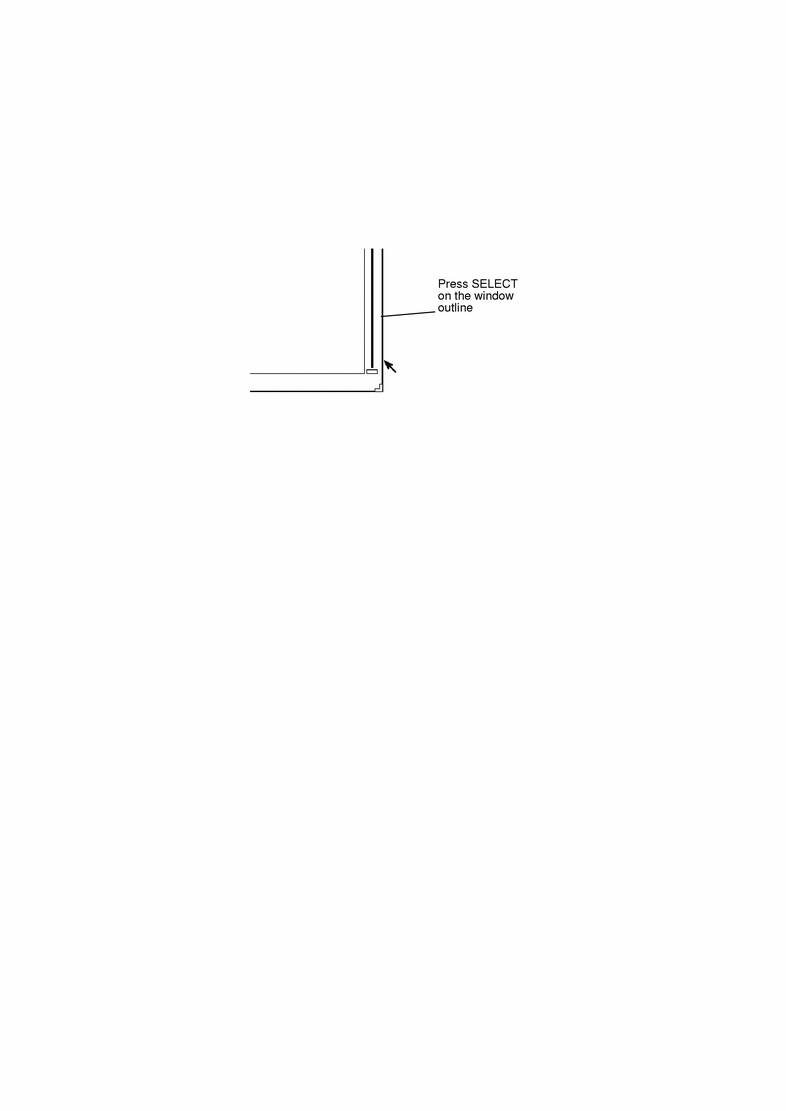
Move the pointer to the black line that surrounds an open window or pinned menu, and press SELECT.
Figure 1-20 shows the pointer on a window edge for repositioning.
Figure 1-20 Moving an Application Window
-
Drag the pointer across the Workspace to a new location.
A border box the size of the window moves with the pointer.
-
Release SELECT.
The window appears in the new location.
Moving Multiple Windows
You can group windows together so that they move as a unit. For instance, you may want to arrange several windows on the Workspace in relationship to one another, and then move the whole arrangement to a new location.
One way to group several windows is to click SELECT on one of the windows and ADJUST on each additional window. Alternatively, you can drag the pointer across the Workspace to form a box around the windows you want to group. You can do this as follows:
-
Place the pointer in the Workspace at one corner of the set of windows you want to group.
-
Press SELECT and drag the pointer diagonally to the opposite corner of the group.
This forms a rectangle around any windows and icons that are fully enclosed within the border box.
-
Release the mouse button.
The items are selected as a unit.
-
Place the pointer on the edge of one of the grouped windows as described in the last section, "Positioning Windows and Pinned Menus", press SELECT, and drag the pointer to a new location.
The group of windows moves to the new location.
-
To un-group the applications, press SELECT anywhere on the Workspace.
Moving a Window Front or Back
To move a window in back of another window:
-
Move the pointer onto the header of the window you wish to move in back.
-
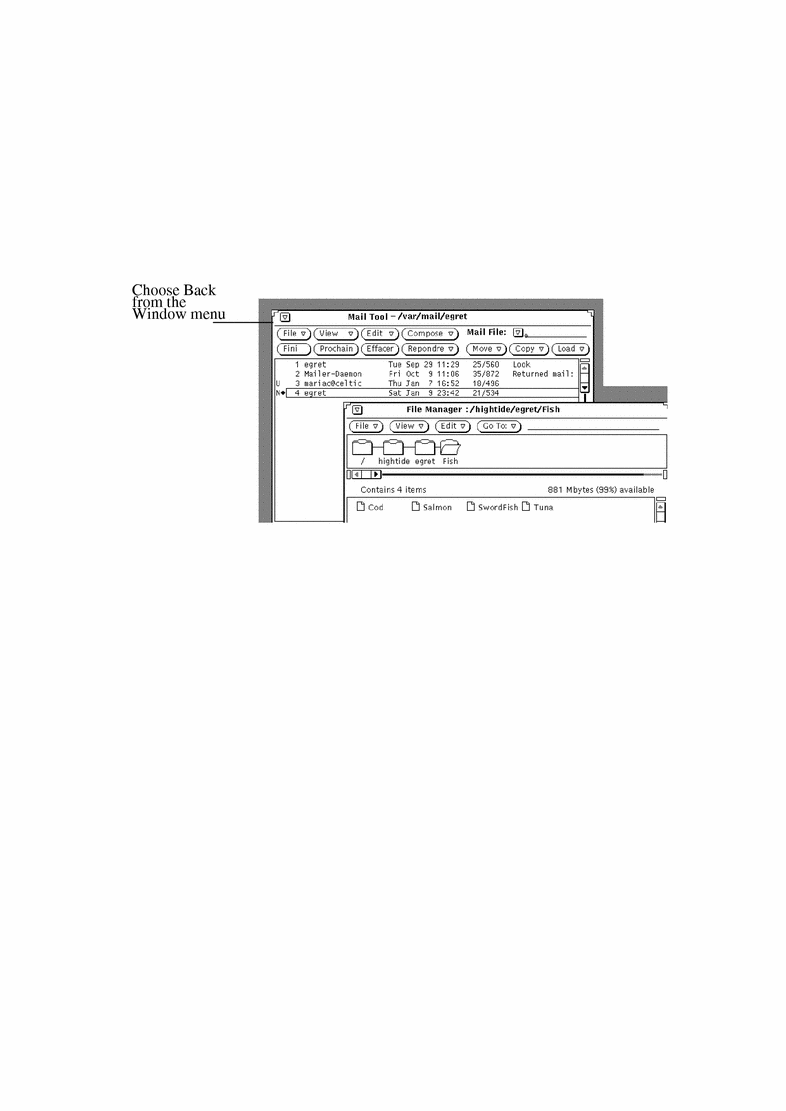
Press MENU, drag the pointer to highlight Back.
Figure 1-21 shows the Back button highlighted on a Window menu.
Figure 1-21 Moving a Window in Back of Another Window
-
Release MENU.
That window moves to the rear.
SPARC only -Alternatively, you can use the Front key on your keyboard, which toggles back/front depending on the location of the window. (If the window is in back and you position the pointer in that window and press the Front key, that window moves to the front. But if it is already in front, it moves in back.)
Moving Icons
You position icons in much the same way as you do windows and pinned menus. To move an icon to a new location, just move the pointer onto an icon, press SELECT, and drag the outline of the icon to a new location. When you release the mouse button, the icon appears in the new place. Figure 1-22 shows an icon and the outline that appears as it is moved.
Figure 1-22 Moving an Icon to a New Location

When you first start an application and then close it to an icon the icon appears in a default location. You can change the default locations by selecting Save WorkSpace from Utilities or with the Workspace Properties window. Chapter 17, Customizing the Solaris Environment, describes the Properties window.
Resizing Windows
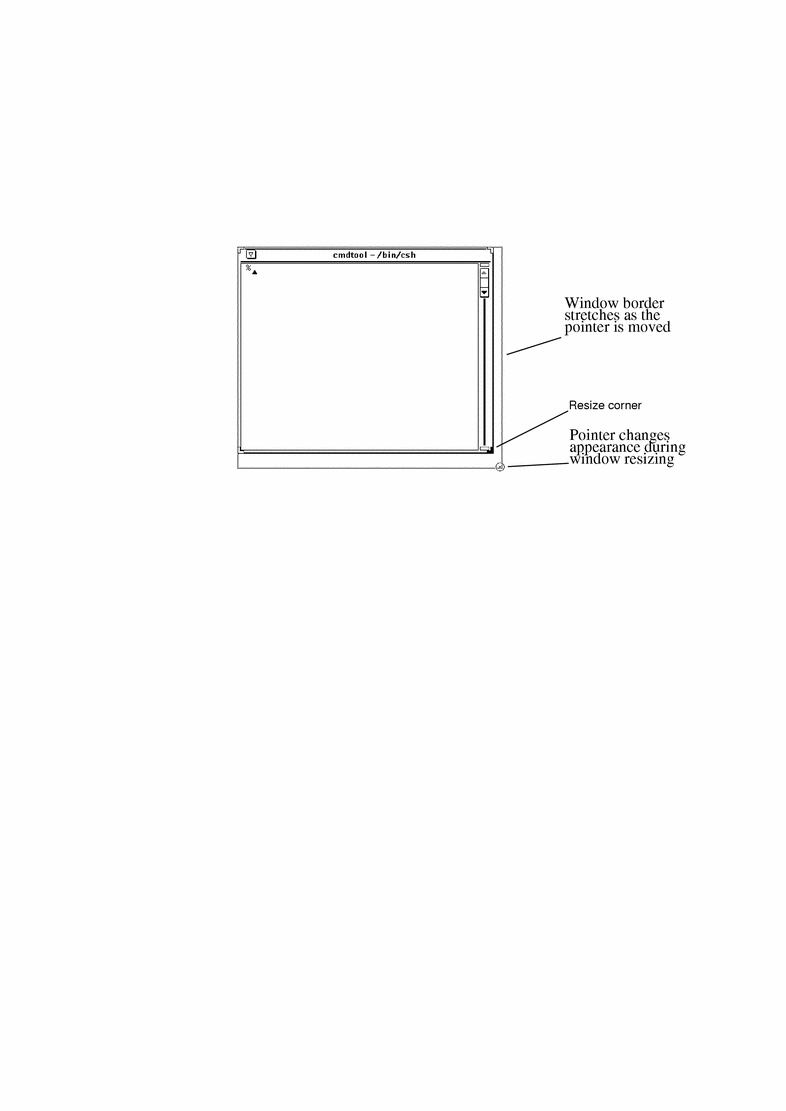
The corners of windows are the handles you use for resizing. To resize a window:
-
Position the pointer on one of the window corners.
The pointer turns into a tiny bull's eye. This means that the pointer is in the correct location for resizing.
-
Press SELECT and drag the pointer to the desired size.
An outline shows the size of the window.
-
Release SELECT.
Figure 1-23 shows the pointer positioned on a window's handle for resizing.
Figure 1-23 Stretching a Window by its Resize Corner
Closing and Quitting Windows
Each window has a Close option in its window menu. You can access this by placing the pointer in the header or on the window border, holding down the MENU mouse button, and highlighting Close, as shown in Figure 1-24.
Figure 1-24 Window Menu with Close Highlighted
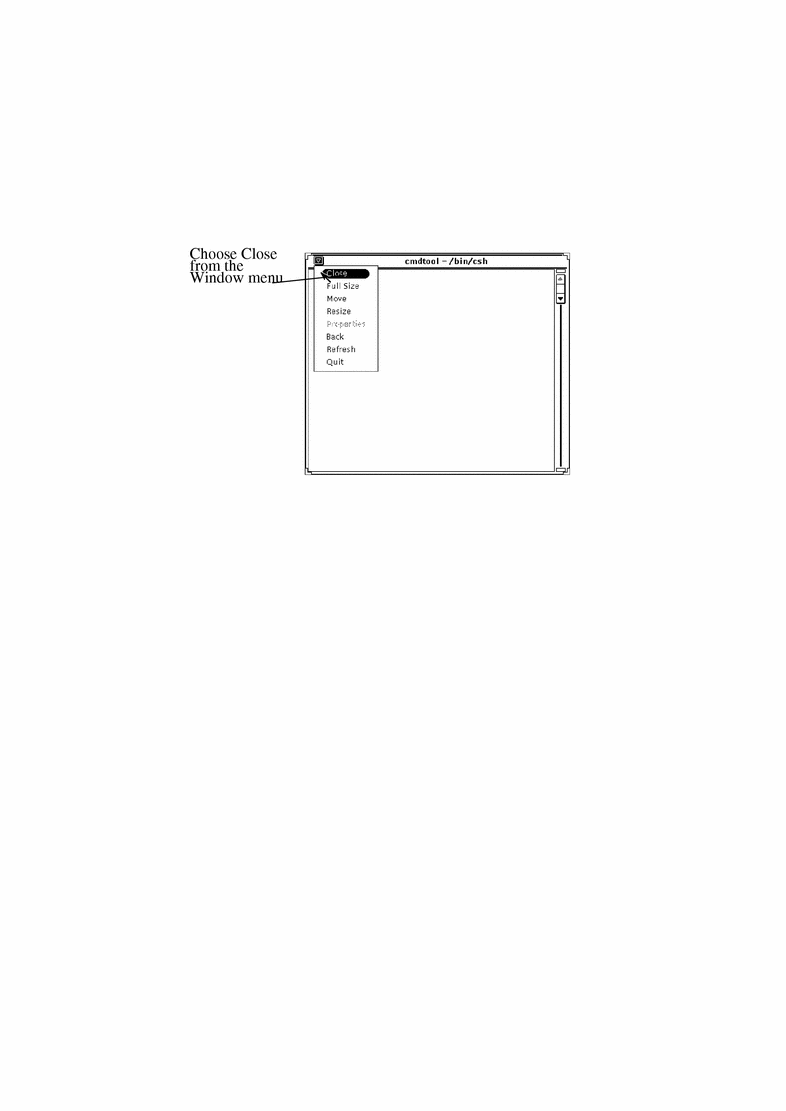
When you release the mouse button, the window closes to its icon form. Alternatively, because Close is the default choice in the window menu, you can click SELECT on the abbreviated menu button in the window header.
The menu in the window header also includes a Quit option. To quit a window from the Workspace, move the pointer onto the header or the abbreviated menu button, press the MENU mouse button, and highlight Quit. When you release the mouse button the window is dismissed from the Workspace and the application quits.
- © 2010, Oracle Corporation and/or its affiliates
