This section walks through the complete process, including both the Loan Management and Credit History applications, step by step. The complete process contains the following entry points, work items (activities), subprocesses, and exit points:
New Loan Request Entry Point
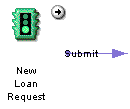
The Loan Management process starts when a user puts in a new loan request. This user is someone at a bank who is responsible for helping customers with their loan applications.
Figure 13.3 The New Loan Request entry point
To start a new loan request, the person at the bank accesses the creation.html form in Process Express, as shown in Figure 13.4.
Figure 13.4 The creation.html form

This form sets the values of the following data fields:
title.
The title of the process instance. Since it appears on the work list, this field needs a value that is meaningful to the end users, for example, the kind of loan requested.
customer.
The name of the customer who is requesting the loan. This is a user picker widget. The customer name is used for the field role Customer. This user needs to be in the corporate directory.
amount.
The amount of money the loan is for.
Verification Work Item
The next step is for the creator of the loan application to verify the information entered to make sure that it is correct. The process map for this step is shown in Figure 13.5.
Figure 13.5 The Verification work item

This step uses the same form as the entry point, creation.html, shown in Figure 13.4. The only additional field is the "comments" text area, where the creator can enter comments that will appear in the details and history. The comments section appears because the Allow to Add Comments property for the Verification activity is set to true.
Check Credit History Subprocess
At this step the Loan Management application calls a subprocess, the Credit History application. The process map for this step is shown in Figure 13.6:
Figure 13.6 The Check Credit History subprocess
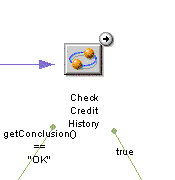
This subprocess checks the credit history of the customer. If the subprocess terminates in the OK exit point, the loan request moves forward to the next step. If the Credit History application does not end at the OK exit point, the loan is denied.
Check Credit History Subprocess Properties
The Check Credit History subprocess in Loan Management has the properties as shown in Figure 13.7. (You can view properties by right-clicking the subprocess item in the process map and choosing Properties.)
The end user does not see these properties, but they govern how the Loan Management application starts the Credit History application as a subprocess.
Figure 13.7 Check Credit History subprocess properties dialog box
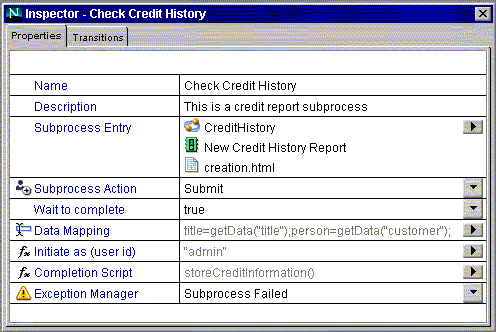
The Subprocess Entry shows that the subprocess application is CreditHistory, that the entry point accessed for this application is the New Credit History Report entry point, and that the form at this entry point is creation.html. A subprocess must use an entry point that only has one form. The fields on creation.html that would ordinarily be filled in by the user at the entry point are filled in automatically using data mapping. For more information, see "Data Mapping" on page 283.
The Subprocess Action is Submit, which is the transition that leads from the entry point to the first activity on the Credit History process map.
The Initiator User ID is the ID of the user who initiates a subprocess. In many cases this field would use a script to determine the user by process instance. However, in this sample it is hardcoded to the static value of the admin user. If you are not using the admin user, or want a different user, you can replace this value. For information about revising the defined users, see "Configuring the Credit History Application" on page 297.
The Data Mapping, Completion Script, and Exception Manager properties are covered in the following sections.
The Transitions tab shows the order in which to evaluate the transitions out of the subprocess. First, the application evaluates the transition named getConclusion() == "OK" . This transition checks if the subprocess ended at the OK exit point. If that is true, the process continues to the Meeting work item. If the subprocess did not end at the OK exit point, the next transition is evaluated. Because the next transition is true, it acts as an "else" statement. If the subprocess ended anywhere except the OK exit point, the process follows this transition to the Loan Refused exit point.
Data Mapping
In the Data Mapping dialog box, the parent process fields are mapped to the subprocess fields that are required to complete the form at the subprocess's entry point. Figure 13.8 shows the dialog box for this sample application.
Figure 13.8 Data Mapping setting dialog box
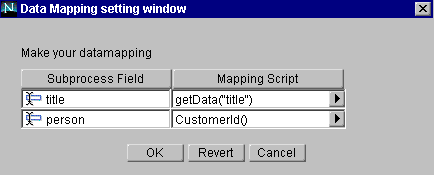
In this sample application, the creation.html form (the form at the entry point of the Credit History application) contains two fields that must be filled in: title, and person.
The title field in the subprocess is mapped to the value in the parent process's title field. The script CustomerId() populates the subprocess data field person with the user ID of the customer stored in the parent process's customer field. For more information on this script, see "CustomerId Toolkit Script" on page 295.
Completion Script
The completion script storeCreditInformation takes the values from the Credit History application and stores them in the appropriate data fields in the Loan Management application. It also determines at what exit point the subprocess ended. For more information, see "storeCreditInformation Completion Script" on page 293.
The Subprocess Failed Exception Manager
If the subprocess fails for some reason, the application calls an exception manager named Subprocess Failed. The tree view shows this exception manager as a yellow triangle. It also appears on the process map, as shown in Figure 13.9, but it is not connected by transitions to any other items.
Figure 13.9 Exception manager

The exception manager is similar to an activity, in that you assign it to someone (usually the administrator), and that person can view a form and take action. For the Loan Management application, the exception manager is assigned to the creator by default, and the assignee views the create.html form.
The Subprocess Failed exception appears on a work list only if the subprocess fails. In most cases it won't appear.
Credit History Application as a Subprocess
When the process reaches the Check Credit History step, the Credit History application is started as a subprocess of the Loan Management application.
The process map for the Credit History application is shown in Figure 13.10. The process map displays the steps that take place before returning to the Loan Management parent process.
Figure 13.10 The Credit History process map
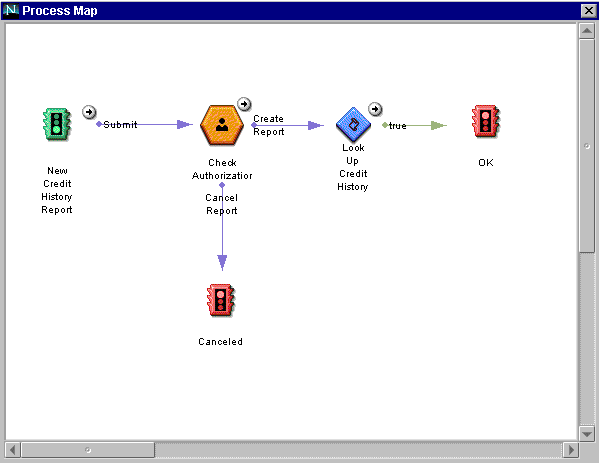
When Loan Management calls Credit History, the New Credit History Report entry point happens automatically. The fields in the form creation.html are filled in by data mapping, and the Submit action is performed automatically.
Check Authorization Work Item
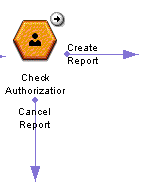
The next step in the process is the first activity in the Credit History application, Check Authorization. The process map for this step is shown in Figure 13.11.
Figure 13.11 The Check Authorization work item
This work item is completed by the person responsible for authorizing credit reports. However, for the purposes of the sample application, this work item is assigned by default to the creator. The form associated with this step is form.html. This form contains a read-only field, person, which is the field role associated with the customer requesting the loan. This field role is picked up from the parent process, Loan Management. In Figure 13.12, the request has been made for the user's SuiteSpot Administrator.
Figure 13.12 The form.html form
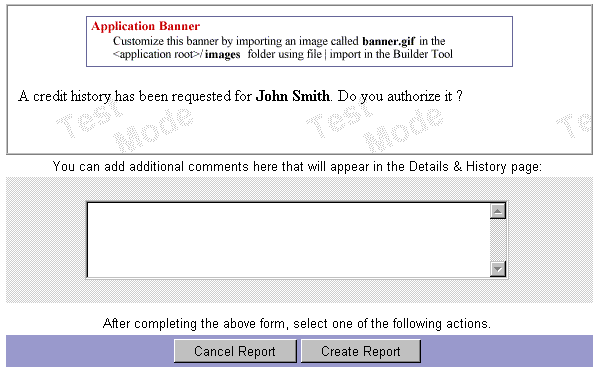
The choices available from this step are Cancel Report and Create Report.
If you choose Cancel Report, the Credit History application continues to the Canceled exit point. If you choose Create Report, the process continues to the automated activity LookUp Credit History.
LookUp Credit History Automated Activity
The next step is the automated activity Look Up Credit History. The process map for this step is shown in Figure 13.13.
Figure 13.13 The Look Up Credit History automated activity

In a real-world situation, this automated activity would look up a customer's credit history in a database. However, for the purpose of this sample application, the values are hardcoded. The value of the data field credit_history is set to 10000.95. The Loan Management process uses this amount, along with the date, when the Credit History subprocess returns to the Loan Management application.
After this automated activity runs, the process continues to the OK exit point for the Credit History application.
Canceled Exit Point
If the report is canceled at the Check Authorization step, the process goes to the Canceled exit point, shown in Figure 13.14.
Figure 13.14 The Canceled exit point

This step displays the form refused.html. This form contains no fields, just the message that the credit history report is not authorized. From this exit point, the subprocess returns to the Loan Management process and continues to the Loan Refused exit point.
OK Exit Point
If the request for the report is approved, the process goes to the OK exit point, shown in Figure 13.15.
Figure 13.15 The OK exit point

This step displays the form completed.html, shown in Figure 13.16.
Figure 13.16 The completed.html form
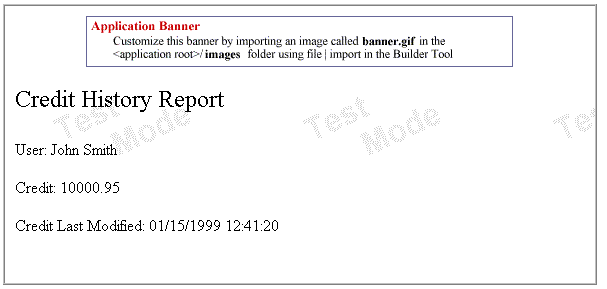
This form shows the information gathered by the LookUpCreditHistory script. It has the following fields:
person.
The person for whom the credit history is gathered. The same as customer in the Loan Management application.
credit_history.
The amount of money the person has been loaned in the past.
credit_date.
The date the credit history check was performed.
From this exit point, the subprocess returns to the Loan Management process and continues to the Meeting work item.
Meeting Work Item (Parent Process)
The Check Credit History subprocess has a completion script, storeCreditInformation. If this script finds that the subprocess concluded at the OK exit point, the subprocess proceeds to the Meeting step, shown in Figure 13.17.
Figure 13.17 The Meeting work item
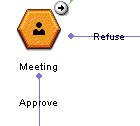
In the Meeting step, the person making the loan meets with the customer to review the loan contract's details. For this sample application, the Meeting activity is assigned by default to the creator of the process instance.
At this point, the customer can either approve or refuse the terms. If the customer approves the terms, the process continues to the Loan Approved exit point. If the customer refuses the terms, the process continues to the Loan Refused exit point.
The form displayed at this step is summary.html, shown in Figure 13.18.
Figure 13.18 The summary.html form
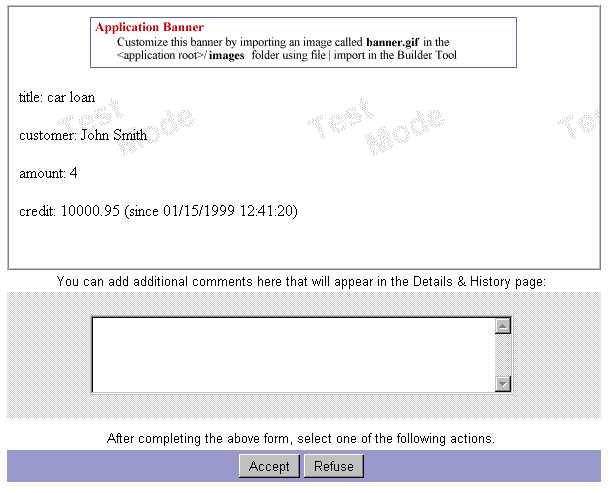
Based on the results of the meeting, the two actions available to the person making the loan are Accept or Refuse. Clicking Accept sends the process to the Loan Approved exit point, whereas clicking Refuse sends the process to the Loan Refused exit point.
Note that this form is also used throughout the process for the group "all," so that everyone can see a summary of the loan process. This form is also used at the "Subprocess Failed" exception manager.
This form contains the following read-only data fields. They are the data fields from the original loan creation form, along with information gathered in the subprocess:
title.
The title of the process instance. Since it appears on the work list, this field needs a value that is meaningful to the end users, for example, the kind of loan requested.
customer.
The name of the customer who is requesting the loan. This is a user picker widget. The customer name is used for the field role Customer. This user needs to be in the corporate directory.
amount.
The amount of money the loan is for.
credit.
The amount of credit the customer has had, as determined by the Check Credit History subprocess.
last_modified.
The date the credit was checked.
Loan Refused Exit Point
If the customer refused the loan terms at the Meeting step, or if the Credit History process ended at the Canceled exit point, the next step is the Loan Refused exit point, shown in Figure 13.19.
Figure 13.19 The Loan Refused exit point

The form for the exit point is summary.html, shown in Figure 13.18. However, since the process is at an exit point, the fields are display-only, and no action can be taken.
Loan Approved Exit Point
You reach the Loan Approved exit point, shown in Figure 13.20, if the loan is approved in the Meeting step.
Figure 13.20 The Loan Approved exit point

The form for the exit point is summary.html, shown in Figure 13.18. However, since the process is at an exit point, all the fields are display-only, and no action can be taken.
|