JavaScript is required to for searching.
Skip Navigation Links
Exit Print View
Sun Storage 6 Gb SAS ExpressModule HBA

Installation Guide For HBA Models SGX-SAS6-EM-Z and SG-SAS6-EM-Z

Oracle Technology Network
Library
PDF
Print View
Feedback
search filter icon
search icon

Document Information

Using This Documentation

Chapter 1 HBA Overview

Chapter 2 Hardware Installation and Removal

Observing ESD and Handling Precautions

Installing the HBA

To Prepare for Hardware Installation

To Install the HBA

HBA LEDs

Port to Phys Mapping

To Complete the Installation

Next Steps

Removing the HBA

To Remove the HBA

Chapter 3 Creating a Bootable Drive in a Preboot Environment

Chapter 4 HBA Software Installation

Chapter 5 Known Issues

Appendix A HBA Specifications

Glossary

To Install the HBA

  1. Attach an ESD wrist strap and remove the HBA from its protective bag.

    See Observing ESD and Handling Precautions.

  2. Refer to your system installation or service manual to determine how to locate an empty PCIe ExpressModule slot in which you can insert the HBA.
  3. Grasp the button (the latching mechanism at the end of the ejection lever) on the front of the HBA and pivot the lever downward.
  4. Insert the HBA into an available PCIe ExpressModule slot in the chassis, as shown in Installing the HBA into a PCIe Slot.

    Figure 2-1  Installing the HBA into a PCIe Slot
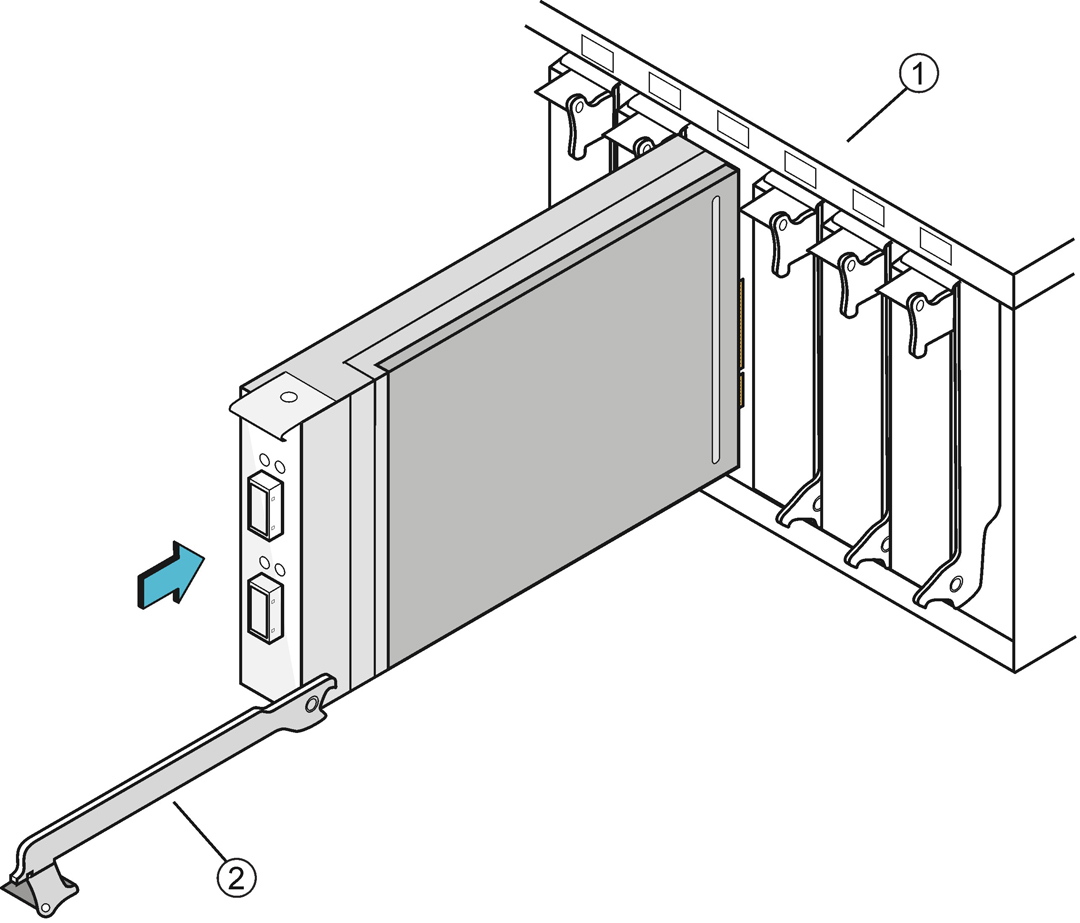
    image:Figure shows installing the host adapter board into a PCI Express slot.

    Figure Legend

    1 Chassis

    2Ejection Lever (Open)


    Note - The configuration of the enclosure in your system might not be the same as shown in this illustration.
  5. When the HBA is fully inserted in the slot, pivot the ejection lever up to the locked position.
  6. Connect SAS cables to the two external x4 mini-SAS connectors and attach the other end of the cables to the disk drives or other SAS/SATA devices, per your requirements.

    Use only Oracle-provided SAS cables (530-3887-01), available for purchase at: http://www.oracle.com

  7. Observe the LEDs to ensure normal operation of the HBA.

    For more information about the LEDs, see HBA LEDs.