| Skip Navigation Links | |
| Exit Print View | |

|
Oracle Java CAPS XSLT Service Engine Tutorial Java CAPS Documentation |
| Skip Navigation Links | |
| Exit Print View | |

|
Oracle Java CAPS XSLT Service Engine Tutorial Java CAPS Documentation |
XSLT Designer: Simple Transformation Tutorial
Configuring the Tutorial Environment
Creating the XSLT Module Project
To Create a New XSLT Module Project
To Create the XML Schema for the Incoming Message
To Create the XML Schema for the Outgoing Message
To Populate the XSL Stylesheet
Creating and Deploying the Composite Application
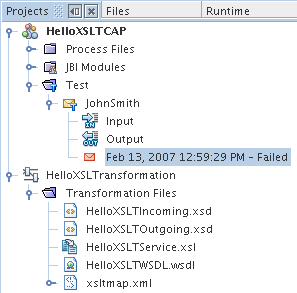
Testing an XSL Transformation Service means sending a message that the Service is expecting and receiving, in this case, a reply message.
Before we can perform the testing, we must create a test case.

<hel:name>?string?</hel:name>
line to
<hel:name>John Smith</hel:name>
The Input.xml file should be:
 <soapenv:Envelope xsi:schemaLocation=
"http://schemas.xmlsoap.org/soap/envelope/ http://schemas.xmlsoap.org/
soap/envelope/" xmlns:xsi="http://www.w3.org/2001/XMLSchema-instance"
xmlns:xsd="http://www.w3.org/2001/XMLSchema" xmlns:soapenv=
"http://schemas.xmlsoap.org/soap/envelope/"
xmlns:hel="http://xml.netbeans.org/schema/HelloXSLTIncoming">

        <soapenv:Body>

                <hel:name>John Smith</hel:name>

        </soapenv:Body>

</soapenv:Envelope>
The Output node under the test case node refers to the expected reply message that is used for comparison with the actual reply messages. Before we run the test for the first time, the Output.xml file is empty. The first test run will populate Output.xml with the real output. Subsequent test runs will compare the real output against the content of Output.xml


<?xml version="1.0" encoding="UTF-8"?>

<SOAP-ENV:Envelope xmlns:SOAP-ENV="http://schemas.xmlsoap.org/soap/envelope/"
xmlns:xsd="http://www.w3.org/2001/XMLSchema" xmlns:xsi="http://www.w3.org/2001/
XMLSchema-instance" xsi:schemaLocation="http://schemas.xmlsoap.org/soap/envelope/
http://schemas.xmlsoap.org/soap/envelope/" xmlns:ns="http://xml.netbeans.org/
schema/HelloXSLTOutgoing">

        <SOAP-ENV:Header/>

        <SOAP-ENV:Body>

                <ns:greeting xmlns:ns="http://xml.netbeans.org/schema/
HelloXSLTOutgoing">Hello John Smith</ns:greeting>

        </SOAP-ENV:Body>

</SOAP-ENV:Envelope>
Notice the line
<ns:greeting xmlns:ns="http://xml.netbeans.org/schema/HelloXSLTOutgoing">Hello John Smith</ns:greeting>
The XSL Transformation Service received the name, concatenated it with the string 'Hello' and sent the reply message.

You have successfully created, deployed and tested an XSL Transformation Service.
Now that you have successfully created the Request-Reply XSL Transformation Service, continue with the Service Bridge type.