JavaScript is required to for searching.
Skip Navigation Links
Exit Print View
Oracle Java CAPS XSLT Service Engine Tutorial     Java CAPS Documentation
search filter icon
search icon

Document Information

XSLT Designer: Simple Transformation Tutorial

Overview

Configuring the Tutorial Environment

Creating the XSLT Module Project

To Create a New XSLT Module Project

Creating XML Schemas

To Create the XML Schema for the Incoming Message

To Create the XML Schema for the Outgoing Message

Creating a WSDL File

To Create a WSDL File

Creating an XSLT Service

To Create an XSLT Service

To Populate the XSL Stylesheet

Creating and Deploying the Composite Application

To Create a Composite Application Project

To Add a JBI Module

To Deploy the HelloXSLTCAP Composite Application

Performing a Test Run of the XSL Transformation Service

To Create a Test Case

To Test the Application:

Creating XML Schemas

In this step you are going to create two XML Schema files: HelloXSLTIncoming.xsd as a basis for the incoming message, and HelloXSLTOutgoing.xsd as a basis for the outgoing message.
To Create the XML Schema for the Incoming Message

  1. In the Projects window, right-click the HelloXSLTransformation > Transformation Files node and choose New > XML Schema.
  2. In the File Name field, type HelloXSLTIncoming.
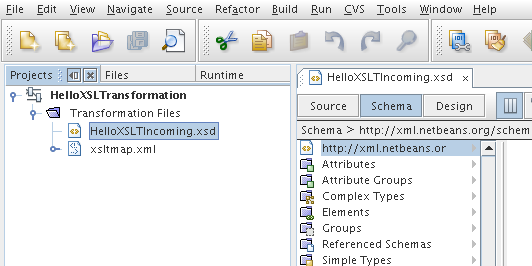
  3. Click Finish. A new node—HelloXSLTIncoming.xsd—appears under the Transformation Files node in your HelloXSLTransformation project and the new Schema opens in the XML Schema Editor.
    image:XML Schema Added to the Project
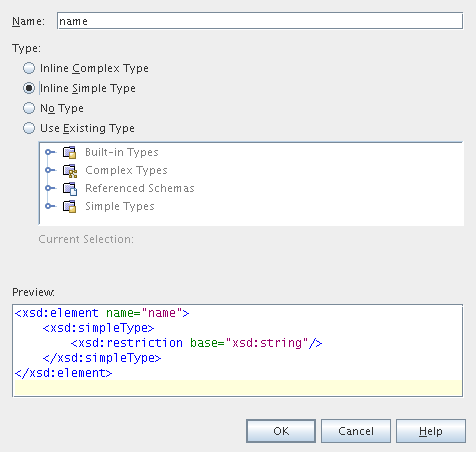
  4. In the first column of the Schema view, right-click Elements and choose Add Element from the popup menu. The Add Element dialog box opens.
  5. In the Name field, type name.
  6. Under Type, select the Use Existing Type radio button.
  7. Expand the Built-in Types node and select string, and click OK.
    image:New Schema Element Dialog
  8. To view the source of the Schema you created, click the Source button on the XML Schema Editor toolbar. You should see the following code:
    <?xml version="1.0" encoding="UTF-8"?>
    <xsd:schema xmlns:xsd="http://www.w3.org/2001/XMLSchema"
                targetNamespace="http://xml.netbeans.org/schema/HelloXSLTIncoming"
                xmlns:tns="http://xml.netbeans.org/schema/HelloXSLTIncoming"
                elementFormDefault="qualified">
        <xsd:element name="name" type="xsd:string"></xsd:element>
    </xsd:schema>

To Create the XML Schema for the Outgoing Message

  1. In the Projects window, right-click the HelloXSLTransformation > Transformation Files node and choose New > XML Schema.
  2. In the File Name field, type HelloXSLTOutgoing.
  3. Click Finish. A new node—HelloXSLTOutgoing.xsd —appears under the Transformation Files node in your HelloXSLTransformation project and the new Schema opens in the XML Schema Editor.
  4. In the first column of the Schema view, right-click Elements and choose Add Element from the popup menu. The Element dialog box opens.
  5. In the Name field, type greeting.
  6. Under Type, select the Use Existing Type radio button.
  7. Expand the Built-in Types node, select string and click OK.
  8. To view the source of the Schema you created, click the Source button on the XML Schema Editor toolbar. You should see the following code:
    <?xml version="1.0" encoding="UTF-8"?>
    <xsd:schema xmlns:xsd="http://www.w3.org/2001/XMLSchema"
                targetNamespace="http://xml.netbeans.org/schema/HelloXSLTOutgoing"
                xmlns:tns="http://xml.netbeans.org/schema/HelloXSLTOutgoing"
                elementFormDefault="qualified">
        <xsd:element name="greeting" type="xsd:string"></xsd:element>
    </xsd:schema>
  9. Click the Save All button on the toolbar.

    You should see two Schema files listed under the Transformation Files node in your HelloXSLTransformation project.
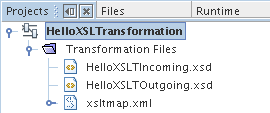

    image:Two Schema Files in the Project