JavaScript is required to for searching.
Skip Navigation Links
Exit Print View
Oracle Java CAPS TCP/IP JCA Adapter User's Guide     Java CAPS Documentation
search filter icon
search icon

Document Information

About the TCP/IP JCA Adapter

TCP/IP JCA Adapters Contrasted With TCP/IP eWay Adapters

Installing the TCP/IP JCA Adapter

Installing the Design-Time *.nbm Files for the TCP/IP JCA Adapter

To Install the NetBeans Modules for the TCP/IP JCA Adapter

Setting Up the Runtime Environment for the TCP/IP JCA Adapter

To Install the Global RAR for the TCP/IP JCA Adapter

To Add a Connector Connection Pool for the TCP/IP JCA Adapter

To Add a Connector Resource for the TCP/IP JCA Adapter

Configuring the TCP/IP JCA Adapter

Configuring Runtime Properties of a TCP/IP JCA Adapter Pool

To Configure a TCP/IP JCA Adapter Pool

Configuring Design-time Properties of an Individual TCP/IP JCA Adapter Component

To Configure a TCP/IP JCA Adapter Instance

Using the TCP/IP JCA Adapter in an EJB Project

Designing an EJB Module to Use TCP/IP JCA Adapter Code

To Create an EJB Module Project

To Add a TCP/IP JCA Adapter to an EJB Project

To Use TCP/IP-Specific Sample Code

Configuration Settings for the TCP/IP JCA Adapter

General Outbound Settings

TCPIP Outbound Settings -- Client Connection Establishment

TCP/IP Outbound Settings -- Server Port Binding

TCP/IP Outbound Settings

Envelope Message Settings

Connection Pool Settings

Designing an EJB Module to Use TCP/IP JCA Adapter Code

This section provides step-by-step procedures for creating an EJB Module project and populating it with TCP/IP JCA Adapter code.

To Create an EJB Module Project

  1. In the NetBeans IDE main menu, click File -> New Project.

    The New Project wizard appears.

  2. Select the following category and project type and then click Next.
    • Category: Enterprise

    • Project: EJB Module

  3. Provide a project name and location and then click Next.
  4. Retain the default values for Server and Settings and then click Finish.

To Add a TCP/IP JCA Adapter to an EJB Project

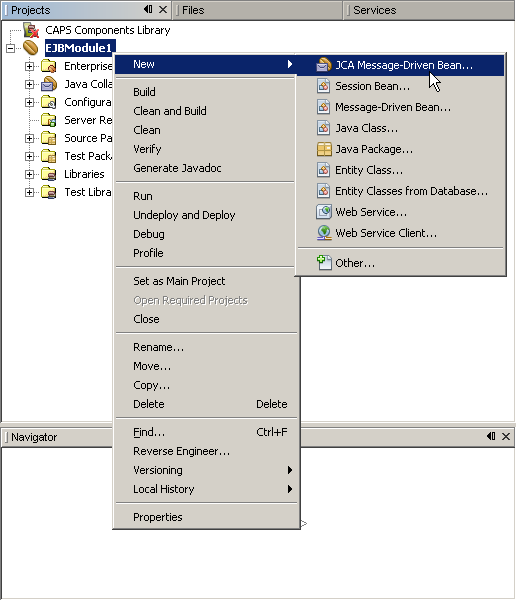
  1. Right-click the EJB Module project and select New -> JCA Message-Driven Bean.
    image:EJB Module project: New -> JCA Message-Driven Bean

    The New JCA Message-Driven Bean wizard appears.
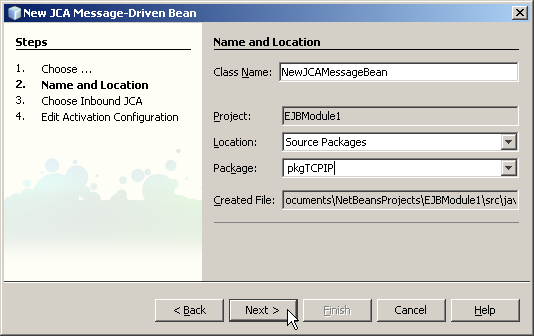
  2. Provide a package name and then click Next.
    image:JCA Message-Driven Bean wizard: Provide Name and Location
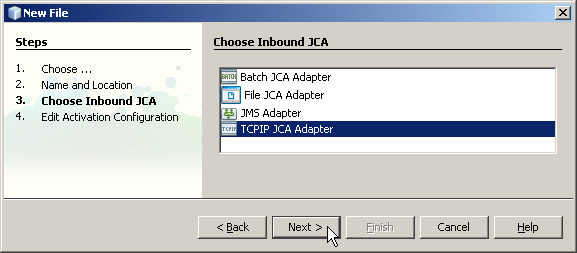
  3. For the Choose Inbound JCA step, select TCPIP JCA Adapter and then click Next.
    image:JCA Message-Driven Bean wizard: Choose Inbound TCPIP JCA Adapter
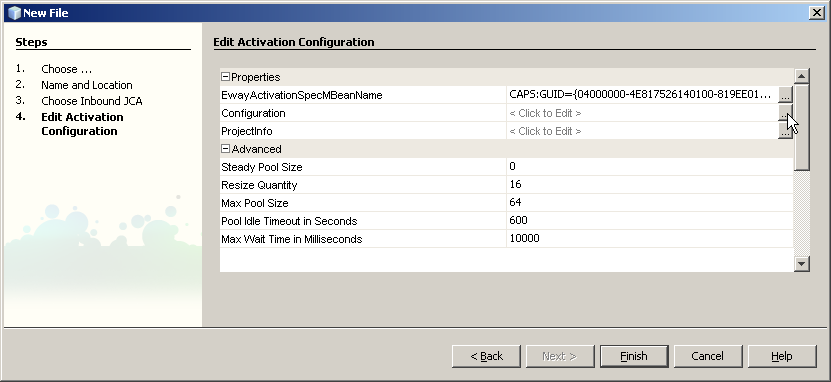
  4. In the final step of the wizard, you can optionally edit the instance properties before clicking Finish.
    image:JCA Message-Driven Bean wizard: Edit Activation Configuration

    If you click the ellipsis to the right of the Configuration property (as shown above), you can view or edit configuration settings of the TCP/IP JCA Adapter.
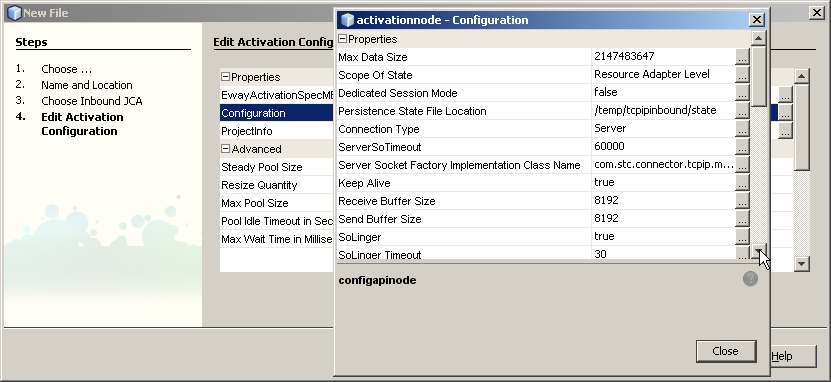

    image:JCA Message-Driven Bean wizard: Editing configuration properties.

    For a complete list and description of configuration properties, see Configuration Settings for the TCP/IP JCA Adapter.
To Use TCP/IP-Specific Sample Code

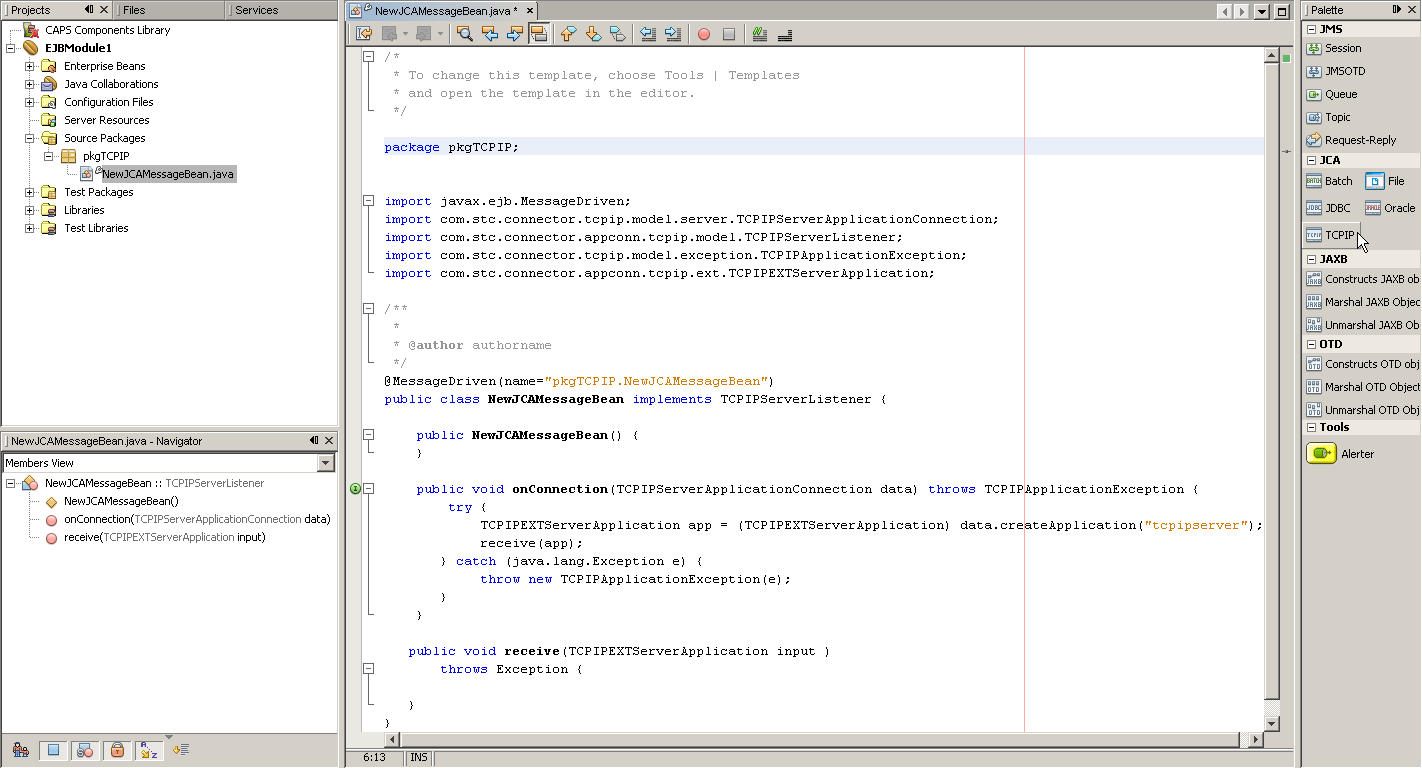
  1. In the NetBeans IDE, open the .java file containing the message-driven bean you just created.
  2. From the palette, under JCA, drag TCPIP onto the code canvas as shown in the far right of the following illustration.
    image:Dragging TCPIP from the JCA code palette.
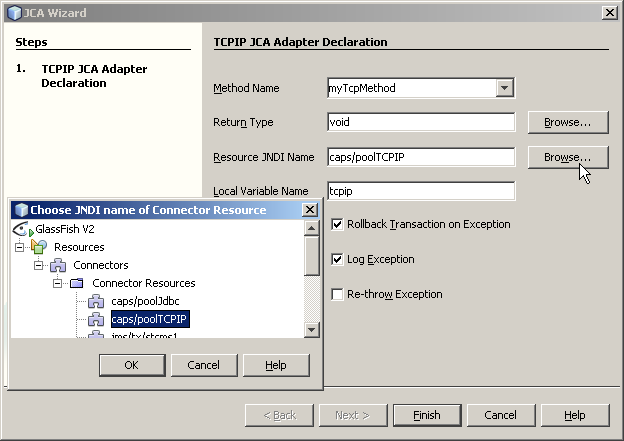
  3. In the JCA Wizard, provide appropriate values for the TCP/IP JCA Adapter declaration and then click Finish.
    image:Browsing to the correct Resource JNDI Name for the adapter declaration

    Result:Three blocks of sample code are added, as shown (expanded) below.
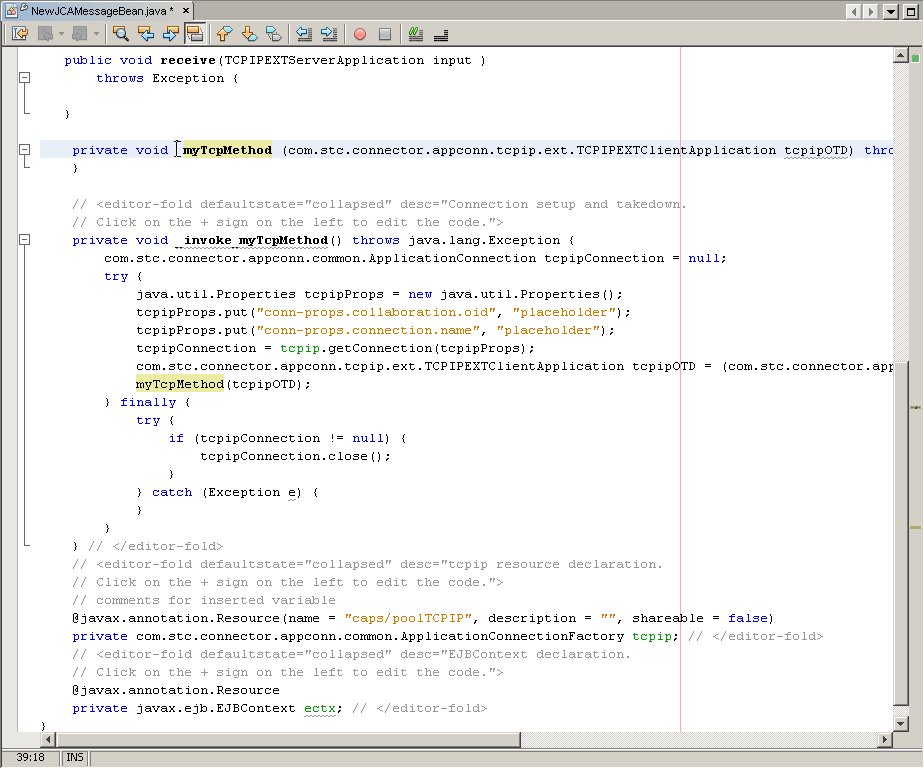

    image:Sample code added by dragging TCPIP from the JCA code palette
  4. Expand each block and edit the code as needed for your implementation.